Home Blog Page 99

AAC Blocks Vs Red Bricks: How to Make the Right Choice

0
AAC Blocks

Are you preparing to build your home? Are you starting to purchase building materials? Then, you must know that traditional red bricks are a crucial building material for masonry. But nowadays, AAC blocks are also gaining equal popularity as masonry bricks. However, many people are confused about whether ‘AAC block or red bricks’ is better for their home construction.

Don’t worry! In today’s blog, Brick & Bolt discusses the advantages and disadvantages of autoclaved aerated concrete (AAC) blocks vs. red bricks. It will help you choose the best option for your home construction. 

Before we compare AAC blocks vs red brick, it’s essential to understand the different types of bricks available for construction.

What are AAC Blocks?

Building Blocks

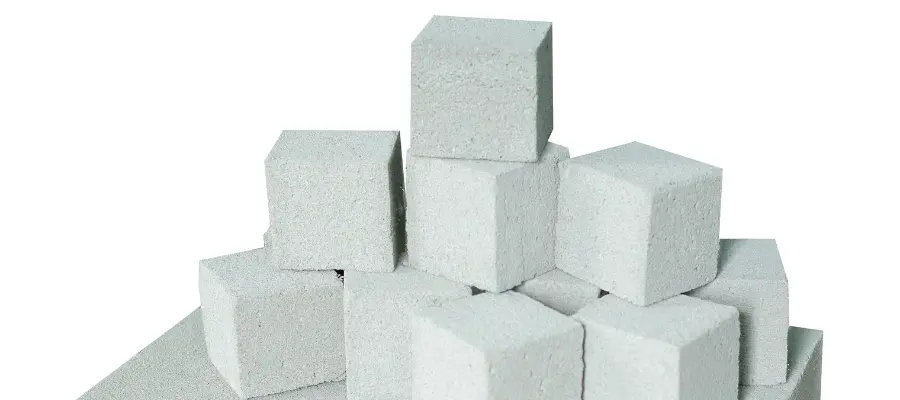
AAC blocks are a special type of precast building block. It’s easy to maintain and lasts a long time. They are great in thermal insulation and durability, So buildings made with AAC blocks stay cooler in hot weather, helping save money on air conditioning bills. AAC blocks are also lightweight, reducing the amount of steel and concrete needed for home foundations and structures. Overall, using AAC blocks can save money on construction and energy costs compared to other building materials.

AAC block advantages and disadvantages

Advantages of AAC blocks

  • AAC blocks are lightweight but strong, making them easy to handle and install with regular tools.
  • They come in large sizes, so a minimum number of blocks is sufficient. This speeds up construction and uses less mortar between joints.
  • Since AAC blocks are light, the overall weight of the building is reduced. This is helpful in earthquake-prone areas and allows less steel reinforcement.
  • AAC is inorganic so it won’t get damaged by termites or pests.
  • In multi-story buildings, it reduces the amount of steel and concrete required for structural support.
  • Their large size and easy installation make transportation to the upper floors simpler.
  • Faster construction due to reduced wall curing time.
  • AAC has excellent insulation properties that keep buildings cooler in summer and warmer in winter.
  • This insulation helps reduce energy costs for air conditioning.
  • There is minimal wastage compared to other masonry units.
  • While initial costs may be higher, the long-term savings on materials and labour can make AAC blocks more economical overall.

Disadvantages of AAC blocks

  • The cost of making an AAC block is higher than that of some other masonry units.
  • The smooth surface of AAC blocks can sometimes make it difficult for the plaster to stick to the walls. Thus, during manufacturing, attention should be paid to slightly roughening the block surface for better adherence.
  • Since AAC is a porous, aerated material, it requires a protective coating or finishing layer. If left exposed without a sealant, paint, or cladding, the blocks could deteriorate or become damaged over time from moisture absorption.

What are Red Bricks?

Red Bricks

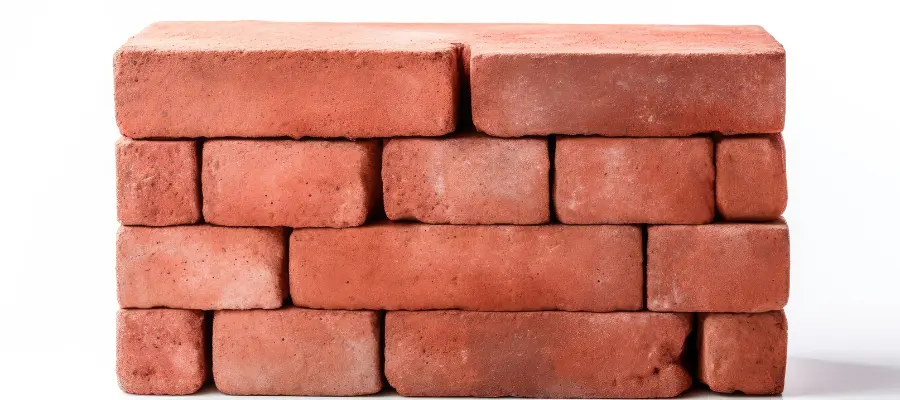
Red bricks are a very old and common building material made from clay. First, the clay is shaped, then dried, and finally, heated in an oven. This makes strong red bricks.

Red bricks are strong, so they can be used to construct the main parts of buildings, like walls, foundations, arches, paths, and bridges. However, because of their attractive red colour and texture, they are also used for decorative purposes. Red bricks can make landscaping features, exterior wall facings, and other architectural designs look nice.

Red Bricks advantages and disadvantages

Advantages of Red Bricks

  • Red bricks are easy to work with during construction.
  • The raw materials needed to make red bricks (clay, sand, lime) are widely available, making them an economical choice.
  • Red bricks require little maintenance once installed and are very durable and long-lasting building materials.
  • when compared to cement bricks, Red bricks are compressive strength is sufficient for typical construction needs like houses and low-rise buildings.
  • Different brick sizes and orientations allow for various attractive textures and patterns on the surface.
  • If a brick structure needs to be demolished, it is a comparatively easy and fast process compared to concrete.
  • Used red bricks can be reused or recycled for other purposes after demolition.

Disadvantages of Red Bricks

  • Brick masonry is more time-consuming compared to some other masonry materials. 
  • Red bricks may not be suitable for load-bearing structures in areas open to major earthquakes due to their weight and lack of reinforcement.
  • The porous nature of clay bricks allows water absorption, which can lead to efflorescence (salt deposits) forming on the surface over time.
  • If not properly cleaned and maintained, rough brick textures can promote mould/mildew growth.
  • Continuous mining of soil and clay to make bricks depletes fertile topsoil resources needed for agriculture.
  • Red bricks are quite heavy, requiring more structural steel and increasing overall construction costs compared to lighter materials.

Comparing AAC Blocks Vs Red Brick

AAC BlocksRed Brick
Raw MaterialsAAC blocks are produced from fly ash, cement, lime, gypsum and an aeration agent.Red bricks are made from clay, sand, lime, iron oxide and Magnesia.
Available SizeStandard sizes of AAC blocks are 400-600×100-200×100-300mm. The dimensions vary from manufacturer to manufacturer.Red bricks are available in the following modular sizes: 190 x 90 x 90 mm and 190 x 90 x 40 mm. Additionally, they come in non-modular sizes of 230 x 110 x 70 mm and 230 x 110 x 30 mm.
Compressive StrengthThe compressive strength of AAC blocks varies between 3 to 4.5 N/mm2The compressive strength varies from class to class and hence lies between 2.5 to 3.5N/mm2.
Dry DensityThe dry density of the AAC block varies from 451 kg/m3 to 1000 kg/m3.Dry density of red bricks varies from 1600 kg/m3 to 1920 kg/m3
Water AbsorptionThe water absorption of AAC blocks is around  10% of their weight.The water absorption of red bricks should be less than 20% of their weight.
Thermal ConductivityIt is recommended that the thermal conductivity of AAC block fall within the range of 0.21- 0.42 W/mk.It is recommended that the thermal conductivity of red bricks fall within the range of 0.6 to 1 W/mK.
Water UsageAAC blocks are cured using steam, resulting in reduced curing needs and, therefore, lower water and electricity consumption.Red bricks require more water for curing, leading to higher electricity bills and labour costs.

Cost comparison between AAC blocks and Red bricks

AAC blocks are generally more cost-effective than red bricks. For instance, constructing a 100 sq ft wall with AAC blocks may cost around ₹700 for materials and ₹700 for mortar, totaling ₹1,400. In contrast, using red bricks for the same wall could cost approximately ₹2,000 for materials and ₹1,700 for mortar, totaling ₹3,700. Additionally, AAC blocks’ lighter weight can reduce structural costs by saving up to 15% on steel and 7% on concrete.

Conclusion

When choosing between AAC blocks and red bricks for construction, both have pros and cons. AAC blocks offer better insulation, lighter weight, and speedy constructions, making them more energy-efficient and cost-effective in the long term despite higher upfront costs. Red bricks are traditional, durable, and aesthetically appealing but heavier, requiring more reinforcement and having higher overall costs. AAC blocks are suitable for energy-efficient buildings in hot climates, while red bricks may be preferred for their classic look in certain architectural or landscaping styles. However, their choice depends on the project’s budget, climate, structural needs, and desired aesthetics.

FAQs

Red brick vs AAC block which is better

AAC blocks are lightweight, provide better thermal and sound insulation, and are more environmentally friendly than traditional red bricks. However, red bricks offer higher compressive strength and durability. The choice depends on specific project requirements and budget considerations.

Beyond Direction: Maximizing Fortune with West-Facing House Vastu

0
West facing house vastu

Generally, people who believed in vastu preferred East-facing or North-facing houses. While traditions can give a sense of security, it’s essential to approach them with an open mind and a willingness to question. Doing so, we may find valuable insights that could broaden our perspectives and lead to more informed decisions.

According to Indian Vastu experts, all houses, regardless of their direction, can be auspicious and significant. They adhere to Vastu principles and follow all the rules. So, why not consider a west-facing home if it offers great benefits 

You’ll learn new insights in this Brick & Bolt blog about west-facing house vastu.

What is a West-Facing House?

If a house faces the west, then it is considered a west-facing home. Stand inside your home by facing your main door or gate for better understanding. If you meet the west, you live in a west-facing home.

Advantages of a West-Facing House

Living in a western-facing house can be greatly advantageous. Now let’s see how:

  • It allows the warm evening sunlight to enter until late at sunset, creating a cosy and relaxing glow.
  • The west direction is associated with Lord Varun, controller of the universe, so it is considered a very promising direction for attracting wealth and prosperity.
  • People living in west-facing homes tend to be more social and outgoing, which can lead to business and financial gains.
  • It is believed to bring positive energy and good vibes, especially for young people living there.
  • West-facing homes generally stay cooler from sunset until the next day’s afternoon. To take advantage of the cooler temperatures, it is ideal to have the bedrooms at the front of a west-facing house.

Vastu Principles for West-Facing Houses

Main Entrance for West Facing House

The correct placement of the main entrance is very important to consider when doing a west-facing house, Vastu. The best direction for placing the entrance or the main door in a west-facing home is such that the main entrance falls in the 3rd, 4th, 5th, or 6th segment/pada (when dividing the home into 9 equal sections, starting from the northwest corner and moving towards the southwest end). These segments, located in the mid-west or part of the home, are considered the most auspicious locations for the main entrance in west-facing house layouts. Also, some metalwork on your west-facing door (metal name board, metallic doorbell) will be suitable for your home. 

Bedrooms in a West-Facing Vastu

To get good sleep, it’s important to place your bedroom in the right spot. In a house facing west, the best places for kids’ and guest rooms are the south, west, and northwest corners. For the master bedroom, the southwest corner is the best choice.

Kitchen in a West-Facing Vastu 

The kitchen is important because it’s where we cook, affecting our family’s health. According to vastu, it must be in the right spot in the house to avoid financial and health problems. The best place for the kitchen is the south-east corner. Avoid putting it in the northeast corner of a west-facing house. Also, the kitchen counter and stove should face east.

Pooja Room in a West-Facing Vastu

It’s common knowledge that the best place for a Pooja room is in the northeast part of the house. So, when planning a West-facing house with a Pooja room, make sure to put the Pooja room in the North East, East, or West directions.

Internal or External Staircase Vastu for West Facing House

It’s crucial to consider internal and external staircase vastu for the west-facing house, as they can cause problems if placed incorrectly. Vastu Shastra suggests that for a west-facing house, the best spots for stairs are in the south, southwest, and west areas. Avoid putting them in the north or northeast, as they might lead to financial and health issues. If you decide to place stairs in the southwest of the south or west sides, make them go anti-clockwise. For the southern part of the southwest, make them go clockwise.

Potential Remedies

West facing house plan
  • Don’t place the main door of your house in the 7th, 8th, or 9th pada/segments.
  • Don’t buy land that’s higher in the north than the south. Whenever you want to buy a plot, vastu-compliant plot selection is crucial.
  • If your house faces west, don’t put the kitchen in the southwest.
  • Also, don’t place water pumps or wells in the southwest.
  • Avoid buying a west-facing house with extensions in the southwest.
  • Please don’t use too many bright tones for your west-facing home; they can overwhelm your west-facing household. You must consider the vastu colors for a home to create harmony.

Conclusion

A west-facing house can be a good option according to Vastu principles if specific guidelines are followed. Major considerations include properly positioning the main entrance, bedrooms, kitchen, pooja room, and staircases in the recommended directions. Some potential remedies to avoid involve not placing the main door in the 7th, 8th, or 9th segments, avoiding a higher north side of the plot, and not using too many bright colors inside. Following these Vastu principles for a west-facing house layout and design is believed to bring positive energy, wealth, prosperity, and good vibes to your home.

Are you interested in building a Vastu-compliant home? Then, Brick & Bolt is here. The leading construction company in Dehli, we can build your dream home that aligns with your requirements and Vastu principles, along with superior craftsmanship and 470+ quality checks In addition, we provide an extensive collection of floor plans designs for free to find the perfect layout for your home.

Wood Work for Home: Transform Your Space with Custom Wood Furniture and Interior Designs

0
Wood work interior design Image

Interior design has used woodwork for hundreds of years because it is both elegant and long-lasting. There are many different kinds of woodworking projects you can do, from complicated interior plans to simple DIY woodwork. In this blog, Brick & Bolt will discuss about woodwork for home, along with the different kinds of wood, how they should be used inside your home, and how you can add woodwork to your bedroom, kitchen, and living room. Furthermore, we discuss the advantages and disadvantages of woodwork and outline the costs involved.

What is Woodwork for Home?

Woodworking includes many skills, such as making cabinets and furniture, carving wood, joining wood pieces, carpentry, and woodturning. It includes everything from small DIY woodworking projects to large-scale custom wood furniture and detailed woodwork elements for interior design. Adding warmth and texture to woodwork for the home can turn ordinary rooms into amazing ones.

Types of Wood & Wood Specification for Home Interiors

Wood Images

Choosing the right type of wood is an important part of any woodworking project. Different types of wood have unique qualities that make them good for different uses in home interiors. Here are some common types of wood used in home interiors, along with what they’re best for and how to use them:

Teak Wood

Teak wood is one of the best and most durable woods you can find because it lasts for a very long time. It is very resistant to rot, decay, and bug attacks because it has a lot of natural oil in it. Teak is very resistant to weather conditions like water, sun, and extreme temperatures because it has a tight grain and natural oils. This makes it great for use both inside and outside. Different types of teak wood are commonly used in outdoor furniture, boats, and other applications due to its high durability and water resistance. 

Teak has a beautiful golden-brown colour that can turn into a silvery-grey stain over time if it is not used. Its smooth, oily texture brings out the natural beauty of the wood’s straight grain and rare wavy patterns. Teak is a thick hardwood, but it’s not too hard to work with, either by hand or with a machine. It can be sanded smooth and is simple to shape and put together to make many different designs.

Teak is a very popular material for patio sets, benches, and chairs because it is very resistant to weather and doesn’t need much upkeep.

Oak Wood

Oak is one of the hardest and most durable woods you can find. Because it’s very dense, it does not break down easily and is a great choice for places with a lot of foot traffic. Oak’s grain pattern is very clear and can be straight or wavy. There are two main kinds of oak: red oak and white oak. The red oak has a rusty colour, and the white oak is lighter and more neutral.

Oak is often used for furniture that needs strength, like dining tables, chairs, and cabinets. Oak flooring is a popular choice for hardwood floors because it lasts a long time and looks great.

Maple Wood

Maple is a very hard wood that doesn’t easily get scratched or cracked. This makes it perfect for areas that get a lot of use. The grain in maple is fine and even, and the colour is creamy white with a reddish-brown tint.

Maple is a great wood for kitchen floors and cabinets because it doesn’t change colour or break down over time. Because it is strong and looks good, it can be used to make strong, good looking furniture like desks and bed frames.

Cherry Wood

Cherry wood is known for having a deep, warm, reddish-brown colour that gets better with age. Exposure to light makes its natural colour look better, which gives it a unique look over time. Cherry has a smooth, straight grain that makes the finish look sleek and classy. Because it looks so expensive, cherry is often used to make expensive furniture like dining sets, desks, and armoires. It’s also used for trim, moulding, and panelling, which add a bit of class to inside spaces.

Pine Wood

Pine is easier to work with than hardwoods like oak and maple because it is lighter. However, it is also more likely to get damaged. Pine has a clear grain and visible knots that give it a rural look. It has a natural, raw look and a colour range from creamy white to yellow.

Rustic and country-style furniture, like farmhouse tables, bookcases, and bed frames, is often made from pine. Because it’s cheap and easy to work with, it’s perfect for home decor items like window frames, wall wood, and shelves.

Walnut Wood

It is known for being strong and long-lasting. Walnut is a thick and durable hardwood. The colour of walnut is a deep, rich brown, and the grain is usually straight but has pretty designs. From light brown to dark chocolate, and sometimes with a purple tint, its color can range. Because it looks so beautiful, walnut is often used to make expensive handmade wood furniture like conference tables, headboards, and cabinets.

Woodwork for Living Room, Kitchen, and Bedroom

Wood work cabinet image

Woodwork for Living Room

Furniture made of wood can add a bit of style to the living room, which is the heart of the house. Consider these ideas:

Custom Wood Furniture: A coffee table or entertainment centre that is made of wood can be the centre of attention in your living room.

Wood Interior Work: Wall panels or ceiling beams made of decorative wood can make a building more interesting.

Woodwork for Kitchen

The woodwork in the kitchen is both useful and stylish:

Cabinetry: Custom wooden cabinets give you a lot of space for storage and make your kitchen look better.

Countertops: Wooden counters have a warm, natural look and can be sealed to last for a long time.

Woodwork for Bedroom

The bedroom should be a safe place, and wood furniture can help make it feel like one:

Built-in Wardrobes: Custom wood cabinets are both stylish and useful because they have built-in closets.

Woodwork Room Design: A headboard or nightstand made of wood can give your bedroom more charm and style. 

Advantages of Woodwork

  • Wood is a very useful material that can be used to make many different things, from musical instruments and furniture to decorations and building materials.
  • Wooden products can last for decades if they are treated and cared for properly, making them a long-lasting and environmentally friendly choice.
  • A lot of people like the organic appeal and warmth of wood. Each is different because of the grain patterns and textures that give the wood character.
  • Unlike plastic or metal, wood is a sustainable building material as it’s a renewable resource that can be harvested and grown sustainably, making it a more environmentally friendly choice especially when integrated with sustainable building practices.

Disadvantages of Woodwork

  • Good wood and tools for working with it can be pricey, especially for people who are just starting out or who are working on big projects.
  • To get results that look like they were made by a professional, woodworkers need to have a certain amount of skill, experience, and knowledge of the methods used. For beginners, it can be hard to get better at these things.
  • Working with power tools and sharp blades can be dangerous if you don’t take the right safety steps. Woodworking can also expose you to wood dust, which is not good for you if you breathe it in.
  • Wood is a resource that can be used again and again, but logging methods that aren’t sustainable and cutting down trees can hurt the environment.

Woodwork Cost

The woodwork cost for home interiors can change a lot depending on the type of wood used, how complicated the design is, and how much the work costs. On average:

Basic Woodwork Cost: For basic and standard woodwork, such as building cabinets or shelves, the price can range from ₹800 to ₹1,500 per square foot.

Mid-Range Woodwork Cost: The price can vary from ₹1,500 to ₹3,500 per square foot for mid-range woodwork with complex designs and high-quality wood.

High-End Woodwork Cost: It can cost more than ₹2,500 per square foot for very expensive woodwork made from very expensive wood and with very complicated designs. 

In conclusion, using woodwork in your home can make it look better and more useful. Choosing the right type of wood and design elements that go with your home’s style is important, whether you have custom wood furniture made or do your own woodworking projects. Woodworking for the home can help you make a place that you and your family will love for years to come if you do it right.

If you know about the different parts of woodwork interior design and their costs, you can make decisions that fit your idea and your budget. If you are planning to build your dream home, then contact the best construction company in Pune.

Ultimate Guide to North Facing House Vastu: Plans, Remedies and Benefits

0
North Facing House Vastu Photo

Vastu Shastra is an ancient Indian science of architecture and design that has been guiding home construction for hundreds of years. Vastu tries to improve health, wealth, and happiness by making the built world work with natural forces. The direction of the house is an important part of the vastu for home. In this blog, Brick & Bolt will discuss the specifics of the north-facing house Vastu and examine its principles, benefits and practical uses.

What is North Facing House Vastu?

A house facing north Vastu refers to the guidelines and principles in Vastu Shastra that are specific to homes that face north. Vastu Shastra says facing north is lucky because it is linked to wealth and success and is ruled by Lord Kuber, the god of wealth. Following Vastu guidelines, people can use the north direction’s good energies to improve their health and happiness.

Vastu Shastra Plan for North Facing House

North facing house image

Planning a house that faces north requires careful thought about many factors to make sure it follows Vastu Shastra. Here are some generic Vastu principles for homes that face North.

Entrance Placement: To attract good energy, the main door should face north or northeast direction. Avoid exits in the northwest, which can cause money problems.

Living Room: The best place for the living room is in the northeast corner of the house. This setting lets in a lot of natural light and makes the space feel cosy and comfortable.

Bedrooms: The master bedroom should face southwest. The northwest can be used for guest rooms.

Kitchen: For health and happiness, the kitchen should be in the southeast corner, which is called the Agni (fire) corner. Don’t put the kitchen in the northeast corner or north.

Bathrooms: To minimise negative energy, bathrooms and toilets should be in the southeast or northwest corners.

Vastu Shastra is really a diverse ancient science, along with the North-facing vastu, it also has the remedies for the Southwest-facing vastu plan. If you want to know about the southwest-facing vastu plan, then click on the link below:

How to Use Vastu Guidelines in Your House Floor Plan

Here are some vastu guidelines to add to your house floor plan design.

Stair Cases: If your house has more than one floor, the stairs should be placed in the southwest or south direction. Do not place the stairs in the middle of the house.

Windows and Ventilation: To let good energy flow, make sure enough windows are facing north and east.

Interior Decor: Vastu says that rooms facing north with light should have walls painted with relaxing Vastu colours. Put things in the north like mirrors and water features to boost wealth energy.

Placement of Furniture: Properly set up the furniture so that it’s easy to move around and that good energy flows through it. Do not put heavy items in the northeast and north corners.

North Facing House Vastu Remedies and Tips

Some Vastu doshas (defects) may happen even if everything is not carefully planned. Here are some good ways to fix Vastu doshas in North-facing homes.

Main Door Vastu Dosha: Hang a brass or copper pyramid on the front door to eliminate negative energy if the main door is not in the suitable place.

Kitchen Vastu Dosha: If your kitchen isn’t in the southeast, put a pyramid or a gas stove that is in line with Vastu in the southeast direction of the kitchen.

Bedroom Vastu Dosha: If the master bedroom is not in a suitable place, put Vastu correction strips (also called Vastu tape) in the southwest corner.

Bathroom Vastu Dosha: To get rid of negative energy, put Vastu salt in the bathroom. Make sure there is enough airflow to keep the room fresh.

How to Improve Positive Energy Flow in North-Facing Homes

Puja Room Placement: The most blessed place for the puja room is in the northeast corner, which is called the Ishaan corner.

Water Elements: To attract money and wealth, place a water feature, like a fountain or aquarium, in the northeast or north.

Greenery: Place indoor plants in the north and east areas of your home to improve their appearance and attract more positive energy.

Crystals and Stones: To increase good vibes, place crystals like amethyst or citrine in the northern area. 

Importance of Pooja Room in Vastu for North-Facing Homes 

Most of the south Indian home designs for pooja rooms in a north-facing house can make the spiritual and good energy of the house much stronger.

The pooja room is a spiritual center that brings in divine blessings and creates a calm environment. If you put the pooja room in the right place, good energy will flow through the whole house. The pooja room should be in the northeast corner, which is thought to be the most holy and lucky spot. Don’t put anything in the pooja room that isn’t needed. To make the space feel more spiritual, use light colours and add things like flowers, candles, and incense. Make sure that pictures of gods or idols face east or west and that people praying face north or east.

Benefits of North Facing House

Following Vastu rules in a house that faces north can bring many benefits and make the people who live there happier and healthier.

Advantages of Natural Light and Air Flow

Optimal Sunlight: Homes facing north get constant indirect sunlight all day, so they don’t need as much artificial lighting and have a bright, happy living area.

Improved Air Quality: Putting windows and doors in the right places allows air to flow freely, which keeps the air fresh and lowers the humidity level.

Positive Impact on Health and Well-being

Stress Reduction: A room with good airflow and natural light can help lower stress and improve mental health.

Better Sleep: Vastu says that placing your bedroom in the right place can help you sleep better, which is good for your health in general.

Financial and Career Growth Benefits

Wealth Attraction: Lord Kuber rules the north direction, which makes it easier to stay financially stable and grow.

Career Advancement: A home that is in accordance with Vastu can create an environment conducive to career success, which can lead to professional growth and new possibilities. 

In conclusion, using Vastu Shastra principles in your north-facing home can make it a peaceful and prosperous place to live. By carefully planning and using simple remedies, aligning your home with these ancient guidelines will create a balance of energy that is good for your health, well-being, and financial growth. By learning and implementing these ideas, you can make your home a place of peace and abundance.

Mediation vs Arbitration in Construction Disputes: Choosing the Best Alternative Dispute Resolution

0
Mediation Vs. Arbitration in Construction Disputes

Legal disputes in the real estate market are getting on the nerves of the people as no one wants to face those months and years of court proceedings. Whether it is residential space or commercial space, legal considerations for construction disagreements are inevitable. Sometimes, it’s just to fraud the money; sometimes, it’s authentic. So what can be the relevant construction dispute resolution methods to avoid long and long court proceedings still getting the resolution? 

This brings into the picture alternative dispute resolution (ADR) as a way to resolve disputes outside of the court, and here starts the debate about which of the two popular solutions, mediation vs arbitration, should be chosen to address the dispute.

Both Mediation and Arbitration are perfect ways to resolve legal disputes in construction outside the court in a more cost-effective way. Which one to choose to sort your legal dispute? Continue reading the blog, as here we will put together the difference between Mediation and Arbitration to help you make an ideal choice.

What is Mediation in a Construction Dispute?

Mediation in the construction industry is one of the effective ways to resolve disputes outside the court. During mediation, parties negotiate to resolve their differences. Mediators are legal professionals involved in the proceedings, identifying key issues in disputes and determining options and alternatives for resolution. Contractual clauses may require mediation or be voluntary, ordered by the court, or mandated by the dispute resolution clause. 

Mediators serve as third parties who facilitate discussions between disputing parties. By asking questions, they help identify the real issues in dispute and develop options for resolution. It is common for the parties to sit in separate rooms in most mediation, and the mediator will speak with one party at a time, switching between them throughout.

Key characteristics of mediation in construction:

  • Neutral Third Party
  • Empowerment
  • Confidentiality
  • Intimate and Flexible

What is Arbitration in a Construction Dispute?

Arbitration is an Alternative dispute resolution construction that involves an independent adjudicator who makes a binding decision after considering both parties’ evidence. Arbitration has many similarities with litigation, but arbitration occurs outside the courtroom. An arbitration clause usually arises from a conflict resolution clause in a contract. Additionally, it can happen when the parties voluntarily agree to arbitrate (for instance, to keep the dispute private). 

Arbitrators are chosen by agreement between the parties. If the parties cannot agree on a specific arbitrator, an independent person or body will often be appointed as an arbitrator. A formal and structured process distinguishes arbitration from mediation.

Key characteristics of arbitration in construction:

  • Neutral Third Party
  • Formal Procedure
  • Binding or Non-Binding
  • Efficiency

Along with this, it’s crucial to know when to hire a construction lawyer to get legal advice. 

Mediation vs Arbitration in Construction Dispute: Comparison Table

Alternative Dispute Resolution in Construction
BasisMediationArbitration
Decision MakerIt is up to the parties to make their own decisions and retain control.An arbitrator renders a final decision, which may be binding or non-binding.
Legally Binding NatureParties can only agree to a binding mediation agreement if they like it and then indicate it is legally valid.Due to the lack of judicial scrutiny, arbitration decisions are usually final and, unless specifically excluded, are as valid as court judgments.
Public or PrivateMediation sessions are conducted in private under strict confidentiality conditions. Arbitration settlements are based on agreements between the parties or on prior laws, whether privately or publicly.
Appeal ProcessMediation usually does not have an appeal process since the outcome is agreed upon by the parties involved.Depending on the arbitration rules and laws that apply, some limited appeal options can be available in arbitration.
Role of the Third PartyThe mediator facilitates communication, filters problems, and generates viable solutions but does not force decisions on parties.Arbitrators function as decision-makers when they evaluate the evidence and make a binding decision.
Nature of ProcedureMediation covers a similar concept guided by a third party but differs from arbitration in that it is more collaborative. The vision behind this is to reach a conclusion and address the disagreement.Arbitration involves alternative dispute resolution, in which lawyers or legal professionals serve as arbitrators. Parties put together evidence for the arbitrator, with the goal of getting the third party to resolve the dispute or disagreement.
Principles for the ProcedureMediation also requires agreement from the parties and collaboration between them. When one party refuses to participate, it is difficult to enforce the agreement. A business agreement may mandate mediation if certain conditions are met.Arbitration requires the parties to agree to arbitrate between themselves, known as an arbitration agreement. An arbitration clause, or arbitration agreement, is usually a relatively short clause included in a business agreement. Even when parties sign written agreements before a dispute arises, they can also agree to resolve it through arbitration. In addition, to avoid any dispute, it’s crucial to understand the contractual agreements in construction.
ConfidentialityMediation also requires agreement from the parties and collaboration between them. When one party refuses to participate, it is difficult to enforce the agreement. A business agreement may mandate mediation if certain conditions are met.Arbitration requires the parties to agree to arbitrate between themselves, known as an arbitration agreement. An arbitration clause, or arbitration agreement, is usually a relatively short clause included in a business agreement. Even when parties sign written agreements before a dispute arises, they can also agree to resolve it through arbitration. 
Estimated Cost and Duration to Get the OutcomeMediation is a cost-effective way to address construction industry disputes and gives you an outcome quicker than arbitration. It is all because of the informal nature and unique approach to fast-pacing the case, which has made it efficient to resolve it quickly within days or weeks. Mediation is an ideal solution for all parties looking for a cost-effective yet quick resolution.In contrast, arbitration is an expensive and time-consuming process. If the case is complex, it will take months or even years to reach a conclusion. Arbitration also involves higher fees because of administrative costs and the arbitrators’ costs.
Legal Framework SupportMediation is less formal than litigation and less governed by procedural rules. Therefore, it is more adaptable to a variety of legal contexts. There are no significant complications associated with its use across different jurisdictions.Whereas arbitration has a specific legal framework that governs it. The Arbitration and Conciliation Act of 1996 provides a complete legal framework for arbitration in India. Arbitration judgments are recognized and enforceable in multiple jurisdictions, making them appealing for resolving legal conflicts.

Conclusion

Individuals hit by legal complications in the construction market looking to avoid courtroom proceedings turn to mediation and arbitration to resolve their legal disputes for residential and commercial properties outside the court. Each of the alternative dispute resolution methods is best in its own respect, so it depends on you and the case complexity to choose from the best. 

If you are afraid of all the legal complications while constructing a space in India, Brick & Bolt is the top construction company that adheres to all the legal complications while constructing the property. We have a team of experts always in the loop to check the legal concerns of every property to ensure that you do not have to face any construction disputes. Contact us today to construct your dream space without compromising on any legal concerns.

Also Read: Legal Implications: When to Use Judicial Stamp Papers vs. Non-Judicial Stamp Papers

Swimming Pool Rules and Regulations in India: Essential Guidelines for Homeowners

0
Legal Requirements for Building a Pool

Adding a swimming pool to your property makes it more valuable and offers various enjoyment and relaxation. If you are inspired by one of those beach vacations or long for a swimming pool, deciding to build a pool in India requires a great deal of legal requirements.

There’s a growing trend for pool owners to seek renewable, energy-efficient, and attractive options. Above all the aesthetics factors, you must not forget to consider pool construction regulations that facilitate the success of installing a pool in the front or backyard of your residence. 

Keep reading to explore the legal requirements for building a pool.

Types of Swimming Pools

Various types of swimming pool options are available to house owners to add value and luxury to the house. Let’s gain a better understanding of the types of swimming pools that are sure to stun you: 

(i) In-Ground Pools

In-ground pools are crucial swimming pool options in India. They have impressive design options and are constructed into the ground. You can customize them as per requirements, adding a stunning touch and value to your homes.

(ii) Above-Ground Pools

Above-ground pools are the perfect choice for individuals looking to construct pools on a limited budget or with less space. You can install them easily and customize them to fit your needs.

(iii) Infinity Pools

Infinity pools are excellent choices for homes with breathtaking views that combine water and horizon to create a stunning effect. To give them a high-end touch and perfect design, choosing a leading construction company in Bangalore, like Brick & Bolt is a one-stop solution for meeting your dream of installing a pool at your premises.

Must Know Legal Requirements for Building a Pool in India

When building a swimming pool in India, there are many pool fencing regulations and compliance measures to be taken into account. It ensures the safety of users, complies with local laws, and follows environmental regulations. Here is a brief breakdown of the legal considerations for building a swimming pool in India.

1. Adhering to Zoning Laws

Zoning laws for pool construction are the most important legal requirement that every individual must implement while constructing a pool at their house. Various legal regulations, including size, placement, and eco-friendliness requirements, can seriously impact the pool project. 

Today, most localities are moving to green Building codes for pool installation to encourage sustainable construction. It is better to ensure that your pool complies with these building codes and standards to avoid legal complications.

2. Getting Permits to Build Pool

Obtaining Pool construction permits is important for all individuals looking forward to constructing the swimming pool at their premises. This works for both residential and commercial settings. To apply for a permit to authorize pool construction, you need to submit an application to the relevant authorities. Along with the applications, you must send architectural drawings and plans to your local government Authority. For example, if you are planning to construct a pool in Bangalore, you need to send an application to Bruhat Bengaluru Mahanagara Palike (BBMP). When you send the applications to the relevant authorities along with the architectural plans, it must include structural designs, dimensions, and material details. 

Authorities will closely review all these plans and designs to ensure quality and compliance with all local regulations. These may include safety standards, environmental regulations, and design requirements. Approval from the authorities can take weeks to a few months.

Environmental compliance in construction is the most important for any project, and if you want to learn more about it, click on the link below:

Environmental Compliance in Construction: Ensuring Sustainability and Legal

3. Insurance and Legal Liability

To construct a pool in India, taking care of liability insurance for pools is an important legal consideration that ensures compensation for any loss. Every pool owner must obtain liability insurance for protection against injuries and accidents. This applies to both residential and commercial pools. To reduce penalties and legal disputes, strictly follow local laws and regulations. To stay compliant, you have to do regular maintenance and inspections.

4. Safety Standards for Construction

Health and safety standards for pools are the most crucial concern when constructing a pool in India. Swimming pools require various structural requirements to maintain durability and stability. Hence, before starting the construction process, it is a good idea to consult with the engineer regarding various factors like soil type, load capacity, and earthquake activity to ensure that the pool meets safety standards. 

To lower the chance of leaks and structural failures, you need to ensure that the materials used are durable and get regular inspections during and after construction. Children will also play in the swimming pool, so you cannot compromise safety. 

Along with our loved one’s safety, it’s also crucial to consider the labour’s safety during the construction work. Hence, everyone must be aware about the Labour Laws and Safety Regulations in Construction.

5. Keep up with Documentation and Certificates.

All the local and state authorities in India have made it mandatory to showcase the documentation or relevant certificates that the pool is constructed and complies with all the regulations. The document shows that the pool follows the approved plan and designs.

You need to ensure that you keep a copy of the permits, licenses, and certifications, as they will be required during inspection or resale. To keep up with the pool’s quality, keep checking on its water quality, timely repairs, and further improvements. In addition to ensuring compliance, this also helps to manage pools efficiently.

Why is Building a Swimming Pool in your Premises a Beneficial Choice? 

Benefits of Building a Pool at Your Home

Swimming pools on your premises go far beyond extending your status in society and even work to fight against the devastating sunny days in India.

If you are losing hope in convincing your family to construct a swimming pool on your premises, here are must-read benefits that will definitely help.

(i) Thrill your family with endless entertainment.

Swimming in your pool allows you to create endless memories with your family and to make your children happy. In addition, family gatherings and lawn parties around the pool is a great options.

(ii) Establish a family-friendly hangout area.

Sometimes, we are so busy with the day-to-day schedule that most have stopped enjoying themselves with their family. By constructing a pool at your house, you can at least enjoy a thrilling time with your family. Swimming pool turns your house into a great paradise, so when you are not in the mood to move out, you can beat the heat and play fun activities at your swimming pool.

(iii) Boost the value of your home.

Building a backyard pool increases the value of your home. A backyard’s unique selling points include a touch of luxury and entertainment. Having a pool at your property in India can increase its value. A house with a swimming pool costs is higher twice to thrice as much as a property without a pool. This shows that the construction of a pool gives you a staggering return, taking your house’s value to the sky. Do you want to get some idea about how much it will cost to build a house? Then, don’t worry, use Brick & Bolt’s Construction Cost Estimator for free to calculate your dream home construction cost.

Investing in a swimming pool can be costly and even involve regular maintenance costs, but it will always give you great value for your money. Besides the monetary benefit, it allows you to have a chill mode right at home.

Conclusion

Building a swimming pool in India is a perfect choice for both commercial and residential areas. It will boost the value of the premises, putting you in a win-win situation to gain most of the benefits. If you are looking to construct a pool in India for your residential or commercial space, Brick & Bolt is the best construction partner. We offer the best hands and world-class technology to develop an impressive, luxurious pool. We understand the importance of legal considerations while constructing a pool in India. Our team complies with all the legal requirements to build you a top-notch pool with approved authority plans. At Brick & Bolt, we take pride in timely completion without sacrificing quality and a modern touch. Contact us today and give a flight to your idea of constructing a pool in India.

The Vital Role of Lintels in Construction: Types and Installation Tips

0
Lintels in Construction

Whether you are constructing a new building or rehabilitating an old one, each component of your house plays a vital role in the stability and longevity of the building. Besides standing as the essential components of a building structure, doors and windows represent vulnerable points of your residence’s external envelope. Builders must be careful while creating an opening in a building. Moreover, you must ensure to maintain structural and thermal stability. Here is where a lintel comes into play.

The importance of lintels dates back to ancient architectural practices when builders used the component for the construction of string and durable structures. Even today, the use of lintels is crucial in modern construction, as it combines functionality and aesthetics. The blog explores the use of lintels in construction, highlighting their types, materials, and the role they play in maintaining the structural integrity of buildings.

What is Lintel?

Builders consider lintels as flexural members and parts of a building’s structural system. It’s a horizontal structure spanning across the top of any opening, including doorways, windows and fireplaces. It supports the weight of the structure above it as it evenly distributes the load, preventing the walls from collapsing. These come in various materials, including stone, brick, concrete, timber and steel. The choice of material depends on several factors, including the required load-bearing capacity, the type of building and local building codes.

In ancient times, people made lintels from stones and carved intricate designs and symbols. However, today, lintels are available in various shapes and sizes, making it possible to find the perfect ones for every project. Since lintels play a crucial role in building stability, choosing the right type and size is crucial to ensure the security and safety of the structure. Besides, the lintels stand as a decorative element, enhancing the overall appearance of the building.

Types of Lintels

You can classify lintels into various categories based on the materials used in the construction. These include:

1. Wood Lintels

Wood lintels or timber lintels are the oldest types of lintels. They are used mostly in hilly areas where timber is cheap and abundant. In the plain lands, timber is expensive and susceptible to catching fire and decaying due to rot and termites. These lintels either consist of a single piece of timber or built-up sections consisting of two or more pieces held by bolts at suitable intervals. Builders and construction firms in Mysuru use built-up lintels for larger areas. You need to place the wood properly with bearings at the ends. Since these lintels are weak, builders place relieving bricks or stones over them. Even the gap between the lintel and the arch requires filling with a brick or stone core.

2. Stone Lintels

Builders use stone lintels where the stone is abundant and the structure is of stone masonry. You can use these lintels in buildings that are stone-facing. These lintels consist of stone slabs having sufficient strength. Since stone has poor tensile strength, it cannot withstand the traverse stresses. Besides, obtaining flawless stone slabs of sufficient length and depth is difficult. Moreover, the stone lintels are expensive, as they require good quarrying, transporting to the site, and special handling due to their weight.

3. Brick Lintels

Brick lintels are a good material for a lightweight structure. Usually, the builders construct these lintels over a temporary wood support known as a turning piece. The end joint of the bricks made for this purpose frequently features depressions called frogs that can aid in preventing shearing.

4. Reinforced Brick Lintels

When using brick litles over a large area, you must reinforce them with steel. Manufacturers make these lintels using the same principle as reinforced cement concrete lintels. The only difference is that you must use good-quality bricks instead of concrete. The lintel manufacturers arrange the bricks in parallel rows, leaving a lengthwise gap of a couple of centimetres to insert the reinforcements or steel bars. These builders later fill or embed the spaces with rich cement mortar or concrete. However, these lintels are not ideal in high rainfall and humidity areas. It’s because the bars receive water, eroding over a period and weakening the lintel.

5. Concrete Lintels

Today, concrete lintels are the most common type of lintels. Made from cement concrete, they are of two types—plain concrete lintel and reinforced concrete lintel. Manufacturers create plain concrete lintels with plain concrete. Since these are devoid of steel bars, they cannot bear heavy loads. Besides, concrete is stringy in compression and weak in tension. Therefore, these lintels are ideal for a span of up to one meter.

On the other hand, reinforced concrete lintels are extensively used in modern construction. Manufacturers reinforce these lintels with bottom bars and shear stirrups. The advantages of RCC Lintels have replaced all other construction materials. They offer rigidity, load-bearing capabilities, strength, fire resistance, affordability, and convenience of use. 

Importance of Lintels in Construction

Load Distribution and Reduction of Stress

With lintel beams, a building experiences equal load distribution. Buildings have open spaces like windows and doorways. When the structural load above these openings exerts pressure on the lintel, it distributes the force to the adjacent walls and columns. The distribution of the load prevents the occurrence of concentrated stress points that could cause structural damage. Because of the distribution, the load helps maintain the stability of the overall structure.

Providing Structural Support

The primary role of lintels in construction is to offer structural support. Often, there are gaps in walls, doors, and windows, which weaken the wall’s load-bearing capacity. Lintel beams help reinforce and distribute the structure’s weight above the opening to the surrounding walls and columns. This ensures the building’s structural integrity and prevents potential risks, including sagging or collapsing.

Provides Design Flexibility

Besides their functional role, lintels offer design flexibility. Since one can design lintel beams in various shapes and sizes, architects and engineers can incorporate unique designs and features into the building. The ability to design lintel beams to specific aesthetic and architectural requirements enhances the structure’s visual appeal, along with offering the necessary structural support. The design flexibility offers several possibilities for creative building designs.

Things to Remember While Installing Lintel Beam

Things to Remember While Installing Lintel Beam

Proper installation of lintel beams is critical, as it ensures their effectiveness and longevity. Ensure to hire experienced professionals during the installation of the beams. They are proficient in calculating the load-bearing requirements and necessary structural calculations. Besides, you must take care of the lintel’s regular maintenance, including inspection for signs of cracking or damage. It ensures the overall stability of the building.

You need to consider the following things while Installing a lintel:

1. Minimum End Bearing

A lintel can provide the correct support only when it extends far into the brick masonry. It includes the sides of the doors and windows. Experts recommend extending the lintels a minimum of 150mm beyond the opening on either side.

2. Bedded on Mortar

Ensure to bed your lintel on mortar. When you install your lintel on a mortar bed, it distributes the loads equally. Look at the thickness of the mortar. It must be sufficient to accommodate any possible unevenness existing between the lintel and the support.

3. Level of the Lintel

After placing the lintel on the mortar level, ensure it’s perfectly level. If you fail to level the lintel, it will not distribute the load evenly and might create undue stress on the supporting walls.

You can use a spirit level to ensure that you placed the lintel perfectly horizontally across the opening. Confirm that the lintel is level crosswise. Simply speaking, you must ensure that neither leaf is higher than the other. If the opposite happens, it will create undue pressure on one of them.

4. Allow Curing of Mortar before Applying Loads

After levelling your lintel, allow the mortar to cure before applying any loads. If you fail to cure the mortar, the lintel will fail to transfer any type of load on the side of the openings. If you are in a hurry and cannot wait for the mortar to cure, ensure to place appropriate supports beneath the lintel before the application of loads.

5. Supporting the Sides with Bricks

Once the mortar dries up or you have support, you start laying the bricks. Ensure that you lay the bricks simultaneously on both sides. This ensures that the load on each leaf does not get too far out of balance. Applying too much load on one side at once might damage the lintel.

6. Install a Damp Proof Course

If you are installing the lintel as a part of the cavity wall, it is crucial to install a damp-proof course. Builders design cavity walls so that the outer leaf remains damp while the inner leaf remains dry. Therefore, when installing a lintel, you must ensure the moisture doesn’t trap between the two.

Conclusion

Lintel beams are the backbone of every construction. Because they provide structural support, even distribution of loads, and design flexibility, their function in supporting doors and windows maintains the structural integrity of the building while preventing any potential collapse or damage.As a leading construction firm in India, Brick & Bolt understands the effort that goes into building your home. The organization has an in-house material supply chain that streamlines material supply. Besides, they ensure a continuous flow of the best quality materials that support the success of your construction project, right from sourcing to delivery.

How to Transform Your Kid’s Room with Creative False Ceiling Designs

0
Kids room false ceiling images

Every parent wants to make sure that their child’s bedroom is not only comfortable and functional but also reflects their child’s own personality and hobbies. The ceiling is an important part of bedroom design that is often forgotten. People pay attention to the walls, floors, and furniture, but the ceilings are a blank canvas for imagination. False ceilings can bring magic into a child’s room and turn it into a magical place. In this blog,  Brick & Bolt will talk about the magical world of kid’s room false ceiling designs and how they can make your children’s safe space feel better.

Understanding False Ceiling

Let’s first talk about what a false ceiling is before we talk about the design options. A false ceiling is a secondary ceiling that is put up below the main ceiling of a room. It is also called a dropped ceiling or a suspended ceiling. There are various types of false ceilings available, whicha are usually made of light materials like plaster, PVC, or metal frames, and it has many benefits, such as better looks, better soundproofing, and better insulation.

Why is Ceiling Design Important in Kid’s Rooms?

The ceiling design is a big part of how a room looks and feels. The ceiling in a kid’s room is like a blank canvas where they can use their ideas to the fullest. A well-made false ceiling can spark a kid’s fantasy and make them feel happy and amazed. There are so many things that can be done, from making the sky look like a starry night to showing off your favourite cartoon figures.

Creative False Ceiling Designs for Kid’s Room

Starry night sky design

Starry Night Sky: 

To create a dreamy atmosphere, put up a false ceiling with LED lights that blink and shine like the stars in the night sky. For an extra touch of magic, add stars and symbols that glow in the dark. This type of kid’s room ceiling design is perfect for little scientists.

Fun Themes: 

Children’s bedroom false ceiling designs with themes can turn your kid’s room into a magical place straight out of a fairy tale. Let your kid’s mind run wild with stories about magical forests or adventures under the sea.

Colourful Clouds: 

To make you feel calm and peaceful, paint the ceiling with fluffy clouds in soft colours. For a relaxing effect, use a sky-blue background with it. This false ceiling design for children’s rooms can make the room calm and relaxing, making it easier to sleep.

Try Out Different Lighting Effects:

If you don’t want to put characters or cartoons on the ceiling, you can choose false ceiling light designs. They all look good with different lighting effects that make the room feel like it’s outside. You can also try out the night sky and glow-in-the-dark patterns to keep the children’s room false ceiling easy but still interesting.

Space Exploration: 

If your child is interested in the universe, have them create a false ceiling that looks like it came from space. Picture planets, rockets, and shooting stars in the dark, which makes you feel like you’re on an adventure and looking for new things.

Whimsical Shapes: 

For a fun twist, try out shapes and patterns that you wouldn’t normally use. Let your imagination run with anything from simple geometric shapes to funny animal or object images.

Benefits of False Ceiling Designs for Kid’s Rooms

  • False ceilings make the room more interesting to look at, which improves its overall look.
  • False ceilings add an extra layer of insulation that helps absorb sound, making the room quieter and more peaceful for sleep and play.
  • False ceilings make it easy to hide wiring, pipes, and fixtures that don’t look good, giving the room a sleek and clean look.
  • There are a lot of different ways to create a room with false ceilings. You can change the style to fit your child’s tastes, making the room truly one of a kind.

In conclusion, false ceilings give you a lot of design options for making a kid’s room feel better. You can make a magical wonderland or encourage a love of travel and adventure. The only thing that stops you is your imagination. You can turn your kid’s room into a magical place where dreams come true by buying a creative false ceiling design. Why wait, then? Give your child the bedroom of their dreams with a beautiful false ceiling design. Go ahead and be creative.

See also: POP Ceiling Designs for Drawing Room.

Unlock the Secrets: Choosing the Right Cement Grade for Your Project

0
Types of cement grades

Behind every strong concrete structure, there is a major part of cement. The compressive strength, workability, and grade of cement can determine the structure’s durability. So, before selecting the right type of cement from the list of building materials for your dream house, learn more about it. 

Let’s explore the various types of cement grades and learn how to choose the best cement, together with insights from the Brick & Bolt blog.

Understanding Cement Grades

Cement grades are the classification of cement that indicate the cement’s compressive strength after 28-day of curing. The major cement grades used in construction are 33, 43, 53 Grade, Portland Pozzolana Cement, and Portland Slag Cement. 

The grade of cement decides the bonding strength of concrete, mortar, and plaster. Also based on grade, Strength of concrete will differ, which impacts the number of cement bags required. Hence, selecting the correct cement grade is crucial for the success of any construction project. In case you choose the wrong grade! It can cause structural weaknesses, reduced durability, and higher maintenance costs. Proper cement selection will make sure that the cement will perform as expected under different conditions, giving safety and longevity to buildings.

Common Types of Cement Grades

Following are the common types of cement grades that you need to consider before choosing cement.

OPC 33 Grade Cement

OPC 33-grade cement is generally called Ordinary Portland Cement(OPC). After 28 days of curing, OPC 33-grade cement offers a minimum compressive strength of 33 MegaPascals (MPa). 

33-grade OPC cement use is flexible due to its slower rate of strength increase. Thus, it’s used for plastering, flooring, and ordinary masonry projects where high strength is not required. It is ideal for pavements and pathways where the load-bearing requirements are minimal. It becomes stronger with time; hence, it is used for grouting and site restoration projects.

OPC 43 Grade Cement

After letting 43-grade OPC cure for 28 days, it will offer the minimum compressive strength of 43 MPa (MegaPascals).

When using this cement in concrete or mortar mixes, the finer cement grains allow the concrete mixture to be worked and spread more easily during application. Due to its strength, 43-grade cement is used in reinforced concrete (RCC) works, prestressed concrete constructions, concrete sleepers, and other non-structural elements like tiles and blocks.

OPC 53 Grade Cement

After 28 days of curing, 53-grade OPC cement will offer a high compressive strength of 53 MPa. Because it gains this high strength faster, it allows construction projects to remove the temporary moulds and supports more quickly, which saves a lot of time and money.

Out of the different cement grades available, the 53 grade is used for heavy-duty, heavy-strength concrete structures like industrial buildings, bridges, high-rise towers, and foundations for homes and buildings. Its exceptional strength and efficiency also make it great for concrete runways and roadways that need to withstand constant heavy weights and forces.

Super Grade Cement

Supergrade cement has a super high compressive strength, beyond 60 MegaPascals. This special cement is made by mixing certain minerals in a unique way. It’s produced by combining really strong Portland cement with some special techniques to grind it up.

People use Supergrade cement in really important construction projects like nuclear power plants,  high-rise buildings, and huge dams. These projects need cement that’s super strong from the beginning and stays strong for a long time.

Factors Influencing the Choice of Cement Grades

Super Grade Cement

Nature of Construction Project

Different types of construction projects will have different strength and durability requirements. So, the nature of construction projects considerably influences the choice of cement grade. 

Environmental Conditions

Different environmental factors, such as humidity, temperature, and exposure to chemicals, influence cement’s performance. Selecting a grade that can withstand these conditions is important for the success of any construction project.

Structural Requirements

The grade of cement determines the strength. The type of cement grade chosen depends on structural requirements, such as how much weight or types of loads are imposed on the structure and how long it needs to last. A higher grade of cement is needed for construction projects that require very high strength capabilities, like bridges or skyscrapers.

Cost Considerations

Budget constraints often impact the selection of cement grades. The really good cement costs more money, but it works better. Investing in high-quality cement may result in long-term cost savings by reducing the need for frequent repairs or replacements. So, you have to find a balance between how well you want it to work and how much money you can spend to get the best outcome. If you want to calculate the overall construction cost of your home, check out our Cost Estimator to help determine your budget.

Conclusion

Selecting the proper cement grade from different types of grades is very important for the success of any construction project. To do that, understanding the characteristics and applications of varying cement grades is a must and should. The chosen cement should meet the project’s specific needs, providing strength, durability, and safety. By considering factors such as project requirements, environmental conditions, and budget, builders can make better decisions that enhance the longevity and performance of their structures.

Types of Load on Structures: A Comprehensive Guide

0
Types of Loads on Structure

Any building or structure must withstand various forces throughout its lifespan. These forces are regarded as loads, and when they are applied to a structure or any of its parts, the loads cause the structure to shift and become stressed. In general, three types of loads may be found on structures: longitudinal, horizontal, and vertical, or gravity loads. These loads are used in the structure’s analysis and design. Hence, the understanding of the various types of loads that are placed on buildings is so essential.

Hence, in this blog, Brick & Bolt discusses the different types of loads, from dead loads to live loads, wind loads to snow loads, imposed on structures or buildings.

10 Different Types of Load on Structures

The loads in structures and buildings can be categorized as longitudinal loads, horizontal loads, and vertical loads. There are three types of vertical loads: live load, dead load, and snow load. The two types of horizontal loads are seismic load or earthquake load and wind load. Precise calculation of the different loads operating is required. Different design loads for buildings and structures are specified by the American Standard Code ASCE 7: Minimum Design Loads for Buildings and Other Structures and the Indian standard code IS 875 (Part 1): 1987 (Reaffirmed 2008). Below is a discussion of each of them.

  1. Vertical Loads
  • Live Load or Imposed Load
  • Dead Load
  • Snow Load
  1. Horizontal Loads
  • Wind Load
  • Earthquake Load
  1. Special Loads
  • Load Combinations
  • Accidental Load
  • Thermal Load
  • Settlement Load
  • Soil and Fluid Load

Let’s explore all the types of loads in detail:

1. Live Load or Imposed Load

A load that is subject to vary over time is referred to as a “live load” or “ imposed load” in civil engineering. The load’s weight fluctuates or changes position while people are moving through a structure, for example. Anything in a building that is movable and not attached to the structure may result in a live load. The calculation of a structure’s gravity load takes live loads into account. The anticipated maximum load serves as the basis for the minimum live-load criteria. A live load may be described as operating on a concentrated region (point load) or as a uniformly distributed load (UDL). At some point, it could be taken into account while calculating gravitational loads.

2. Dead Load

Dead loads, often referred to as permanent or static loads, are those that don’t change much over time. Examples of these include the weight of the structural components of a structure, such as the beams, walls, roof, and structural flooring. Immovable fixtures, built-in cabinets, and permanent non-structural barriers are examples of dead loads. The weight of the structure or other permanent components makes up the dead loads, which are calculated before any live loads. The total loading applied to the structure is the sum of the live and dead loads. Each structure’s dead loads are determined by multiplying the unit material weight by the volume of each segment.

3. Snow Load

Snow Load on Building

This is the weight that snow buildup may impose, and it is especially concerning in areas where snowfall can be severe and frequent. Large amounts of snow may build up and place a significant strain on a building. One significant aspect influencing the amount of snowfall is the design of a roof. The code IS 875 (Part-4):1987 addresses snow loads on building roofs. The weight of snow is dependent on many factors, such as temperature variations, distribution and accumulation, and moisture content.

4. Wind Load

Analysis requires knowledge of both structures, meteorology and aerodynamics. Wind loads may be imposed by the movement of air relative to a structure. While wind load may not be a major worry for large, low-level, or small structures, it becomes more relevant with height, when lighter materials are used, and when designs that might alter airflow—typically roof forms—are used. It could be necessary to add additional supports and fasteners when a structure’s dead weight is inadequate to withstand wind stresses. In structural design, wind load must be taken into account, particularly if the building’s height is more than twice the dimensions measured longitudinal to the exposed wind surface.

5. Earthquake Load

The inertia force created in the building by earthquake vibrations causes an earthquake load. Earthquake load depends on variables like seismic activity hazards, structure parameters, and gravity load. The force of inertia changes with mass. Because of the structure’s higher weight, there will be a greater seismic loading. The structure will break down or sustain damage when the moment of resistance provided by the element is exceeded by the earthquake load. The weight or mass of the building, its dynamic characteristics, the variation in stiffness between adjacent floors, the severity and length of the earthquake, and other factors all affect how much an earthquake loads a structure. A neighboring building or the surface of a structure on the ground is subject to an earthquake load. Structures in seismically active places must be carefully analyzed and planned to make sure they won’t collapse in the event of an earthquake.

6. Load Combination

When many different types of loads operate on the structure, a load combination is created. Building codes often provide a range of load combinations along with load factors, or weightings, for every kind of load to guarantee structural integrity under various maximum anticipated loading situations. The following load combinations are described in the standard code:

  • DL+IL,
  • DL+WL,
  • DL+IL+EL,
  • DL+IL+TL and more.

Where DL- Dead Load, IL- Imposed Load or Live Load, WL- Wind Load, EL- Earthquake Load, TL- Temperature Load)

7. Accidental Loads

Human activity causes accidental loads, which include crashes, explosions, and fires. Dropped items from cranes or trucks, broken cranes, and other things are all examples of impacts and accidents. In short, impact loads are rapid loads that are put on a structure for a short time compared to other loads that are imposed on a structure. Impact loads are created when heavy objects fall from heights or when live loads, like moving cranes, cars, or machinery, vibrate. When they act on structure parts, they put more stress on them than when the same amount of force is delivered slowly. There are two kinds of impact loads: vertical and horizontal. 

8. Thermal Load 

These loads are caused by the expansion or contraction of the materials as a result of temperature changes, and they have the potential to apply considerable stresses to a structure.

9. Settlement Load 

The term “settlement load” refers to the phenomenon that takes place when one section of a structure settles more gradually than other sections.

10. Soil and Fluid Load 

There is an excessive flow of water in the soil, which affects the density of the soil. This is the cause of the soil and fluid load.

In conclusion, paying attention to various types of structural loads that will be applied to the building is always necessary. This is because the loads and the effect they have have a direct link to the safety features of the structure. Anyone who does not want to make any compromises about the safety factor is required to have an understanding of the varied loads that the building is subjected to throughout its existence. Hence, it’s recommended that you hire a skilled team of professionals like Brick & Bolt Hyderabad to evaluate the different types of load that will be imposed on your structure and give you a strong and long-lasting structural design according to your house floor plan design.

FAQs

types of load in civil engineering

In civil engineering, loads on structures are classified into three main types: vertical loads (live, dead, and snow loads), horizontal loads (wind and earthquake loads), and longitudinal loads. These loads affect the design and stability of buildings and must be carefully considered to ensure structural safety.

how many types of load

There are three main types of loads on structures: longitudinal loads, horizontal loads, and vertical loads.