Home Blog Page 98

Understanding Building Material Density: A Crucial Factor in Construction

0
Building construction materials

Whenever you are going to build your dream house, material selection is crucial. There will be several properties to consider before the selection of building materials. One of them is the building material density. Density refers to how much mass is comprised within a given volume of a substance. It plays a key role in determining factors such as structural integrity, weight distribution, insulation properties, and cost-effectiveness. 

In today’s blog of Brick & Bolt, you’ll understand the concept of building material density and why this property is so important in the construction industry.

What is Building Material Density?

The building material density or unit weight of any construction material is defined as the mass per unit volume of materials. Density indicates the degree of compactness of the material. It differs with temperature and pressure.

It is represented by a symbol ρ (rho). The density’s SI unit is kg/m³

The formula for density is,

Density = Mass/ Unit Volume

ρ = m/v

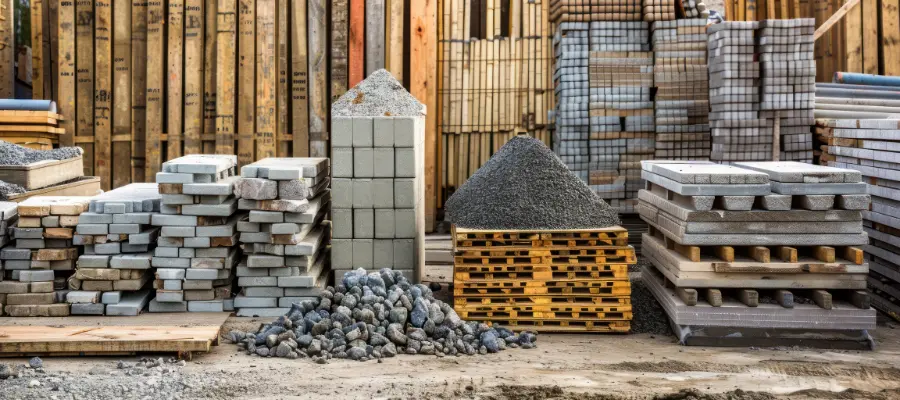
Common Building Materials and Their Densities in Room Temperature

Any substance used in building a structure is called construction building material. There are numerous materials used for building purposes. Some of the most common construction materials are discussed below.
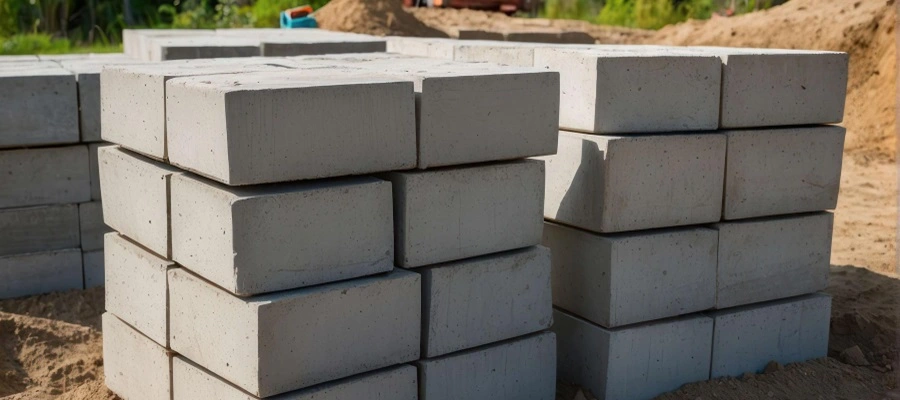
1. Concrete

Concrete is the most utilised material in the construction process. There are various types of concrete used in construction and its density depends on the components with which it has been made, such as sand, water, types of cement, gravel, and limestone. 

The density of concrete will be around 2400kg/m³.
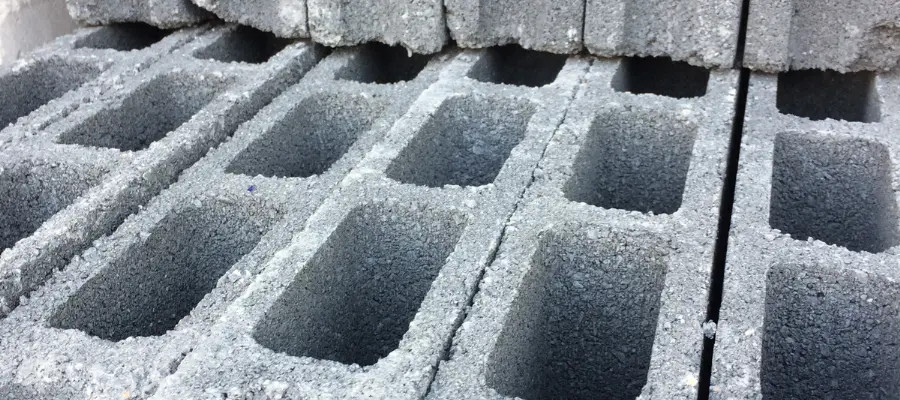
2. Bricks

A brick is a construction material used to construct walls, pavements, and other elements of masonry construction. Brick density is an important parameter. It indicates the weight of the brickwork. Cores, Cells, and Frogs decrease the density, which in turn decreases the material cost. Different types of bricks have different  densities. While fire clay bricks have a density of 2400 kg/m³, for common red bricks it is 1900 kg/m³.

3. Cement 

Cement is a very useful binding material in construction. By altering the amount of an ingredient during cement production, one can achieve the desired cement quality. They are made of Lime, Silica, Alumina, Magnesia, Iron oxide, Calcium, Sulfur trioxide, and Alkaline.

Generally, the density of cement is 1440 kg/m³.

4. Sand

Density of sand

Sand is a mixture of small grains of rock and granular materials, and it is mainly defined by size: it is finer than gravel and coarser than silt. 

The density of dry loose sand is 1442 kg/m³. 

Dry sand’s density is 1602 kg/m³. 

The density of packed sand is 1682 kg/m³. 

5. Wood

Wood is one of the best sustainable construction materials, it is a natural resource from trees used in home construction. The basic wood density is the ratio of dry weight and volume of the given wood. More wood content in a specific volume means it has a high building material density. Wood density differs from type to type depending on the tree growth environment, species, and area measured for density calculation. Generally, it varies from 350-800 kg/m³.

6. Glass

The density of glass is an important factor in construction because it influences the weight and structural load of the building components where glass is used, such as windows, facades, and partitions.

The density of glass is 2500 kg/m³.

Following are some important building material densities.

Building MaterialUnit Weight/ Density(kg/m3)
Water1000
AAC blocks550-850
Bricks and Masonry Units1900 – 2100
Cement1440
Concrete2400
Steel7700
A.C Sheet17 Kg/m3
Cast iron7203 
Wood350-800
Aluminium2723
Bitumen1019 – 1427
Glass2580

Importance of Building Material Density

Building materials needed to build a house

The density of building materials plays a crucial role in various aspects of construction:

  • It affects the overall weight of a structure, influencing the design of home foundations, load-bearing components, and overall structural stability.
  • Heavier, denser materials need stronger equipment and careful handling during transport and installation, which can affect project costs and logistics.
  • Lighter building insulation materials offer better thermal resistance, helping improve a building’s energy efficiency by reducing heat transfer.
  • The density of materials also plays a role in how well they absorb or reflect sound, which impacts the acoustics inside a building.
  • For marine structures or buildings in flood-prone areas, the building material density relative to water is crucial for determining buoyancy and flotation.
  • Denser materials often cost more per unit volume, so balancing density, strength, and cost is essential for optimising material usage and staying within budget.

Selecting Building Materials Based on Density

When selecting building materials, you should consider building material density along with other important factors such as strength, durability, cost, sustainability, and application-specific requirements. A higher-density material may sometimes be preferred for its structural strength or weight-bearing capacity. In other situations, a lower-density material might be more suitable for insulation or weight reduction purposes.

Concrete’s relatively high density offers excellent compressive strength and durability, making it suitable for structural elements like foundations and load-bearing walls. On the other hand, low-density insulation materials are preferred for their thermal resistance and energy efficiency benefits despite having lower structural strength.

Conclusion

The use of different materials in construction improves and strengthens the project. Building materials are also evolving along with the construction industry. Construction planners need to evaluate their building material options during the project planning phase to determine which materials will work best.

Before choosing building materials, it’s important to select based on the building material’s density, consult relevant building codes, industry standards, and regulations, and seek guidance from professionals like architects, engineers, and contractors. They can give valuable insights and recommendations based on the specific project requirements, local climate conditions, and other factors.

Creating Safe and Stylish Staircases: Space Planning and Design Essentials

0
Space required for staircase

Whenever you look into a multi-story building, a staircase will give it a distinct aesthetic. It’s crucial for functionality and safety. If you’re building a new home or renovating an existing space, understanding the basics of staircase design is vital when designing homes and row houses, ensuring safety and security, and calculating the space required for staircases. 

In today’s blog of Brick & Bolt, you will get a detailed understanding of the space required for a staircase, covering standard staircase dimensions, various types of staircases, and calculating the minimum space required for staircases.

What is a Staircase? 

Size of standard staircase

A staircase is a structure designed to facilitate vertical movement between different levels of a building or structure. It consists of a series of steps (treads) connected by vertical risers. Staircases can vary in design, size, and material, ranging from simple to functional designs.

Types of Staircases

There are four major types of staircases, and each type of staircase has its own set of pros and cons. You should consider them before deciding on the type of staircase for your home. 

Straight Staircases
L-shaped Staircases
U-shaped Staircases
Spiral Staircases

Straight Staircases

These are the most general and simplest types, requiring a straightforward approach to space planning. They normally require a significant amount of linear space but are easy to construct and navigate.

L-shaped Staircases

L-shaped staircases are attractive designs that are excellent for saving space. It will have a single 90-degree turn.

U-shaped Staircases

U-shaped staircases have two landings and are excellent for saving space. It will have a two 90-degree turn. This type can fit into corners and small spaces more efficiently than straight staircases.

Spiral Staircases

Spiral staircases are the best fit for small homes and apartments as they require very little space. However, they can be less comfortable to navigate than other types of staircases and may not be suitable for homes with elders, kids or pets.

Apart from these major types, there are many other types of staircases available; and the detailed knowledge of the different types of staircases will help you to choose the best type for your home construction. So, click on the link below to read our blog on types of staircases.

Types of Stairs in Building Construction

Dimensions of a Standard Staircase

Area required for staircase

It’s very important to consider the dimensions of a standard staircase to design the space required for the staircase: 

  1. The minimum width of a standard staircase should be 36 inches(91cm), which is also required as per most building codes. This width will be greater in commercial settings, with a minimum of 44 inches (112 cm).
  2. The minimum length of a standard staircase is 4 feet, which is also required as per most building codes.
  3. The height of a staircase is 6 feet. This is the minimum height required as per most building codes.
  4. The tread is the part of the stair where you step, while the riser is the vertical portion between each tread. Standard residential building staircase dimensions for treads are around 10 inches (25 cm) deep, with risers typically about 7.5 inches (19 cm) high. 
  5. The headroom is the vertical space between the stair tread and the ceiling above it. A minimum headroom of 80 inches (203 cm) is generally required to prevent head injuries.
  6. Landings are flat areas between sections of a staircase, essential for changing direction and providing rest points. A landing should be at least as wide as the stairs and at least 36 inches (91 cm) in depth for safety and comfort.

Calculating the Minimum Space Required for Staircase

When you wish to add stairs to your home, you need to make sure there is enough space for it. To calculate the minimum space required for staircases, the following are a few measurements you have to take:

  1. Measure the width of the stairs from one side to the other.
  2. Measure the height from the top of the first step to the bottom of the last step.
  3. Measure the depth of each step from front to back.

Once you have those three measurements, you can use this simple formula to calculate the minimum width space the stairs will need:

(width + height + depth) x 2 + 9 inches

This formula gives you the minimum area required for staircases, but depending on your specific home layout, you may need even more. If unsure, it’s best to talk to a professional before installing the stairs.

The standard staircase dimensions you need to take are the width, height, and depth. Accurate input of these values into the formula will provide you with the minimum width space required for your staircase.

The Importance of Railings in Staircases

Railings, or handrails, are a major component of staircase design. They are important for the stairs’ attractiveness, safety, and accessibility. Make sure that it meets local code specifications. Continuous railings from top to bottom are best for maximum safety. Open rail designs can enhance aesthetics while still providing secure hand-holding.

Conclusion

Understanding the space required for staircase concerns considering multiple factors, including standard staircase dimensions, design guidelines, building codes, and the specific needs of different types of buildings. Also, the inclusion of railings is important for safety, accessibility, and aesthetics. Proper planning with regulations will make staircases safe, functional, and visually appealing. Always consult professionals when designing or renovating staircases to achieve the best results. 

Also Read: Safety and Style: How to Choose the Right Balcony Grill Design for Your Home

Difference between Stone masonry and Brick masonry

0
Difference between stone masonry and brick masonry

It’s hard to decide between brick and stone masonry as they have unique advantages and disadvantages. This blog of Brick & Bolt explores the difference between stone masonry and brick masonry. It covers their materials, types, advantages, and disadvantages and provides a comparison.

Definition of Masonry

Masonry is the process of placing one masonry unit, such as bricks and stones, concrete blocks, etc., over another with mortar in a regular way to construct a building member.

Types of Masonry

Depending on the materials used, there are numerous types of masonry used in construction. The most common include stone masonry, brick masonry, concrete block masonry, and glass block masonry. In today’s blog, we discuss the difference between stone masonry and brick masonry.

What is Stone Masonry?

Stone for masonry work

Stone masonry is a type of construction that utilises mortar and stones on masonry. Stone masonry materials are natural rocks like limestone, sandstone, marble, slate, fieldstone or granite that are cut and prepared into proper shapes for stone masonry construction. It is used for foundations, floors, arches, stairs, walls, retaining walls, and columns. Stones are among the most durable and strong building materials in India. 

While Stone masonry work is to serve as an excellent cladding material, there are various other options for exterior cladding applications.

What is Brick Masonry?

Brick masonry involves arranging bricks in mortar to construct structures. There are various types of bricks used in construction, each with unique properties and suitable applications, which come together in brick masonry to create sturdy and durable structures.

Difference between Brick masonry and Stone masonry

Stone MasonryBrick Masonry
AppearanceStone masonry can be different colours depending on the stones used. Hence, it is used for buildings where architecture demands heavy mouldings with large projections.Brick masonry is usually red. It is used for colossal works, temples, bridges, etc.
StrengthSince stones will be irregular in shape, obtaining a proper bond in stone masonry is difficult, and the bond is less strong. A dead load of stone masonry is also higher.Since bricks are regular and uniform in shape, proper bonds can be easily obtained, thus providing better strength. The dead load of brick masonry is less.
DurabilityThe life of stone masonry is higher as compared to brick masonry.Fairly durable and has a moderately long life.
Cost of ConstructionMore costlyMore economical than stone masonry
Maintenance CostMore costlyCheaper 
Fire ResistanceHigher fire-resistanceFair fire-resistance 
AvailabilityStones are naturally made and obtained from quarries.Bricks are made up of using clay.
HandlingHandling is difficult.Handling is simple.

While both stone masonry and brick masonry offer decent fire resistance, there are other building materials that excel in this aspect.

Major Types of Stone Masonry

Major types of stone masonry are

  1. Rubble Stone Masonry
  2. Ashlar Masonry
  3. Square rubble masonry

Rubble Stone Masonry

Rubble masonry is the simplest type of stone masonry. It uses stones exactly as they are found in nature, without any cutting or shaping. The joints between the stones are wide because the stones are irregular and uneven. This method is the most economical because it uses stones in their natural, unrefined state.

Ashlar Masonry

Ashlar masonry uses stones that are neatly cut into smooth, consistent shapes and sizes. The stones are precisely cut and prepared, giving the masonry a polished, formal, and grand appearance that looks very impressive. However, because cutting and shaping each individual stone takes a lot of skilled work and effort, ashlar masonry is more expensive than rubble masonry. 

Square Rubble Masonry

Squared stone masonry concerns working the stones to ensure that all the corners are square and levelled. This gives the work a very accurate and clean look. 

Major Types of Brick Masonry

Maintenance of brick masonry

Major types of brick masonry are
1. Brick Masonry with Mud 

2. Cement Brickwork

Brick Masonry with Mud

In mud brick masonry, mud acts as the mortar. Bricks are held together with a mud mixture, which is more flexible than cement mortar.

Cement Brickwork

In cement brickwork, bricks are placed using cement mortar. The arrangement of bricks in different patterns, known as bonds, is an important aspect of brick masonry construction, and there are various types of brick bonds used in this technique. This type of brick masonry creates buildings that are strong, stable, and long-lasting. The mortar used in cement brickwork, which is a mixture of cement and sand, plays a crucial role in the strength and durability of the construction. 

Advantages and Disadvantages of Stone Masonry

Advantages of Stone Masonry

  • Stone masonry buildings are extremely durable and long-lasting when high-quality stone is used.
  • Fire resistant and able to withstand weathering over centuries.
  • The natural appearance of stone adds beauty.
  • Good insulating properties to regulate interior temperatures.

Disadvantages of Stone Masonry

  • Stone masonry will be expensive because it demands skilled labour and quality stones.
  • Stone masonry buildings are difficult to modify once constructed.
  • In stone masonry buildings, weight requires extremely strong foundations.
  • The masonry stone supply is limited.

Advantages and Disadvantages of Brick Masonry

Advantages of Brick Masonry

  • Bricks are more affordable and easily obtainable than quality stone
  • Manufacturing ensures consistently sized units of bricks for efficient construction
  • Brick masonry is extremely strong and durable, like stone masonry
  • Bricks can be moulded into various colours, textures, and shapes

When undertaking brick masonry construction, especially for residential projects, it’s crucial to accurately determine the required quantities of materials, including plastering.

Disadvantages of Brick Masonry

  • Not as aesthetically unique looking as natural stone masonry
  • Skilled labour is still required to properly bond and lay bricks
  • Exterior brick can crack from moisture if not sealed
  • Fire resistance is lower than stone masonry

When considering brick masonry construction, particularly with cement bricks, it’s essential to familiarise yourself with the different types, sizes, advantages, and costs involved.

Conclusion

After considering the difference between stone masonry and brick masonry, both have unique advantages and disadvantages. Stone masonry offers unmatched durability, natural beauty, and fire resistance. However, it costs more due to the need for skilled labour and limited stone supplies. Brick masonry is more affordable, uniform in sizing, and relatively strong and durable, though not quite to the level of quality stonework. Ultimately, the choice between stone and brick masonry will depend on the specific project requirements, desired aesthetics, budget constraints, and engineering needs. Careful consideration of the advantages and disadvantages of each is essential for choosing the best fit for any modern masonry construction project.

FAQs

What is the difference between rubble masonry and ashlar masonry ?

Rubble masonry uses irregularly shaped stones, often rough and uncut, placed without much precision, resulting in a more rustic appearance. Ashlar masonry, on the other hand, involves precisely cut and dressed stones, arranged with tight joints, providing a smooth and uniform finish. While rubble masonry is typically less expensive, ashlar masonry offers a more refined, durable, and aesthetically pleasing result.

What are the types of masonry ?

Rubble Masonry
Ashlar Masonry
Brick Masonry
Concrete Block Masonry
Stone Masonry
Cavity Wall Masonry
Reinforced Masonry

Everything You Need to Know About Cement in Construction

0
Cement in Construction

Cement is one of the most extensively used building materials worldwide. It is affordable, strong, and versatile. When utilized properly, cement is commonly used to create a variety of structures, including homes, commercial buildings, bridges, tunnels, and roadways. Despite this, most individuals are not usually familiar with cement, like what it is, its types, properties etc. Hence, Brick & Bolt Brings the compressive guide on cement in construction, which includes its manufacturing process, types, properties, uses, advantages, costs and top cement companies in India. 

So, let’s start the journey!

What is Cement?

Over the years, people have started using cement in more and more different ways. Back in the day, people used crushed pottery, volcanic ashes, and other things as cement. Joseph Aspdin made Portland cement in 1824. It was the first type of cement that we use today. 

In a broader sense, cement refers to any kind of adhesive material, but in the context of building construction and civil engineering, it refers specifically to the binding components. Cement is a finely powdered mixture of calcium, silicon, iron, and aluminium compounds ground firmly together. It hardens into a hard mass when combined with water. When cement is mixed with water, a chemical reaction called hydration occurs. 

Hydration produces submicroscopic crystals or a gel-like substance with a large surface area, which is what causes setting and hardening. Simply put, when you mix cement with water, you get a paste holding other heavy components like sand or aggregates. Because of its cohesive and adhesive qualities, it is a necessary component of mortar and concrete. Constructional cement, which may even set and harden in water, is called hydraulic cement due to its hydrating qualities. Portland cement is by far the most significant of them.

There are various types of cement and various types of cement grades are available in the market. You need to choose the type and grade of cement for your project based on its specifications and requirements.

Cement Manufacturing Process

Ordinary Portland cement is mostly manufactured from calcareous and argillaceous materials, such as chalk or limestone, as well as from minerals found in clay or shale, such as magnesium, silica, ferric, and aluminium oxides. Almost every country has the raw materials and cement plants needed to make Portland cement.

  • The local rock is used to quarry the raw materials, which are then first crushed to a size of less than 50 mm. 
  • Then, in a raw mill, the raw materials are combined and ground. Weigh feeders distribute precisely measured amounts of each item onto the belt. The chemical composition of the raw mix is corrected in its formulation.
  • Then, the produced raw mixture is heated to between 1400 and 1450 °C in a large rotary kiln.
  • After that, the material that emerges from the kiln is clinker, which is shaped like balls and has a diameter of 10–20 mm. After being allowed to cool, the clinker is sent to a ball and tube mill and processed into a fine powder. Then, 5 per cent gypsum is added during grinding to stop the cement from setting too quickly.
  • The raw materials for cement manufacturing may be combined and ground either in a wet or dry environment. Thus, there are two cement manufacturing processes available: first, the Dry Process and second, the Wet Process.
  • The actual manufacturing processes also rely on the moisture content and hardness of the raw materials.

Types of Cement

Cement comes in a variety of forms, each having special qualities, applications, and benefits. Selecting the best type of cement for a given set of building requirements requires an understanding of its applications and characteristics. The following are the most common types of cement used in construction and civil engineering.

  1. Ordinary Portland Cement (OPC)
  2. Portland Pozzolana Cement (PPC)
  3. Rapid-Hardening Cement
  4. Extra-Rapid-Hardening Cement
  5. Quick-Setting Cement
  6. Low-Heat Cement
  7. Sulfate-Resisting Cement
  8. Blast Furnace Slag Cement
  9. Coloured Cement
  10. Air-Entraining Cement
  11. Expansive Cement
  12. Hydrographic Cement
  13. Portland Limestone Cement
  14. High-Alumina Cement
  15. White Cement

Properties of Cement

Properties of Cement

The different physical properties of cement are as follows:

Fineness: Fineness refers to the cement’s particle size. Clinker gets ground to the appropriate fineness by varying the grinding process.

Strength: The compressive strength, tensile strength and flexural strength of cement is test to evalute the durability of cement over an extended length of time.

Consistency: The viscosity, or flowability, of cement paste is called the consistency of the cement.  

Soundness: The cement’s capacity to withstand shrinking as it hardens is what makes it sound. The soundness of cement may be determined using the Le-Chatelier and Autoclave tests.

Setting Time: The amount of time needed for cement to transition from a liquid to a plastic state and then from the plastic state to a solid state is known as the setting time of cement. 

Heat of Hydration: Heat of hydration is the chemical process, which takes place when cement and water come into contact. It releases the energy. It’s  one of the important component in the curing of concrete.

Specific Gravity: The mass of cement divided by the mass of the reference material, which is often water, is the cement’s specific gravity, also known as its relative density. 

Bulk Density: The mass of a material in relation to a certain volume is known as its bulk density, which is often stated in cement as “kilograms per cubic meter.” The volume occupied by the cement and any air caught in between the particles is reflected in the bulk density.

Loss of Ignition: This is the weight change that is measured in a heated cement sample. Loss of ignition is a useful indicator when the cement has been contaminated by transportation or other circumstances.

Uses of Cement in Construction

Cement is one of the highly helpful binding ingredients in building construction. Cement is a crucial component in civil engineering because of its uses in so many different areas of the construction industry. The following list includes only a few of cement’s many uses.

  • Cement is a component of the mortar used for masonry work, plastering and pointing work.
  • It is used in the fabrication of pipe and drain joints.
  • It is used to ensure that the building is waterproof.
  • Cement is used in various types of concrete to build columns, lintels, staircases, beams, floors, and roofs.
  • It is used in situations when a hard surface is necessary to shield exposed building surfaces from weather-related damage as well as certain organic or inorganic chemical exposure.
  • Cement is used in the production of precast pipes, heaps, fence posts, etc.
  • It helps build important engineering buildings, such as bridges, culverts, dams, tunnels, and lighthouses.
  • It is used in the construction of pathways, waterproof flooring, and home foundations.
  • Cement is used to build highways, water tanks, light poles, telephone booths, tennis courts, and more.

Advantages of Cement

Cost of Cement

Cement is a highly used construction material in the industry. Its cost usually ranges between 270 and 500 rs. However, remember that the price of cement varies according to its types, grades, market conditions, supply and demand, your location, and the cement brand you choose for your project.

Top Cement Companies in India 

Top Cement Companies in India

Here are some of the best cement companies in India that you can choose from for your building projects.

  1. Ambuja Cement
  2. Ultratech Cement
  3. ACC cement
  4. Dalmia Cement
  5. Ramco Cement
  6. Prime Gold Cement
  7. Birla Cement

Conclusion

Cement is one the amazing construction materials that is used in many different sectors of the industry. It is a crucial component of construction that may be used for building significant structures. Because of its unparalleled strength, durability, and versatility, cement is a fundamental component of the building industry. Architects and builders can choose the best cement for their projects by having a thorough understanding of the types of cement, its applications, properties, advantages, costs and top cement brands in India. Most of the highly reputed construction companies, like Brick & Bolt, choose the most suitable type of cement for your project after analysing your structure’s need, types of loads imposed on the structure and weather conditions. In addition, they provide the best quality craftsmanship, 470+ quality checks, and an online house construction cost calculator for free for your construction projects.

The Ultimate Guide to Home Construction Labour Costs Per Square Foot

0
Home construction labour costs

Budgeting is the major part before starting a house construction process. Labour cost is one of the crucial parts to estimate the overall construction cost. Labour rates can account for a considerable portion of the total construction costs, so understanding labour charges is essential for effective planning and cost management. 

In this blog of Brick & Bolt, you’ll explore everything you need to know about home construction labour costs per square foot.

Understanding Labour Costs in House Construction

Building construction labour rate

Home construction labour costs refer to the total costs associated with hiring workers to perform various tasks required to complete the building. These labour costs incorporate employee salaries, perks, and payroll-related taxes for different types of labour, including skilled and unskilled workers, subcontractors, and specialised professionals.

Managing these labour costs for construction well helps finish the project on time and allows the community’s economic growth. Fair pay attracts good workers, making timely completion and long-term durability of your project.

Factors Influencing Home Construction Labour Costs Per Square Foot

Several factors can impact labour costs for house construction per sq ft. Understanding these factors is crucial for proper house construction cost estimation and effective project planning. 

Type of Construction

House construction labour costs per sq. ft. depend significantly on the type of construction. Compared to normal homes, custom-built homes often require specialised skills and detailed craftsmanship from different types of contractors which tend to have higher labour costs.

Location

Working location plays a key role in determining labour costs for construction. In urban areas or regions with a high cost of living, labour rates for building construction are generally higher than those for constructing a house in a smaller town. When choosing the right location for your dream home, it’s important to consider the impact on labour costs.

Quality of Materials

The choice of materials also influences the labour rate for building construction. High-quality, premium materials often require specialised installation techniques and, ultimately, skilled labour, which increases labour costs. Ensuring quality assurance and quality control throughout the construction process is crucial, as highlighted in our blog post on the importance of quality assurance and quality control in construction.

Local Labour Market Conditions

Local labour market conditions, including the availability of skilled workers and the demand for construction services, significantly affect labour costs. In areas with a shortage of skilled labour, wages tend to be higher, driving up overall labour expenses. Conversely, in regions with abundant labour supply, costs may be lower.

Seasonal Factors

Seasonal factors can influence labour costs in house construction. During spring and summer, the demand for labour is high, leading to increased wages. In contrast, during off-peak seasons, labour costs may decrease as demand for construction work diminishes.

Knowledge of the factors that affect the overall construction cost will help you plan your budget and the overall project accordingly. Hence, we recommend reading our detailed blog on the factors affecting construction costs.

How to Manage Your Home Construction Labour Costs Effectively?

Labour cost for construction
  1. Analysing Current Labour Costs

Analyse your current labour costs. Let’s say your financial planning and budgeting do not account for labour expenditures. If so, you probably need to gather the necessary information in order to fully analyse the labour costs as they stand right now. You need to pay special attention to a few crucial costs, like pay rates, perks, overtime charges, and other labour-related expenses. This will assist you in determining where there is room for improvement and cost-cutting. 

  1. Effective Workforce Planning 

Effective workforce planning is crucial for optimising resource allocation and ensuring operational efficiency so that you can maintain home construction labour costs effectively. 

When employees have clarity regarding their schedules and shifts, it relieves possible stress and boosts morale. A well-planned workforce enhances productivity and contributes to a positive employee experience, as individuals can better manage their work-life balance.

  1. Efficiency and Productivity

Improving efficiency and productivity on the construction site can significantly reduce labour costs. This involves proper project management, ensuring timely materials delivery, and minimising downtime. Implementing efficient construction techniques, utilising modern tools and equipment, and maintaining clear communication among workers contribute to enhanced productivity and cost savings. Proper site preparation is also crucial, as highlighted in our blog post on house construction site preparation.

  1. Safety Matters

Ensuring workers stay safe isn’t just morally right; it’s also good for the bottom line. Accidents and injuries can result in delays, increased insurance premiums, and legal liabilities, all of which add to labour costs. Executing robust safety protocols, providing adequate training, and enforcing compliance with construction labour laws and safety regulations can lessen risks and prevent costly incidents. Check out our blog post on improving construction site safety best practices for more insights.

How to Calculate Labour Costs in Construction?

Accurately estimating labour costs is crucial for contractors to submit realistic bids and set proper expectations. So you can avoid mistakes during home construction.

There are three effective methods for calculating labour costs: unit pricing, square foot, and rule of two.

1. Unit Pricing Method

The Unit pricing calculates labour costs by hourly rates and time required. Simply put, it determines the hourly labour rate multiplied by the estimated time required to complete one unit (e.g., building a wall). Add material costs to get the total direct cost per unit. This method of calculating home construction labour costs is ideal for detailed project design and bid estimates.

2. Square Foot Method

The square foot method utilises historical cost data per square foot for various project types. Contractors collect and analyse average labour costs per square foot from past projects. This data enables quick budget estimates for prospecting or last-minute bids. Engineers and architects benefit from this method of calculating home construction labour costs during preliminary design stages to align with potential costs and the Construction Rate Per Square Foot varies from state to state

3. Rule of Two Method

The rule of two is a simple estimation technique of home construction labour costs based on the contractor’s experience. Labour costs typically comprise 40-50% of total project costs. Take the known or estimated labour cost and multiply it by two, then add a 10% contingency. While less precise, this method provides a rough total cost estimate when detailed labour data is unavailable.

Conclusion

House construction labour costs are crucial as they influence the project’s budget, quality, timeline, and compliance. Effective management of these costs is essential for successfully completing a construction project, ensuring that the house is built to the desired standards while remaining within financial constraints.You can use online tools like the Brick & Bolt Cost Estimator for an initial estimate costs for your home construction project.

What is Lightweight Concrete?-Types, Uses and Advantages

0
Lightweight concrete Image

Lightweight concrete is a construction material becoming more common because of its unique qualities and ability to be used in many different ways. It is not as dense as regular concrete, which has many benefits, such as better heat insulation and less structural load. In this blog, Brick & Bolt will discuss lightweight concrete, its various types, and the advantages and disadvantages of using this useful material.

What is Lightweight Concrete?

When lightweight coarse aggregates are added to concrete, the mixture’s volume increases, and its density decreases compared to traditional aggregates. This is known as lightweight concrete(LWC). It is one of the best types of construction materials used in construction projects. While traditional concrete has a density of 140 to 150 lb/ft³, lightweight concrete usually has a density of 90 to 115 lb/ft³ (1440 to 1840 kg/m³). Expanded shale, clay, or slate are the lightweight aggregates used in structural lightweight concrete. These materials are heated in a rotating kiln to create a porous structure. Products like slag from air-cooled blast furnaces are also used.

Difference Between Traditional and Lightweight Concrete

Lightweight concrete contains more water than traditional concrete. Because using porous aggregates increases the drying time, the aggregates are pre-soaked in water before being mixed with cement to mitigate this issue.

As previously said, traditional concrete has denser particles in its original state, weighing anywhere from 140 to 150 lbs/ft³. Because of this, many people think regular concrete is less expensive than less-weight concrete. On the other hand, traditional concrete projects need more material for steel reinforcing, cladding, and framing, which raises the entire cost of construction. Thus, LWC remains affordable, particularly for larger construction projects.

Types of Lightweight Concrete

These types of lightweight concrete are mainly divided into groups according to the materials used, the process utilised to get the lightweight characteristics, and the intended application. The primary categories are as follows:

Lightweight Aggregate Concrete

Expanded shale, clay, or slate are examples of lightweight aggregates that can be used in place in all of the traditional weight aggregates in reinforced concrete. The processing of these aggregates creates a porous structure that lowers the concrete’s density. Lightweight aggregate concrete is frequently used in structural applications like high-rise buildings and bridges, where weight reduction is important.

Aerated Concrete

Air or gas bubbles are added to the concrete mixture to create aerated concrete, commonly referred to as cellular concrete or foam concrete. This is accomplished by incorporating a foaming agent into the mixture, which causes the concrete to develop a network of small air cells. The end product is a lightweight material with good acoustic and thermal insulation qualities. Aerated concrete is frequently used for non-structural applications, like building blocks, panels, and partitions.

No Fines Concrete

When the fine aggregates (sand) are removed from the concrete mixture, only the cement and coarse aggregates remain. This is known as no-fines concrete. As a result, a lightweight building material with good drainage qualities and a porous structure with large voids are produced. No-fine concrete is often used in applications where permeability is desired, like in drainage layers and permeable pavement construction. 

Types of Lightweight Concrete Based on Density and Strength

Lightweight concrete can also be divided into groups according to its strength and density. The main categories are:

Low-Density Concrete: This lightweight concrete is mostly used for building insulation purposes.

Moderate-Density Concrete: This type of lightweight concrete is utilised for both structural and insulation purposes.

Structural Lightweight Concrete: This type of lightweight concrete reduces weight while giving enough strength for structural applications. 

Advantages of Lightweight Concrete

The following advantages of lightweight concrete make it a preferred option for a variety of construction applications:

  • One of lightweight concrete’s main advantages is its lighter weight, which results in a lower dead load on structures. This is especially helpful for high-rise buildings and bridges, as lowering the load can result in significant cost savings in the design of the home foundation and support systems.
  • It provides excellent thermal insulation properties because air spaces are present throughout lightweight concrete construction. This makes it the perfect material for energy-efficient structures, which lower the cost of heating and cooling.
  • Due to its porous nature, lightweight concrete is more fire-resistant than traditional concrete. Because of its insulating properties, the material’s air gaps prolong the time it takes for the concrete to reach critical temperatures by reducing heat transfer.
  • Lightweight concrete with air holes makes it better at blocking out noise. This makes it a good material to use for building in noisy areas, including those next to busy roads or airports.
  • Because lightweight concrete weighs less, it is easier to handle and transport, speeding up and improving construction process efficiency. As a result, project timelines may be shortened, and labour costs may be reduced.
  • Lightweight concrete has numerous applications, including partition walls, insulation, and structural elements. Because of its adaptability, it is useful in modern construction.

Disadvantages of Lightweight Concrete

Although lightweight concrete has several advantages, there are a few disadvantages to be aware of as well:

  • However, lightweight concrete has certain restrictions. Because of its higher water content, it takes longer to dry out. 
  • Furthermore, if you add too much water, laitance layers may form, and if you add too little water to compensate for this restriction, the combination may become weaker.
  • An additional problem with lightweight concrete is that it tends to separate from the aggregates if the cement is mixed improperly. 

In conclusion, lightweight concrete is a versatile and innovative building material with many advantages, such as lower structural load, better sound and heat insulation, and higher fire resistance. It comes in many types, like lightweight aggregate concrete, aerated concrete, and no-fine concrete, which can be used for many different types of building projects. Builders can use lightweight concrete to make projects that are both efficient and long-lasting if they carefully consider these factors and use the right mix of designs and building methods. However, if you want to construct your dream home with Chennai’s best construction company, visit us and make your dream come true.

Eco-Friendly Home Design: Sustainable Strategies for a Green Living Space

0
Eco-friendly home design

Human activities have triggered a cascade of natural disasters like floods and storms, disrupting our world. But within this crisis, lies an opportunity for change. Embracing solutions like environmentally friendly house construction can mitigate our impact and create resilient, harmonious homes.

Eco-friendly home design is not just about environmental care. It’s about economics, as it reduces energy costs and increases property value. Hence, this blog of Brick & Bolt guides you with the various strategies and materials you can use to build an environmentally friendly home.

Tips to Make Eco-Friendly Home Design

The following are the best practices to make environment-friendly homes.

  1. Energy-Efficient Strategies
  • Passive Design In Sustainable Building Practices
  • Energy-Efficient Appliances 
  • Solar Photovoltaic Systems
  1. Water Conservation Measures
  • Rainwater Harvesting
  • Efficient Landscaping
  • Low-Flow Fixtures
  1. Sustainable Building Materials
  • Recycled and Reclaimed Materials 
  • Bamboo
  • Green Masonry & Eco-Friendly Concrete
  1. Eco-Friendly Interior Design
  • Natural Lighting 
  • Sustainable Furniture
  • Eco-Friendly Textiles
  • Indoor Plants

Let’s explore all the tips for making eco-friendly home design: 

Energy-Efficient Strategies

Energy efficiency is not just a buzzword, it’s a crucial aspect of eco-friendly home design. By reducing energy consumption, you’re not only cutting down on your bills, but also making a significant contribution to reducing your dependence on non-renewable resources and combating climate change. 

Following are some effective techniques to enhance energy efficiency in your home:

1. Passive Design In Sustainable Building Practices

Passive design is one of the most important parts of sustainable building practices. With passive design, your eco-friendly home design will work with local climate conditions to decrease the energy use requirement. Passive design includes strategies like natural ventilation and daylighting, which can all reduce energy demand. This will be done in the building modelling stage of a new construction project with Building Information Modeling (BIM).

2. Energy-Efficient Appliances 

You can choose energy-efficient home appliances, which will be an effective way to reduce energy consumption at home. It will be helpful for significant energy cost savings, environmental benefits, and long-term financial gains.

3. Solar Photovoltaic Systems 

You can install Solar Photovoltaic systems in construction to yield energy from the Sun. These store power in batteries so you can also have electricity at night. But, consider the house’s orientation before installation to get more exposure to the Sun. You can also sell it back to others if you get more energy.

Water Conservation Measures

Following are a few major water conservation measures

1. Rainwater Harvesting

Rainwater harvesting is a sustainable method used in eco-friendly home design that includes collecting, storing, and using rainwater for various purposes. It is a great way to collect and store rainwater for multiple uses in a house, such as irrigation, washing, and drinking. It will also be a great solution to water scarcity and droughts. With this system, you can save water bills and help conserve water.

2. Efficient Landscaping

Using trees or bushes to shade a building reduces the amount of heating or cooling needed inside. You can arrange plants or trees to block wind from hitting the building directly. With this sustainable landscaping, you’re not just reducing heating and cooling needs but also making a significant contribution to environmental conservation. 

3. Low-Flow Fixtures

A low-flow fixture saves water by having a lower flow rate or using less water per flush. You can install low-flow showerheads, faucets, and toilets to use less water without losing performance

Sustainable Building Materials

Environmentally friendly house

When building a sustainable home design, you can choose wisely by using the following sustainable construction materials.

Recycled and Reclaimed Materials 

It’s a practical and effective approach to promoting sustainability. By using recycled and reclaimed materials for construction( such as steel and reclaimed wood), you decrease the demand for new resources and waste.

Bamboo

Bamboo is a rapidly renewable resource useful for affordable housing, flooring, cabinetry, and other structural elements. It grows quickly and requires less pesticides and fertilizers than traditional timber. It is a more affordable and eco-friendly substitute for conventional building materials.

Green Masonry & Eco-Friendly Concrete

Green concrete is an eco-friendly form of concrete manufactured using waste or residual materials from different industries. It requires less energy for production than traditional concrete types, produces less carbon dioxide, and is considered cheap and more durable. This will reduce the dependence on natural resources and increase the dependency on recyclable materials.

Eco-Friendly Interior Design

Eco-friendly decoration

The fastest-growing segment in the design industry is sustainable or “green” interior design. This includes innovative eco-friendly decoration practices, as follows.

Natural Lighting: 

By increasing natural light, you can reduce the need for artificial lighting, and it’s also good for health. You can use creative ways to bring natural light into your home, such as strategically placing windows and choosing curtains made of thin or light fabrics, which can bring natural light in and reduce energy usage. 

Sustainable Furniture: 

You can choose a woodwork for your home interior; it’s the most sustainable option. You can opt for eco-friendly options like bamboo or recycled metal. You can also buy multifunctional furniture that can be used for more than one purpose for eco-friendly decoration, like a sofa bed in the living room or a dining table with built-in storage.

Eco-Friendly Textiles: 

Upholstery, bedding, and window treatments are very important elements in interior design. Textiles made of organic cotton, hemp, or recycled materials are free from harmful chemicals and better for the environment.

Indoor Plants: 

Adding special types of plants to your home decor enhances aesthetics and improves indoor air quality. Plants can absorb pollutants and increase oxygen levels, creating a healthier living environment.

Conclusion

Designing an eco-friendly home involves careful planning and integrating various sustainable practices. By focusing on energy efficiency, water conservation, sustainable materials, and eco-friendly interior design, you can build a home that is not just environmentally responsible but also comfortable and cost-effective. Adopting these guidelines will be helpful in creating a healthier planet and a better quality of life for you and future generations.

Are you interested in building a home with an eco-friendly home design? Then, Brick & Bolt is here. The leading construction company in Jaipur, we can build your green home that aligns with your requirements, along with superior craftsmanship and 470+ quality checks.

Comprehensive Guide to AAC Blocks: Benefits, Types, and Installation

0
Autoclaved Aerated Concrete Blocks in Construction

The construction industry is ever-evolving, making innovation and efficiency the primary drivers of progress. Recently, autoclaved aerated concrete (AAC) blocks have gained significant attention for their versatility and benefits. These eco-friendly, lightweight, precast, low-density blocks transformed the way construction firms construct buildings, offering a sustainable alternative to traditional building materials.

Successfully developed by Swedish architect Dr. Johan Axel Eriksson in 1924, AAC blocks replaced wood. This superb building material has similar properties to wood. These green building materials provide an edge over wood for building structures without causing any decay, termite damage and combustibility.

In this blog, Brick & Bolt focuses on the essentials of AAC blocks. It further discusses the various types of AAC blocks, their properties, advantages, application, maintenance, and future trends and innovations. Whether you are a builder or architect, understanding AAC blocks provides valuable insights into creating stronger and more sustainable structures. 

Autoclaved aerated concrete(AAC) blocks

Autoclaved aerated concrete (AAC) blocks emerged as a revolutionary building material that changed the way of constructing the buildings. Their lightweight and durability helped it emerge as an excellent building material. Manufacturers combine cement, fine aggregates, water and an expansion agent in the manufacturing of these blocks. The expanding agent is primarily aluminium powder or paste, which reacts with other ingredients to create small air pockets. 

Manufacturers then pour the mixture into moulds and cure it in an autoclave, which uses high pressure and steam to harden the blocks, this process is known as steam curing. The final material obtained is a versatile and eco-friendly building material that is ideal for wider applications. AAC blocks are five times lighter than traditional concrete and contains approximately 80 percent air.

Types of AAC Blocks Used in Construction

Just like the types of bricks, manufacturers tweak these blocks slightly to suit the requirements of various projects. Whether you require these blocks for fire resistance, thickness, or durability, there’s an AAC block type for you.

(I) Fire Resistant AAC Blocks: 

Builders use these blocks in construction where fire resistance is essential. If safety is the top priority in your construction, this fire-resistant material is perfect for the project since it offers excellent fire protection.

(II) 100mm AAC Blocks: 

If your construction project requires a thinner wall structure, the 100mm blocks are the ideal choice. While providing construction versatility, these blocks retain their advantages.

(III) 200mm AAC Blocks: 

Does your construction require more insulation or thicker walls? Then, 200mm AAC blocks are the best choice for building insulation. Their increased thickness offers more strength and insulating capacity.

(IV) Long-Lasting AAC Blocks: 

These blocks are the best solution for buildings that require longer life. Their time-tested engineering guarantees your construction long-term strength and durability.

(V) Rectangular Fly Ash AAC Blocks: 

These types of concrete blocks are the best choice for sustainable building practices and are best suited for projects that try to incorporate building materials that do not harm the environment. The blocks’ advantages are enhanced by using fly ash, a waste by-product. Using these blocks in a building’s construction makes them an environmentally responsible option. 

Properties of AAC Blocks

AAC Blocks

The properties that make AAC blocks a preferred choice for construction include the following:

Dimensional Tolerance

AAC blocks possess the highest surface texture combined with the lowest dimensional tolerance. That is why they are ideal for load-bearing and non-load-bearing applications.

Thermal Conductivity

The high thermal resistivity and low thermal conductivity make AAC blocks a popular choice in the construction industry. The code specifies a maximum limit of 0.24W/m.K. AAC blocks play a significant role, as they protect the occupants from the outside heat. When compared to traditional clay bricks, AAC blocks are more resistant to heat. This helps the occupants save on air conditioning costs over their lifetimes. Besides, these blocks help keep the building cool. 

Dry Density

When placed in an oven at 105°C for a long period, the AAC block does not reduce in weight. After almost 36 hours, you can measure its dry density. The process is vital as manufacturers make these blocks using heat treatment through steam. Besides, even after autoclaving, these contain residual moisture. Therefore, it’s necessary to check the oven-dry density to choose the one suited for your project.

Fire Rating

Fire safety has become a prime concern in modern construction. Today’s builders and the leadning construction firms in Delhi consider AAC blocks superior building materials. This is because these blocks score high in terms of fire-rating concrete. The melting point of these blocks is 1500°C, which is over twice the temperature of fire in a building. 

Advantages of Autoclaved Aerated Concrete Blocks

The following are the advantages of these blocks.

Self-Heat Insulation

AAC blocks have an inner insulation value of R30. Therefore, they offer the best performance. Since these blocks contain aluminium, the metal prevents the creation of hydrogen from combusting when it interacts with calcium hydroxide. When you construct structures using these blocks, the occupants require fitting fewer air conditioners and blowers, aiding in effective energy conservation.

Low Density

Since AAC blocks are lightweight, they are ideal for transport and use in constructing buildings. When compared to traditional red bricks and concrete, they are 30 to 35 per cent lighter. The decreased dead lads of the AAC blocks aid in the construction of taller buildings. These types of concrete blocks offer superior workability, which is another benefit, helping to reduce construction investment and overall expenses.

Flexibility

When compared to the AAC blocks vs red bricks, AAC blocks come in varies sizes, you can easily replace the traditional bricks with a few of them. It shortens the project’s duration, as you do not need time for installation and laying. When compared to other concrete buildings, these blocks reduce the requirement to add more joints. As you can adjust these blocks in various ways, including cutting, nailing and drilling, they offer better flexibility.

Earthquake Resistant

Nowadays, people are becoming more conscious and demanding of designing structures that can withstand seismic waves. Autoclaved aerated concrete blocks are ideal for this demand. To understand how AAC is suitable for it, you must understand the factors for earthquake-resisting houses. For example, a structure’s weight directly correlates to the force of an earthquake, and the lightweight structure of the blocks is safer than other structures.

Pest Resistance

Manufacturers construct AAC blocks from inorganic materials. Therefore, it protects against damage from rodents, termites and other pest infestations. Besides, it prevents the development of molds inside the building.

Application of AAC Blocks in Construction

Builders in Bangalore use autoclaved aerated concrete, mostly as concrete masonry units. These are economical in large-scale projects with wide use in civil and industrial construction. Builders use these for walls, floors, and roofs. Some of the uses of AAC blocks in construction include the following:

  • Construction of residential and commercial buildings.
  • Since these blocks have excellent insulation properties, they are best suited for external walls.
  • Multi-storeyed construction and viable even for a five-storeyed construction.
  • You can build entire residential areas using autoclaved aerated concrete blocks.
  • You can also use this construction material as your interior blocks. Since they are very levelled, you can finish them with a thin coat of plaster.
  • Builders can also use these blocks to create kitchen surfaces, as they are easy to remove without damaging the surroundings.

Maintenance and Care of AAC Blocks

You must do the following to maintain your AAC block structure.

1. Annual Examination: 

Ensure that the structure is examined annually by professionals. This will help you take proactive measures to resolve any issues arising with the structure.

2. On-Time Repairs:

Is your structure experiencing degradation? Check it for the presence of cracks and other damages. Take immediate action to stop further degradation.

3. Frequent Cleaning: 

Washing your AAC block surface with water and detergent helps maintain the shine.

4. Effective Drainage: 

In case of a waterlog, drain the water properly. Leaving water in the system for a long time might damage the material.

5. Pest Control: 

Often pests invade structures. If you relate to this, take immediate actions to control pest infestation; else, it might harm your AAC blocks.

6. Sealing Integrity: 

The occupants might experience lack of insulation in the building. If that’s the case, inspect and maintain the sealing of joints and connections to ensure insulation and energy efficiency.

Future Trends and Innovations in AAC Block Technology 

With a wide range of applications and a reduction in carbon footprint, autoclaved aerated concrete blocks have emerged as the best materials in the construction industry. They are revolutionary building materials for green buildings, require less material, are durable, and produce minimum waste. Besides, they can tackle common inherent challenges, including noise and uneven terrain. Therefore, AAC blocks’ roles might grow exponentially in the construction industry.

Conclusion

The lightweight, insulating, and eco-friendly autoclaved aerated concrete blocks revolutionized the landscape of present-day construction. As the most preferred choice for sustainable and efficient building materials, AAC blocks offer a wide range of applications, from residential projects to large-scale infrastructure. As a leading construction firm in India, Brick & Bolt offers design-to-build services. The best part of the organization is that you get real-time tracking, quality checks, effective communication with the project manager, and regular updates on your projects from the first day until their completion. I addition, you can also calculate your home construction cost by using an online cost estimator for free. Brick & Blot focuses on and practices a sustainability approach and, therefore, incorporates innovative construction materials like autoclaved aerated concrete (AAC) blocks for project construction.

All About Painting Cost Per Sqft in Bangalore

0
Painting cost image

Painting your house isn’t just an attractive thing to do for looks; it’s an important part of maintenance that can protect it from damage and make it look better at the same time. In a bustling city like Bangalore, where homes range from small apartments to large houses, it’s important for homeowners to understand the painting costs. It can be hard to make an accurate budget because so many things, like the type of paint, the amount of work needed, and the total square footage, can affect the budget. In this blog, Brick & Bolt will go into great depth about how much painting costs per sqft in Bangalore. It will cover different types of paint, labour costs, and useful tips for getting the best value for your money. Whether you want to paint a single room or the whole house, this article will help you make smart choices that will get you the results you want without breaking the bank.

Painting Cost Per Square Foot in Bangalore

Painting in Bangalore usually costs between 10 and 35 INR per square foot, but this depends on the paint type used and the chosen painting service. For example, a simple painting job might cost between INR 10 and 20 per square foot if you use standard paints like Asian Paints or Berger. But if you want high-end paints or textured finishes, it can cost up to INR 35 per square foot.

Different Types of Paint and How Much They Cost in Bangalore

Types of painting image

Here are some of the prices of the different types of paints for your home available in the market

Distemper Paint: Distemper paint costs start from 8 rupees per square foot, making it the less expensive type. It can be used for rental properties or short-term options.

Emulsion Paint: Emulsion paint costs about INR 12 to INR 60 per square foot. It is famous because it lasts a long time and is easy to clean.

Enamel Paint: Enamel paint costs from INR 80 per square foot. It has a glossy finish and doesn’t stain easily.

Texture Paint: If you want to give your walls a unique look, texture paint costs between INR 80 and INR 200 per square foot. 

How Much Does it Cost to Paint a House per Square Foot (sqft) in Bangalore?

Painting a house in Bangalore can cost a lot, depending on the size of the house, the type of paint used, and the difficulty of the job. Knowing these factors can help people make smart budgeting and painting project choices.

1 BHK Painting Cost in Bangalore

 In Bangalore, painting a 1 BHK apartment can cost starts from about 7500 INR. This price includes the cost of basic emulsion paint and labour.

2 BHK Painting Cost in Bangalore 

The price for painting a 2 BHK can range from INR 11000 to INR 12000, depending on the quality of the paint and how much extra work is needed to prepare the surface.

3 BHK Painting Cost in Bangalore
It can start from 13500 INR. This price quote covers labour, paint, and small repairs.

4 BHK Painting Cost in Bangalore

 If you choose high-end paints and finishes, the cost of painting a 4 BHK house can go over INR 20,000. 

Factors that Affect Paint Cost of Houses in Bangalore

Several things affect how much it costs to paint in Bangalore:

Size of the House: Larger houses naturally cost more to paint and fix up because they require more work.

Type of Paint: The cost is affected by the quality and type of paint chosen. Premium oil paint cost more, but they last longer and look better.

Surface Condition: If the walls aren’t in good shape, it will cost more to do extra work like sanding, filling cracks, and adding a primer.

Labour Charges: The worker fees for painting in Bangalore depend on the painter’s skill and the job’s difficulty. 

Labour Cost for Painting House in Bangalore

Labor cost plays an important role in how much it costs to paint a house in Bangalore. If you know these prices, you can make a more accurate budget and be sure you’re getting a good deal for the work. Painting work costs in Bangalore depend on a number of things, such as the type of job, the difficulty of the design, and the painter’s level of skill.

Things You Must Consider Before Painting Your Home

Before starting to paint, there are a few things you should keep in mind:

Colour Selection: Pick colours that go well with your furniture and other items in the room. You should also think about how different colors will look in various types of light.

Paint Quality: Buying good paint can save you money in the long run because you won’t have to paint as often.

Surface Preparation: If you prepare the walls correctly, the paint will stick better, and the finish will be smoother.

Professionals Services: Hiring painters with a lot of experience can improve the job’s quality. 

Tips to Get the Best Painting Quotation Cost in Bangalore

If you want to find the best paint prices in Bangalore, you can follow these steps:

Compare Multiple Quotes: Get quotes from more than one painter to make sure you’re getting the best deal.

Detailed Breakdown: Ask for a full breakdown of the costs, including the paint, the work, and any other fees that might apply.

Check Reviews: Check other customers’ ratings of the painting service’s work to get an idea of how reliable and good the service is.

Negotiate: If you’re hiring a contractor for a large project, don’t be afraid to negotiate the price.

Fresh vs Repaint Cost in Bangalore

It costs more to paint over something than to start from scratch. When repainting, you first need to fix the surface again, like removing old paint and filling the crack, etc. Then, use a primer. Finally, paint at least two or three coats. On the other hand, when painting fresh, you need to do wall putty, a primer coat, and one or two coats of paint.

In conclusion, the painting costs per square foot in Bangalore vary depending on the house’s size, the paint type, and the difficulty of the work. By considering things like paint quality, work costs, and surface preparation, people can make smart choices and get the look they want for their homes.

For the best value for your money, it’s helpful to know how much painting a house costs, no matter how big or small it is (1 BHK or 4 BHK). Professional painting services are always the best way to get a high-quality finish that makes your home’s rooms look better and last longer. If you want to be in the budget and plan your home improvement project, contact the best construction company in Bangalore

Click the link below to learn more about low-cost painting options for your home.

Low-cost Painting Options to Give a Rich and Classy Look

Exploring the Different Types of Concrete Blocks Used in Construction

0
Solid blocks

In a concrete structure, the concrete blocks are a building block for the structure’s durability and stability. The concrete blocks take parts from residential homes to commercial complexes, offering a powerful foundation.

Have you ever wondered about types of concrete blocks? Of course, their types are based on projects’ specific requirements and preferences.

In today’s Brick & Bolt blog, you will learn more about the types, their features, applications, and benefits.

What are Concrete Blocks?

Concrete blocks are a type of building material made from a combination of cement, sand, and gravel. They are generally utilised in construction to form masonry, floors, and home foundations. They can also be used as foundations for other structures, like houses or commercial buildings.

Types of Concrete Blocks for Construction

There are two important types of concrete blocks: hollow and solid. Both types are generally used for wall construction and other purposes. 

1. Solid Concrete Blocks

Solid blocks are denser and more robust than hollow concrete blocks, making them ideal for projects that require the utmost durability. Their solid, dense construction allows them to handle heavy weights without breaking or cracking.

Following are general types of solid concrete blocks

  1. Fly Ash Block
  2. Aerated Autoclaved Block
  3. Paving Block
  4. Cellular Lightweight Block
  5. Expanded Clay Aggregate Block

2. Hollow Concrete Blocks

Hollow concrete blocks

Hollow blocks are prepared with holes or cavities, making them lighter than solid blocks. This characteristic makes them more useful when wiring or piping needs to be run through them.

Following are general types of hollow concrete blocks

  1. Stretcher Block
  2. Pillar Block
  3. Lintel Block
  4. Jamb Block
  5. Column Block
  6. Corner Block
  7. Splitface Block
  8. Bullnose Block
  9. Partition Block

So, let’s explore all the types of concrete blocks in detail:

Types of Solid Concrete Blocks

Fly Ash Block

Fly ash blocks are eco-friendly blocks used in Green buildings as they are made from a blend of fly ash(a waste product from coal combustion), cement, sand, and water.

Fly ash blocks are strong and provide good insulation. That’s why they are often used for partition walls, exterior walls, and load-bearing walls. These blocks are usually small because larger ones are more likely to crack.

Also Read: Exploring the Different Types of Bricks for Your Construction Needs

Aerated Autoclaved Block

Aerated autoclaved blocks are lightweight construction materials made from a mix of fine aggregates, cement, lime, water, and an aerating agent. They are great for insulating and ideal for energy-efficient construction. 

Since they are made of 80% air, they are weaker than denser concrete blocks and usually need reinforcement. These are available in various forms, including blocks, panels, and speciality shapes such as lintel blocks and U-shaped bond beam blocks, each offered in different thicknesses. They are also used to block out sound and are fire-resistant. They are used for walls, floors, and roofs.

Paving Block

Paving blocks are solid blocks used to create pavements. They come in square or rectangular shapes and serve various purposes, such as paving roads, walkways, driveways, and outdoor spaces. Their key advantages are durability, visual appeal, and easy installation. These blocks are available in different sizes and a wide range of colours, such as sandstone, tan, dark brown, charcoal, and light grey.

Cellular Lightweight Block

CLC blocks provide excellent sound and temperature insulation since they are composed of foam, fly ash, and cement. Used for walls and roof insulation. They are economically priced, environmentally friendly, and resistant to fire. These blocks are made to be very effective and light in weight. They aren’t the best in circumstances requiring load-bearing.

Expanded Clay Aggregate Block

Expanded clay aggregate blocks are prepared by using clay granules, cement, and water. These blocks are fire-resistant and waterproof.

They can reduce the overall structural load by as far as 50%. They also provide good sound and temperature insulation.

For the latest innovations in construction materials and methods, check out Advanced Construction Materials and Techniques.

Types of Hollow Concrete Blocks

Partition block

Hollow concrete blocks come in different sizes. Some common sizes are 4 x 8 x 16 inches, 6 x 8 x 16 inches, and 8  x 8 x 16 inches. Most hollow concrete blocks are grey in colour. But you can also find them in tan or dark red. There are several size and colour options to choose from.

Stretcher Block

Stretcher blocks are a general type of hollow block used in walls. They are characterised by their long, rectangular shape, and their faces are laid parallel to the wall’s face. Concrete stretcher blocks are used to connect the corners of masonry units.

Pillar Block

Pillar blocks, also known as double corner blocks, are versatile masonry units designed for constructing pillars, piers, and other structures where both ends of the block need to be visible. Their unique shape allows for a finished appearance on two sides, making them ideal for exposed applications. Their functionality and visual appeal make them a popular choice among masons and builders alike.

Lintel Block

Lintels, essential for supporting loads above openings like doors and windows, are crucial elements in construction projects. Lintel/channelled/beam blocks are identified by their U shape. A Lintel beam block is used for the sake of provision of a beam or lintel beam. It is usually provided on the top portion of doors and windows. After setting the blocks, this groove is filled with concrete along with reinforcement. Solid-bottom lintel blocks are available in a 6-by-8-by-16-inch configuration. 

Jamb Block

Jamb blocks are special blocks with grooves used for framing doors and windows, especially double-hung windows. The grooves allow the window framing pieces to fit securely and align properly, providing structural strength when connected to other blocks like stretchers and corners.

Column Block

A column block is normally a square block with a single hole. Column blocks are developed for constructing columns and pillars, providing stability and load-bearing capacity. They can be stacked on top of one another to form columns with reinforced from the inside.

Corner Block

Corner blocks are designed to used at the ends or corners of masonry. Generally at the ends of windows and door openings. The plain side is disclosed to the exterior, while the stretcher side runs along the wall. 

Splitface Block

Splitface blocks resemble pillar blocks, but with a distinct rough texture on one side, revealing the inner aggregates of the block. While they are more prone to water damage, they boast greater resilience against fires. These blocks are commonly used for decorative purposes. A typical splitface block, usually measures 6 inches in width, 8 inches in height, and 16 inches in length.

Bullnose Block

Bullnose blocks, as the name suggests, have a rounded edge and are generally used in architectural details, such as curved walls or edges.

Partition Block

Partition concrete blocks are commonly used to construct partition walls. Partition blocks have a larger height than their breadth. The hollow part is split into two to three components in case of partition blocks.

Conclusion

Concrete blocks do not just offer functionality; they also bring environmental benefits, like energy efficiency and sustainability. From fly ash blocks to aerated autoclaved blocks, innovations in block manufacturing continue to push the boundaries of what’s possible in modern construction.

Whether you’re building a residential home, a commercial complex, or a simple pavement, choosing the right type of concrete block is key to a successful project. The concrete blocks you select can ensure your project is strong, looks good, and is better for the environment.

For more information on the different types of concrete used, check out Types of Concrete Used in Construction Projects.