Home Blog Page 85

Waterproofing in Building Construction: Types, Advantages, and Application

0

Waterproofing is necessary in construction for basements, walls, bathrooms, kitchens, terraces, balconies, decks, green roofs, water tanks, swimming pools, etc. In a nutshell, waterproofing prevents water from penetrating interior and external building components like toilets, swimming pools, water tanks, walls, and ceilings. Waterproofing acts as a barrier that stops water from penetrating through the material, preventing flooding and dampness in structures.

Waterproofing reduces the humidity in the house’s interiors, preventing damage to our indoors from being exposed to dampness or water.

Waterproofing

What is Waterproofing in Construction?

Waterproofing in construction means protecting a building from water leaks or moisture. It’s especially important for places like basements, roofs, and walls, which can get damaged by water. The process involves using materials like special membranes or coatings to stop water from seeping in. Proper waterproofing helps the building last longer and prevents problems like mold, cracks, and weakening of the structure.

Importance of Waterproofing

Waterproofing the house is very important as it helps to protect the integrity of the building structure. Some of the significant importance of waterproofing are as follows:

  1. Waterproofing helps to protect the walls of your house from creating a seepage. It will also help prevent water damage and promote a healthy, strong start for your newly constructed building.
  2. The walls and ceilings of the house become damp when moisture enters and thus leads to the spread of mould and mildew. This produces spores, which once more result in several health issues. It’s always advisable to get your home waterproofed to protect you and your family from such unforeseen health issues.
  3. The cost of waterproofing often appears to be a blow to your budget, and you find it daunting to waterproof your house. However, it is ideal to consider it a long-term investment that generates money during the building’s lifetime.
  4. It has been found that waterproofing helps to seal a new construction site early, which promotes long-term comfort. The steps are conducted to assist in lowering the amount of moisture inside the building.
Importance of Waterproofing

Types of Waterproofing

Waterproofing is the process of preventing the entry of water and vapor. It helps in filling the structural crack. Therefore, choosing the finest waterproofing technique takes a lot of work. Some of the waterproofing types are listed below:

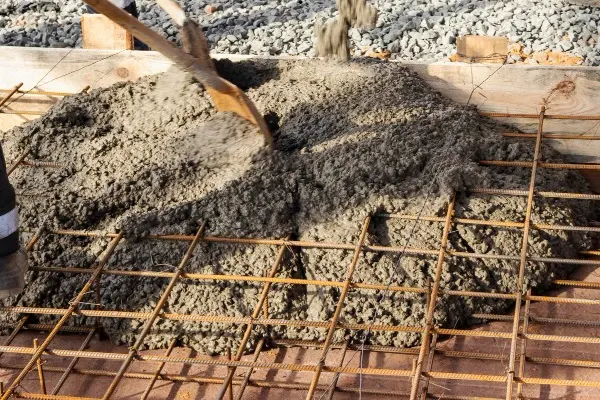
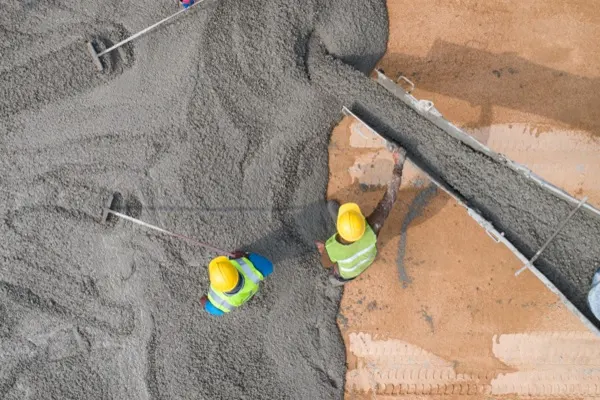
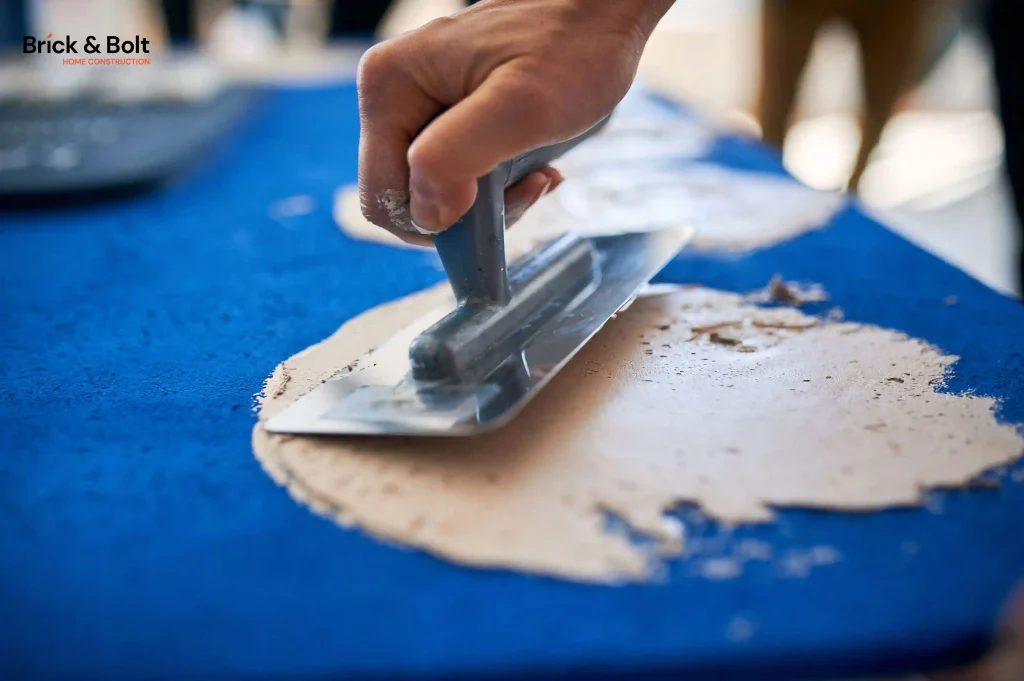
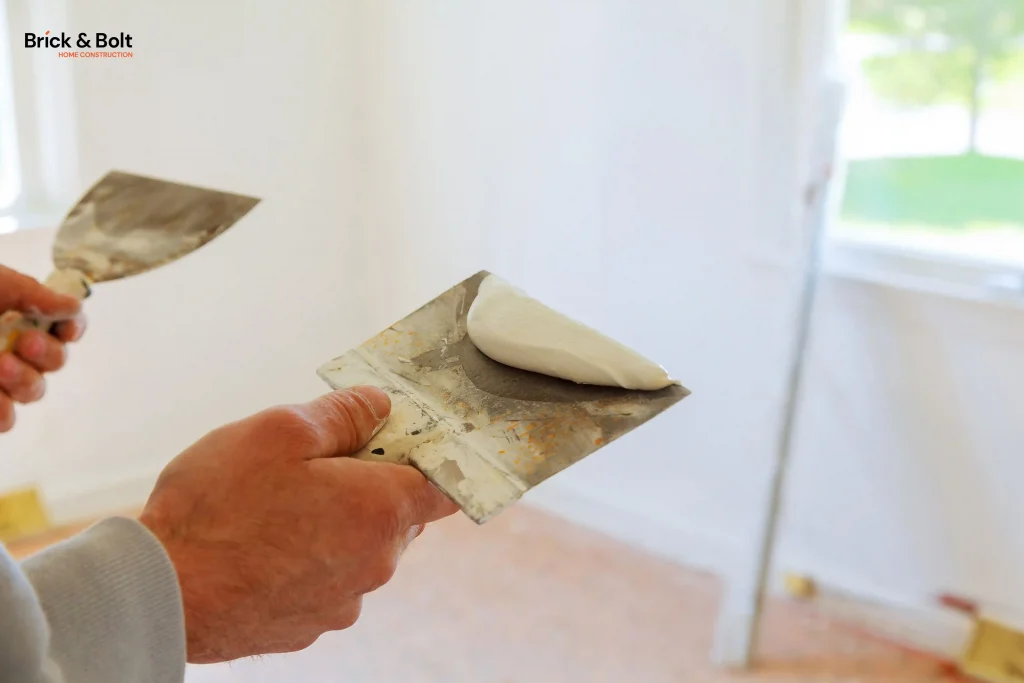
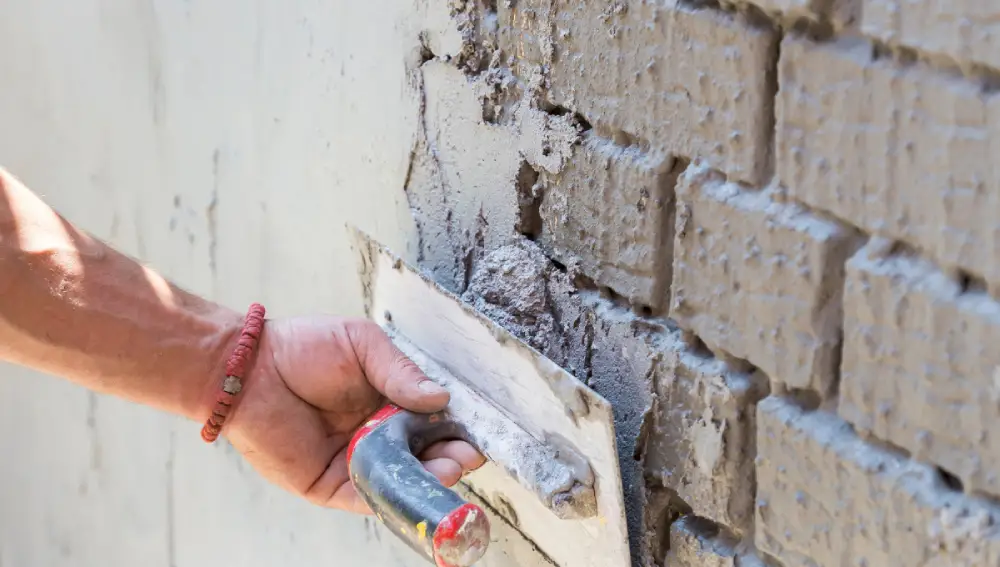
Cementitious Waterproofing:

Cementitious products are usually the most accessible waterproofing materials that can be used. They are readily available with masonry product vendors and are simple to mix and apply. Cementitious waterproofing materials are usually rigid or semi-flexible and are hence used in interior spaces like bathrooms and other places that are shielded from the sun and weathering. This kind of waterproofing can be used in a variety of concrete applications.

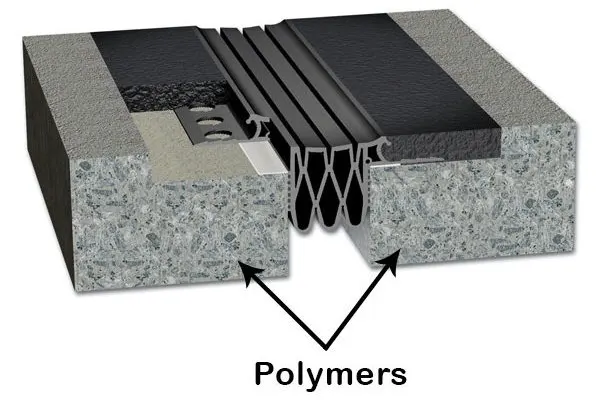
Polyurethane Waterproofing:

The base and reactor are the two elements that make up polyurethane. When combined in a specific design ratio, both result in a liquid coating for waterproofing applications. Polyurethane is a fairly common choice due to its ease of installation. This polyurethane application requires considerably less skill and supervision than other waterproofing technologies like sheet membranes and liquid-applied membranes. This waterproofing material can be applied quickly and is also useful for post-construction applications. As polyurethane is very sensitive to moisture content, it must be used in evaluating moisture before application, so that membrane peeling or de-bonding does not occur.

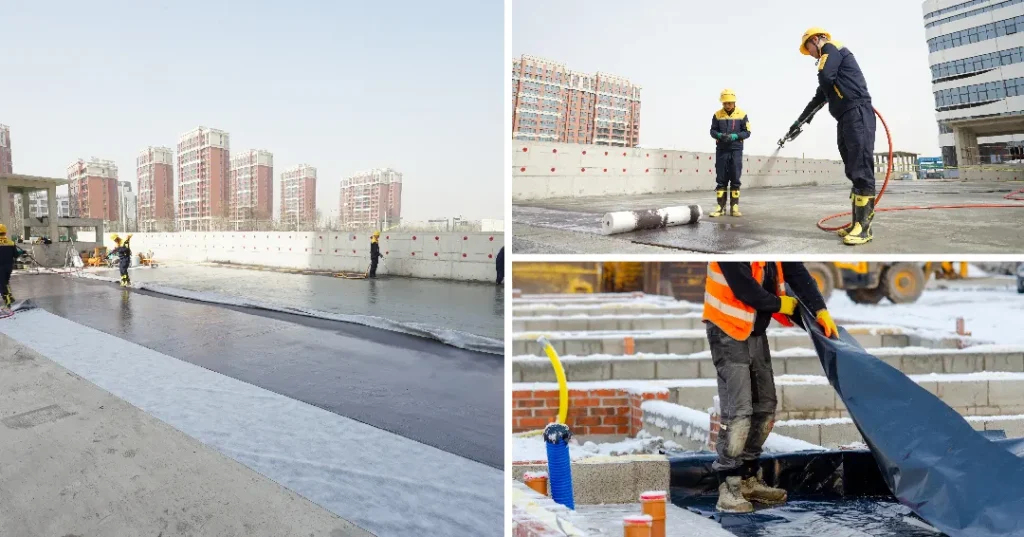
Bituminous Membrane Waterproofing: 

Bituminous coating is a flexible protective coating that is used for waterproofing. It works very well as a waterproofing and protective coating, especially on surfaces such as concrete foundations. The mixed substance is typically composed of sticky organic liquids. Additionally, they are vicious and long-lastingly waterproof. This makes the material extremely useful for this particular purpose. Bituminous membrane waterproofing is frequently used in the construction of roofs it controls the leakages.

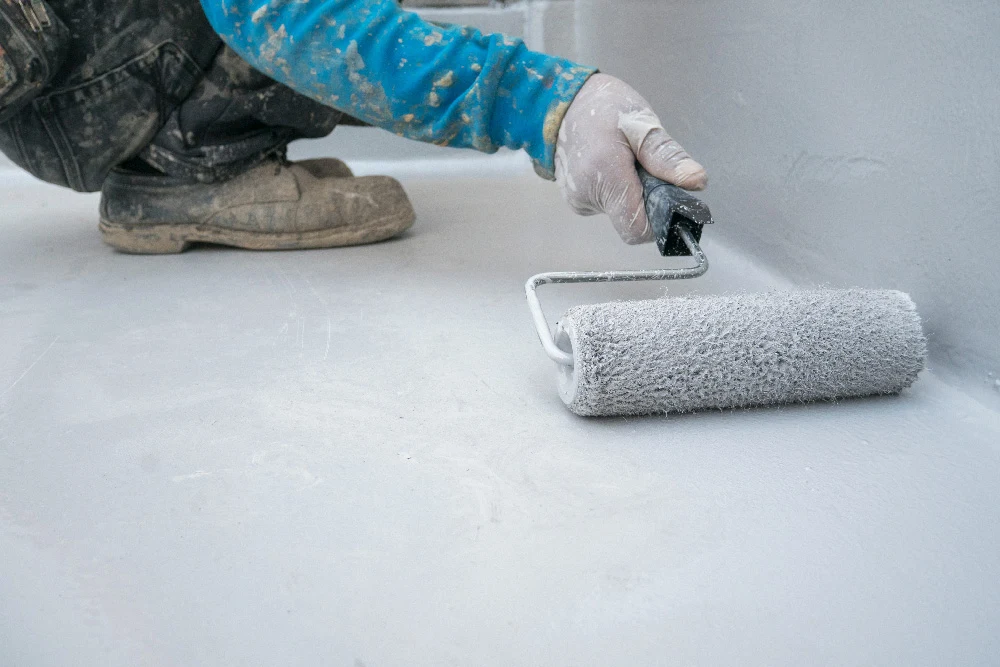
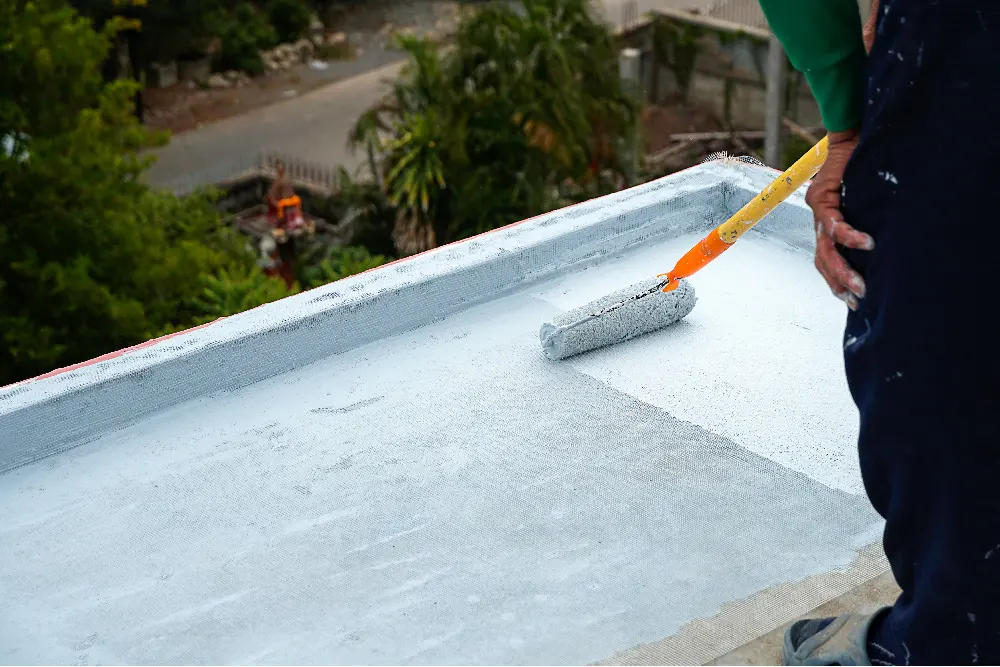
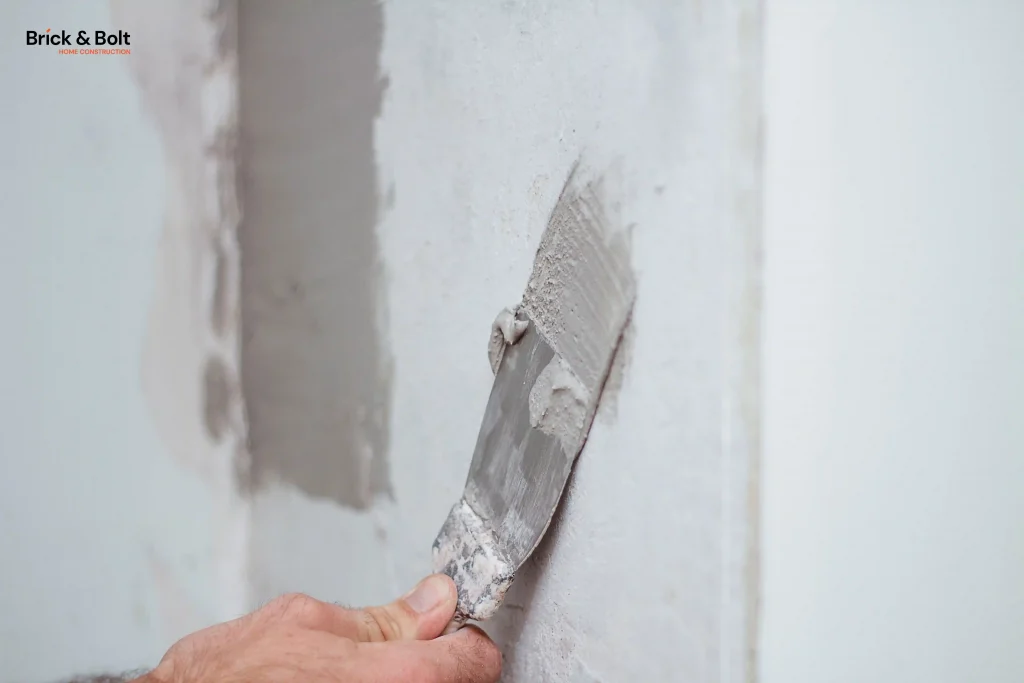
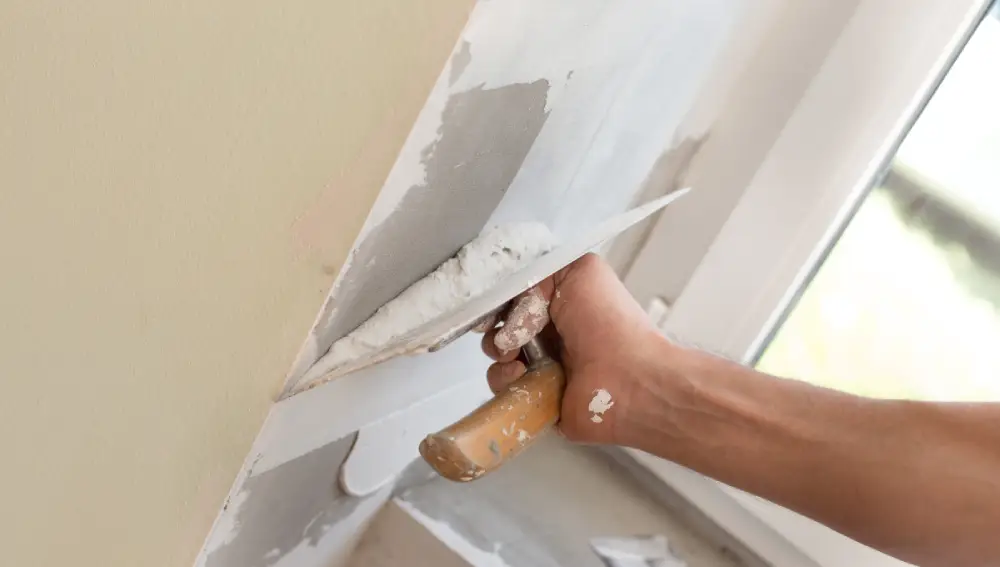
Liquid Rubber Waterproofing: 

A liquid membrane is a thin covering applied with a spray, roller, or trowel with a primer and topcoat and provides more flexibility than cementitious waterproofing. The surface elongation qualities of the liquid depend on the manufacturer’s type, and the liquid is usually cured in a rubber coating on the wall.

PVC Waterproofing:

This is a common roofing material that is made of polyvinyl chloride. The main application for it is to waterproof roofs. This type of waterproofing material will have a base that is reinforced. Typically, the base is constructed of polyester mesh or glass fiber. Most of its applications are for roofing, but it’s also frequently used for underground buildings, swimming pools, and tunnels.

PVC Waterproofing

Advantages of Waterproofing

The advantages of waterproofing are as follows:

  1. Waterproofing helps to reduce water absorption and prevents the concrete floor from developing cracks.
  2. Waterproofing helps increase the lifespan of solid construction and prevents reinforcement corrosion.
  3. It also guards against moisture coming inside the building structure and prevents seepages from the walls and ceiling.
  4. The application of waterproofing is easy and reduces the maintenance cost of a building
  5. A good waterproofing system provides a healthy environment and a clear living workspace.
  6. Waterproofing safeguards both the building and the people living inside them.

Disadvantages of Waterproofing

The disadvantages of waterproofing are as follows:

  1. In the summer heat, bitumen-based products deteriorate because the black color has a short shelf life due to solvent evaporation.
  2. The protective covering made of polyurethane shouldn’t be highly adaptable.
  3. The protective layer made of polyurethane prevents concrete from naturally breathing.
  4. The pot life of polyurethane protective coating is constrained, and water can accumulate beneath impermeable floor coatings.
  5. The inability to manage the fractures leads to further leakage in cementation waterproofing.
Waterproofing for Roof

Waterproofing for Roof

The roof of your house is always subjected to the worst weather conditions. Heavy rains and frequent temperature swings deteriorate materials and may result in irreversible damage. Nobody wants their ceiling to be leaky with water trickling inside. While building your new house, you must waterproof your terrace. In the long run, you can save a lot of time and money if you waterproof the roof while your house is being constructed. Water may enter your home if incorrect terrace waterproofing is done and it might lead causing damp patches on the ceiling and walls. In extreme circumstances, it might even seep down and cause leakages. Therefore, it is essential to do roof waterproofing to safeguard your terrace from water leaks and seepage.

Steps to Waterproof a Roof

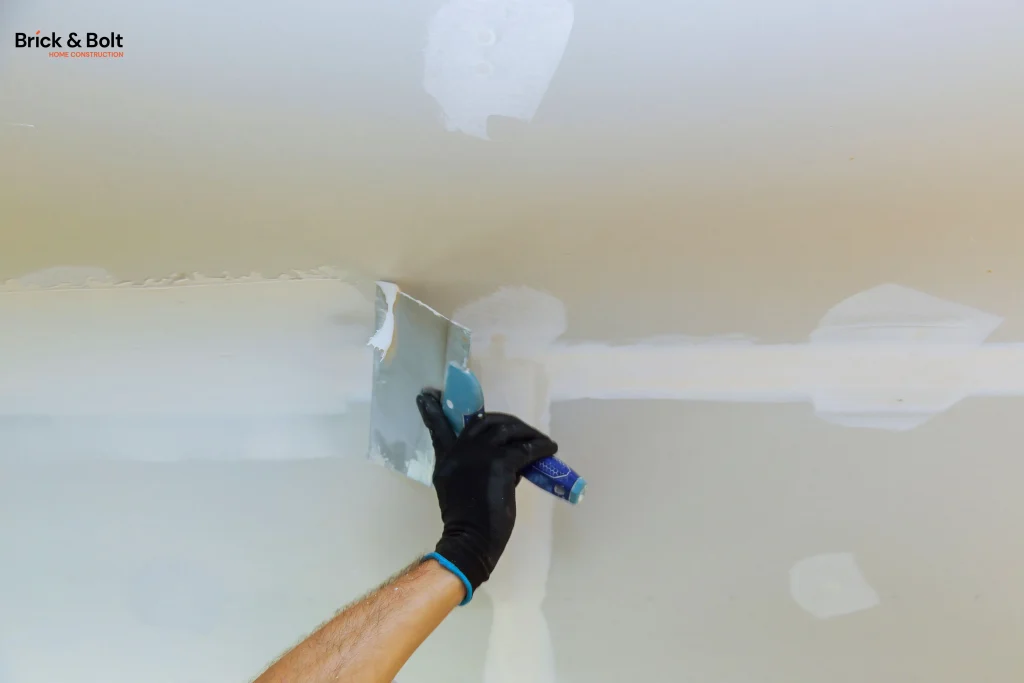
  1. The first step involved in waterproofing a roof is cleaning the substrate. Superior adherence is necessary for all effective liquid-applied membrane applications. Because of this, thorough cleaning is just as essential as applying the liquid solution correctly.
  2. The surface is primed after cleaning to increase the membrane’s adherence. Additionally, primers help prevent bituminous oils from the old roof from leaking through the liquid membrane. Contractors must ensure the surface is dry before applying most primers.
  3. The treatment of details is the third step. Contractors must carefully attend to every detail; only when this is done can they resume applying the liquid membrane in the field.
  4. The liquid membrane is then applied to the roof in the following procedure. Liquid-applied membranes come in two varieties; some need reinforcement mats impregnated during installation, while others do not. Regardless of whether the fabric mat is required, most manufacturers demand that the coating be applied in two or more subsequent layers.
  5. The manufacturer should inspect most of the projects during all phases of the application. This may include checking the primer’s coverage, performing pull-out mock-up tests, visually inspecting the detailed treatments, and yet checking the millage of the coating that has been applied.
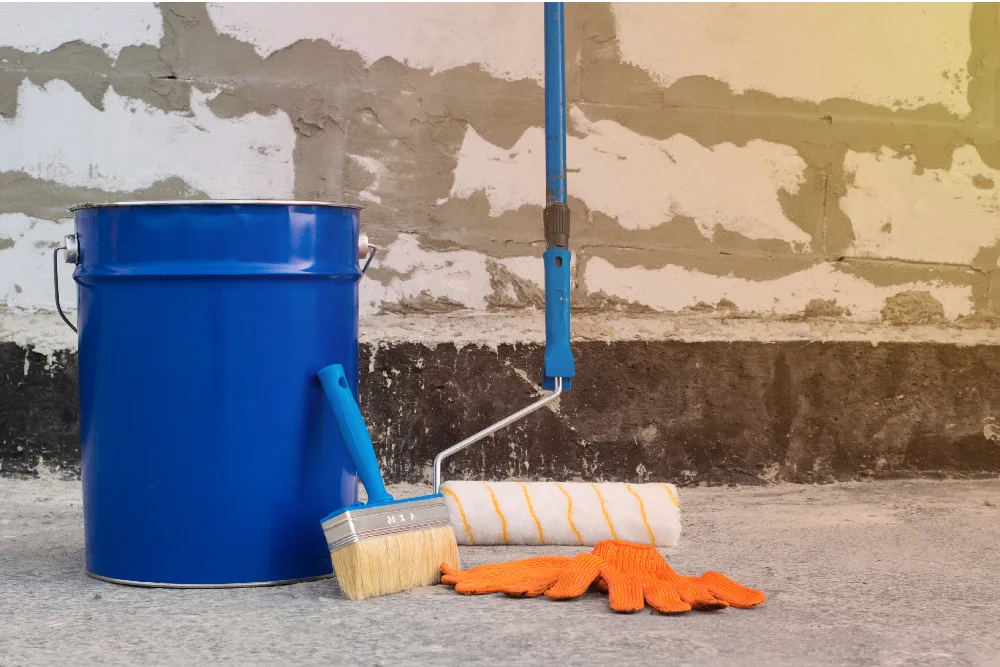
Steps to Waterproof a Roof

Waterproofing Paint

Waterproof paints often include an organic base made of oil, latex, or concrete and claim to bond with materials like concrete or wood to create a solid, water-resistant, or waterproof seal. Many house owners additionally apply waterproof paint in the bathroom and basement because regular paint doesn’t hold up well to the humid conditions in those areas. This safeguards against leaks, excessive moisture, and even mildew or mould. Waterproof paint is an affordable solution because it is easy to apply without the help of skilled professionals. Waterproof paint does not stop the water from coming from its source; it merely forms a barrier to keep the moisture.

Types of Waterproof Paints

There are numerous waterproof paints, each with a different level of durability and type of application. Here are some of the most typical kinds of waterproof paints used:

Masonry Paint:

Ceramic components are used in the production of a latex-based masonry waterproofing paint to offer it water- and mildew-resistance properties. It can be readily cleaned with soap and water and is made to adhere to brick and concrete.

Epoxy Paint:

Epoxy, a plastic resin, helps this paint harden fast into a durable, waterproof seal. Although it can be used on stone, metal, concrete, and cement surfaces, as well as the basement or garage flooring, it is most frequently used for boats and (at home) water tanks.

Acrolein Elasticized Paint:

Highly toxic acrolein, when combined with acrylic paint, becomes a waterproof compound that prevents mould, mildew, and moisture-loving bacteria from growing on concrete. One should be cautioned when using this paint and adhere to any safety precautions listed on the product’s label.

Acrolein Elasticized Paint

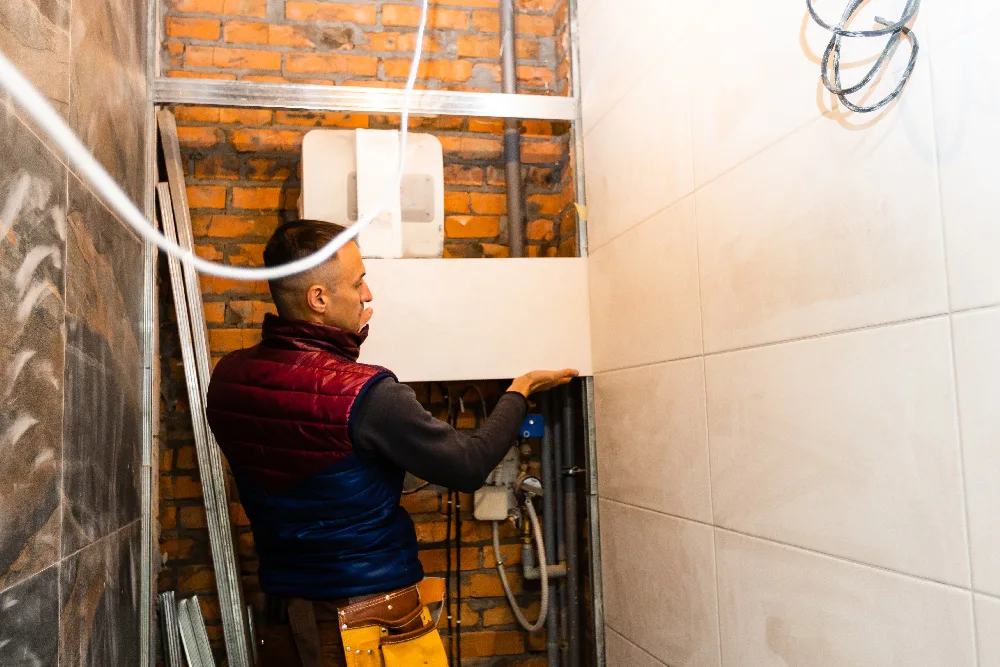
Why waterproofing the bathroom is required?

Why waterproofing is necessary for bathrooms is a common question most people ask when constructing a home. A bathroom is merely a place in the house where one goes to freshen up and rejuvenate. However, we must remember that bathrooms are damp rooms in your home regularly exposed to a lot of moisture. Today, bathrooms are more than personal space in our house. We often try to decorate this place just like the entire house. Not only do damp walls create water seepage in the bathroom area, but also sanitary fixtures and pipes, which can seriously harm your home’s appearance. This is where bathroom waterproofing is required.

The bathroom area is exposed to water daily. When a bathroom is being built, it should be waterproofed to prevent internal damage, resident inconvenience, and expensive future repairs. Over time, ceramic shower tiles could become cracked or damaged. So, one must pay proper attention to waterproofing the bathroom space while constructing the home.

Terrace Waterproofing

Terrace waterproofing is an essential exterior home maintenance step that stops leaks and prevents rainwater from entering your house. One method of protecting your roof is waterproofing. Generally, the experts will cover the roof with a protective waterproofing membrane to

  1. Prevent water leakage from the terrace to your house
  2. Prevent the structure of your roof from deteriorating due to heat and water damage.
  3. To preserve your home’s aesthetic appeal and reduce your future investment.
  4. To increase the roof’s durability
  5. Prevent the growth of mould and tiny cracks from developing on the surface.

Method of Waterproofing the Terrace

  1. The below steps are followed for waterproofing the terrace:
  2. First, we have to clean and remove the dust from the roof terrace surface.
  3. Fill all the visible cracks by using a specially prepared silicone crack filler.
  4. Use diluted silicone to apply the first coat, which helps to fill the invisible cracks and tiny holes.
  5. Apply a second and third coat of silicone-based cement waterproofing to make the surface strong and durable.
  6. Then, apply the fourth and final coat of silicon-based cement waterproofing.
  7. In the end, the final layer is the finish. This could be made of stone, tile, or any other durable material for resisting extreme outdoor conditions. The finish and filler layers don’t help in the waterproofing process.
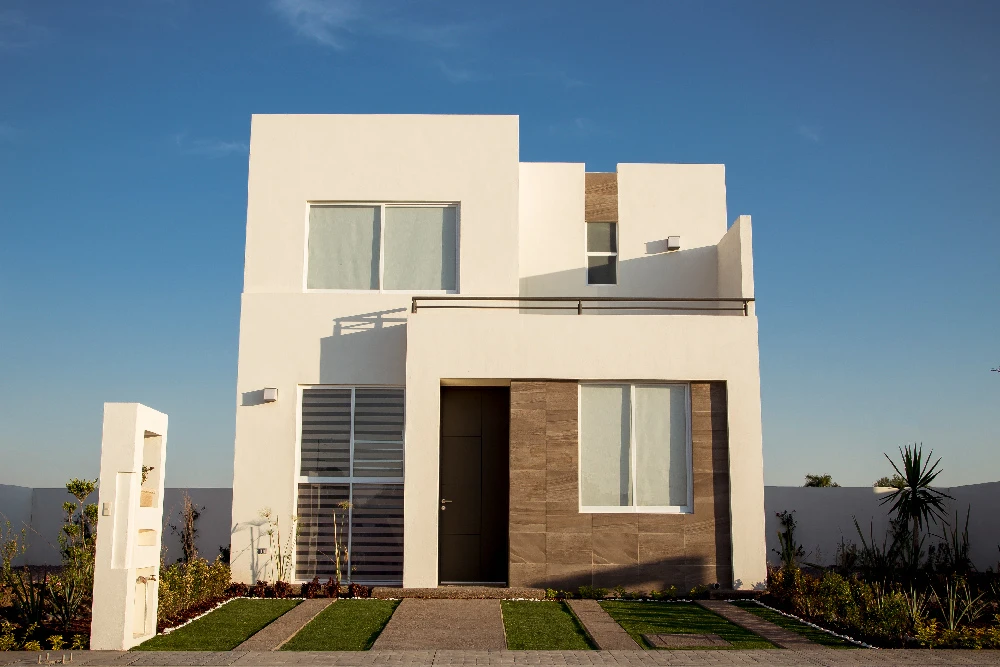
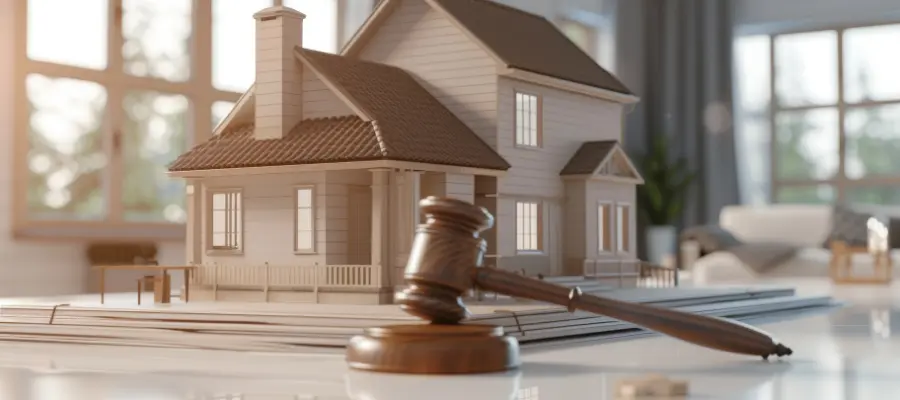
Conclusion:

Waterproofing your home is crucial whether you’re building a new one or remodeling an old one because it will not only upkeep its aesthetics but also increase its resale value.

Most homeowners frequently deal with problems like water seepage and dampness. The main causes of these issues are construction quality and inadequate waterproofing measures. While the immediate effects, such as puffiness of the walls, dampness, and paint peeling, may seem insignificant, if these are not addressed appropriately, they can seriously harm the house.

So, you must select the right construction company to efficiently do the waterproofing procedure at your house with the best materials. The waterproofing products used by India’s number one construction company Brick&Bolt are rated amongst the best in the waterproofing process and the entire construction process. Our waterproofing materials are made to last a long time in harsh climatic conditions. Our materials are the best when it comes to preventing or plugging the existing cracks effectively to prevent water seepage. We have an expert team of professionals with years of experience in this industry who take care of the entire waterproofing process.

If you want to experience high-quality construction service at an affordable price, then all you’ve to do is connect with Brick&Bolt today. To know more about our service or to get a complimentary price quote, call us at +91 7505 205 205

Navigating National Building Code in India: Key Considerations for Construction

0

Following building codes and construction project regulations is the most significant aspect of building construction in India. By doing so, you can protect the building’s occupants, ensure their safety and security, and complete your construction project without any delay or legal responsibility.

When it comes to project building regulations in India, the National Building Code is involved. It allows compliance with building laws, ensures the long-term durability and safety of a building, and maintains the comfort and safety of occupants.

Here, we will cover everything about construction project regulations.

About the National Building Code

The National Building Code, introduced to the market by the Bureau of Indian Standards, brings into light the guidelines for building structures that will last, maintain safety provisions, be sustainable, provide comfort, and be environmentally friendly. Basically, it’s a standard code that should be adopted by everyone involved in construction, whether it’s the public works department or the construction department of the government.

Why is It Important to Follow the National Building Code?

The NCB – National Building Code of India is a crucial building code that offers guidelines for regulating the construction of buildings across the country. Several essential documents describe the process, standard, and type of building construction in India. This building code provides guidelines for constructing institutional, commercial, and residential buildings. An NCB boosts a building’s safety by preventing hazardous materials from entering the construction process.

To develop structures that fulfil the norms and standards stated in the NBC, architects and builders must include these regulations in their designs. Consider your foundation, structural design, construction materials, plumbing service, lighting, and fire and life safety.

It’s important for anyone working in construction to understand the NBC. It helps them design buildings that are appealing, secure, and environmentally friendly by incorporating the objectives of the code into their structural plans.

Building Regulations India

Complying with Building Codes: Key Considerations for Construction in India

Land Use and Zoning Regulations

Constructing buildings in any Indian cities and towns calls for keeping up with the zoning regulations to begin the journey to successful infrastructure development. The land use and zoning compliance varies with each town depending on the building permissions process and restrictions. 

Here are the top zoning regulations to consider for each type of property while constructing a building in India: 

  • Residential Zones: 

All regions that allow the residential sector, such as building houses ranging from single-family to multi-family dwellings, have specific laws and regulations for constructing legal properties. However, low-density zones may prohibit the construction of large family homes, whereas high-density zones grant open access for larger buildings and more units per plot.

  • Commercial Zones: 

Commercial zones are specifically for businesses, retail shops, corporate offices, and other types of infrastructure to conduct business activities. These types of infrastructure are much taller than residential buildings. By meeting the zoning regulations, businesses get the green signal to build a property that meets all their business requirements. 

  • Industrial Zones: 

Industrial areas are other zoning regulations for building property in India. These requirements are mainly to construct manufacturing infrastructure, warehouses, and other infrastructures that relate to maintaining strict pollution policies and safety regulations. Businesses with these properties under their control must maintain a proper balance to ensure that zones like residential and commercial are not impacted.

Building permits require compliance with zoning regulations. Developers must perform detailed land use analyses and consult with local planning authorities to align proposed projects with designated land uses.

Approvals and Permits for Buildings

Getting approval and permits is the most important building regulation to consider while constructing infrastructure in India. To get approval for the building, you are required to carefully prepare the documentation covering even the minute details. You are also required to contact the government authorities responsible for facilitating approval and permits for the building. 

Here are some crucial approvals and construction permits in India required from each government authority: 

  • Development Plan Approval: 

The local authorities oversee the infrastructure development plan approval process. They will closely check every aspect of the construction plan, which includes the site plan, architectural design, structural plans, measures to protect the environment and so on. Once everything is in place and according to the regulations, local authorities can begin to approve the development plan. 

  • Construction Permit: 

Once the development approval process is complete, it is time now to apply for construction permits in India. Now, you need to draft the construction permit application, where you must present the construction drawings, specifications for materials, and construction methods. Besides, developers are also required to pay attention to public health, fire services, and environmental protection, which may also require approval. After getting the construction permit, developers can start the construction adhering to the regulations.

  • Occupancy Certificate: 

Occupancy certification is another crucial document to consider while constructing a building. This certification gives you complete assurance that the building holds all the safety standards to occupy and comply with all relevant regulations

Structural Safety 

Infrastructure safety is an important building regulation to consider while constructing buildings in India, as natural calamities like earthquakes always stand to bring compromises along. Therefore, it is important to run through detailed analyses before construction to ensure the building can handle the lethal force of earthquakes. 

This means designing crucial facets of construction that are efficient enough to manage the effect of earthquakes while keeping the standards high for the safety of occupants. 

To comply with safety regulations, it is important to use high-end materials that exceed all safety expectations. Some of the top-class materials include cement, steel, and concrete, which ensure the structural stability of the building. 

Fire Safety

Fire safety is an important building regulation to consider while constructing buildings. Fire can happen anywhere, from residential to commercial, so you cannot compromise fire safety considerations.

Even various government authorities have made it mandatory to have fire extinguishers and alarm systems in commercial to residential buildings to protect the people and buildings. Besides this, it is important to design the building with room for emergency exits to make a comfortable exit without getting caught by the fire. 

Universal Design and Accessibility

Constructing a building that goes easy on all types of residents is an important building regulation to consider while developing buildings. 

When constructing buildings, it is essential to integrate various elements like elevators, ramps, and toilets that meet all accessibility standards. These high-end features must be easy for wheelchair and crutch users and ensure that those using mobility aids will have no problems traversing the building.

By incorporating universal design principles, all users can benefit, regardless of age or ability. The goal is to create intuitive and user-friendly spaces that can be modified to suit various needs. 

Conclusion 

Complying with the building code while constructing property in India is important as it will help you avoid any further legal disputes. Legal requirements for construction projects specify adherence to minimum design requirements, construction, and maintenance of buildings. They allow real estate developers to perform the best practices to mitigate risk and even prevent accidents during construction. At Brick & Bolt, we meet your requirement to construct buildings following every aspect of building regulations. 

As the best construction company in India, we construct buildings that are in the best interest of people. We ensure that every construction follows all the compliance so you do not have to hurdle with disputes. 

Contact us today to construct a building that meets every building regulation. 

A Complete Guide to Putty: The Secret to Beautiful Walls

0
Putty

The construction process is complex, as numerous activities must be completed correctly to produce excellent outcomes. Though construction usually takes less time, adding finishing to the building’s overall appearance will take more time. To enhance the great impact of finishing, different contractors use various products. Wall putty is one of the products that is frequently used in the construction process. It is a cement-like material with high plasticity, and normal people tend to believe it is similar to Plaster of Paris or clay. However, the putty material is not identical to any of them. In this blog, we will discuss the use of putty in construction and all the essential things one must know regarding putty for better construction of their house.

What is putty in construction?

Putty is commonly used in the construction industry as a filler and sealant. It is traditionally made by combining finely powdered chalk (sometimes called whiting) with linseed oil, kneaded properly to make the consistency of dough. Putty is available in many colors and can be painted once completely dried off.

Putty is highly plastic and is frequently used in traditional single glazing to seal glass panes into wooden frames. Before painting, walls can be given a smooth, damp-resistant surface using wall putty.

 putty in construction

What is wall putty?

Wall putty is a cementitious material with high plasticity that looks similar to the clay texture. It offers a safe, smooth base for painting. It also serves as a filler because we can use it to fill any patches or cracks in the wall. Wall putty allows all types of colors to be applied over the walls. The benefit of wall putty is that it can be easily applied to interior and exterior surfaces, whether old or new.

Before painting any surface, two layers of putty are often used before painting any surface since the first coat fills in surface cracks and gaps, and the second coat ensures a smooth surface. Wall putty is used over different types of walls, such as dry, concrete, plaster, etc.

What are the different types of wall putty?

Numerous wall putties are available on the market based on the requirement of different purposes. However, the two types of most used wall putties are as follows:

White Cement Based Wall Putty:The most common kind of wall putty is white cement putty, which is made of fine white cement, polymer, and minerals. White cement putty provides a great binding property. It also provides a glossy, excellent, and smooth finish making it perfect for interior and exterior surfaces. Additionally, the white cement resists the dampness of the wall and is used for various decorative purposes. The white cement wall putty has high strength because cement is the main ingredient used to make the putty.

Acrylic Wall Putty: This putty is water-based and made of white pigments, acrylic emulsion, and additives. The acrylic wall putty is only used for the inside surface of the wall, and after applying the putty on the walls, it gives a matte finish and a smooth, even look. White cement putty has a higher binding property than acrylic putty.

What are the advantages of wall putty?

Some of the advantages of wall putty are as follows:

1. It increases the wall’s tensile strength

2. The longevity of the wall paint is extended by wall putty

3. Wall putty helps to reduce the cost of the consumption of paints on the walls

4. Wall putty is moisture-resistant

5. It helps to provide a smoother finish to the walls

6. The wall putty does not flake off or get easily damaged

7. It gives the walls a glossy, smooth, and attractive finish that brings out the actual color of the paint

What are the disadvantages of wall putty?

There are a few disadvantages of wall putty:

1. Once hardened, it is not possible to use wall putty paste

2. Trained and skilled laborers are required to apply the wall putty to get the desired finishing

3. As mixing wall putty by hand takes more time and the material dries quickly, mechanical mixing equipment is required

apply putty on walls

How to apply putty on walls?

The steps for applying putty on the walls are as follows:

1. At first, we need to confirm if the surface is constructed of cement or plaster, and then we have to make sure that the wall surface is thoroughly cleaned and there are no minute particles or dust present

2. The wall surface shouldn’t have grease, oil, or leaks. After cleaning the wall surface, moisten it with water and let it air dry until it feels damp. Keep the wall surface dry.

3. According to the manufacturer’s instructions, mix the putty with the necessary amount of water in a 2:1 ratio and stir it with the mixing tool for 10 to 15 minutes

4. Make sure there are no lumps in the mixture as you mix it, and after the mixture is done, it should have the consistency of a smooth, creamy paste. The mixture should be prepared in such a way that it can be used for the next 2-3 hours

5. Before applying putty, apply one layer of primer and let it dry for at least 12 to 24 hours. Some manufacturers recommend adding primer, while others do not, depending on the ingredients of putty

6. The first coat of putty must be applied from bottom to top, and it is recommended to allow it to dry for 6 to 8 hours completely

7. After that, use sandpaper to gently remove any remaining particles before applying the second coat of putty in the same manner and then let it dry completely for 6 to 8 hours

8. The thickness of the wall putty should be at most 1.5 mm. Anything thicker than that may create cracks, peel off, and take more time to dry. The drying time of the wall putty also depends on dampness and climatic conditions

What are the tools used for wall putty?

Bucket: For the convenience of mixing putty and water, a bucket is required.

Mixing tool: Putty dries more quickly, therefore a mechanical mixing tool speeds up the process and reduces the chance of lump formation

Wall putty blade: This tool is used to apply and spread putty evenly on walls. Consequently, a smooth surface will be created

Sandpaper: After the putty is fully dried, sandpaper is rubbed on the surface of the wall to make sure there are no minute particles or uneven surface patches.

How to mix wall putty?

It’s relatively easy to mix wall putty. A bucket and some water are required to produce wall putty paste. Two parts of wall putty and one part of water are required because the mixing ratio must be 2:1. After that, stir those materials thoroughly. As the wall putty paste is made, we can apply the putty with a flat tool.

Do we need to put primer after wall putty?

There are different opinions regarding this answer. Many people think that the surface where we will work must be cleaned first. After that, it is suggested to apply primer to the surface. After this step, one should apply the wall putty.

However, the use of primer is optional after applying wall putty. Primer is utilized to ensure that the paint has a stable base for proper adhesion. It is optional to put a primer on a surface before painting as the wall putty already creates a surface ideal for painting.

wall putty

Are wall putty and plaster the same?

Wall putty is used to fill the pores in walls and ceilings. Putty can be easily and quickly applied for minor work using a spray or brush. In contrast, plaster is a whitish powder that, when mixed with water, hardens into a material that may be used to make sculptures and casts and added to lime plasters to create casts for broken limbs.

Conclusion:

The best quality of your living can be enhanced with the best possible construction standard. From that perspective, choosing the right wall putty can be important in constructing your dream home.

As you know, wall putty is essential for highlighting the elegance and flawlessness of your wall painting. You should now be able to achieve that seamless appeal just by connecting with India’s no 1 tech-enabled construction company Brick&Bolt.

We provide the necessary tools and expertise to meet your painting requirements for residential and commercial properties. 

To know more about our service or to get a free quote, call us at +91 7505 205 205

Top 10 Things to Know Before Plastering Your Home

0

One of the most important aspects of making your home look beautiful is doing perfect plastering. It is an essential part of the construction process, and plasters are meant to enhance the splendor of your house. Plastering the walls of a building is a requirement as it decides the strength of the building. One needs to be super careful when the plastering work is going on in their house as it is the key to a healthy and long building life.

In this article, we will give you all the necessary information regarding the plastering of a building so that you become well aware of all the minute details of plastering and construct your dream home most amazingly and make it look beautiful in and out.

What is Plaster?

plaster

Before understanding the requirement of plastering during construction, it is essential to get some deep knowledge about what Plaster is. Plaster is a building material manufactured in the form of a dry powder and converted into a paste by mixing water into it. This paste is used for the protective or decorative coating of the building walls and ceilings.

What do you mean by plastering?

Plastering is the process of covering uneven and rough surfaces with plastic materials such as Plaster or mortar to create a uniform, smooth, regular, transparent, and durable surface. A mixture made of lime or gypsum, sand, water, and sometimes fiber helps to make the walls and ceilings more waterproof, adhesive, and termite-resistant. Plastering is also done to prevent the entry of porous materials into the masonry surfaces of the building. Plastering provides a satisfactory base for whitewashing and color washing in the building.

What are the different types of plaster?

There are different kinds of plastering done depending on the mortar. Below is a brief description of the most typical types of plasters:

Cement Plaster: This plaster is made by combining sand, portland cement, and water. Cement plaster is used to create a smooth surface on the interior and exterior of masonry structures. It is considered the most suitable plaster to reduce dampness. The materials are mixed, one cement bag of plaster is created at a time, and the plaster is eaten within 30 minutes of adding water.

Lime Plaster: It is composed of sand, hydrated lime, and water. Lime plaster is created when lime is used as a binding agent. Sand and lime are often combined in equal parts to make the mortar used in lime plaster. It is advisable to add a small quantity of cement into the lime plaster’s mortar so that the strength of the lime plaster is increased.

Lime plaster does not tend to set when submerged in water. The lime can stay soft for longer if a thick layer or multiple coats are applied.

Mud Plaster: Well-tempered clay or brick earth, chopped straw, hay, loose soil, hemp, and cow manure are all used in equal amounts to make mud plaster. All these ingredients are combined and lifted with a good amount of water for nearly seven days. This is thoroughly mixed once again until the required plaster consistency is achieved; in some cases, mud plaster which is made of clay and sand, is also used.

Gypsum Plaster: Gypsum plaster can also be referred to as plaster of Paris. Gypsum is heated to 150°C to create calcium sulfate hemihydrate, which is then used to make the mortar for the plaster. Plaster of Paris powder is also termed calcium sulfate hemihydrate powder, which is combined with a small quantity of water to create a slurry. Gypsum crystals are made by rehydrating the slurry once again.

With the help of trowels and metallic float, the plaster of Paris paste is applied to rough walls or ceilings. The paste is well-leveled overall on the surface. Once the paste is dried, it is polished with sandpaper to give a smooth finish to the walls. Plaster of Paris and white cement look alike but have major differences in between them

Heat-resistant plaster: This plaster is made to endure temperatures as high as 50 degrees Celsius. This plaster is mainly used for placing over chimneys and exhaust pipes that are connected to stoves. These plaster mortars are explicitly made from inert materials like fly ash and a balanced mixture of sand and cement.

What are the advantages of plastering?

Plastering is an essential stage in creating a solid foundation for building projects. In terms of its decorative and aesthetic appeal, it has several advantages:

  • Existing drywall is given a sturdy and long-lasting finish by plastering. When water leaks out of the cement mixture, a chemical reaction occurs. The bond is strengthened as a result of this reaction, making the plastered walls more durable.
  • An even surface is created after plastering is done, which helps when applying paints. Painted walls give a stunning look to the walls of the houses.
  • Plastering adds a decorative charm. The builder can produce various designs and textures because plastering gives the walls a stable and uniform finish.
  • Plastering is a quick and simple procedure allowing on-time completion of any renovation work.
  • Plastering is pollution-free; even when exposed for extended periods, it produces less dust on its surface.
  • Plastering is less likely to cause cracking on surfaces, thus, leaving a flawless finish on its surfaces.

What are the disadvantages of plastering?

When compared to drywall construction, plaster walls have some disadvantages, which are  as follows:

  • Building plaster walls incurs high cost as more skilled labor are required.
  • Maintaining plaster walls is quite challenging. Drilling pilot holes and setting anchors are required for hanging pictures or televisions. Textured plaster walls can be challenging to maintain in terms of cleanliness.
  • Plaster becomes more rigid and fragile as it ages, thus raising the possibility of surface cracking.
  • Repairing or replacing plaster requires skilled hands. Professionals can fix large cracks and sagging ceilings, but the procedure is expensive and time-consuming.

What is overboarding?

Overboarding refers to applying new plasterboard over the top of the existing plastered surface instead of putting the new plasterboard directly on the ceiling joists. New plasterboard would be put up on top of the old plasterboard in case the ceiling is artexed, lath, and plastered. It is essential to find and fix the original ceiling dots when the overboarding occurs.

What is skimming?

skimming

Skimming is a type of plastering method. A thin layer of coat is applied to a plastered wall during the process of skimming. Skimming usually takes place on a plastered wall. It is a difficult process to perform and requires a skilled plasterer who knows how to bring the finish because, in skimming, the finish is the ultimate lookout. Skim plastering creates a continuous, smooth surface that is ready for decoration. The skim coat is used on the uneven cement surface. Various other plastering procedures must be done to create a smooth surface, but the quality of the finish depends on the skills of the plasterer.

What is dry lining?

Dry lining refers to cladding for internal walls and ceilings to prepare them for painting r covering. A flat and smooth surface is created by attaching a plasterboard.

The plasterboard used in the dry lining can hide pipes and wires, produce insulation space, and even provide soundboarding. Dry lining can be used for various applications, such as it can be added to surfaces that include brickwork or uneven surfaces. Additionally, it can be used to build curved walls, which allows for creativity and helps in managing small or uniquely shaped structures.

New buildings are often made with stud walls to create separate living spaces. Dry lining plasterboard may be readily added to these stud walls to make them smooth, strong, and safe.

What are the tools used in plastering works?

We can get a well-plastered wall with a smooth finish by using some important tools referred to as plastering tools. So below, we have discussed some of the plastering tools with their uses.

Finishing Trowel: A finishing trowel is essential for plastering work. It uses a larger, flatter blade to smooth the plaster and give your surfaces an incredibly smooth finish.

Window Trowel:Most plasterers will use their window trowel when they can’t use any other trowels near windows. Due to its smaller blade face, which gives better maneuverability across the wall, the window trowel is specially designed for use around your house windows.

Mortar Stand: A mortar stand is a compact, foldable table that can hold the plastering material while allowing easy access while working. This is a simple tool used in plastering, but it has significant impacts.

Hawk: One of the essential tools the plasterer ensures to have while plastering is the hawk. It is a portable surface that holds the plaster material when moving. Hawk helps apply plasters across the walls and ceilings quickly and simply.

Snips: This plastering tool is an essential element required in modern plastering. It helps to cut both popular types of beading metal. All plasterers should use a durable set of snips for smooth plastering work.

Plasters Float: This tool is used to give a smooth and high-quality finish to the final layer of the plaster. Plasters usually carry this tool with them to smooth down the plaster’s top layer, and people will be able to see the surface end up even.

Scarifier: It is a large metal comb that helps the plasterer to comb lines directly into the render, and it creates a stronger bond when the next layer of plaster is added to the surface. This tool helps to simplify the plastering work.

How to plaster ceilings?

Plastering a ceiling is quite a complicated job and, if not done properly, will pick up lumps and bumps and reflect during daylight and night. One can traditionally plaster a ceiling or can do it by applying plaster to existing drywall. Below are the basic steps that one must know for plastering the ceiling of their house

Prepare the area for plastering: Plastering a ceiling is primarily messy work, so try to cover the entire floor with a few large clothes. Make sure the furniture near the plastering area is well covered with plastic sheets because splatters and spills are a natural part of the plastering procedure. Put on a dust mask, safety glasses, and some old clothes you don’t mind spoiling. Several buckets for mixing plaster, as well as a bucket of water for cleaning you’re plastering tools, are also required.

Prepare the Ceiling: Take out any screws or nails on the ceiling. Before you start, make sure that all light fixtures are covered and taped. You will need to sand these spots with a sanding block if there are any spots or crumbling plaster on the ceiling.

Mix the Plaster: You must always add the plaster to the water, never the other way around. After preparing, the plaster must have a thick, creamy consistency with no lumps.

Apply the Plaster: Put a good amount of plaster on your hawk and remove some of it using a trowel. Trowel the plaster onto the ceiling in thin (about 2mm thick) and even rows, starting from the edge of the wall. Reduce the amount of trowel-line evidence as much as possible while maintaining consistency and evenness.

It is now safe to trowel on the second coat of plaster since the first coat will have dried very quickly. It would help if you had about 4-5mm plaster on the ceiling after applying the two layers. Once the plastering is done, clean up the entire floor so that no stains get settled.

How long does it take to plaster one room?

The amount of time it takes to plaster a room depends on what needs to be done and how big the room is. Usually, it takes a day or two to plaster a room. The rest can be estimated after visiting the place and the portion of the building where plastering will happen.

Conclusion:

Plastering is a very important process for any of the ideal construction projects, Gypsum and cement are known for best plaster. Therefore, it is suggested to find the right construction partner for doing this difficult task. At Brick & Bolt, we have precisely the correct equipment and workforce with the appropriate expertise and experience. For any of your needs and questions regarding construction or getting a free quote, contact us now at +91 7505 205 205

Single Floor House Design: Ideate, Plan, and Elevate

0

What is a Single Floor House Design and the Magic of Elevation?

Magic of Elevation

Step into your dream home, encompassed within a single floor

Have you been dreaming of a home that is easy to navigate, low maintenance yet oozes charm and style? Let us introduce you to the world of single floor house design. Imagine stepping into a home where every room unfolds on a single level. That is what a single floor house design is all about.

Often referred to as one-floor house design, it allows all living spaces to exist cohesively on one plane. But that is not all. Have you noticed how every home has a distint character that stands out when you first lay eyes on it? That is the magic of elevation! An integral part of the architectural design, elevation offers a front-on view of the house, revealing the exterior facade. A perfect blend of a simple single-floor house design with an enchanting floor plan can create a beautiful and practical home.

Brick&Bolt specializes in bringing your dreams to life. As India’s No. 1 technology-based construction company, we focus on creating single floor house designs that embody your unique tastes and lifestyle. They ensure that it is not just visually appealing but functionally outstanding too.

Features of Single Floor House Design

Single Floor House Design

Watch as a kitchen co-exists as a dining area

Now that you have a grasp of what single floor house designs entail, it is time to delve deeper. This type of design comes with a host of features that make it a practical and appealing choice for many homeowners. Let us explore these in detail to understand why single floor homes are increasingly becoming a preferred choice.

Space Saver:

Single floor house designs offer a clever utilization of area. With an open floor plan and fewer walls, it creates an illusion of more space.

Easy to Maintain:

With no stairs to clean and fewer rooms, a single floor house design is relatively easier and less time-consuming to manage.

Cost-Effective:

House construction for a single house design tends to be more budget-friendly, as it requires fewer materials and less labor compared to multi-story houses.

Easy Accessibility:

Single-floor houses offer greater ease of movement, making them an ideal choice for families with children, the elderly, or individuals with mobility restrictions.

Flexible Design:

The simplicity of single floor house design provides flexibility for customization, making it easier to adapt to an evolving lifestyle or family needs.

Single Floor House Designs to Consider for the Modern Charm

Modern Charm

With the basics of single floor house designing covered, it is time for the fun part – exploring the various design options at your disposal. There is a wide spectrum of options to consider, each with its unique allure. Whether you are inclined towards a modern house design or a charming bungalow vibe, Brick&Bolt is your partner in curating a design that embodies your dream home. Remember, our passion is to design homes that reflect your personality and lifestyle. So let us look at some exciting designs that could be the blueprint of your future home.

Modern Single Floor House Design:

The modern single-floor house design embraces minimalism, sleek lines, and large windows for natural light, resulting in a sophisticated aesthetic.

Contemporary Single Floor House Design:

Contemporary designs merge current trends with traditional elements, creating a harmonious blend of old and new.

One-Storey Built Bungalow Design:

A one-storey bungalow design often includes a wide porch, low-slung roof, and open floor plan, radiating charm and homely warmth.

Simplistic Single-Floor Design:

A simplistic single floor house design focuses on functionality over frills, perfect for those seeking an efficient, practical layout.

Factors to Consider for Choosing a Single Floor House Design

Factors to Consider for Choosing a Single Floor House Design

Choosing the perfect single floor house design is not just about aesthetics. Several other factors come into play to ensure your home meets your lifestyle needs and preferences. Our team of experts at Brick&Bolt guide you through these considerations, helping you make informed decisions. We commit to making the house construction process as seamless and personalized as possible. Now, let us uncover the key elements you should consider for creating your ideal single floor home design. Take these factors into account to ensure your home meets all your needs.

Size and Layout of Plot:

The size and shape of your plot can significantly influence the design of your single-story home. Finalizing the layout and size will allow you to determine how you want the walls and rooms to look. It will also show you how the appliances and furnishings fit accurately into your single floor house design.

Number of Bedrooms:

Consider your family’s needs in terms of personal space when deciding the number of bedrooms.

Number of Bathrooms:

Factor in the number of family members, guests you frequently have, and personal preference while deciding the number of bathrooms.

Budget:

Remember, the complexity and size of your house design can directly influence the cost of construction.

Lifestyle:

Your floor plan should cater to your lifestyle, be it minimalistic, luxurious, or family-oriented. And in India even our geographic locations also influnece our design choices like south indian house design, North indian house design, etc. With Brick&Bolt, build your perfect house design where superior creativity meets modern living.

Create Efficient Floor Plans with Brick&Bolt

Efficient Floor Plans

A well-conceived single floor house design can offer a myriad of benefits ranging from easy maintenance to cost-effectiveness. Whether you prefer a modern, contemporary, or simplistic style, it is crucial to have a design that reflects your personality and caters to your lifestyle needs. At Brick&Bolt, we pride ourselves on bringing your dream home to life. With our seasoned architects and builders, we are dedicated to delivering bespoke single floor home designs that are not only aesthetically pleasing but also functional. We understand that a home is more than just a structure; it is a space where memories are made. So, let us help you build a space that is truly yours. Get in touch with us today and embark on a journey to create your ideal single floor house design.

How Do You Select The Right Construction Company For Your Construction Project?

0

Are you looking for a good construction company to hand over your project and then relax? Do you know how it’s done? Choosing an efficient construction company is critical, as many people spend too much money on remodelling and building new homes yearly. As a result of the increased competition, choosing a reputable construction company is becoming increasingly difficult. Furthermore, selecting the best construction company to build your home is the most significant decision, requiring extensive research. 

This blog by Brick & Bolt, the best construction company in Bangalore, aims to resolve your query- ‘How do you select the right construction company for your project?’. By considering aspects such as experience, reputation, knowledge, and project suitability, you can make informed decisions that meet your needs and ensure a smooth and successful construction process.

What Does a Construction Company Mean?

A construction company is an organization that designs, plans and executes construction projects. These businesses manage the entire project, from site excavation and foundation work to framing, electrical, plumbing, and finishing.

They may specialise in residential, commercial, or industrial projects and frequently collaborate with architects and engineers to ensure that projects are completed as per requirements and building codes. Construction companies often employ a team of professional labourers and supervisors to handle day-to-day construction site operations.

How Do You Select the Right Construction Company to Build Your House?

Choosing the right construction company is a crucial but easy task, as a construction company offers all the services at one stop, especially tech-driven construction companies like Brick & Bolt that use advanced technology and 16+ apps to make your dream home a reality. They overlook the house-building project from the beginning to the end and take care of all the phases of the building project.

Such companies are also responsible for hiring and supervising subcontractors, hiring designers and architects, and scheduling the inspections and examinations of the house. But before proceeding with a construction project, you need to do some basic things yourself before handing the project over to the company.

  • You must find a suitable place to build your house,
  • You must know exactly what you want,
  • You must select construction materials based on their brand and grade,
  • You must plan your budget, and only then,
  • Select the right construction company.

Steps to Keep in Mind While Selecting the Right Construction Company for Your Construction Project

Right Construction

One of the most vital factors to consider when selecting a construction company is their knowledge and expertise. Look for a company with a track record of completing projects like yours.

Established companies are more likely to have encountered various obstacles and developed the necessary abilities to address them successfully. They can anticipate challenges, manage resources effectively, and provide high-quality results.

With numerous options available, examining these factors is critical to ensure you make an informed and satisfied decision.

Expertise in the Field

Any construction company you select to engage with should have extensive experience. When developing structures that meet high architectural requirements, extensive experience in the sector is required.

So, before hiring a construction company, research their previous work history online or through reliable sources.

View the Company’s Portfolio

Each construction company has its distinct signature touches that make their buildings unique. As a result, you should review a company’s portfolio before hiring them for your project.

Please take a closer look at the design and style of previous structures they constructed. You may be a good fit for the organization if it appeals to you. If this does not suit your preferences, you should consider other alternatives.

Talk to the Company’s Past Clients

One of the most effective ways to assess the construction company for a building project is to speak with its previous clients. Past clients can provide honest feedback on the project, including what went well and what went wrong.

They can also tell you if there have been any difficulties with the building since then and, if so, how the construction company addressed them. A professional construction company should be able to provide you with references from previous customers.

Verify Licenses and Certifications

Ensure the construction company you hire is licensed and certified to operate in the area. Check if they have suitable certifications, as this assures that they follow industry standards and have the essential qualifications.

Research the Company’s Reputation

After you’ve verified that a company is licensed and insured, consider spending some time researching the company’s reputation. This involves conducting an online search and reading reviews, as it is vital to recognize that more dissatisfied customers will leave feedback than satisfied customers.

However, you notice reviews with similar issues, such as failing to complete a project on schedule or exceeding budget. In that case, there is probably some truth to it. Researching a client’s reputation can help you identify potential problems with a company.

Reliability

When researching the experience of construction companies in the field and reading reviews about their completed projects, remember to consider their trustworthiness or market reputation.

Suppose the organization is reputable in the field of construction. In that case, it will complete the project by the deadline to maintain its reputation while also within the predetermined budget.

Conclusion

In conclusion, choosing the right construction company for your project is an important decision that needs to be carefully considered. A dependable and professional construction company can make your dream home a reality, ensuring the project is executed efficiently, within budget, and to your specifications. To make an informed decision, consider the company’s experience, portfolio, client recommendations and licensing, and reputation. Conduct careful research, speak with previous clients, and verify the company’s credentials to guarantee they meet your project requirements.

At Brick & Bolt, we recognize the importance of selecting the right construction partner. Our dedication to excellence, technological innovation, and track record make us a dependable partner for your construction projects. Following these procedures and partnering with a reputed construction firm like ours will allow you to confidently set out on your construction journey, knowing that your vision is in capable hands.

Low-Cost House Construction Techniques and Tips | Brick&Bolt

0
Low-Cost House Construction

As we all know, everyone dreams of building their dream house. But the main issue they may face could be the budget. Low-cost house construction in India can become a practical and economical choice for individuals and families looking to become homeowners.  Hence, with the help of low-cost building materials and efficient planning, one can do low-cost building construction in India.

Low-cost house construction concepts focus on building structures using affordable home builders and readily available materials and employing efficient construction techniques to minimise costs. To enable low-cost house construction in India, one should know appropriate planning and efficient utilisation of resources. 

Methods for Low-Cost House Construction in India 

low cost House Construction

Low-cost House Construction Techniques in India: 

1. Choosing the Right Property:

Choosing the right property is one of the most important aspects of construction. Before selecting a plot, consider the place’s future development and worth. Determine the budget for both the land purchase and construction. Look for all the facilities, locations, and accessibility.

2. Choose Low-Cost Building Materials:

Half of the construction cost depends on the cost of building materials. So, using low-cost building materials like bamboo, compressed earth bricks, and fly ash hollow bricks with good quality will save money and keep your project within budget. Research and seek advice from vendors, compare the cost and the quality, and bring it to the finals.

Because of this, it’s beneficial for you to utilize Brick&Bolt’s exclusive cost estimator. You can also use the online house construction cost calculator to get a basic estimate for your construction cost.

3. Use Load-Bearing Structure:

One of the best ways to achieve low-cost house construction involves using load-bearing structures. A load-bearing structure transfers its weight through its walls and down a vertical path. The weight is distributed from the roof to the walls and the foundation. The load-bearing building structure is recommended for structures with up to two stories only. Through low-cost construction techniques, somebody can do construction quickly and cheaply. 

4. Choose an Experienced Contractor: 

Always try to hire an experienced contractor because they have in-depth technical knowledge and expertise in construction. They might charge a little higher than the freshers, but they can plan your budget and resources more efficiently and accurately, reducing the overall cost of your construction. 

Brick & Bolt, the best construction company, hires experienced construction partners to make your money and construction work safer. Before onboarding any construction partners, we will conduct a background check on their previous performance and problem-solving abilities.

Contractor

4. Pre-fabrication: 

Pre-fabrication, or prefab, is a construction technique in which building components are manufactured off-site and assembled on location.  It also offers more control over the design and quality of the finished product, as everything is built to precise measurements and can be easily customised. Using prefabricated building components such as precast concrete panels or steel frames. These modular elements can reduce construction time and labor costs. You can use prefabricated materials for making walls, floor slabs, roofs, doors and windows.

Low-Budget Housing Schemes in India: 

The Indian government has introduced in-expensive housing construction schemes for economically weaker sections. Most people in India dream of homes but need higher construction costs. As we all know, construction costs are getting higher, day by day, due to material costs and labor costs. The main aim of this scheme is to achieve the mission of “Housing for All “. To sort out the rising cost problems, the government has developed

7 low-cost affordable housing schemes in India.

Pradhan Mantri Awas Yojana (Urban)(PMAY):

The scheme seeks to build 2 crore houses for homeless people across India’s urban and rural populations by 2024. This scheme mainly targets poor and low-income people. This scheme will also favour minorities, including the transgender community and widows. The goal of Pradhan Mantri Awas Yojana is to assist urban residents in finding suitable housing with a lower interest rate than other home loans.

Pradhan Mantri Gramin Awas Yojana(PMGAY):

Pradhan Mantri Gramin Awas Yojana (PMGAY) is a housing initiative launched by the Government of India to provide rural houses to the poor. Eligible families will receive financial assistance of up to Rs. 1.2 lakh for the construction of a housing unit. The scheme also provides subsidies on loans to construct or purchase a house. The scheme’s objective is to provide decent and affordable housing in India to rural people and help uplift this important section of society.

Rajiv Awas Yojana(RAY):

Rajiv Awas Yojana was launched in2009 under the Ministry of Housing and Urban Property Alleviation. This scheme offers slum residents legal alternatives to eradicate slums. The main objective of this scheme is to make the city slum-free and prepare projects for slum development.

Delhi Development Authority Housing Scheme:

The Delhi Development Authority (DDA) Housing Scheme is a government initiative to provide affordable housing to residents of the National Capital Territory of Delhi (NCT). The scheme offers a variety of housing options, including flats and group housing units, at subsidised prices to eligible applicants. Applicants must meet certain income and household size requirements to qualify for the scheme. Interested applicants can apply for the scheme through an online portal and must undergo a background check and verification process. The DDA housing scheme is an important initiative to address the housing shortage and improve living conditions in the NCT.  

Tamil Nadu Housing Board Schemes:

This scheme aims to provide housing mainly to Tamilnadu residents. It is also an affordable housing project for low and middle-income groups. Some of the criteria for this scheme are: The applicant should be a resident of Tamilnadu, and the person who has applied for this scheme should not apply under any housing scheme in India. Mainly, the applicant should be salaried.

Maharashtra Housing and Area Development Authority Lottery Scheme:

This scheme ultimately involves the distribution of a lottery scheme to make residential properties accessible. Hence,  this scheme is also referred to as a lottery scheme. The criteria for this scheme are as follows: The candidate should be from Maharashtra. The person applying for this scheme should possess an individual salary with a PAN card. Based on your salary range, you can use it for a flat price.

NTR Housing Scheme:

This scheme was launched in2016 by the Government of Andhra Pradesh to help the people in rural-urban areas of Andhra Pradesh. The criteria for this scheme are as follows: The applicant should be a resident of Andhra Pradesh. A person with a BPL card below the poverty line can apply for this scheme. The people using this scheme should not own property under any other housing scheme in India.

Mainly,low-cost housing construction in India allows every person to own their home with budget-friendly and good-quality materials in less time. Low-cost house construction has significantly impacted people’s ability to build their dream homes. But for a low-cost housing construction concept, one should know about the construction methods, plans to give the money in safer hands, suitable quality materials, necessary combination skills, and modern technology.

Retirement Home Construction in India for NRIs

0
NRI-Home-Construction

A person who was born in India but now resides overseas is known as a Non-Resident Indian (NRI). But as the years pass and retirement hits, everyone wants to enjoy a comfortable retirement in their exclusive space in their home country. This brings them to retirement home construction in India. India has a great real estate market and lots of scope to construct retirement homes with modern amenities, making it the perfect solution for NRIs to spend their retirement time. 

Similar to any other house construction or purchase, senior living projects in India for NRIs follow a step-by-step approach. So, Prepare your needs and choose the retirement house construction company in India, like Brick & Bolt, to bring your luxurious retirement homes to reality because developing the perfect-looking retirement that you have always desired is made simple by top building firms in India like as Brick & Bolt. 

Here, we will discuss the importance of NRI retirement home investment in India and the steps you can take to acquire retirement homes. 

Why Should NRIs Invest in Retirement Homes in India?

  1. Cultural and Emotional Ties

Most NRIs consider their strong emotional tie with the country’s soil a good reason for assisted living facilities for NRIs in India. They want to return to enjoy the local traditions, cultures, festivals, languages, and cuisine to get the most out of retirement. 

  1. Aspects of the Economy

Living costs in India are generally lower than in many Western countries. As a result, India offers many benefits to NRIs who want to make the most of their retirement savings. Fixed-income families can afford housing, health care, and daily expenses, improving their quality of life.

There’s no doubt that Indian real estate experiences robust growth, which makes it an attractive investment for Retirement villas for NRIs in India. Property values can increase significantly over time, resulting in significant returns. Aside from that, the Indian rental market is lucrative, allowing you to make money regardless of whether the property is occupied.

  1. Optimal Exchange Rates

Currency exchange rates also play a turning point for NRIs buying retirement homes in India. During retirement, you do not earn anything but utilize your savings effectively, so you want to take a cost-effective approach. However, foreign currencies like the US Dollar and Euro have significant buying power against the Indian Rupee, which can significantly reduce the property’s end cost in comparison with the Indian rupee. With this favourable exchange rate, NRIs can purchase homes in India with greater luxury.

  1. Great Retirement Communities

Indians have developed many high-quality retirement communities to meet their needs. These communities often provide health facilities, recreational areas, security services, and social activities, which contribute to their comfort and enjoyment. The communities are built to international standards and blend traditional Indian hospitality with modern conveniences.

  1. Legal and Regulatory Framework

The Indian government has made efforts to make property purchases easier for NRIs. Regulatory frameworks have been established to protect NRIs’ interests, enhancing their safety when investing in real estate. NRIs can also benefit from specialized services provided by developers, including legal assistance and property management.

Home Construction for NRIs

Constructing Retirement Homes for NRI in India: Essential Steps to Follow

NRIs looking for retirement housing options in India need to undergo a detailed process to ensure that they end up getting the perfect retirement home. Here are easy steps to construct homes in India.

Prioritise Your Retirement Home Requirements

When you are ready to spend your retirement in India with your family and friends, setting your priorities for home is essential. This means choosing your favourite location, amenities and types of property to spend your retirement the way you have always wanted. Here are three important elements that allow you to meet your home retirement home requirements:

Location

Location is the most important part to consider while constructing retirement homes in India for NRIs. During your retirement, you always want to have a peaceful location near a soothing view or long beach where the soothing sound of birds chirping makes your day. From climate, easy accessibility, modern amenities, nearby essential facilities like hospitals, grocery markets, transportation and so on is the perfect location to construct luxury retirement homes for NRIs in India where you can enjoy your happy time with your loved ones. 

Besides that, consider whether you are comfortable spending retirement in an urban area, a rural area, or somewhere in the middle. 

Type of Property

When you are in retirement, you want to enjoy everything with your favourite type of property where you find comfort all along. Therefore, you must choose your property type while constructing the home that meets all your lifestyle and needs. Various options are available, from independent homes, townhomes, or villas, each serving NRI retirement needs and lifestyle. 

When it comes to independent houses, you often enjoy greater privacy and space than in apartments, where you find high-end security and communal amenities. There are usually amenities that cater to retirees in retirement communities, including health care, recreation, and social services.

Modern Amenities

Set your priorities for amenities when you look forward to enjoying your retirement in your custom retirement homes in India. Some of the promising amenities to consider include on-site healthcare, round the clock security, maintenance services, swimming pools, and fitness centers. These must-have modern amenities in your retirement homes to get access to all those facilities that contribute to a comfortable stay. 

Plan Your Budget

Setting your budget is important to get an idea of what it will take to construct retirement homes in India. While setting your budget, make sure to keep a certain amount ready for additional expenses to give your home a more modern look. Various cost considerations go into constructing retirement homes, including registration fees, stamp duty, legal fees, and other fees. 

If you are short on budget, you can access a wide range of financing options to meet your home requirements. NRIs can obtain home loans customized to their needs through many Indian banks. 

Reach Out to Real Estate Developers

Take your move towards choosing retirement home developers or construction companies like Brick & Bolt to share your retirement home construction requirements. Rather than shortlisting properties from the online portal it is ideal to construct it from a reliable construction company.

While you construct your retirement house from reputable real estate developers like Brick & Bolt, they will follow high end quality standard to bring your dream retirement home to reality.

Whether you need a modular kitchen with a cutting-edge interior or anything that suits your lifestyle, the construction company can meet all your retirement home requirements.

Construction Site Visits

Plan a visit to India to personally inspect the properties before construction begins. Ensure the property’s construction quality, amenities, and general condition are good. It is always a great take to get the house developed under your eyes so that you can make the additions or improve as per your expectations.

While you are debating on the construction do not forget to consider the security, cleanliness, and the general ambiance in the surrounding areas. Ensure access to essential services, including supermarkets, hospitals, and public transportation, is readily available. An enjoyable retirement should be fostered by a peaceful environment.

Arrange Financing

Several companies have entered the market to provide various financing options for home buyers. A home loan is the perfect way to arrange immediate financing to purchase your retirement home and enjoy a comfortable retirement.

NRIs can apply for home loans from banks and financial institutions that offer them. They must provide proof of income, employment, identity, and residence abroad. The bank will assess their eligibility based on their repayment capabilities and submitted documents.

After your loan application is approved, you will receive the loan amount from the bank, as discussed in the terms and agreement from the bank. 

Complete Payment

The final payment should be made to the real estate developers in accordance with the contract. Obtain receipts for all payments and keep records of all financial transactions. In addition, there may be other charges that have been agreed upon.

Make sure you pay any additional fees, such as stamp duty and registration fees. Legal transfer costs are essential to completing the transfer of ownership and should be included in your budget. Avoid delays by making all payments within the stipulated deadlines.

Conclusion

Many NRIs dream of retirement homes in India, but there is much debate about how to construct a comfortable retirement home. This is where Brick & Bolt, the top construction company in India, enters the play to end the hassle of constructing retirement homes that exceed all expectations. 

We have a team of leading developers who construct your retirement home that complements your best location and promising amenities, giving you the most promising retirement days. 

To develop retirement homes in India for NRIs, remember the name Brick & Bolt to guide your ideas.

Exploring Reinforced Cement Concrete: Uses, Advantages & Disadvantages

0

The most widely used material in construction is concrete. It’s a mixer of cement, sand, aggregate, water and sometimes admixtures. It’s the most essential building material used in all types of construction projects, including homes, high-rise buildings, roads, dams, bridges, etc. Concrete can be moulded into a variety of shapes with the right formwork and is also available in many different types. But, reinforced cement concrete is the most popular type among all types of concrete.

Reinforced cement concrete (RCC) is an extensively used and adaptable building material that combines the flexibility and tensile strength of steel reinforcement with the strength of concrete. It has completely changed the way we construct buildings by providing a dependable and long-lasting solution for a variety of uses. 

So, in this blog, Brick & Bolt provide a detailed guide on reinforced cement concrete, including what it is, types of reinforcement used in RCC, factors its uses, advantages and disadvantages, and the factors to consider before using rcc.

What is Reinforced Cement Concrete -RCC?

Reinforced cement concrete is made by combining concrete and steel bars, or reinforcement bars, the importance of reinforced cement concrete is RCC simultaneously support the tensile and compressive strength of the structure. Plain concrete cement is very strong in compression but weak in tension and has a low resistance to tension. Steel, on the other hand, is equally strong in both compression and tension, which is why plain concrete can only be used where the structural component is in pure compression. Therefore, steel and concrete work incredibly well together and are used to absorb all stresses. 

Types of Reinforcement Used in RCC:

The following types of reinforcement are used to make reinforced cement concrete

1. Mild Steel Bars

Mild steel bars are generally bent easily without breaking at the bends. They are available in different diameters, but you have to check if they meet the requirements of the applicable codes regarding characteristic strength in tension.

2. Hot Rolled Bars

Hot rolled bars are specially prepared reinforcements. Compared to mild steel bars, their tension strength is nearly twice as high and is commonly available in thick sections. They can be bent without developing any defects when heated to up to 100°C, but using regular mild steel bars is not achievable.

3. Cold-Worked Bars

The cold-worked steel bars are formed into twisted or stretched shapes with long ribs or other structures running the length of them. Additionally, their characteristic strength is significantly higher than mild steel bars’, at approximately 425 N/mm2 instead of 250 N/mm2. These bars might not be heated in order to bend and re-bend.

4. Steel Fabric

Steel fabrics are made with different types of bars and wires such as indented and deformed wires, plain round wires, and deformed steel bars of cold-worked bars etc. These wires are made into mesh by carefully and strictly welding straightened lengths together in compliance with the specifications. If proper care should be not taken, there could be a negative impact on the mechanical characteristics of the reinforcement.

Uses of Reinforced Cement Concrete

Reinforced Cement Concrete

RCC is the most practical and affordable material for various building applications, such as:

  • Buildings
  • Bridges
  • Roads
  • Water Tanks
  • Flyovers
  • Floating Structures
  • Foundations
  • Marine Structures
  • Precast Works
  • Bunkers and Silos
  • Chimneys and Towers
  • Pipes and Conduits
  • Retaining Walls

Advantages of Reinforced Cement Concrete

The following are the advantages of reinforced cement concrete.

1. Strength

It is among the best building materials because of its excellent tension and compression strengths.

2. Durability

The RCC structures are long-lasting and durable. It can endure for up to 100 years and is not impacted by snow or rainfall. Because RCC has a low permeability, it can withstand substances like carbon dioxide, sulfates, and chlorides that dissolve in water without having significant deterioration.

3. Ductility

The reinforcement bar gives the ductility to the reinforced concrete structures. When reinforced concrete is overloaded, its ductility appears as distress in the form of cracks and deflection. This gives the engineers the opportunity to think of ways to prevent concrete damage to it.

4. Versatility

At the construction site, the concrete can be shaped into the desired shapes, forms, surfaces, textures, and sizes using shuttering or formwork configuration. When concrete is made, it is liquid, which makes it more suited for a variety of architectural needs.

5. Cost-Effective

The components of RCC are inexpensive and widely accessible worldwide. The cost of production is also extremely low. It is extensively utilized because reinforced concrete lasts a long time and requires less maintenance. In addition to being resilient and long-lasting, reinforced concrete uses less energy, resulting low operating costs of the structure.

6. Fire Resistance

No fire or burn occurs in the RCC. It can resist heat for a duration of two to six hours. Compared to other construction materials like steel and wood, reinforced concrete buildings have a higher fire resistance. 

Disadvantages of Reinforced Cement Concrete

The following are the disadvantages of reinforced cement concrete:

  • RCC structures are normally heavier than those made of steel, wood, or glass.
  • Generally, RCC buildings require a lot of labour and site or workspace to fix because they require massive formwork, centring, and shuttering.
  • It takes time for RCC to reach its maximum strength. Thus, it cannot be use right away after construction. 
  • Mixing, casting, and curing are the three primary steps to make reinforced concrete which all influence its ultimate strength.
  • When compared to other methods, the forms needed for casting RCC are expensive.
  • Strength loss and the formation of cracks are caused by shrinkage.

Factors To Consider Before Using RCC

To ensure the required quality, suitability, and cost-effectiveness, you should take these factors into account before using reinforced cement concrete for a construction project.

1. Requirement of Strength

Determine your requirement for the strength of the concrete according to the the intended use of the structure and design specifications. Take into account variables like structural stability, environmental conditions, and load-bearing capacity.

2. Quality Standards

Make sure the reinforced cement concrete fulfils all necessary quality standards and requirements. Hence, you have to verify that the manufacturer or supplier complies with strict quality control standards and holds the necessary certifications. By doing this, you can make sure that the concrete meets the required performance, strength, and durability requirements, guaranteeing a dependable and superior building material.

3. Mix Design

Understand the design of the concrete mix, including the amounts of water, admixtures, cement, sand and aggregates. Check whether the concrete mix design complies with the needs and specifications of your project. Think about the important factors like desired strength, workability, and setting time.

4. Source of Materials

Examine the source and quality of the major ingredients like aggregates, reinforcement, and cement which are used in making reinforced cement concrete. To increase the overall quality of the concrete, make sure you get these materials from reliable suppliers and that they meet all relevant quality standards.

Conclusion

In conclusion, this comprehensive guide to reinforced cement concrete (RCC) offers an in-depth understanding of its benefits, uses, disadvantages, and the factors to be considered before use. Because of its strength, durability, and versatility, reinforced cement concrete is frequently used by construction professionals in a variety of structures and projects. In contrast, They can ensure the long-term durability, structural integrity, and overall success of construction projects by putting best practices in reinforced cement concrete construction into practice.

Polymer Concrete: Types, Uses, Advantages and Disadvantages

0
Polymer-Concrete

Concrete has been an essential building material due to its versatility and durability for decades. It’s a mixture of cement, sand, aggregate, water and admixtures. Concrete is widely used in the variety of constructio including residential buildings, commercial building, industrial buildings and more. As per your requirement, you can use the different types of concrete such as reinforced concrete, plain cement concrete, polymer concrete, etc. according to their properties and usage. 

Sounds interesting!

So, Brick & Bolt presents a detailed guide on the polymer concrete, it’s one of the most beneficial types of concrete. This guide will serve all the details including what polymer concrete is, the types of polymers used in it, types of polymer concrete, its applications, properties, advantages and disadvantages.

What is Polymer Concrete?

Concrete that uses polymer as a binder instead of cement is known as polymer concrete. Sometimes, the polymer is combined with Portland cement to create Polymer-Modified Concrete (PMC), Polymer Cement Concrete (PCC) and Polymer Impregnated Concrete (PIC). 

Depending on the composition, polymer concrete composites have unique characteristics, including high tensile, flexural, and compressive strengths; long-lasting durability regarding freezing and thawing action; good adhesion to most surfaces; good chemical resistance; low permeability to water; and lightweight. They also cure quickly at ambient temperatures between –18 and +40°C (0 and 104°F).

Types of Polymer Materials Used in Polymer-Modified Concrete

The following resins are used to make polymer-modified concrete:

  • Unsaturated Polyester Resin
  • Epoxy Resins
  • Methanol
  • Vinyl Acetate-Ethylene (VAE)
  • Furan Resins
  • Styrene-Butadiene Resin (SBR)
  • Styrene and Polyester Styrene
  • Methyl Methacrylate MMA
  • Polyvinyl Acetate (PVA)
  • Acrylics and Styrene-Acrylics
  • Poly Urethane Resins (PUR), etc.

Types of Polymer Concrete

Types of Polymer Concrete
  1. Polymer Concrete (PC)
  2. Polymer Impregnated Concrete(PIC)
  3. Polymer Cement Concrete(PCC)

Let’s dive deeper into all types-

1. Polymer Concrete (PC)

In polymer concrete, aggregates are bound with a polymer binder instead of cement, as in traditional concrete. In order to reduce the amount of polymer required to bind the aggregates, the primary method in Polymer Concrete is to decrease the void volume in the aggregate mass. To achieve the highest density and lowest void volume, the aggregates must be appropriately graded and mixed. To make the polymer concrete, you need to take graded aggregates in a mould, and then the monomer is spread through the aggregates to start the polymerization by using radiation or a chemical process. In addition, a silane coupling agent is mixed with the monomer to enhance the bond strength between the aggregates and the polymer.

2. Polymer Impregnated Concrete (PIC)

The most common type of polymer composite is polymer-impregnated concrete. The concrete is precast and conventional, and it is dried and cured in an oven or by dielectric heating. The air in the open cell is then drawn out using a vacuum. Afterwards, a monomer with low viscosity is spread throughout the exposed cell and polymerised through the application of heat, radiation, or chemical initiator.

3. Polymer Cement Concrete (PCC)

Cement, aggregates, water, and monomers are combined to create polymer cement concrete. After that, the mixture is cured, dried, and polymerized in moulds. Polyester-styrene, epoxy-styrene, furans, vinylidene chloride, and other monomers are utilized in PCC.

Uses of Polymer Concrete

Polymer concrete is utilised in specialised construction projects where resistance to multiple forms of corrosion and long-term durability are required. It can be applied in the same way as regular concrete. Polymer concrete is most suitable for the construction works like-

  • Repair to corrosion-damaged concrete,
  • Marine works,
  • Prestressed concrete,
  • Electrical or industrial construction,
  • Road construction,
  • Nuclear power plant construction,
  • Irrigation works,
  • Waterproofing of structures,
  • Sewage works and desalination plants,
  • Prefabricated structural components like manholes, acid tanks, drains, highway median barriers, etc.

Properties of Polymer Concrete

1. Strength 

Compared to cement concrete, it has superior tensile, flexural, and compressive strengths, as well as good abrasion resistance.

2. Durability

Minimizing the infiltration of salts and chlorides provides good long-term durability to concrete against chemical attack and freezing and thawing cycles.

3. Rapid Curing

The effect of curing is quick at room temperature (–18 to +40°C). While conventional concrete only gains 20% of its 28-day strength in a single day of curing at room temperature, polymer concrete develops 70% of its strength after just one day.

4. Good Adhesion

Polymer concrete has good adhesion to the old surface, enhancing the bond strength of most surfaces.

5. Low Permeability and Lightweight

It has a low water permeability and makes lightweight concrete.

Advantages of Polymer Concrete

Polymer Concrete

The following are the advantages of polymer concrete:

  • Polymer concrete offers excellent resistance to both corrosion and chemical reactivity.
  • Applying polymer concrete in extremely thin cross-sections is possible.
  • Polymer binders are helpful for repairing old structures because they set quickly and provide resistance to the weathering effect.
  • It decreases the shrinkage.
  • It decreases carbon dioxide intrusion, protecting concrete from carbonation and resulting in a decrease in alkalinity.

Disadvantages of Polymer Concrete

The following are the advantages of polymer concrete:

  • Skilled labour is required to mix the polymer concrete.
  • Compared to conventional concrete, polymer concrete is much more costly.
  • It is crucial to wear masks and hand gloves to protect your skin from the potentially hazardous chemicals and resins used in polymer concrete.
  • It is necessary to design the mix properly because it is possible for two-component materials to be improperly proportioned.

Conclusion

On a final note, polymer concrete offers a remarkable range of benefits and uses since the polymer is used as a binder rather than traditional cement. It is useful for a variety of construction projects, including corrosion repair, marine construction, and electrical infrastructure, due to its exceptional strength, durability, and resistance to corrosion. Polymer concrete is a valuable building material in modern construction because of its adhesion properties, quick curing time, and reduced permeability. These properties make it more expensive and labour-intensive, but it also provides innovative solutions for improving structural integrity and longevity.

Image Source: Image 1 & 2- Gharpedia