Home Blog Page 81

Smart Switches for Home Automation

0
Smart Switches for Home Automation- featured image

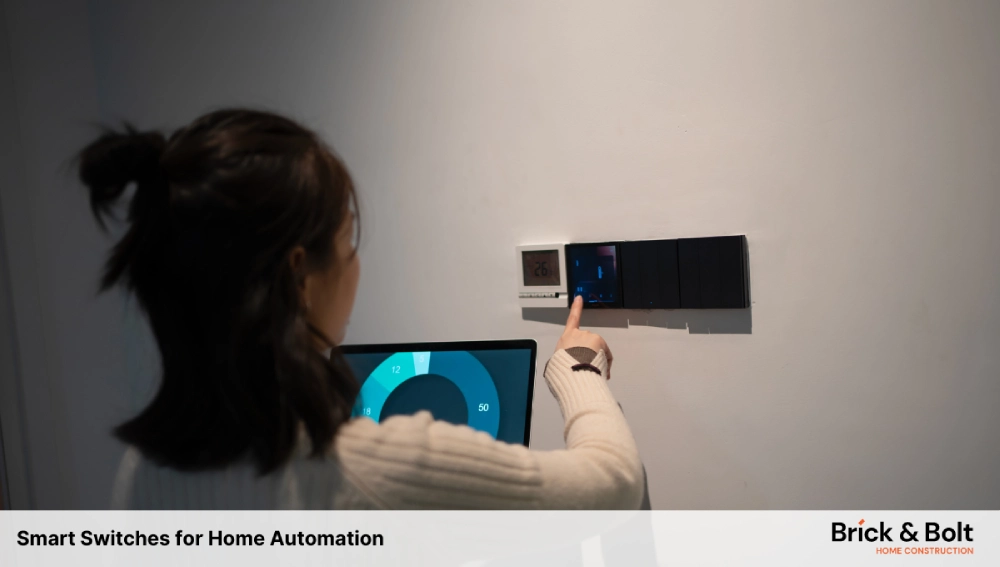
Home automation is becoming popular in recent years as people seek convenience, and security in their houses. In that way, smart switches are essential for smart homes which change the way we control lighting, appliances, and other electrical devices.

Unlike traditional switches, smart switches provide advanced features like Alexa, Google Assistant, and Siri, whether you want to turn off the lights without getting out of bed or create an ambiance that welcomes you when you arrive home. In this blog, let’s look into Top 10 categories of Smart Switches used widely by homeowners and businesses.

Top 10 Smart Switches for Home Automation

1. TP-Link Kasa Smart Wi-Fi Light Switch (HS220)

Features:

  • It has a remote control facility via the Kasa App.
  • It has voice control with Alexa and Google Assistant.
  • Easy to Install.
  • Widely known for its Sleek design

Specifications:

  • Power Consumption <1W standby power
  • Voltage is up to 100-120V
  • It uses Wi-Fi for connection
  • Rating: 4.7/5

Advantages:

  • It is convenient to control from anywhere
  • Hands-free operation are available with voice commands
  • Quick and simple setup process
  • Modern and stylish design which suits today’s generation.

Disadvantages:

  • It requires a neutral wire for installation.
  • Wi-Fi connectivity may be inconsistent where users might face hassle in automations.

Installation Tips:

  • Check if there is a neutral wire in the switch box.
  • Turn off the power at the circuit breaker before installation.
  • Follow the step-by-step instructions in the Kasa app for a smooth installation.

When it comes to Power Consumption, it can standby less than 1 watt, making it energy-efficient.

2. Mercusuar Wi-Fi Smart Switch (MS100)

Features:

  • You can control your devices from anywhere with the Mercusuar app
  • Create schedules to turn devices on and off automatically 
  • Works with Amazon Alexa and Google Assistant for voice control.
  • Monitor power consumption, To track the energy usage of your devices
  • Easy Installation

Specifications:

  • Power consumption <0.5W standby power
  • Voltage 110-240V
  • It connects using Wi-Fi.
  • Rating: 4.5/5

Advantages:

  • Flexible control options
  • Automated lighting schedules for convenience
  • Durable and stylish tempered glass panel
  • Straightforward installation process

Disadvantages:

  • May require a strong Wi-Fi signal for optimal performance
  • Limited compatibility with some older devices

Installation Tips:

  • Check if there is a neutral wire in the switch box.
  • Use the provided installation guide for step-by-step instructions.
  • Connect the switch to your Wi-Fi network and set up using the app.

Power Consumption:

  • Standby power consumption is less than 0.5 watts.

3. Philips Hue Smart Switch

Features:

  • Control Philips Hue Smart Lights
  • Turn Lights On/Off
  • Dim Lights
  • Set Light Scenes
  • Integration with Hue Bridge and App

Specifications:

  • Power Consumption: Minimal as it mainly acts as a controller
  • Connectivity: Zigbee (requires Hue Bridge)
  • Rating: 4.8/5

Advantages:

  • Seamless integration with Philips Hue lighting system
  • Simple on/off and dimming controls
  • Ability to create and recall custom lighting scenes
  • Convenient control through the Hue app

Disadvantages:

  • Requires Hue Bridge for full functionality
  • Limited to Philips Hue products

Installation Tips:

  • Ensure you have a Hue Bridge set up.
  • Pair the switch with your Hue system via the app.
  • Place the switch in a convenient location for easy access.

Power Consumption:

  • Minimal, as it functions as a low-power controller.

4. Legrand Smartify Wi-Fi & Bluetooth Switch

Features:

  • Remote Control – Control lights from anywhere by using the app.
  • Scheduling – Set automatic on/off times for lights simulating occupancy.
  • Voice Control via Alexa and Google Assistant
  • Sleek Glass Panel
  • Compatibility with Legrand’s Eliot IoT Program 

Specifications:

  • Power Consumption: <1W standby power
  • Voltage: 110-240V
  • Connectivity: Wi-Fi, Bluetooth
  • Rating: 4.6/5

Advantages:

  • Flexible control options
  • Automated lighting schedules
  • Elegant glass panel design
  • Integration with Legrand’s smart home ecosystem

Disadvantages:

  • Requires neutral wire for installation
  • Slightly more expensive than basic switches

Installation Tips:

  • Check if there is a neutral wire in the switch box.
  • Follow the installation instructions provided by Legrand.
  • Connect the switch to your Wi-Fi network and pair with the app.

Power Consumption:

  • Standby power consumption is less than 1 watt.

5. Havells Crabtree Crabex Smart Wi-Fi & Bluetooth Switch

Features:

  • Remote Control – Control lights from anywhere by using the app.
  • Scheduling
  • Voice Control with Alexa and Google Assistant
  • Tempered Glass Panel – It gives a stylish and durable finish to your wall.
  • Easy Installation – Setting up is quick and easy for a smooth experience.

Specifications:

  • Power Consumption: <1W standby power
  • Voltage: 110-240V
  • Connectivity: Wi-Fi, Bluetooth
  • Rating: 4.5/5

Advantages:

  • Convenient remote access
  • Automated lighting schedules
  • Durable tempered glass panel
  • Simple installation process

Disadvantages:

  • Requires neutral wire for installation
  • Limited to Bluetooth and Wi-Fi connectivity

Installation Tips:

  • Check if there is a neutral wire in the switch box.
  • Turn off the power at the circuit breaker before installation.
  • Follow the step-by-step instructions provided in the user manual.

Power Consumption:

  • Standby power consumption is less than 1 watt.
Smart Switches for Home Automation

6. Digitech DZ Smart Wi-Fi & Bluetooth Switch

Features:

  • Remote Control -Control lights from anywhere by using the app.
  • Scheduling – Set schedules for your lights to automate on/off functions.
  • Voice Control through Alexa and Google Assistant
  • Tempered Glass Panel
  • Compatibility with Digitech DZ Home App – It works with the Digitech DZ system to control your smart home using the app.

Specifications:

  • Power Consumption: <0.5W standby power
  • Voltage: 110-240V
  • Connectivity: Wi-Fi, Bluetooth
  • Rating: 4.4/5

Advantages:

  • Flexible control options
  • Automated lighting schedules
  • Durable tempered glass panel
  • Integration with Digitech’s smart home app

Disadvantages:

  • Requires a stable Wi-Fi connection
  • Limited compatibility with non-Digitech devices

Installation Tips:

  • Check if there is a neutral wire in the switch box.
  • Follow the installation instructions in the user manual.
  • Connect the switch to your Wi-Fi network and configure it using the Digitech app.

Power Consumption:

  • Standby power consumption is less than 0.5 watts.

7. Amazon Echo Plus (2nd Gen)

Features:

  • Smart Speaker – Plays music, answers questions, and controls smart home devices with your voice.
  • Built-In Zigbee Smart Home Hub – Connects directly to Zigbee-compatible smart home devices without a separate hub.
  • Control Compatible Smart Home Devices.

Specifications:

  • Power Consumption: ~3W in standby mode
  • Connectivity: Wi-Fi, Bluetooth, Zigbee
  • Rating: 4.7/5

Advantages:

  • Versatile smart speaker with voice control
  • Integrated Zigbee hub simplifies smart home setup
  • Ability to control various compatible devices

Disadvantages:

  • Higher power consumption compared to basic switches
  • Requires a stable internet connection

Installation Tips:

  • Plug in the Echo Plus and connect it to your Wi-Fi network.
  • Follow the setup instructions in the Alexa app.
  • Pair your smart devices with the Echo Plus using voice commands.

Power Consumption:

  • Standby power consumption is approximately 3 watts.

8. Honeywell Home Smart Room Controller

Features:

  • Manage temperature, humidity, and ventilation levels in your home from anywhere.
  • Control and monitor your comfort settings through the Honeywell Home app.
  • Voice Control with Alexa

Specifications:

  • Power Consumption: ~2W in standby mode
  • Connectivity: Wi-Fi
  • Rating: 4.6/5

Advantages:

  • Convenient remote control of HVAC settings
  • Compatibility with Honeywell Home app for easy management
  • Voice commands for hands-free operation

Disadvantages:

  • Limited to Honeywell systems
  • Requires a stable Wi-Fi connection

Installation Tips:

  • Install the controller according to the provided instructions.
  • Connect it to your Wi-Fi network.
  • Use the Honeywell Home app to configure and manage settings.

Power Consumption:

  • Standby power consumption is approximately 2 watts.

9. Leviton Decora Smart Wi-Fi Dimmer Switch

Features:

  • Remote Control – Control lights from anywhere by using the app.
  • Scheduling
  • Voice Control through Alexa and Google Assistant
  • Sleek Design – Looks like your other switches for a nice, matching look.
  • Compatibility with Leviton Decora Smart App

Specifications:

  • Power Consumption: <1W standby power
  • Voltage: 120V
  • Connectivity: Wi-Fi
  • Rating: 4.5/5

Advantages:

  • Flexible control options
  • Automated lighting schedules
  • Elegant Decora design
  • Integration with Leviton’s smart home app

Disadvantages:

  • Requires neutral wire for installation
  • Limited to Wi-Fi connectivity

Installation Tips:

  • Check if there is a neutral wire in the switch box.
  • Follow the step-by-step installation guide provided by Leviton.
  • Connect the switch to your Wi-Fi network and set up using the Decora app.

Power Consumption:

  • Standby power consumption is less than 1 watt.

10. Brilliant Control Panel Switch

Features:

  • All-in-One Smart Home Controller – Put in a new switch to control lights, cameras, music, and more from one place.
  • Touchscreen Display
  • Integration with Alexa, Google Assistant, and Various Smart Home Platforms.

Specifications:

  • Power Consumption: ~4W in standby mode
  • Connectivity: Wi-Fi, Bluetooth
  • Rating: 4.8/5

Advantages:

  • Centralized control for multiple smart home devices
  • Intuitive touchscreen interface
  • Compatibility with a wide range of smart home platforms

Disadvantages:

  • Higher power consumption compared to basic switches
  • More expensive than other smart switches

Installation Tips:

  • Follow the detailed installation instructions provided by Brilliant.
  • Connect the control panel to your Wi-Fi network

Conclusion

During the selection of a smart switch, the above consideration is a must to check the device compatibility. These Smart Switches fit in all different kinds of houses modern to traditional homes Instead of looking at the Normal Electrical points and switches, checking the detailed specifications, advantages, and disadvantages can help you to make a decision that will suit your home automation goals.

Designing the Perfect Wardrobe: Essential Tips and Dimensions for Optimal Storage

0
Wardrobe_Storage

The internal planning of a wardrobe revolves around a combination of hanging closets, drawers, and shelves, which are used for keeping clothes, accessories, jewelry, shoes, and more. A well-organized internal wardrobe layout is crucial for ensuring a clutter-free look and making efficient use of every inch of space. Before ordering a new wardrobe, it is essential to make a list of your requirements, including the number of drawers and shelves and the amount of space needed for hanging clothes, so that they can be incorporated into the design.

Here are the key dimensions and tips that will help you create the perfect wardrobe for your needs.

Hinged Wardrobe

Hinged wardrobes have front doors fixed with simple hinges and are one of the most traditional wardrobe designs.

Key Dimensions:

  • Depth: The standard depth of a hinged wardrobe is 24 inches. If your room is short on space, you can opt for a depth of 22 inches; however, this depth is not ideal for hanging clothes.
  • Height: The height of the wardrobe should either match the lintel level of the doors, usually 84 inches, or you can create a full-height wardrobe by using the space from the floor to the ceiling.
  • Width of Door Panels: The door panel of a single-door or double-door wardrobe should not exceed 24 inches in width to avoid putting too much load on the hinges.

Hinged wardrobes are versatile and can be customized with various internal layouts to suit different storage needs. They provide easy access to all sections of the wardrobe simultaneously, which is a significant advantage over sliding wardrobes.

Sliding Wardrobe

Sliding wardrobes are a modern and space-saving alternative to hinged wardrobes. They comprise front panels that slide on tracks, which makes them ideal for small rooms where space is a premium.

Key Dimensions:

  • Depth: The depth of a sliding-door wardrobe should be 26 inches, which includes a running track of about 2 inches to allow free movement of the sliding panels and prevent clothes from getting stuck.
  • Minimum Length: The minimum length (left to right) of a sliding-door wardrobe should be at least 7 feet to accommodate two door panels of 3.5 feet each. This allows you to access each of the 3.5-foot-wide openings of the wardrobe one at a time.
  • Width of Panels: The width of each panel of a sliding wardrobe should not exceed 4 feet to ensure the panels are not too heavy and can slide easily.

Sliding wardrobes offer a sleek, contemporary look and are particularly useful in rooms with limited space and loft space. They can be customized with a variety of internal configurations, including shelves, drawers, and hanging rails.

Men’s Wardrobe

A men’s wardrobe should be designed with specific storage requirements in mind, such as hanging rails for shirts and coats, and ample drawer space for accessories and smaller items.

Key Dimensions:

  • Hanging Rails: Introduce two hanging rails for shirts by dividing the wardrobe vertically into two equal sections, each with a minimum height of 40 inches. Ensure there is a minimum space of 3 inches between the rail and the top of the wardrobe for easy removal and replacement of hangers.
  • Depth for Coats: A wardrobe dedicated to coats should have a depth of 28-30 inches to accommodate the wider sleeves of coats without them getting stuck in the door panels.

In addition to hanging space, consider including drawers of varying depths for items such as ties, belts, and other accessories.

Wardrobe Storage

Women’s Wardrobe

Women’s wardrobes typically need more vertical space for hanging long dresses, gowns, and sarees, as well as shelves for folded clothes and accessories.

Key Dimensions:

  • Hanging Long Clothes: For hanging long dresses and gowns, the vertical clearance should be 66-72 inches, adjusted according to individual height and requirements.
  • Hanging Shorter Clothes: For hanging sarees or formal shirts, a height of 40 inches is sufficient.
  • Shelves: Introduce open shelves for keeping folded clothes, with a clearance of at least 12-15 inches between each shelf.

Including a mix of drawers and shelves can help keep accessories, jewelry, and other items organized and easily accessible.

Child’s Wardrobe

Children’s wardrobes require careful planning to accommodate their specific needs, such as lower hanging rails and drawers for toys and accessories.

Key Dimensions:

  • Hanging Rails: Divide the vertical length of the wardrobe into three sections of about 28 inches each, which is ideal for hanging clothes for kids and toddlers.
  • Drawers: Include drawers ranging from 6 to 15 inches in depth to accommodate accessories, books, and toys.
  • Shelves: Opt for open shelves spaced 12 inches apart for shoes, folded clothes, and towels.

A well-organized child’s wardrobe can help instill good habits and make it easier for children to find and put away their clothes and belongings.

Walk-in Closet

A walk-in closet offers ample space and flexibility for organizing clothes, shoes, and accessories. Proper planning is essential to make the most of this luxury space.

Key Dimensions:

  • Clearance: If there are wardrobes on both (opposite) sides of the closet, maintain a clearance of about 54-60 inches between the facing wardrobes to ensure enough space to pass by even if one wardrobe door is open. If there is a wardrobe only on one side of the wall, ensure a clearance of at least 3 feet in front of the wardrobe.
  • Sliding Panels: For narrow walk-in closets, consider using sliding panel wardrobes as a space-saving solution.

Walk-in closets can be customized with a variety of storage solutions, including shelves, drawers, and hanging rails, to create an organized and luxurious dressing area.

Wardrobe Drawers

Drawers are a vital component of any wardrobe, providing easy access to smaller items and keeping the wardrobe neat and organized.

Key Dimensions:

  • Multi-purpose Drawers: The common depth for multi-purpose drawers is around 8 inches, suitable for storing clothes, accessories, and other items.
  • Accessory Drawers: For accessories such as belts, ties, and jewelry, consider drawers with a depth of 4-6 inches.

Including a variety of drawer depths ensures that all items can be stored efficiently and accessed easily.

Shoe Shelves

Shoe shelves are an essential part of a well-organized wardrobe, ensuring that shoes are easily accessible and neatly stored.

Key Dimensions:

  • Height: Allow a height of 6-7 inches for each shoe shelf, enough for high-heeled sandals, flat shoes, and running shoes. For storing long boots, opt for a section with a height of around 18-20 inches.
  • Depth: The depth of shoe cabinets should be approximately 15 inches.

Proper shoe storage helps maintain the condition of your footwear and keeps your wardrobe looking tidy.

Additional Considerations

When designing your wardrobe, consider the following additional elements to enhance functionality and aesthetic appeal:

  • Cupboard for Clothes: Ensure that your wardrobe includes ample cupboard space for hanging clothes.
  • Wooden Cupboard for Clothes: Wooden cupboards are durable and provide a classic look to your wardrobe.
  • Wardrobe Design: A well-thought-out wardrobe design can make a significant difference in how organized and functional your storage space is.
  • Small Cupboard for Clothes: Incorporate small cupboards for specific items like accessories or seasonal clothes.
  • Kapde Rakhne Ki Almari: Ensure there is enough space for storing all types of clothes, including traditional attire.
  • Internal Wardrobe Dimensions: Pay close attention to the internal dimensions to ensure every item has its designated space.

Conclusion

Creating the perfect wardrobe involves careful planning and consideration of your specific storage needs. By understanding the key dimensions and incorporating a mix of hanging rails, shelves, and drawers, you can design a wardrobe that maximizes space and ensures a clutter-free, organized look. Whether you choose a hinged, sliding, or walk-in wardrobe, these tips and dimensions will help you make efficient use of every inch of space, providing a functional and aesthetically pleasing storage solution.

Best Steel For House Construction

0
Best Steel For House Construction

Constructing a house or building is quite a challenging task. You must be aware of numerous factors to ensure longevity, stability, budget, and durability. Among this, choosing the best steel plays a paramount role in construction.

Whether it is a commercial or industrial building, yielding the utmost strength is a fundamental expectation of everyone. So, keep an eye on every material selection. To help you out in the best way, we have listed the best construction steel for houses, which is the best in quality and durability and lasts for a long time.

Best Steel Types for House Construction 

1. Mild Steel

Mild steel is used in building frameworks for its high tensile strength, malleability, ductility, and weldability, making it a popular choice for construction. Also, mild steel is affordable and widely available compared to other high-strength steel. It is ideal for beams, columns, and other structural elements in residential buildings.

Composition:

Carbon: 0.05% to 0.25%

Manganese: 0.4% to 0.7%

Silicon: 0.1% to 0.3%

Sulfur and Phosphorus: Trace amounts

Benefits:

-Mild steel can withstand high tension and stress without breaking.

-It can be easily bent and shaped, making it suitable for various construction needs.

-Mild steel can be stretched into thin wires without breaking.

-It can be easily welded, allowing for strong joints.

2. Stainless Steel 

Stainless steel is usually preferred for its aesthetic appeal. It is ideal for countertops, sinks, and fixtures due to its hygienic properties. On the other hand, it is also used in hospitals and food processing plants for its ease of cleaning and sterilization. Due to its high durability, corrosion, and fire resistance, Engineers prefer this type of steel for railings, cladding, and decorative elements.

Composition:

Iron: 72% to 90%

Chromium: 10% to 20%

Nickel: 0% to 8%

Manganese: Up to 2%

Silicon: Up to 1%

Carbon: Up to 0.15%

Benefits:

  • It has a clean, modern look.
  • It is resistant to wear and tear, making it long-lasting.
  • Resists rust and corrosion, ideal for damp environments.
  • It can withstand high temperatures without losing strength.
  • Easy to clean and disinfect, making it suitable for hospitals and food processing plants.

3. HYSD Steel

High-yield-strength deformed (HYSD) steel can bear greater loads and is suitable for basements and other areas prone to moisture. It is highly resistant to corrosion and can be used in beams, columns, and slabs. 

It is one of the most cost-effective steel types Used in Construction compared to other high-strength steel.

Composition:

Carbon: 0.2% to 0.3%

Manganese: 0.5% to 1.5%

Silicon: 0.2% to 0.6%

Sulfur and Phosphorus: Less than 0.05%

Benefits:

– It can bear greater loads compared to other steels.

– Long-lasting and resistant to environmental stress.

– Suitable for damp environments.

– It provides high strength at a lower cost than other high-strength steels.

4. TMX Steel 

Thermex steel or Thermo Mechanically Treated bar is a high-quality steel suitable for high-performance requirements. It is ideal for building bridges, flyovers, and other critical infrastructure.

It has high strength, flexibility, durability, resistance to fire, and weldability characteristics. Most importantly, it requires less material than TMT bars to achieve the same required strength, so it is highly preferred for use in construction.

Composition:

Carbon: 0.2% to 0.3%

Manganese: 0.5% to 1.5%

Silicon: 0.2% to 0.6%

Sulfur and Phosphorus: Less than 0.05%

Benefits:

– It can withstand stress without breaking.

– Long-lasting and resistant to environmental stress.

– It can withstand high temperatures.

– Easy to weld for strong joints.

– Requires less material than TMT bars for the same strength.

5. Structural Steel

Structural steel is a good choice for building the main framework, including skyscrapers, industrial buildings, and large bridges. Due to its high strength-to-weight ratio, prefabrication facility, and durability, structural steel is a widely sought-after option due to its flexibility.

Composition:

Carbon: 0.12% to 0.25%

Manganese: 0.25% to 1.5%

Silicon: 0.1% to 0.6%

Sulfur and Phosphorus: Less than 0.05%

Benefits:

-It provides strength without adding excessive weight.

-It can be prefabricated, reducing Construction Structure time.

-Resistant to wear and tear.

-It can be used in a variety of construction applications.

6. Deformed Steel Bars

Deformed steel bars are also used for reinforced concrete structures in residential and commercial buildings. They come in various grades and sizes, making them suitable for construction projects.

Composition:

Carbon: 0.15% to 0.30%

Manganese: 0.5% to 1.5%

Silicon: 0.2% to 0.6%

Sulfur and Phosphorus: Less than 0.05%

Benefits:

– The deformations on the bars provide a better grip with concrete.

– It is widely available and affordable.

– It is available in different grades and sizes for various construction needs.

7. Galvanized Rebar

Galvanized rebar has a zinc coating, which gives it high corrosion protection. The shiny zinc coating offers better bond strength with concrete and improved aesthetic appeal. It is used in bridges, piers, and other marine structures.

Composition:

Carbon Steel Rebar, coated with a layer of zinc for corrosion protection.

Benefits

-Zinc coating provides high resistance to corrosion.

– It offers improved bond with concrete.

– Shiny zinc coating provides a clean look.

8. Epoxy-Coated Rebar

Epoxy-coated rebar is highly corrosion-resistant and has good electrical insulation. It also provides a better bond strength when mixed with concrete. Epoxy-coated rebars are utilized in marine structures like piers and docks, bridge decks, underground structures, chemical plants, refineries, and in earthquake-prone areas. 

Composition:

Carbon Steel Rebar coated with a layer of epoxy for enhanced corrosion resistance.

Benefits:

-Epoxy coating protects against corrosion.

-It provides good insulation properties.

-It enhances the bond with concrete.

9. TMT Bars:

Thermo-mechanically treated (TMT) bars are essential for building high-rise buildings, shopping malls, and office complexes. Steel frames are made up of TMT bars

TMT bars come in different grades, such as Fe 415, Fe 500, Fe 550, and Fe 600. The higher the grade, the stronger the bar. The diameter should be appropriate for your construction needs. Common diameters range from 8mm to 32mm.

Composition

Carbon: 0.15% to 0.25%

Manganese: 0.5% to 1.5%

Sulfur: 0.05% (maximum)

Phosphorus: 0.05% (maximum)

Silicon: 0.1% to 0.4%

Benefits

-TMT bars are economical and require reduced maintenance costs, and longevity.

-Due to their low carbon content, TMT bars can be easily welded without losing strength, making construction easier and more efficient.

-It can withstand high temperatures (up to 600 degrees Celsius), providing added safety in case of fire.

How to Choose the Best Steel for House Construction?

How-to-Choose-the-Best-Steel-for-House-Construction

Following the list of the best steel for construction projects, you need to be aware of the tips to find the appropriate one. Take note of these crucial factors to be worth the money.

  • Keep your eye on the grade as it indicates the strength and composition and diameter which affects the load-bearing capacity of the steel.
  • Inspect the steel rods for any visible cracks or defects because it is essential for the structural integrity of your building.
  • The weight of the steel should be consistent.
  • Steel should be free from rust or excessive corrosion as it can weaken the steel and compromise the strength of the structure.
  • It should have finished edges to minimize the risk of injuries
  • Reputable brands are more likely to offer high-quality steel that meets industry standards.

Which is the Best Steel for Construction?

In general, the TMT bars are the ideal choice for quality construction. From residential to commercial buildings in coastal areas, bridges, skyscrapers, or dams, TMT holds an immense part. It is mainly because of its extended strength, durability and longevity in every construction project.

Conclusion

If you are looking to build a house, these are the things you have to consider. Hopefully, you can find the best steel suggestions that will be suitable for you in all aspects. Once you choose the brand, ensure that the product is completely neat and clean to avoid any costly troubles in the future.

FAQs

Which steel is generally used in RCC?

Mild steel is generally used in RCC (Reinforced Cement Concrete).

What are the disadvantages of steel over RCC?

Steel can incur a higher initial cost and is susceptible to fire at high temperatures and corrosion.

Khata Certificate and Khata Transfer Bangalore Process

0
Khata Certificate and Khata Transfer Process in Bangalore

A Khata extract, also known as a Khata certificate, is a legal instrument that represents an account of a property’s valuation for tax purposes in the state of Karnataka, primarily in Bangalore. The property khata has to be registered with BBMP (Bruhat Bangalore Mahanagara Palike). The property will be charged to tax, given its own local number, and the details of the individual who is directly responsible for paying the property tax will be recorded until it is registered with the Municipality or Corporation.

The khata document is important to get any document that is related to the sale or construction of a sanctioned property. It’s also needed when applying for a water or electricity link with BBMP in Bangalore, as well as when selling a home. A khata contains two elements: 

  • Khata certificate: It is needed for property transfer and registration.
  • Khata extract: It contains details of the land such as valuation, size, is it used commercially or residentially. This extract is also needed while procuring a trade license.

If you’re planning to purchase property in Bangalore, it is crucial to understand the various formalities involved in verifying a property’s legitimacy. For a comprehensive overview of the key factors to check before making a plot purchase, be sure to review the things to check before buying a plot in Bangalore, which outlines the critical steps in ensuring the property you’re investing in meets legal and regulatory standards.

Land tax collection was a major headache for the authorities prior to 2007, and there were three independent organizations that collected and had an interest in tax collection. After the BBMP (Bruhat Bangalore Mahanagara Palike) was created in 2007 to simplify the collection of property taxes from Bangalore residents, the property khata concept was created.

Types of khata issued by BBMP

The Khata certificate is broadly classified into two types – A Khata and B Khata. Tax is levied upon the residents of Bangalore that fall under the A Khata and B Khata under the jurisdiction of the BBMP. The concept of A Khata was introduced to reduce duplication by reforming the tax collection process. The legal properties in Bangalore were listed under A Khata whereas the B Khata enlisted the semi-legal or illegal properties of the city. 

A Khata 

The A Khata serves as a smooth source to maintain Property Tax collection by the Municipal Corporation. It signifies a certificate that indicates that all the taxes are paid by the registered property owner to the BBMP. It also suggests that property ownership is legal. You can apply for loans, trade licenses, or building licenses if you possess a Khata Certificate. If you have the A Khata papers, which are needed for any other payment information involving your property in Bangalore, your property is effectively legal.

B Khata 

All the illegal properties according to the Karnataka High Court order of 2014 are listed in a distinct register known as B Khata. It records the properties that have illegal ownership in the city of Bangalore, even if the owner has paid the civic charges for the land. The B Khata corresponds to the Karnataka Municipal Act, 1976, Section 108A, which was amended in 2009. The BBMP uses this registry to raise taxes on structures that were built unlawfully, such as those that were built in violation of bylaws, on revenue property, with unlawful layouts, or without completion or issuance certificates. The properties under the B Khata can be converted to A Khata through a BBMP Khata transfer process. You need to fulfill certain criteria such as DC converted property, tax payment of all properties, etc. levied by the BBMP.

Panchayat Khata

Approval of plans for panchayat khata plots is a quick and painless operation. There are a variety of authorities who can authorize the property, depending on their jurisdictions. Gram and taluk panchayats are the permission bodies for construction on less than one acre of land within village limits. The Directorate of Town Planning does, however, approve proposals for developments that are intended to cover more than one acre of land (DTP). Bangalore Metropolitan Region Development Authority (BMRDA) and Bangalore International Airport Area Planning Authority (BIAAPA) are two local planning authorities that sanction layout plans in villages under their jurisdiction.

Major difference between A Khata & B Khata Property

A legitimate property that complies with all construction bylaws, tax norms, and government regulations receives an ‘A’ Khata certificate. ‘B’ Khata certificate is a temporary property khata that is issued to properties that have pending property tax dues and are in defiance of construction by laws and government norms.

 The difference between A khata and B khata is as under:

  • A Khata properties have building licenses and are able to extend their properties, whereas B Khata properties are not.
  • Loans are available on and for A Khata properties, but not for B Khata properties.
  • Landowners with A Khata documents can easily resell or pass ownership of their lands, whereas those with B Khata documents are unable to do so.
  • A Khata is a definitive certificate stating that the land in question is fully legitimate and tradeable, while a B Khata is a provisional document that must be converted to an A Khata to receive the full benefits.
  • B Khata properties used to have some of the same privileges as A Khata properties, but that status was nullified by a recent Karnataka High Court order issued in December 2014. B Khata assets are now classified as illegal and must be transferred to A Khata properties to prevent problems with inland trade, building, and transition.

khata transfer bangalore – How to transfer?

Khata transfer refers to the process of changing the ownership of the property as a gift or due to the demise of the previous owner.  The application for a khata transfer is the same as for the registration but some additional documents are needed for the khata transfer process. 

According to the BBMP officials, this conversion will ensure transparency and uniformity in the functioning of the system. 

  • Step 1: Request for District Commissioner (DC) Conversion to change the land’s use from agricultural to non-agricultural.
  • Step 2: Pay all property taxes owed on the property to date in accordance with government regulations.
  • Step 3: Pick up a khata transfer application from the BBMP office or apply for an online khata transfer and fill in the requisite details.
  • Step 4: Gather all of the required documentation to add to the application.
  • Step 5: Pay the BBMP Betterment Charges, which are khata transfer charges for changing the ownership, and send the completed form, along with the tax receipts and other required documentation, to the Assistant Revenue Officer of the affected district.
  • You will receive a Sakala Number that helps you in tracking the transfer process. A message alert shall be sent to you by the authorities once the process is completed. 

In most cases, akhata certificate is released within 4 to 6 weeks.

What is an E-Khata? 

If you are looking for a property in Bangalore or already have one, you must ensure that you have a legitimate khata certificate. An E-Khata is not another type of khata or condition imposed by the Government. An E-Khata is an aid to fill out your application online mode. It is a digital khata, that can be procured by simply registering online at the BBMP’s official website, thanks to technological advancements.

However, an E-Khata can be used only by landowners provided with a Property Identification Number (PID number). It would incorporate properties that were registered with the Bangalore Mahanagara Palike (BMP), the governing body in Bangalore until 2007. The owners may also clear property tax dues online through the E-Khata service. Also, only the owners with A khata have the advantage of availing the facilities of an E-Khata. Therefore, it is necessary to transfer B khata to A khata. 

The E-Khata method has proven to be beneficial for the owners. They’re provided with a significant PID number to access their account, receive receipts and pay the taxes; everything within the click of the mouse. In case your PID number is misplaced, you can contact the nearest BBMP office. The state government of Karnataka is still in the process of digitizing all future land-related accounts.

How To Apply For E-Khata Online?

The BBMP has recently included Khata transfer under Sakala. The application form for Khata registration, Khata transfer, or Khata modification is the same. The property owners can apply online to get BBMP khata transfer through the Sakala services. 

Following are the steps to apply for an online khata transfer/registration:

  • Step 1: A notary public must certify a copy of your property’s sale deed. 
  • Step 2:  The next move is to obtain an Encumbrance Certificate. An Encumbrance Certificate’s aim is to ensure that the property is free of all financial or legal obligations. Obtaining an Encumbrance Certificate can take up to a week in most cases.
  • Step 3: Then go to http://bbmp.gov.in/en/web/guest/Khatha-certificate on the Sakala website. Take a printout of the Suvarna Khata Application Form for Khata Registration/Transfer available on the website by clicking on the option ‘Suvarna Khata Application Form for Khata Registration/Transfer’. Alternatively, for a fee of Rs.10/-, you can receive a Khata application form from the BBMP Assistant Revenue Officer Office.
  • Step 4: The application should be filled out completely and the required documentation must be added. Forward the form to the BBMP office after it has been completed. For monitoring purposes, an acknowledgment will be given.
  • Step 5: On a weekly basis, keep an eye on the application. The amount of time it takes to get permission varies. If the BBMP Office does not respond after two months, an RTI can be filed to obtain details on the application status.
  • Step 6: Following the satisfactory submission of the claim, a revenue officer from the BBMP will assess the property for verification purposes.
  • Step 7: The BBMP will charge a Khata registration fee of 2% of the property valuation as specified in the selling deed. The email on the payment of the outstanding property tax balance will be issued upon payment of this registration fee. This is a sign that the property has been licensed under your name. This tax must be collected within 15 days of the invoice date.
  • Step 8: The Khata extract will be issued in your name once the property tax is paid. The formalities for a Khata transfer process are few and the required documents are also different. The applicant must keep in mind that the tax amount charged for commercial properties is twice as high as the residential properties.

Essentials documents required for Khata Transfer

The documents required for a Khata transfer, Khata registration, Khata bifurcation, and amalgamation differ slightly. Documents required for Khata transfer with all the scenarios as per the official website of Sakala are listed below.

  • Title deed/ Sale deed
  • Receipts of taxes paid
  • Blueprint with the location of the property
  • Occupancy certificate
  • Possession certificate
  • Rs 200 worth National Savings Certificates 
  • Khata extract
  • An affidavit is required confirming the applicant is a legal heir to settle cases of a will
  • A certificate in case of the death of the previous owner

Additional documents in case of khata transfer from B khata to A khata:

  • A certificate with the property dimensions and other specifications 
  • Any other document as required for the conversion
  • Proof of paid improvement charges 
  • Order indicating land conversion from agricultural to non-agricultural

These are some general documents required during the khata transfer process to show that no building norms are being violated. However, the BBMP has provided variation in terms of documents based on several scenarios.

Everything you need to know about Gram Panchayat Khata

The land that falls under the limits of the Gram Panchayat is owned by them. These properties may include villages, towns or agricultural land. Transfer khata charges need to be paid in the same way as transferring B khata to A khata. Buying the land owned by the gram panchayat requires an E-khata. This serves as proof to indicate that the land has been converted. Therefore, you must consider a gram panchayat khata transfer first. For a gram panchayat khata transfer, you require all the documents along with an Order indicating land conversion from agricultural to non-agricultural and Khata extract issued by the panchayat in addition. The khata transfer charges for converting agricultural land into residential land are usually about 6% of the registration fees.

FAQs

what are the documents required for khata transfer ?

Sale Deed
Title Deed
Khata Certificate and Extract
Property Tax Receipts
Identity Proof
Address Proof
No Objection Certificate (NOC)
Application Form

Which Cement is Best for House Construction?

0

People who are considering building a new home often inquire about which cement is best for house construction. Consider the following question: Which cement is the best for house construction? Finding the right cement for house building is extremely important and crucial to the success of your project. And in this blog, we’ll discuss which cement is best for your building during the construction process.

Since the cement is one of the most essential building materials to ensure the longevity of a structure, any misdirection or influence will cost a lot of money or affect the construction quality. Cement is categorized primarily based on its quality. After 28 days of setting, the concrete’s compressive strength (Mpa) is determined by the cement grade. For building purposes, there are about ten different forms of cement.

Cement comes in a variety of types and grades, each with its own set of characteristics. Some types of cement grades will be best suited to use in the construction of specific property parts. When comparing OPC cement with PPC, PPC may be used for the whole house building. Cement bags are needed for the preparation of concrete for RCC structures, motors between bricks, and wall plastering. It performs well with the proper amount of water, sand, and aggregates. For per square ft. of construction, 0.38 cement bags are used. For a 1000 sq ft house, approximately 400 bags of cement (each weighing 50kg) are needed.

Types of cement used for house construction & which cement is best

Types of cement

Cement comes in a variety of types and is used for a variety of purposes in construction. As a result, it is critical to comprehend the properties of each form of cement as well as its applications. Ordinary Portland Cement (43 Grade & 53 Grade), Portland Pozzolana Cement, and Portland Slag Cement are the three most common forms of cement used in general construction.

There are approximately ten different forms of cement used in buildings. The five most common forms of cement used in home construction are listed below.

Ordinary Portland Cement (OPC) 43 Grade Cement

It is primarily used for wall plastering, non-RCC structures, and pathways. After 28 days of setting, 43-grade cement has a compression strength of 43 Mpa (megapascals). Ensure that the IS 12269 standard code is followed by your 43-cement brand.

Ordinary Portland Cement (OPC), 53 Grade Cement

It’s also used in higher-grade RCC and prestressed concrete, as well as cement grouts and instant plugging mortars. For fast-paced construction where initial strength must be reached quickly, 53 Grade cement is used. In comparison to 43-grade cement, which achieves 23 Mpa in 7 days, 53-grade cement achieves 27 Mpa in 7 days. The IS 8112 standard code is followed by 53 Grade cement.

Portland Pozzolana Cement (PPC)

PPC Cement has a higher degree of fineness, as well as an impermeable and corrosion-resistant nature, resulting in denser concrete and longer-lasting structures. It’s used in both mass concrete and RCC projects. While PPC cement has a short initial setting period, it gains strength over time. The IS 1489 standard code is followed by PPC cement.

Portland Slag Cement (PSC)

In constructions where the structures are more susceptible to sulfate and chloride attack, PSC is preferred over OPC grade. It is widely used in coastal regions, sewage disposal, and water treatment plants due to its excellent corrosion resistance, especially to saltwater. The IS 455:1989 standard code is followed by PSC Grade cement.

White cement

This cement is used to cover holes in wall tiles and ceramic bathroom fixtures, as well as in architectural and decorative designs. As opposed to ordinary Portland cement, the manufacturing process for white cement is more complex. 

Aside from the forms mentioned above, other types of cement are also used in buildings.

Sulphate Resisting Portland Cement (SRC)

This cement is used in structures that are more susceptible to sulphate attacks from water or soil. C3A levels must be less than 5% and 2C3A + C4AF levels must be less than 25% in SRC. In sewage and water treatment plants, it can be used.

Rapid Hardening Cement

It’s used when a project has to be completed quickly due to a lack of time or other factors. It is primarily employed in the repair and restoration of buildings.

Hydrophobic Portland Cement

Hydrophobic cement is used to extend the shelf life of cement in areas with a lot of rain. During the manufacturing process, the cement is given a chemical coating that gives it a water-repellent property. As a result, the cement is not damaged by high humidity and can be stored for longer periods.

Low Heat Portland Cement

It is primarily used in mass concrete for dams and other water-retaining structures, such as bridge abutments, huge retaining walls, piers, slabs, and so on.

Which grade of cement is best for house construction?

grade of cement

For residential house building, we suggest using PPC Cement because it is more durable and chemical resistant. The use of OPC Cement is recommended for high-rise buildings. It is also important to choose the best cement firm, in addition to the form of cement.

Different forms of cement are available in various grades, each with its own set of characteristics. As a result, some of the cement would be better suited to use in the building of particular sections of the property. And, since there are different types of cement for different parts of your building, it’s a good idea to learn about them and buy the correct type and grade of cement during each process of construction.

In India, two forms of cement are commonly used in the construction of residential houses:

OPC Cement

It’s a fine powder formed by calcining limestone and clay minerals in a kiln, then grinding the clinker and adding 2 to 3% gypsum. OPC Cement is available in three grades: 

  1. Grade 33 of the OPC 
  2. Grade 43 of the OPC 
  3. Grade 53 of the OPC 

OPC Cement comes in a variety of grades, each with a different compressive power. The higher the grade, the more concrete strength it can provide.

PPC Cement

PPC is made by combining pozzolanic materials with grey cement to improve chemical resistance. After 30 days, PPC cement has a strength of about 43 N/sq.mm. PPC cement, on the other hand, maybe used for whole-house building. However, each component of the house is unique, as are the cement specifications. Let’s look at which type of cement is best for which part of a home’s construction.

The best foundation cement

Since the foundation bears the entire weight of the building, the cement used for it should have the following characteristics: 

  • The cement must be able to provide your foundation with the required strength and toughness.
  • It must also be able to keep moisture out and protect the foundation from corrosion and underground chemicals.
  • Besides, the base must withstand the movement of the earth around it, which is important for the building’s long existence.

As a result, we suggest using Portland pozzolana cement PPC, which is the best cement for laying your house’s foundation. Because of its slow hydration property and ability to provide excellent strength after curing, PPC Cement is highly recommended.

The best masonry work/Brickwork cement

Masonry is the portion of the structure made of bricks or concrete blocks that makes up the majority of the structure. As a result, when selecting cement for masonry work, keep the following points in mind: 

  • The cement used here must have a high initial strength so that it can bind the bricks or concrete blocks and provide the necessary degree of strength to the structure.
  • Also, the cement must achieve its final strength level with the least amount of time and curing. 

As a result, we suggest using Ordinary Portland Cement (OPC) grade 43 or 53. We recommend it because it achieves a compression power of 27 MegaPascals in just seven days.

The best RCC Columns & Beams cement

The weight-bearing structures in your building are the concrete columns and beams that give it its form and structure. When selecting cement for the project, keep the following points in mind:

  • Since the columns are made of reinforced concrete, the cement used here must have a higher binding strength to be able to support the weight of the structure, necessitating a cement with higher compression strength.
  • We suggest Ordinary Portland Cement 53 grade for RCC columns because it has a higher compressive strength of 27 MegaPascals in 7 days, or Portland Pozzolana Cement (PPC) because it has a finer particle size, is more corrosion resistant, and cures to a thicker concrete with more strength.

The best concrete slab cement

Concrete slabs are used to construct the building’s roofing and other covering structures, and they must be sturdy and able to maintain their size and shape for an extended period. As a result, we suggest using Ordinary Portland Cement (53 grade) or Portland Pozzolana Cement, both of which are good for making strong concrete and are particularly good for Reinforced Concrete Structures.

The best plastering cement

Plastering the walls and other surfaces gives the structure a smooth appearance while also protecting the walls and surfaces from the damaging effects of natural elements. As a result, the plastering cement must be able to provide high initial strength with minimal setting time, as well as high corrosion resistance. As a result, we suggest using Ordinary Portland Cement (43 grade), which does not crack or shrink over time. If you’re constructing a high-rise structure, you can also use OPC grade 53.

The best tiling cement

Tile is an integral part of your home, and you use it to cover the floors and some of the walls. The tile-laying cement must be rendered into thin layers, have strong initial strength, and have a fast-setting period. As a result, we suggest using Ordinary Portland Cement 43 grade, which has the requisite fineness for making thin layers of tile-laying mortar with high adhesive strength for tiling surfaces.

The Best RCC stairs cement

For RCC Stairs, we suggest PPC Cement because it has a higher degree of fineness, is impermeable, and corrosion-resistant, resulting in denser concrete and longer-lasting structures. PPC is used in both mass concreting and RCC work. While PPC cement has a short initial setting period, it gains strength over time. PPC cement also complies with the IS 1489 standard code.

Amount of cement required for 1000 sq ft

How many cement bags are needed for a 1000 square foot house? We will discuss how many cement bags are required for a 1000 square foot house. The actual quantity of cement is calculated according to the plan, but if no design is given, the cement quantity is calculated using the Thumb Rule and how many cement bags were used in the construction of a 1000 square foot building.

  • The number of cement bags required for a 1000 square foot house is determined by a variety of factors. 
  • Structure form (Load Bearing/Framed) 
  • The structure’s purpose (Load depends on the utility) 
  • The concrete grade that was used 
  • Dimensions of the column’s height and the length of the beam (in terms of height, as requirement varies according to construction i.e., whether horizontal or vertical.)
  • The form of foundation is the most significant (depends on soil bearing conditions)

We must quantify cement bags for a general residential low-rise ground-floor home. In all types of RCC structures, including footings, columns, beams, and RCC slabs, as well as brickwork, flooring, and plastering, we use different types of Thumb Rules to measure cement quantity.

Using different thumb rules to calculate cement quantity for a 1000 square foot house 

  1. The rule of thumb for RCC concrete is 0.301 cement bags per square foot of the built-up area of a low-rise ground-floor residential building.
  2. In a low-rise ground-floor residential building, the rule of thumb for surface ground flooring is 0.089 cement bags per square foot of built-up space. 
  3. For external wall brickwork, the rule of thumb is 1.26 cement bags per m3 of 9-inch brickwork (cement-sand ratio 1:6)
  4. The rule of thumb for cement bags in internal wall brickwork is 1.28 cement bags per m3 of 4.5-inch brickwork (cement-sand ratio 1:4) 
  5. For external plastering, the rule of thumb is 0.017017 cement bags per square foot of plastering.
  6. For internal plastering, the rule of thumb is 0.0086 cement bags per square foot of plastering. 
  7. For ceiling plastering, the rule of thumb is 0.0051 cement bags per square foot of plastering.

All of these suggestions can be used as a guide to selecting the “Correct Cement” for different applications in house construction, allowing you to save money and get decent results on which cement is best for house construction while avoiding the premiums that big cement brands charge. Let’s build your dream home with Brick & Bolt.

Brick vs Cement Block in Masonry

0
Brick-Vs-Cement-Block

The field of masonry has seen a proliferation of new and innovative building materials in recent years. Several examples of new-age materials used in home construction include:

  1. Autoclaved Aerated Concrete (AAC) blocks
  2. Insulated Concrete Forms (ICFs), and
  3. Geopolymer bricks. 

That said, brick and cement blocks are the most common building materials in use today in masonry. However, the masonry circles’ brick vs cement block debate has intensified. 

While some argue cement blocks are the better choice, others stand by bricks as the superior material. So which one is better? The answer is not always clear-cut, and the best way to decide is to weigh the pros and cons of each. Allow us to elaborate further in this blog.

Difference between Bricks and Cement Blocks in Masonry

Concrete bricks vs red bricks is a common debate over both these building materials. Both have their own distinct advantages and drawbacks. Let’s compare them in detail to better understand what are the factors that differentiate them.

Bricks and cement block

Take a look at red bricks vs cement blocks in terms of their cost, composition, & so on

Brick vs Cement Block: Differentiating FactorsBrick BlocksCement Blocks
CompositionThe primary component of red bricks is clay, which is a type of sedimentary rock. The other ingredients that go into the making of redbricks are Lime, Alumina, Sand, Iron Oxide, and Magnesia. This entire mixture is mixed with water and then formed into bricks which are then burnt at high temperatures in a kiln to create bricks. These are made from a mixture of gravel, sand, and cement. The cement is the primary binding agent here. As with the red bricks, the mixture is mixed with water, poured into moulds, and then allowed to harden. In certain situations, the fine sand can be substituted by fly ash.
Compressive Strength  Red bricks have a compressive strength of 3.5 to 35 N/mm².Concrete blocks have a compressive strength of 4 to 5 N/mm² based on the types of cement used in its manufacture. 
DurabilityRed bricks are more durable primarily due to the fact that clay is its primary ingredient that is resistant to weathering and cracking.Concrete blocks, on the other hand, are more susceptible to damage from the elements
Water Resistance
and
Thermal Conductivity
Red bricks work better for colder regions where the goal is to warm up the building during the day and retain the heat during the night and vice versa.Cement blocks are the opposite, they are naturally better at resisting water, but if they do get wet, they take a lot longer to dry out. 
Cost and AvailabilityRed bricks are typically more expensive than concrete blocks. This primarily comes down to the primary ingredient, clay which is costly when compared to cement.Cement blocks are generally easier to manufacture, but if you live close to a location with an abundance of brick kilns, red bricks may be easier to obtain.

Advantages and Disadvantages of Red Bricks

Red Bricks have stood the test of time and have been used in masonry for centuries. Here is a brief summary of their pros and cons.

red bricks

Primarily composed of clay, red bricks continue to be used in masonry despite the rising availability of alternatives 

AdvantagesDisadvantages
Highly fire-resistantThe manufacturing process isn’t environmentally friendly
More durable than their cement counterpartsBrittle and thus require careful handling
Recyclable and reusableOffer less tensile strength
Cost effectiveUneven surfaces often lead to higher mortar consumption during construction

Advantages and Disadvantages of Concrete Blocks 

Concrete or cement blocks are a fairly recent addition to the world of masonry. Here is a

concrete blocks

Easily manufactured, concrete blocks prove to be a competent competitor to red bricks

AdvantagesDisadvantages
Offer better thermal and sound insulation than red bricksNot as aesthetically pleasing as red bricks
More environmentally friendly in comparisonProne to water seepage over time
Consistency in their size (they are generally about 2.5 times larger than red bricks) and shape reduces the need for mortar and plasterRequire waterproofing due to high porosity

The Final Verdict on Brick vs Cement Block

Verdict on Brick vs Cement Block

To go with highly durable red bricks or the more environmentally-friendly concrete blocks? What will it be?

Taking all things into consideration, both cement blocks and red bricks excel in their own unique ways, and the question of what is best basically comes down to the individual needs of a specific project. Hence, the question of what is better primarily depends on the location and intended usage of the construction material. 

FAQs

1. Why are red bricks and cement blocks commonly used in construction?

Red bricks andcement blocks are commonly used in construction as they are tried and tested construction materials that have stood the test of time.

2. Can red bricks be used for both load-bearing and non-load-bearing walls?

Yes, red bricks can be used for both load and non-load-bearing walls. 

3. Is there a specific mortar or cement mix that should be used for laying cement blocks?

There is no one specific mortar or cement mix when it comes to laying cement blocks. The ratio of the mortar will vary based on the type of cement block, the load the wall will support, and the climate for which the block wall will be designed.

4. Which is better: red brick or cement block?

Concrete blocks and red bricks have their own distinct advantages and drawbacks. That said, concrete blocks are stronger, more eco-friendly, and more economical than red bricks.

Griha Pravesh Muhurat 2024-25: Auspicious Dates and Rituals for Moving Into Your New Home

0
Griha Pravesh

Moving into a new home is a significant event in one’s life, marked by various rituals and ceremonies across cultures. In Hindu traditions, one such ritual is Griha Pravesh, which entails entering a new house at an auspicious time to ensure prosperity, happiness, and good fortune for the inhabitants. Understanding the Griha Pravesh Muhurat, or the auspicious timing for this ceremony, plays a crucial role in ensuring a smooth transition and positive energies for the new home.

Importance of Griha Pravesh Muhurat

According to Hindu beliefs and Vastu Shastra, Griha Pravesh should ideally be performed during specific months and on auspicious days known as Muhurat. These timings are determined by the alignment of celestial bodies, particularly the positions of stars and planets, to harness maximum positive energy. Performing Griha Pravesh during these auspicious periods is believed to ward off negative influences and invite divine blessings into the new home.

Griha Pravesh Muhurat Calendar 2024-25

The Griha Pravesh Muhurat for 2024-25 offers several auspicious dates spread across different months. Each date is associated with specific Nakshatras (constellations) and Tithis (lunar days), ensuring a comprehensive selection based on astrological considerations. Here’s a detailed look at some of the auspicious Griha Pravesh dates during this period:

  • November 2, 2024 (Saturday): Muhurat timing from 05:58 AM to 06:40 AM, November 3
  • November 4, 2024 (Monday): Muhurat timing from 06:40 AM to 08:04 AM
  • November 7, 2024 (Thursday): Muhurat timing from 12:34 AM to 06:42 AM, November 8
  • November 8, 2024 (Friday): Muhurat timing from 06:42 AM to 12:03 PM
  • November 13, 2024 (Wednesday): Muhurat timing from 01:01 PM to 03:11 AM, November 14
  • November 16, 2024 (Saturday): Muhurat timing from 07:28 PM to 06:47 AM, November 17
  • November 18, 2024 (Monday): Muhurat timing from 06:48 AM to 03:49 PM
  • November 25, 2024 (Monday): Muhurat timing from 06:52 AM to 01:24 AM, November 26
  • December 5, 2024 (Thursday): Muhurat timing from 12:49 PM to 05:26 PM
  • December 11, 2024 (Wednesday): Muhurat timing from 07:02 AM to 11:48 AM
  • December 21, 2024 (Saturday): Muhurat timing from 06:14 AM to 07:08 AM, December 22
  • December 25, 2024 (Wednesday): Muhurat timing from 07:09 AM to 03:22 PM
  • February 6, 2025 (Thursday): Muhurat timing from 10:53 PM to 07:06 AM, February 7
  • February 7, 2025 (Friday): Muhurat timing from 07:06 AM to 07:05 AM, February 8
  • February 8, 2025 (Saturday): Muhurat timing from 07:05 AM to 06:07 PM
  • February 14, 2025 (Friday): Muhurat timing from 11:09 PM to 06:59 AM, February 15
  • February 15, 2025 (Saturday): Muhurat timing from 06:59 AM to 11:52 PM
  • February 17, 2025 (Monday): Muhurat timing from 06:58 AM to 04:53 AM, February 18
  • March 1, 2025 (Saturday): Muhurat timing from 11:22 AM to 06:45 AM, March 2
  • March 5, 2025 (Wednesday): Muhurat timing from 01:08 AM to 06:41 AM, March 6
  • March 6, 2025 (Thursday): Muhurat timing from 06:41 AM to 10:50 AM
  • March 14, 2025 (Friday): Muhurat timing from 12:23 PM to 06:31 AM, March 15
  • March 15, 2025 (Saturday): Muhurat timing from 06:31 AM to 08:54 AM

This comprehensive list allows individuals to choose a date based on their specific astrological beliefs and personal preferences, ensuring the Griha Pravesh ceremony is conducted under the most favorable conditions.

Rituals and Practices During Griha Pravesh

The Griha Pravesh ceremony involves several rituals aimed at purifying the new home and welcoming positive energies. Some of the common practices include:

  • Purification of the Home: Before the Griha Pravesh ceremony, the new home is thoroughly cleaned and purified to remove any negative energies.
  • Arrangement of the Kalash: A Kalash (pot filled with water and topped with mango leaves) is placed at the entrance to symbolize abundance and prosperity.
  • Lighting of Lamps: Lighting lamps or diyas is believed to ward off darkness and invite positive vibrations into the home.
  • Havan (Fire Ritual): A sacred fire ritual is performed to purify the atmosphere and appease the gods for blessings.
  • Offerings and Prayers: Offerings such as fruits, flowers, and sweets are made to the gods, followed by prayers for health, wealth, and prosperity.
  • Placement of Deities: Idols or pictures of deities are installed in the appropriate Vastu-compliant locations within the home to ensure harmony and well-being.
  • Feeding of Brahmins: As a gesture of gratitude and respect, Brahmins or priests are invited and fed after the completion of the rituals.

These rituals not only uphold cultural traditions but also create a harmonious and auspicious environment for the new occupants.

Vastu Considerations for Griha Pravesh

Vastu Shastra, the ancient Indian science of architecture, emphasizes the importance of directional alignments and spatial arrangements to enhance positive energies in a home. Some key Vastu considerations during Griha Pravesh include:

  • Direction of the Main Entrance: The main entrance, known as the Simha Dwara, should ideally face the north, east, or northeast direction for prosperity and positivity.
  • Placement of Puja Room: The puja room or altar should be located in the northeast corner of the home, considered the most auspicious direction for spiritual practices.
  • Avoidance of Negative Zones: Certain areas like the southwest corner (Nairuthi) are considered inauspicious for activities like sleeping or placement of heavy furniture.

Adhering to these Vastu principles during Griha Pravesh ensures harmony, happiness, and prosperity for the new residents.

Griha Pravesh Decoration Ideas

Decorating the home during Griha Pravesh not only adds aesthetic appeal but also enhances the positive vibrations within the space. Some popular decoration ideas include:

  • Toran of Marigold and Mango Leaves: Hanging a toran made of fresh marigold flowers and mango leaves at the entrance signifies prosperity and welcomes guests warmly.
  • Rangoli Designs: Creating intricate rangoli patterns at the doorstep using vibrant colors is believed to attract good luck and ward off evil spirits.
  • Lighting: Decorating the home with diyas, candles, and string lights not only brightens up the space but also symbolizes the triumph of light over darkness.
  • Puja Room Decor: Adorning the puja room with fresh flowers, incense, and traditional decorations creates a serene atmosphere conducive to prayers and meditation.

These decorations not only enhance the aesthetic appeal of the home but also create a spiritually uplifting environment during the Griha Pravesh ceremony.

Dos and Don’ts for Griha Pravesh

To ensure the success and positivity of the Griha Pravesh ceremony, certain dos and don’ts should be followed:

  • Dos:
    • Complete all construction work and ensure the home is fully ready for occupancy before the ceremony.
    • Perform the Griha Pravesh only during auspicious dates and times as per the Muhurat calendar.
    • Invite Brahmins or priests to perform rituals and offer them traditional food and gifts as a mark of respect.
  • Don’ts:
    • Avoid performing Griha Pravesh during inauspicious periods such as Tuesdays or days with adverse planetary alignments.
    • Refrain from shifting heavy furniture or setting up the kitchen until after the ceremony is complete.
    • Ensure that the home remains occupied and does not stand empty for an extended period before Griha Pravesh.

By adhering to these guidelines, individuals can ensure that the Griha Pravesh ceremony is conducted with utmost reverence and adherence to cultural traditions. For professional assistance, consider consulting with Brick & Bolt, a renowned house construction company.

Vastu Remedies for South-West Toilet/Bathroom: Attracting Positive Energies

0
South West Toilets Vastu

When moving to a new house or renovating your existing dwelling, paying due diligence to Vastu Shastra is of utmost importance. Vastu Shastra, an ancient Indian science of architecture and building, provides guidelines to ensure that your living space harmonizes with natural forces for a healthy, prosperous, and peaceful life. Here, we showcase some of the best Vastu remedies for your bathroom or toilet located in the South-West direction, explaining how you can attract positive cosmic energies to your house.

Understanding the Importance of Vastu for Bathrooms and Toilets

Bathrooms and toilets are crucial areas in a home that can significantly impact the energy flow. According to Vastu Shastra, these spaces are associated with water, which symbolizes purification and elimination. Incorrect placement of bathrooms and toilets can lead to the accumulation of negative energies, affecting the health and well-being of the inhabitants. The South-West direction, in particular, is considered sensitive and requires specific remedies to maintain balance and harmony.

Effective Vastu Remedies for South-West Toilets

The Secret of the Vastu Pyramid

Ideally, toilets or bathrooms should be avoided in the South-West direction. However, if this is unavoidable, placing a Vastu Pyramid on the exterior wall of the toilet can help mitigate negative energies. The Vastu Pyramid acts as a corrective measure, balancing the energies and neutralizing any adverse effects. Additionally, ensure that the toilet doors remain closed at all times to prevent negative energies from spreading to other parts of the house.

Entry Door and Toilet Seat Direction

The positioning of the entry door and toilet seat plays a vital role in adhering to Vastu principles. The main door of the toilet should be constructed on the northern or eastern wall. The toilet seat should be aligned in the north-west or south-east direction, ensuring that the person using the toilet does not face the west or the east. This orientation helps in maintaining a positive energy flow and prevents the buildup of negative vibes.

Ventilation and Height of the Toilet

Proper ventilation is crucial for bathrooms and toilets to ensure the expulsion of negative energies and the influx of fresh, positive air. Install a window opening along the west, east, or north walls. Additionally, constructing the toilet a few feet above the ground level is in tune with South-West toilet Vastu remedies. These rectifications ensure a healthy and positive living environment.

Arranging Items Inside the Toilet

For a combined bathroom and toilet setting, the toilet should be positioned in the west or north-west direction, as these areas are considered suitable for waste elimination. Showers and washbasins should be placed in the east, north-east, or north part of the bathroom, as these directions are associated with water elements and promote positive energy.

Deciding on Bathroom Pipe Directions

The direction of bathroom pipes also influences the Vastu compliance of the space. Ensure that the pipes have an outlet in the east or north directions. Avoid having a shared wall between the toilet and the pooja room, as this can have negative consequences. Such arrangements help in maintaining a balanced energy flow and prevent the accumulation of negative vibrations.

South West Toilets Vastu

Mirror Placement and Colour Choices

Mirrors are essential elements in bathrooms and toilets, reflecting light and energy. In a South-West toilet, place the mirror on the east or north wall to enhance positive energy flow. As for color choices, opt for light-toned shades such as pink, light blue, or grey. These colors create a calming atmosphere and align with Vastu principles.

Location of the Staircase and Bed

Avoid building a toilet under the staircase, as this space should be used for storage or other utilities. Also, ensure that the toilet does not face the bed, as this can lead to disturbed sleep and negative health effects. These adjustments help in maintaining harmony and positive energy flow in the house.

Adjustments of Water Storage and Taps

Water storage and tap directions are crucial in Vastu Shastra. Avoid placing taps or storing water in the south-west or south-east directions, as these areas are not favorable for water elements. Correct placement ensures compliance with Vastu and promotes a balance of energies.

Direction of the Septic Tank and Commode

The septic tank should be located in the west direction of the house. Avoid placing it on the south side of the toilet, as this can lead to negative energy accumulation. The commode should be positioned along the north-south axis to maintain energy balance and harmony.

Door Material and Decorative Elements

The material and design of the toilet door are also significant in Vastu Shastra. Ensure that the toilet door in the south-west direction is made of wood and not metal. Avoid doors with ornamental statues of gods, as this is considered inauspicious. Additionally, place the exhaust fan in the north-east or east direction to ensure proper ventilation and energy flow.

Summing Up: Vastu Tips for South-West Toilets

If you have a toilet in the South-West direction, do not worry. By following these simple Vastu tips, you can welcome positive cosmic vibrations into your life. Vastu Shastra provides comprehensive guidelines to harmonize your living space with natural forces, ensuring a balanced and prosperous life. Respecting and adhering to these principles can significantly enhance the energy flow in your home, promoting health, wealth, and well-being. For professional assistance, consider consulting with Brick & Bolt, a renowned home construction company.

Property Sale Agreement: Essential Clauses and Legal Insights

0
Property Sale Agreement

A property sale agreement is a legal document that focuses on terms and conditions that the buyer and seller agree upon. You may need assistance at times while dealing with sales agreements. This blog will help you understand the property sale agreement, clauses, and process. 

What is a property sale agreement?

The property sale agreement is a legal contract between the buyer and the seller that contains the conditions and terms that the buyer should abide by to purchase a real estate transaction. 

The sale deed summarizes the details both parties agree to and the proper signature before transferring the property. It plays an important role as it is the legal agreement for the property sale. 

The sale agreement covers certain key elements like:

  • The property details: Clear address, identification number, and legal description. 
  • The total amount the buyer has to pay to the seller. 
  • The closing date.
  • The details of the ownership transfer.
  • The conditions present in the property sale agreement.

Why is a sales agreement important?

sales agreement

The sales agreement is important as it outlines the terms of the sale, including the payment and sales conditions, and is a legal document that protects both the seller and the buyer. 

A sales agreement ensures that the seller and buyer agree to individual conditions. It helps to maintain relationships, and the document can be submitted as proof in case of any dispute. 

In short, a sales agreement is an important tool that facilitates easy transactions and protects the interests of both parties. 

Clauses That Go into an Agreement to Sell

The sales agreement is important, especially in the complex real estate scenario. Some important clauses that must be present in the agreement include:

Identification Certificate

Both parties (the seller and the buyer) must bring valid proof of identification containing the full address and contact number.

Details of Property

Details of Property in an agreement to sell refer to the comprehensive information about the property being transacted. This section includes:

Residential Address:

The full address of the property, including the street name, number, locality, city, state, and postal code. This ensures there is no ambiguity regarding the exact location of the property.

Property Description:

A detailed description of the property, which may include the type of property (e.g., apartment, villa, plot), the size (e.g., square feet or square meters), the number of rooms, and any unique features or amenities (e.g., garden, parking space, swimming pool).

Legal Description:

The legal description of the property as per the municipal or local authority records. This includes details like plot number, survey number, registration district, and any other specific identifiers used in official records.

Ownership Information:

Details about the current owner(s) of the property, including the name(s) of the seller(s). This section confirms the ownership and ensures that the seller has the legal right to sell the property.

Buyer Information:

Details about the buyer(s), including full names, addresses, and contact information. This establishes who the buyer is and provides necessary contact details.

Terms and Price of Sale: 

The agreement is made upon specific terms and price that the seller and buyer have agreed upon. Hence, the terms involve deadline, balance due, and down payment details. 

Risk of Loss: 

Before the property transfer, the party that bears any risk of loss should be determined and mentioned in the agreement. 

Title: 

The title in the sale agreement determines who holds the property after ownership. 

Closing and Transfer: 

It is important to choose a closing date to transfer ownership. Additionally, fixing the specific information plays a crucial role in legal documents.

Clauses to Pay Extra Attention to in a Sales Agreement

Paying attention to certain clauses can help both parties proceed smoothly with the conditions of the agreement.

Clauses to look after in a sale agreement include:

  • Termination clause: It focuses on the conditions that can be terminated when a party breaches the contract. 
  • Indemnification clause: It determines the party responsible for damage in liability or any damage in total. 
  • Confidentiality and dispute handling clause: This clause outlines how to handle the consequences of disagreements in arbitration or negotiation. 

The entire clause of the agreement should contain all the details agreed by the buyer and the seller, which should be legally sealed and abide by the laws of the jurisdiction. 

Sales Agreement for Commercial Property

A commercial sale agreement contains the legal contract that a buyer and seller agree to exchange for money. The document outlines the details of the property, location, and description of obligations until payment and transactions. 

The agreement lists the price of purchase agreed upon for the property, including the earnest money and final deposit. Additionally, the commercial property contains clauses in which the buyer accepts the property as it is, and the seller agrees to no warranties. 

Once the buyer finalizes the property after a period of inspection, the property will be legally stamped and transferred after full payment.

Process of Executing a Sale Agreement

The process of executing a sale agreement is listed below:

Agreement draft

A lawyer or a real estate agent should draft the agreement. The draft agreement contains the address, name, price of sales and payment terms, completion time, each party’s responsibilities, and dispute resolution process.

Finalizing the agreement

Once the agreement draft is completed, both parties carefully review it. The contract will be finalized upon both parties’ verified signatures.

Signing and execution

Both parties must sign the agreement to sell the property upon visiting the location. 

Registration

The registration process is not always mandatory but will give you total control over legal security. Registering a commercial property is a legal document that is evidence in dispute cases. 

Conclusion

A property sale agreement is important when dealing with a property transaction. Having adequate knowledge of what goes into a property sale agreement will help you avoid scammy deals. In case of doubts and deeper understanding seek the help of a legal advisor and move the process according to the legal terms.

A Property Sale Agreement and a Power of Attorney for Property are both legal documents used in real estate transactions, but they serve different purposes and have distinct roles in the process.

Consider crucial clauses such as termination, indemnification, confidentiality, etc. Ensure that all clauses have a proper legal basis. Always make sure to visit the location and study the agreement before proceeding.

FAQs

1. Why is a sales agreement important?

A sales agreement is a legal document that can be submitted as proof of any arising dispute. Hence, it plays an important role in case of any breach of the papers. 

2. Is the process of sales agreement across all states in India?

The sale agreement for a commercial property remains the same across India. It comprises the sale price, payment terms, property description, and possession dates. 

3. Who can I trust to make my agreement to sell a property?

A lawyer specialized in guiding property sale agreements can help you with the deal. So, make them deal with the sale agreement till the end.

What is a Possession Certificate & How to Get It?

0
Certificate

A possession certificate is a legal document that acts as evidence for land or property ownership. It is an important document plays a lead role in selling your property. It is issued by Revenue Divisional Officer (RDO) in urban areas, and Tahsildar in rural areas.

This document is often called a possession letter or land possession certificate. With this article, let’s have a clear understanding of the possession certificate and how to get it.

What is a Possession Certificate

A possession letter or certificate is a crucial document denoting that specific property belongs to an individual or entity. It is provided by the municipal corporation or local authorities to legally utilize the property.

It is evidence of ownership that the seller has to hand over to the buyer. If you are looking to buy a new property, it is recommended to consult the professional authorities to ensure that it is aligned with legal regulations.

How to Get a Possession Certificate

Here are the easy steps you need to follow to get a possession certificate:

  • To apply for a possession letter, opt for application at the RTPS (Right to Public Service), the Revenue Divisional Officer, or Anchaladhikari in your area. Alternatively, you can also get it from the Revenue and Land Reforms website.
  • Enter the appropriate details in the respective fields on the online application form.
  • Submit the application form, including all required documents.
  • Finally, you can track the status of your application using an acknowledgment receipt and a number provided to you.

Documents Required for Possession Certificate

Below are the lists of documents you should submit to avail the possession certificate in TamilNadu:

  • Registered sale agreement copy
  • Sale deed agreement copy
  • Scanned copy of lease cum sale deed
  • Income certificate
  • Aadhar card
  • Ration card
  • Passport size photo
  • Application form
  • Applicant’s signature proof and identity
  • Scanned copy of photo identification proof and address proof
  • Copy of encumbrance certificate

Importance of Possession Certificate

Possession Certificate

A possession certificate holds immense significance in real estate transactions. This crucial document acts as a proof of ownership and adds value to the property.

Proof of Ownership

A land possession certificate is legal evidence that ensures the rightful ownership of a specific land or property.

Makes Property More Attractive to Buyers and Lenders

A possession certificate increases the resale value of your property, attracting more buyers and lenders in the future. It creates demand for your land and makes it more valuable.

Reduces risk of Future Ownership Disputes

Thoroughly verifying the possession certificate helps prevent potential disputes before they occur. It indicates to the buyer that you have all legal rights to sell it.

Offers Confidence and Security in your Property Rights

A possession letter is indisputable proof that is essential to every homeowner. It offers security and assurance by stating that you are the rightful owner of a particular land or property.

May be Required for Government Schemes and Negotiations

A possession certificate is mandatory to obtain the benefits of government subsidies like tax subsidies and more. Providing a possession letter as proof is essential to ensure that you are the rightful owner.

FAQs

1. What is the Difference Between Possession and Ownership Certificate?

A possession certificate is evidence that you have taken physical possession of a property. However, the ownership certificate transparently says the legal ownership and title of the property in your name.

2. What is the Difference Between Possession Certificate and Occupancy Certificate?

A possession certificate is a proof that you are the rightful owner to the property. While the occupancy certificate establishes that the property is safe for occupation and it has been constructed under approved plans and conditions.