Home Blog Page 79

Home Building Materials List: Foundation to Finish

0
Home Building Materials List

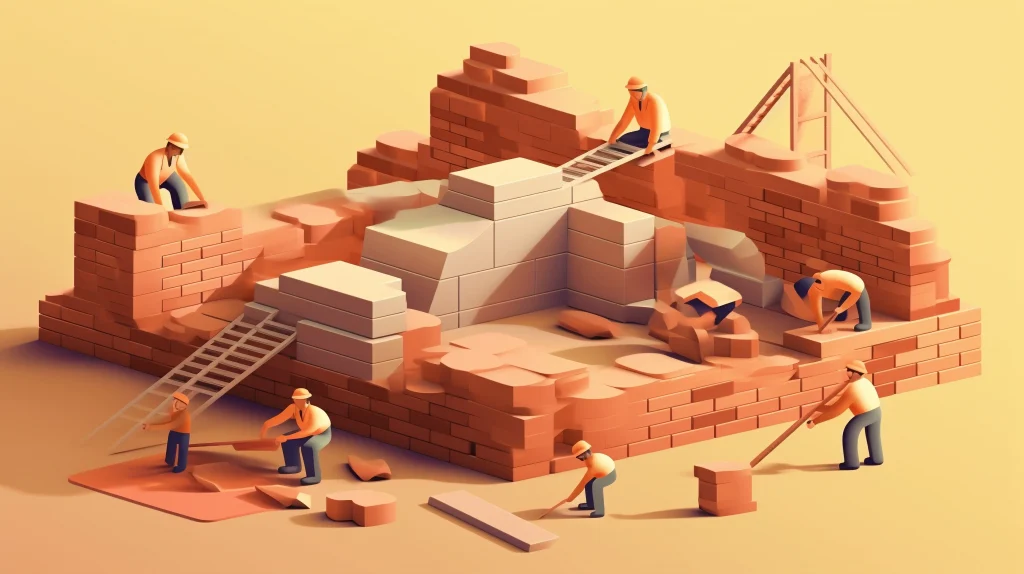
“Home is where the heart is’.’ Certain elements need to be utilized to make the building stand erect. From skyscrapers to huts, these materials play a crucial role in strengthening buildings. This blog covers twelve building materials that are required to start and finish the building construction.

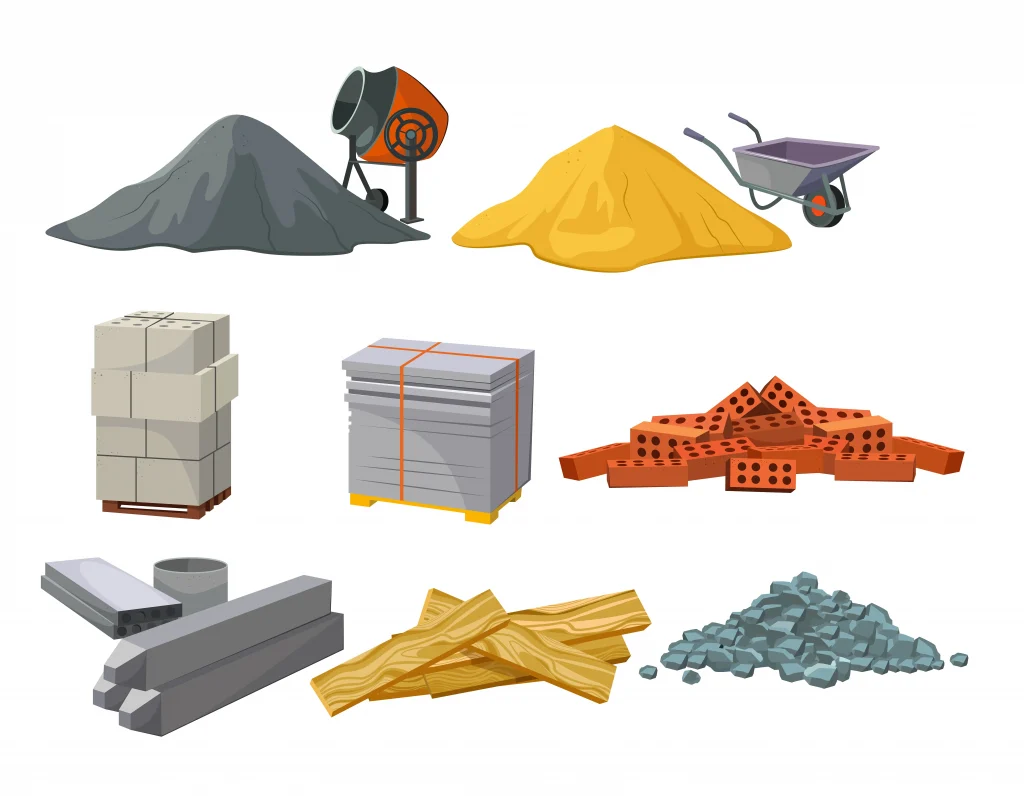
12 Types of Building Materials Used in Construction

construction material

Never compromise on when building a home, as it encompasses various components involved in constructing the structure. Twelve elements are used in building construction. Let’s see them one by one.

1. Concrete

Explanation: Concrete is a composite material made from cement, sand, aggregate (gravel), and water. It hardens over time and gains strength, making it a fundamental building material.

Applications: Concrete is used in constructing foundations, slabs, beams, columns, and other structural elements. It is also used for sidewalks, driveways, and roads. Concrete can be molded into various shapes and forms, making it versatile for different construction needs.

2. Steel

Explanation: Steel is an alloy of iron and carbon, known for its high tensile strength and durability. It is widely used in construction due to its flexibility and ability to withstand heavy loads.

Applications: Steel is commonly used in building frameworks, including beams, columns, and trusses. It is also used for reinforcement in concrete structures, roofing, and as a structural component in large buildings like skyscrapers, bridges, and industrial facilities.

3. Wood

Explanation: Wood is a natural material obtained from trees, valued for its aesthetic appeal and versatility. It is lightweight, easy to work with, and provides good insulation.

Applications: Wood is used in framing houses, making doors, windows, furniture, and flooring. It is also used for decorative purposes in interiors and for constructing wooden decks, fences, and pergolas.

4. Brick

Explanation: Bricks are small, rectangular blocks made from clay, sand, lime, or concrete materials. They are fired in a kiln to harden and strengthen them.

Applications: Bricks are used in building walls, partitions, and foundations. They are preferred for their durability, fire resistance, and thermal insulation properties. Bricks are also used in paving pathways and creating decorative elements in facades.

5. Stone

Explanation: Stone is a natural building material extracted from quarries. It is valued for its strength, durability, and natural beauty.

Applications: Stone is used in constructing foundations, walls, and facades. It is also used for flooring, countertops, and as a decorative element in landscaping. Common types of stone used in construction include granite, marble, limestone, and sandstone.

6. Glass

Explanation: Glass is a transparent or translucent material made from silica, soda, and lime. It is widely used in modern construction for its aesthetic appeal and ability to let natural light in.

Applications: Glass is used for windows, doors, partitions, and facades. It is also used in making skylights, glass walls, and decorative elements. Tempered and laminated glass are used for safety purposes in areas prone to impact or stress.

7. Aluminum

Explanation: Aluminum is a lightweight, corrosion-resistant metal commonly used in construction. It is known for its strength, flexibility, and ease of fabrication.

Applications: Aluminum is used for window frames, doors, roofing, and cladding. It is also used in making structural components for buildings and bridges. Aluminum’s resistance to corrosion makes it ideal for coastal and industrial environments.

house construction material

8. Plastic

Explanation: Plastic is a synthetic material made from polymers. It is lightweight, durable, and resistant to moisture and chemicals.

Applications: Plastic is used for piping, insulation, window frames, and roofing materials. It is also used in making flooring, wall panels, and various fixtures and fittings. Its versatility and ease of molding into different shapes make it popular in construction.

9. Cement

Explanation: Cement is a fine powder made from limestone, clay, and other minerals. When mixed with water, it forms a paste that hardens and binds other materials together.

Applications: Cement is a key ingredient in making concrete and mortar. It is used for constructing foundations, floors, walls, and other structural elements. Cement is also used in plastering and tiling works.

10. Clay Tiles

Explanation: Clay tiles are made from natural clay, molded into shapes, and fired in a kiln. They are known for their durability, aesthetic appeal, and resistance to weather.

Applications: Clay tiles are used for roofing, flooring, and wall cladding. They provide good insulation, are fire-resistant, and come in various colors and designs. Clay tiles are popular in both residential and commercial buildings for their rustic and traditional look.

11. Gypsum

Explanation: Gypsum is a soft sulfate mineral used in the production of plaster, plasterboard, and other construction products. It is lightweight, fire-resistant, and easy to work with.

Applications: Gypsum is used for making drywall (gypsum board) for walls and ceilings. It is also used in plastering, creating decorative elements, and as a base for paints and textures. Gypsum board is preferred for its smooth finish and ease of installation.

12. Bamboo

Explanation: Bamboo is a fast-growing, sustainable material used in construction. It is strong, flexible, and environmentally friendly.

Applications: Bamboo is used for scaffolding, flooring, roofing, and wall panels. It is also used in making furniture and decorative elements. Bamboo’s natural aesthetic and sustainability make it popular in eco-friendly and traditional construction projects.

Conclusion

Wrapping things up, the elements of the construction from beginning to end play a crucial role, with each having a specific function. However, the world is evolving, and certain construction materials are being replaced with upgraded materials. These materials comprise the essential components needed for building construction from start to finish. 

FAQs

What are the materials used for the foundation of a building?


The materials that play an important role in forming the foundation of a building are concrete and concrete blocks. 

What are some of the building materials used?


Some of the common materials used for building purposes are concrete, cement, sand, brick, blocks, and wood.

What Should You Never Compromise On When Building A Home

0
what should you never compromise on when building a home

Constructing a house is an important task that entails a careful analysis of a number of factors so as to get a good and comfortable home. Here are some detailed insights into essential aspects to prioritise when constructing a house:
2 Most important things not to skimp when building a house

1. Quality of Construction

Why It Matters:

The quality of construction is the backbone of your house. It affects the structural integrity, safety, durability, and overall performance of the building. Skimping on construction quality can lead to significant problems down the line, including costly repairs, safety hazards, and a reduced lifespan of the house.

Key Areas to Focus On:

Key Areas to Focus On (1)

a. Foundation and Structure:

Practical Knowledge: The foundation is the most critical part of any building. It bears the entire load of the structure. Using high-quality materials and ensuring proper construction techniques are followed is vital. For example, the soil should be tested to determine its bearing capacity, and the foundation should be designed accordingly. Reinforced concrete is commonly used for its strength and durability.
Tips: Hire experienced engineers and contractors, use quality cement and steel, and ensure adequate curing time for concrete to achieve maximum strength.

b. Building Materials:

Practical Knowledge: The choice of materials like bricks, cement, steel, and wood directly affects the house’s durability and maintenance needs this are Building materials. Using substandard materials can lead to issues like cracks, water leakage, and structural failures.
Tips: Always opt for reputed brands and quality-certified materials. Conduct regular site inspections to ensure the materials used match the specifications.

c. Workmanship:

Practical Knowledge: Skilled labour is essential for quality construction. Poor workmanship can lead to uneven walls, improper fittings, and weak structures.
Tips: Hire qualified and experienced labourers, supervise the work regularly, and ensure that construction follows the approved plans and specifications.

d. Waterproofing and Insulation:

Practical Knowledge: Proper waterproofing prevents water seepage, which can damage walls and foundations. Good insulation helps maintain a comfortable indoor temperature and reduces energy costs.
Tips: Use high-quality waterproofing materials for roofs, basements, and bathrooms. Invest in proper insulation for walls and roofs to enhance energy efficiency.

2. Basic Infrastructure

Basic Infrastructure

Why It Matters:

Basic infrastructure includes essential services like plumbing, electrical systems, and sewage. These systems ensure the functionality and habitability of your home. Poor infrastructure can lead to frequent repairs, increased maintenance costs, and potential health hazards.

Key Areas to Focus On:

a. Plumbing:

Practical Knowledge: A well-designed plumbing system ensures efficient water supply and waste disposal. Poor plumbing can result in leaks, water damage, and health issues.
Tips: Use high-quality pipes and fittings, ensure proper installation, and conduct pressure tests to check for leaks. Plan for easy access to pipes for future maintenance.

b. Electrical Systems:

Practical Knowledge: A reliable electrical system is crucial for safety and convenience. Faulty wiring can cause short circuits, fires, and electric shocks.
Tips: Hire certified electricians, use high-quality wires and components, and install adequate circuit breakers. Ensure that the wiring system adheres to safety codes and regulations.

c. Sewage and Drainage:

Practical Knowledge: Efficient sewage and drainage systems prevent waterlogging and maintain hygiene. Poor drainage can cause flooding, structural damage, and health hazards.
Tips: Ensure proper slope and design for drainage systems, use durable pipes, and include inspection chambers for maintenance. Regularly check and clean drains to avoid blockages.

d. Ventilation and Natural Light:

Practical Knowledge: Good ventilation and natural light are essential for a healthy living environment. Poor ventilation can lead to mold growth and respiratory problems.
Tips: Design the house to maximize natural light and airflow. Use large windows, ventilators, and exhaust fans. Consider installing skylights and openable windows in each room.

Other things to consider when building a house

Location

It is important to understand that the location of the house defines its value in the long-term period as well as the quality of life. Real estate location features that should be taken into consideration include; accessibility to facilities, security of the area, and plans for development in the future, and attractiveness of the location. 

Floor Plan, Lot Size & Layout

Most times, the physical structure and design, including the size of the house, the pattern of the floor, and the location of the plot, define the usability and beauty of the house. Depending on what you plan to do outside your home and on the possibility of expanding the living area outside the house, the lot size is crucial.

Room Height

Room height is another aspect that people seldom pay attention to though it plays a vital role in the improvement or degradation of a home’s atmosphere. This is due to the fact that taller ceilings (at least 2. 5 meters) makes the room feel less confined, increases air flow and lets in more natural lighting. There is also more design potential for light fixtures and other kinds of decor when the ceilings are higher.

Reliability of the Developer

Choosing a reputable and qualified developer can help avoid problems during construction and ensure that the client and developer are happy with the results. When picking a developer, consider the developer’s overall reputation. Also, look at their past projects and their performance. Base this on the reviews of other customers who have worked with them before.

 Basic Amenities

Electricity, water, sewage, internet, and other amenities make life comfortable in some regions. Check the services’ backgrounds. Ensure they are accessible and effective where your house will be. This will prevent future problems or extra costs.

Parking Space

Accessible parking areas are basic needs that add functionality and usability to the overall living space of a home. Also in your house design it is important that there is provision for parking of your vehicles as well as any other visitors that may come over. Items to consider include width of the driveway, size of the garage, and landscape design. The goal is to maximise parking space without hurting the beauty of the house.

Security

Prioritising security features in your house design can provide peace of mind and protect your property and loved ones. Install strong security systems. They can include alarms, cameras, motion sensors, and secure entry points. They will deter intruders and let you monitor your home remotely. Consider factors such as neighborhood safety, lighting, and landscaping. They will enhance your property’s safety.

Conclusion

Making sure your home design has the above security features helps a lot. It promotes the safety of your home and your family. Deciding on security features involves key factors. These include the safety of the neighbourhood and the adequacy of lighting. They also include landscape design.

How to Find Patta Number: A Complete Guide

0
how to find patta number

The Patta number is a serial number allotted to every property, especially in Tamil Nadu. It is used for different reasons like property registration, tax payments, or any important official dealings. 

In this blog, we will explain how you can find your Patta number. You can do this with the help of documents you already have, and without them. 

How to Find Patta Number

The Patta number is key for property transactions. It is needed for Home loans, taxes, and solving ownership disputes in Tamil Nadu. By following the steps below, you can easily locate your Patta number, whether you have the original document or not. Always verify the information to avoid discrepancies.

Locating Your Patta Number Through Existing Documents

Physical Patta Document:

– Always make certain of your physical Patta document because it is commonly released by the Revenue Department.

– As for the Patta number, it is mostly indicated in the upper right corner part of the said document.

– You will need details like district, taluk, village, and survey number to search for the Patta number on the Tamil Nadu Revenue Department website.

– Make sure the document is not a fake and that it is the updated version.

Online Records:

– Visit the official website of the Tamil Nadu Revenue Department (https://www.tn.gov.in/department/4).

– The aforementioned tab is usually titled as “Patta Chitta” or “Patta Search.”

– To search for the Patta number, enter the district, taluk, village, survey number, and so on.

– Cross-check with the physical Patta document that was issued to you and the information displayed on the website.

Methods to Find Your Patta Number Without Existing Documents

Number Without Existing Documents

Online Search (Tamil Nadu Only):

– Visit the official website of the Tamil Nadu Revenue Department (https://www.tn.gov.in/department/4).

– Search for the option that has “Patta Chitta” or “Patta Search” in the given website.

– Tick the option to search Patta number without having existing documents.

– You will still need details like district, taluk, village and the survey number or even the town or city (if the property is in urban areas) to search on the Tamil Nadu Revenue Department website.

– Mention the district, taluk, village and the survey number or even the town or city if the property you are going to avail lease is in urban areas.

– The following should be done: Confirm the accuracy of the information that is provided on the website.

Office Visit:

Office Visit

– Visit the local Revenue Office or the Tahsildar Office in your area.

– Provide your property details to the officials, such as the address, survey number, and any other relevant information.

– The officials will assist you in finding your Patta number by searching through their records.

– Bring valid ID proof and any supporting documents related to your property.

– Be prepared to pay a nominal fee for the Patta number search, if applicable.

Conclusion

Patta number is very important in certain government-related activities. The above-mentioned methods are the procedures you can follow to get the Patta number; In this case, if you have got your documents, you can proceed to get your Patta number easily. It is always good to cross-check the information provided to avoid any inconsistencies. You can obtain the ward and block number for a patta either online or by visiting the Taluka office

Should you require any assistance or if you have additional questions, visit your local Revenue Office or speak to a lawyer.

FAQs

How can I know my Patta number in Tamil Nadu?


You can either locate your physical Patta document or search for it online using the official website of the Tamil Nadu Revenue Department.  If you are unable to acquire the documents from anywhere, you can always approach the local Revenue Office or Tahsildar Office available in the particular region.

How can I know my Patta block number?


The Patta block number is usually printed on the physical Patta document. If you lost the document, then you can visit the nearby Local Revenue Office or Tahsildar Office of your area, and by providing the specific details of your property, they can tell you the block number of your Patta.

How to download Patta in Tamil Nadu?


1. Visit the official website of the Tamil Nadu Revenue Department (https://www.tn.gov.in/department/4).
2. Click on the “Patta Chitta” or “Patta Search” section.
3. Enter your property details such as district, taluk, village, and survey number.
4. Click on the “Search” button.
5. Once the Patta details are displayed, look for the “Download” option.
6. Click on the “Download” button to download your Patta document.

how to find survey number without patta ?

To find a survey number without a patta, visit the Village Administrative Office (VAO) or local revenue department with property details. Alternatively, check the sale deed or search for land records on your state’s online portal if available.

How to Change Name in Adangal: Streamline Property Records

0
How to Change Name in Adangal

The village administrative officer maintained Adangal, which is an official land record. The term Adangal is primarily used in the states of Telangana, Tamil Nadu, Karnataka, and Andhra Pradesh. The document contains the information on a particular property containing the name of the owner, type of land, and taxes. 

Additionally, if you are an individual who has recently changed your name due to divorce, marriage, or any other reason, your Adangal should reflect the update. 

This blog gives a detailed overview of Adangal entries depending on different states’ regulations.

Changing Your Name in Adangal 

The details on how to change names in Adangal in the state of Tamil Nadu are listed below.

Online Application 

Online Application

The procedure and availability to change names in Adangal differs between states. To find the choice offered by your government, look for:

Check Your State Government Website

Almost all the state governments have dedicated websites to change the information for citizens. Use keywords, namely “E-Seva” or “Citizen Service Portal,” to understand the government service provided in your state.

Website:https://www.cra.tn.gov.in/e-adangal.php

E-Seva/Citizen Service Portal

Once you find the relevant website, you can easily navigate towards the services of the revenue department or land records. On the website, you can choose options such as a name change in Adangal or functions similar to it. 

Website:  https://eservices.tn.gov.in/eservicesnew/index.html

Steps in the Online Application Process

  • Registration: Using your ID proof (Aadhar or any government ID), create an account.
  • Application Form: On the website, locate the online application form for a change of name in Adangal. This form enquires details of your name, name to be changed, address, Aadhar proof, and survey number.
  • Fees Payment: After filling out the form, you can pay the processing fee using a credit card, debit card, or net banking option. 
  • Submission and Tracking: Once you have finished the payment, you can submit your application and monitor your application status online. 

Note: In case your state government doesn’t offer any online portals, kindly utilize the offline mode of application. 

Offline Application 

In case of the absence of an online application change, you can proceed with traditional offline steps.

Application form: To change the name in Adangal, kindly visit the nearest revenue office, which is the Tahsildar office, and get the form.

Filling the form: Once you grab your form, fill in the details like name, new name, address, village information, and survey number. 

Documents Needed: Attach copies of the marriage certificate, court order, or gazette documents with attestation that serve as supporting documents confirming the new name.

Submission and fee payment: Once you have filled out the form and completed the application process, you have to submit the supporting documents along with the form and fees to the Tahsildar office.

Processing Time and Follow-Up

Processing Time and Follow-Up (1)

https://www.bricknbolt.com/blogs-and-articles/permits-and-legal/how-to-change-name-in-adangalThe process of changing the title for a name in Adangal can vary depending on the Adangal & Patta rules of the state government. These include:

State Regulations: For updates and procedures, each state has its timelines.

Workload: The workload in the revenue department might be busy and has an impact on the speed of processing. If the workload is higher, the waiting time will be higher. 

Application of Completeness: Make sure that the document is filled accurately to avoid delays and missing information. 

General Range

While the time may vary, the time required to change the name and reach you will take around two weeks to a month. In some conditions, it may take more than one month.

To speed up the process, submit the application with relevant documents attested properly, double-check the information, and politely ask for reasons in case to avoid any unnecessary delays or misplacement. 

Conclusion

In summary, it is important to update your Adangal name to ensure that the land records have uniform information to avoid any confusion or complication in the property while getting the Adangal.

Additionally, it’s crucial to understand the difference between various land records, such as Adangal vs Register, when dealing with property documentation. Even we have to make sure to explore your state’s government websites and portals since it leads to easy procedures and tracking.

FAQs

How do I change the name on a certificate online?

Changing names in any certificate might be pretty tough. The name on any certificates cannot be changed entirely using online mode. Hence, you need to contact the authority issuing it and follow certain procedures that involve both offline and online components. 

Is it possible to change the name on the certificate?

Yes, it is possible to change the name on the certificate by obtaining a court order or through a gazette. The certificate will be issued upon the conditions.

What are the ways to correct names in Adangal?

To change the name in Adangal, you can go to computerized Adangal corrections or 1B services that can help you correct any changes in the Pahani/Adangal.

Structural Stability Certificate: The importance and value

0
Structural Stability Certificate

The Certificate of Structural Stability is an important legal requirement to help protect the lives of people involved in construction. It is usually provided after an examination of a structure’s stability. 

It ensures that the structure meets regulations and standards. In this blog, we will discuss the Structural Stability Certificate, explaining why it is necessary and its benefits.

What is a Certificate for Structural Stability?

A Structural Stability Certificate is an approval issued by a professional engineer or structural surveyor. This assessment concerns the planning and execution of the structure. They issue it after examining the structure for stability.

It covers the materials used to build it and how it can handle loads and stresses from construction, including natural disasters like earthquakes and hurricanes. It proves that the structure is fit for use in human habitation and occupation, as indicated on the certificate.

Steps to Obtain a Structural Stability Certificate

1. Preliminary Site Inspection

The first step is the preliminary site inspection. It is the start of getting a Structural Stability Certificate. In this step, you do a thorough visual exam of the building. This is to find any clear signs of structural distress or problems.

Steps Involved:

  1. Visual Inspection:
    • Inspect the building’s exterior and interior. Look for visible cracks, bending, and signs of material decay.
    • Check the foundation, columns, beams, walls, floors, and roof for any apparent issues.
  2. Initial Measurements and Sketches:
    • Take preliminary measurements of critical structural elements.
    • Create rough sketches of the building layout, noting any areas of concern.
  3. Environmental Factors:
    • Look for hazards in the environment. These can include soil erosion, waterlogging, or nearby construction.
  4. Documentation Review:
    • Review the existing building plans. Also, review the old inspection reports and any repair or renovation records.

2. Detailed Structural Assessment

The assessment is a detailed review of the building’s structural strength. It involves many tests and analyses. They are to find the load-bearing capacity and stability.

Steps Involved:

  1. Material Testing:
    • Test concrete, steel, and other construction materials. Do it to find their strength and condition.
      • Concrete Core Test: Extract cores from concrete elements and test for compressive strength.
      • Rebar Testing: Use non-destructive methods. For example, use the Rebar Locator. Use it to check the position, diameter, and condition of reinforcement bars.
  2. Structural Analysis:
    • Use software tools to analyze the structure. Use them to model the building and simulate loads.
    • Analyze the building’s response to different loads. These include dead, live, wind, and seismic loads.
  3. Load Testing:
    • Conduct load tests on specific structural elements to verify their capacity to bear loads.
      • Static Load Test: Apply incremental loads and measure the deformation and deflection.
      • Dynamic Load Test: Apply dynamic loads and monitor the structure’s response.
  4. Non-Destructive Testing (NDT):
    • Use NDT methods to assess the internal condition of structural elements without causing damage.
      • Ultrasonic Pulse Velocity (UPV) Test: Evaluate the quality and integrity of concrete.
      • Ground Penetrating Radar (GPR): Detect hidden defects and reinforcements.
  5. Foundation Assessment:
    • Examine the foundation for signs of settlement, heaving, or other issues.
    • Perform soil tests to determine soil bearing capacity and stability.

3. Documentation and Report Preparation

The final step is to compile the findings from the site inspection and assessment. Then, put them into a report. Then, the report is submitted to get the Structural Stability Certificate.

Steps Involved:

  1. Compilation of Data:
    • Gather all data from inspections, tests, and analyses.
    • Organize the information systematically for easy reference.
  2. Report Preparation:
    • This section gives a brief overview of the building. It covers its history and the goal of the assessment.
    • Methodology: Detailed description of the inspection methods, tests conducted, and analytical tools utilized.
    • Findings: The report will include the findings. These findings cover visual inspections, material tests, structural analyses, and load tests.
    • Recommendations: Specific recommendations for any necessary repairs, reinforcements, or further monitoring.
    • Conclusion: It summarizes the building’s overall stability. It also states if it complies with relevant standards and regulations.
  3. Certification:
    • Submit the report to the relevant authorities or certifying body.
    • The report is reviewed, and if it meets all requirements, a Structural Stability Certificate is issued.
  4. Follow-Up:
    • Implement recommended repairs or reinforcements.
    • Schedule regular inspections. They are part of the building’s ongoing structural health monitoring.

Benefits of a Structural Stability Certificate

A Structural Stability Certificate offers several benefits to property owners, developers, and users. These benefits include:

Safety

A Structural Stability Certificate ensures Construction Site Safety It prevents accidents. This is especially true where buildings contain people. They do so in some way, such as in homes, businesses, or other public places. 

In this way, they reduce the likelihood of a structural failure or the inability of the structure to handle a disaster.

Compliance

This certificate guarantees compliance with state building codes and laws. This is crucial in acquiring the right permissions and, equally, not forgetting the legal ramifications of not doing so. In many places, the law requires one to get a stability report before selling or transferring property.

Value

It is good to own a Structural Stability Certificate. It can boost property sales and rent. The certificate states the structure is safe, and the owner cares for it. That may be more the case in business markets, especially if a sound building forms part of a consistently enduring image.

Insurance

It is also common for insurance companies to require the Structural Stability Certificate. This certificate allows property owners to now persuade insurance companies to raise insurance rates and improve premium conditions. 

This implies that property owners can work hard on their structures. They aim to lower their insurance costs. They want to get the best insurance for structures.

Cost Savings

It can also help building owners and managers. A Structural Stability Certificate helps them find other problems. These problems could lead to disasters. In that light, property owners should address such issues. It may save them loads of money on repairs or property replacement.

What is a Structure Stability Test?

A stability test is a full evaluation of a structure. It checks its ability to withstand different loads and stresses. This test involves a series of assessments, including:

  • Visual inspection
  • Non-destructive testing (NDT)
  • Analysis of engineering plans
  • Computer modeling

Based on the results of all these tests, the engineer will determine whether the structure is stable enough for its intended use. They will also recommend if there are any repairs or reinforcements to be done.

What Does Structural Stability Include?

Visual Inspection: It examines the structure. Look for areas that may need repair.

Material Testing: It verifies the structure’s materials and ensures they are suitable and comply with relevant industry laws.

Load Calculations: It determines the structural capacity for different kinds of loads including dead, live, wind, and earthquake loads.

Dynamic Testing: These are tests done on the structure to determine the response of the structure to dynamic loads.

Conclusion

With this certificate, property owners and developers can be sure they are working within the law. It will also boost the property’s value and create comfortable conditions for users. This information will help those making structural changes or seeking a Stability Certificate make better decisions about their buildings’ condition and integrity.

How To Check The Direction Of Your House

0
How To Check The Direction Of Your House

When you’ve decided to build a house, the first thing you will consider is which way the house will face. It’s also the case when you wish to rent a house.

People have linked the direction of a building to luck and wealth since ancient times. There are some methods you can follow to check the direction of your house. We will look at some of those methods in this article.

How To Check The Direction Of House

You don’t have to fret too much and think it a difficult task to check the direction of your house. You can follow any of these three methods to identify the direction of your house.

Using A Compass

Using A Compass

This is the most basic and accurate method of checking the direction of your house.

Step-by-Step Guide to Using a Compass

  1. Preparation and Equipment:

Ensure you have a reliable, high-quality compass. You can use both traditional magnetic compasses and modern digital compasses.

Verify the correct calibration of the compass to ensure accurate readings.

  1. Positioning:

Stand at the front door of your house, ensuring you are completely outside the building.

Position yourself opposite your house, with the door at your back. This ensures that the compass reading will indicate the direction your house faces.

  1. Aligning the Compass:

Hold the compass flat in your hand at waist height, ensuring it is level. This is crucial, as tilting the compass can lead to incorrect readings.

Keep the compass at the same angle as the front of the house. If your house angles towards the street. You should hold the compass so that it aligns with this angle.

  1. Taking the reading:

Allow the compass needle to settle and point towards the magnetic north. This may take a few seconds.

To find out your house’s direction, use a compass. Read the cardinal or intercardinal direction shown by the needle.

  1. Recording and Interpreting the Results:

Note the direction indicated by the compass. For example, if the needle points to 90 degrees, your house faces east. If it points to 180 degrees, your house faces south, and so on.

For a clearer understanding, consider the azimuth reading. This is the compass degree from 0 degrees to 360 degrees. This gives a more accurate direction.

Based on this, you can identify the direction of your house through a compass.

Using a smartphone compass app.

If you don’t have a compass in hand, don’t worry.

You can still find the direction your house is facing accurately. You just need your smartphone for this.

Every smartphone will have a compass app. You can use it to find the direction you are facing. Like a regular compass, your smartphone’s compass points north.

To find the direction with your smartphone compass, stand at your house’s front door. Do as we’ve discussed above. You can then use the same method you saw above to identify the direction of your house.

Note: Unlike your regular compass, the smartphone compass may have less accuracy if you don’t turn on your location. So check if your location is on before using it.

Online Tools

Online Tools

Aside from your regular and smartphone compasses. There are also online tools to identify your house’s direction. One such useful tool is your Google Maps application.

Follow these steps to identify your location with Google Maps:

  1. Go to Google Maps.
  2. Search for your home address.
  3. Zoom into your house for a clear view of it’s.

By default, Google Maps orients itself in the north. You can identify the direction of your house by finding which side it faces.

Another online method can help you find your house’s direction. It is the Online House Inspection Report. Some areas provide online house inspection reports through realtor websites or government portals. These reports might contain the direction of your house.

Importance of House Direction as per Layout or Design Purpose

When planning a house’s layout or design, the direction it faces matters a lot. It affects daily routines and capabilities in significant ways.

Natural light and ventilation.

Which way your house faces decides how much light it receives. If your house faces east, it gets morning sunlight. This is good for bedrooms and living rooms.

If it faces west, it gets more afternoon and evening light, which is good for kitchens and dining rooms. Ventilation is also important for fresh air and good indoor air quality.

Energy Efficiency

To maximize energy efficiency, position your house in the right direction. In cold areas, a south-facing house receives more sunlight. This lowers winter heating costs. In hot regions, a north-facing house avoids too much heat. It reduces the need for air conditioning. Placing windows and doors in the right spots can help save energy by using sunlight and fresh air.

Importance of House Direction as per Vastu

Vastu Shastra is an ancient Indian science of architecture. It emphasizes how a house’s facing direction can influence energy flow. This can impact the occupants’ health, prosperity, and happiness.

Positive Energy and Prosperity

According to Vastu Shastra, people consider a house facing east to be lucky. It faces the morning sunlight, which brings positive energy and good fortune.

A house that faces north brings prosperity and stability. It aligns with the magnetic field and energy flow from the north facing. Making sure your house faces one of these directions can attract good vibrations. It can also promote well-being.

Health and Well-being

The direction your house faces can also impact the health and well-being of its occupants. For example, people believe that a house that faces east or north improves mental clarity. It’s also said to boost physical health and spiritual growth.

In contrast, people may view a south-facing house as less favorable. This is due to its link to high energy and potential conflicts. Aligning your house with Vastu principles can create a balanced living environment. It supports physical and mental wellness.

Conclusion

We discussed those methods above. They are the most common ways to find your house’s direction. You can also use the direction of sunrise to identify the direction of your house. 

The sun climbs over the horizon to the East. So, stand facing away from the direction of sunrise and estimate which side your front door is facing. This can help you identify your house’s direction.

FAQs

1. How Do I Know Which Direction My House Is Facing?

Here are some methods you can use to know which direction your house is facing:

  • Use your regular or smartphone compass.
  • Use Google Maps.

2. How To Check Vastu For Home Entrance?

To check Vastu for your home entrance, stand inside facing outwards. Use a compass or smartphone app to identify the direction. Your entrance should face north, east, or northeast for optimal results.

3. How Do I Know If My House Is East Facing?

The most common way to determine if your house is east-facing is through the Sun. Discover the house side facing the sunrise at dawn. Your front door receives direct sunlight, indicating an eastern orientation. You can also use a compass to identify whether your house is east-facing.

South Indian House Designs: Tradition Meets Functionality

0
South Indian House Design

South Indian houses are renowned for encompassing artistic appeal and highly functional aspects. Known for their terracotta tiles, central courtyards, and carved pillars and doors, they are not just aesthetically pleasing but also designed to be exceedingly practical, ensuring a comfortable living experience.

The states of Maharashtra, Karnataka, Andhra Pradesh, Kerala, and Tamilnadu offer distinct housing styles yet share a common thread in their offering of sophistication, elegance,  rustic charm, and cultural appeal. These designs are not just architectural marvels but also a reflection of our rich heritage and cultural diversity.

If you want to incorporate South Indian house style into your building venture, you sure are making the right choice.

Best South Indian House Design 

Knowing the variety of South Indian house designs can empower you to choose the appropriate style and comfortable fit per your liking and budget. Each design has its unique charm and features, offering a wide range of options to suit your preferences.

Some of the best South Indian house designs include:

  • Nalukettu Houses
  • Ettukettu Houses
  • Pathinarukettu Houses
  • Chettinadu Houses
  • Brahmin Agraharam
  • Guthu Mane
  • Manduva Logili

Nalukettu Houses

Kerala housing style

Nalukettu is a traditional Kerala housing style wherein four blocks of rooms are joined together in a rectangular shape with an open central courtyard.

The four blocks are located in four directions and are named accordingly:

  • Vadakkini (Northern room)
  • Thekkini (Southern room)
  • Kizhakkini (Eastern room)
  • Padinjattini (Western room)

Each room had a specific purpose, and the houses focused on ventilation, insulation, sophistication, and serenity.

Ettukettu Houses

Like the Nalukettu houses, the Ettukettu houses were rectangular but had eight rooms. “Ettu” in the South Indian languages Tamil and Malayalam means “Eight.”

The eight rooms had specific purposes, such as hosting a bigger family. Ettukettu houses had two open central courtyards.

Pathinarukettu Houses

Pathinarukettu houses are elaborate versions of the Nalukettu and Ettukettu houses, with sixteen halls or rooms and four open central courtyards.

Pathinarukettu houses typically supported bigger families. The houses incorporated terracotta tiles decorated with elaborate wooden carvings and designs and posed a sign of grandeur.

Chettinad House

Chettinad House

Chettinad or Chettinadu style houses are popular and world-renowned UNESCO-acknowledged heritage pieces of artistic works.

Known for their sprawling rooms and courtyards, the Chettinadu houses symbolize artistic and architectural development in Tamilnadu during the 19th century AD. 

The houses boast Italian marble, Burmese teaks, Belgian mirrors, Indonesian pottery, and local and popular Aathangui tiles.

Brahmin Agraharam

Brahmin Agraharams come in different styles but mostly tend to be narrower and longer. They have open spaces in the back. People in Agraharam give important to vastu directions and most of the houses are north-facing

Brahmin Agraharams are usually constructed as a series of houses sharing a common wall on either side of the roads.

Guthu Mane

Guthu Manes are Karnataka’s pride, particularly sprawling in the Mangalorean region. They are usually massive mansions built by the Bunt community. Guthu Manes or Gutu houses mean “Homes of prestige.”

Guthu Manes has a main door called the “Hebbagilu,” which is not the actual main door but a long building housed in front of the main building or house.

The house was located past a courtyard after the Hebbagilu and contained a verandah for gathering.

These houses boast exquisite designs and wooden carvings with beautifully created wooden furniture.

Manduva Logili

Andhra Pradesh’s Manduva Logili is the perfect fit for larger families and offers touches of tradition, culture, and history.

Red brick walls, rosewood or teak logs, and red tile roofs characterize Manduva Logili housing structures. The houses have a courtyard with spacious rooms in all four directions. 

Key Factors to Consider When Choosing the Best South Indian House Design

If you are interested in incorporating South Indian housing styles into your homes, look for the following best South Indian house designs and characteristics.

  • Terracotta Roofs provide natural cooling and a traditional look.
  • Carved Wooden Pillars, Doors, and Windows enhance aesthetic appeal and showcase craftsmanship.
  • Verandahs and Open Courtyards are known for promoting natural light and ventilation in the house.
  • Wooden, Clay, and Metal Artifacts decorate interiors to reflect cultural heritage.
  • Floor Mats and Low Seating give you the feel of Traditional seating arrangements for comfort and a cultural touch.
  • Bright and Earth-Tone Colors give vibrant and natural hues for walls and décor.
  • Floral and Geometric Design patterns for walls, floors, and furnishings.
  • Red Oxide Floors or Patterned Tiles are classic flooring options that add to the rustic charm.
  • Ethnic Motifs symbolize cultural stories and traditions.

Including any of these elements can enhance the ethnic characteristics of the house and help portray the South Indian roots.

Conclusion

Houses are our identity. They reflect our roots, culture, traditions, artistic tastes, and perspectives.

South Indian house designs are noted for their extreme practicality and blend of nature and culture. Including such South Indian housing style elements into your homes can add functionality to comfortability and a traditional touch.

FAQs

What are some popular South Indian house design styles?

Some of the popular South Indian house design styles include the Chettinadu homes of Tamilnadu, the Nalluketu, Ettuketu, and Pathinarukettu homes of Kerala, the Guthu Mane of Karnataka, and the Manduva Logili of Andhra Pradesh.

How can I find the best South Indian house design for me?

First, figure out the kind of South Indian house style you wish to incorporate into your house, like the Tamilnadu Chettinadu or the Kerala Nalluketu style. Then, look into elements like red flooring, wooden columns, open courtyards, or other features that you wish to incorporate into your home.

What are some additional design elements to consider when designing South Indian-style houses?

You can include ethnic motif designs while designing your interiors, opt for low-seating furniture, floral and geometric patterns, bright and contrasting colors, and other design elements while designing South Indian-style houses.

Difference Between Lease Deed And Rent Agreement

0
difference between lease deed and rent agreement

Do you need help deciding whether to opt for a lease or rental agreement? The world of property and real estate can be complex at times. However, understanding the key differences between a lease deed and a rental agreement can help you crucially.

The pros and cons of leases and rental agreements may vary but generally involve similar conditions. Let us examine the differences between a lease deed and a rent agreement.

What is a Lease Deed?

A lease deed is a contract between two parties, the lessor and the lessee. The lessor is the property owner who lends the property to the lessee for a particular period. The lessee can use the property for the agreed-upon period. 

The period of use in a lease deed is usually longer than in a rental agreement. Lease agreements over 11 months are typically made.

Lease deeds discuss who is responsible for maintaining the property and paying taxes. At the end of the agreed-upon period, both parties must decide whether to renew the lease.

What is a Rental Agreement?

Rent Agreement

A rental agreement is a landlord and occupant or tenant contract. The landlord rents her or his property to the tenant for a particular sum that should be paid monthly. The renting period can be between 6 months to more than a year, There are Different Types of Rental Properties available

The rental agreement can discuss who is responsible for maintaining the property and paying taxes. At the end of each month, both parties must decide whether to renew the tenancy.

The party wanting to vacate the property must also initiate a notice period based on the rental agreement.

Key Differences Between a Lease Deed and a Rent Agreement

Lease DeedRent Agreement
MeaningA contract made between two parties regarding using one of the parties’ property for a particular period, which is usually longer in a lease scenario.A contract made between two parties regarding renting one of the parties’ properties on a month-to-month basis.
TerminologyA lease deed addresses the two parties: the lessor and the lessee. The lessor lends the property for use, and the lessee uses it on a contract or an agreement basis.A rent agreement addresses the landlord and tenant. The landlord rents the property for use, and the tenant uses it on an agreement basis.
Duration of AgreementThe duration of the agreement in a lease contract is usually more than 11 months.The duration of the agreement is generally between 6 months to one year or more than a year.
Renewal of the ContractIf both parties wish to proceed with the contract, it can be renewed for another set of duration at the end of the agreed-upon period.If both parties wish to proceed with the agreement, it can be renewed at the end of the agreed-upon period, usually 6 months to one year or even longer.
Maintenance of the PropertyThe lessee usually pays the charges for the upkeep of the property.The tenant usually pays the maintenance charges for the property.
Taxes to be PaidThe lessor usually pays all applicable taxes to the property.The landlord generally pays all the taxes applicable to the property.
Amendments to the AgreementAny amendments to the lease deal cannot be done once the agreement is signed.The landlord can change the contract terms at any time, but she or he must inform the tenant about the changes within an agreed-upon period.
Termination of an AgreementThe lessee must pay the agreed-upon sum even if she or he wants to terminate the lease deed before the end of the agreed-upon period.If the tenant terminates the agreement before the end of the month, she or he must pay any agreed-upon sum.
Notice PeriodTermination or renewal of the occupation must be notified as per the norms agreed in the lease deal.Termination or renewal of the tenancy must be notified as per the norms agreed in the agreement.
Advance Payment or Security DepositThe advance payment, if any, must be dealt with as per the agreement upon the termination of the lease agreement.Upon the termination of the rental agreement, the advance payment, if any, should be dealt with as per the agreement.

How can a Rent Agreement Qualify as a Lease Agreement?

A rent agreement can be upgraded to a lease agreement if the following conditions are met:

  • When the landlord transfers the right to use the property to the tenant for an extended period, for example, more than 11 months, or for infinity.
  • The tenant must regularly pay the agreed-upon monthly rent or any other value, such as service, share of crops, and so on, in exchange for transferring the right to use the property to the landlord.

Conclusion 

The primary differences between leasing and renting are the duration of the agreement and the time of payment for using the property. Knowing these differences can help you decide whether to lease or rent your property or if to rent or lease the property.

The pros and cons of leasing and renting may differ under different circumstances. You will have to weigh the pros and cons based on your affordability and comfortability before making the choice of renting or leasing.

FAQs

What is the difference between a lease and a rent agreement?

A lease agreement will consist of the terms and conditions for leasing a property, and a rent agreement will consist of the terms and conditions for renting a property. The primary differences between the lease and renting agreements are the conditions for the duration of the agreement and the time of payment for using the property.

Are the lease agreement and lease deed the same?

No, the terms lease agreement and lease deed are not the same. While the lease agreement dictates the terms and conditions for leasing the property, the lease deed talks about how the lease agreement would be executed.

What is the significance of a lease deed?

A lease deed protects the interests of the parties to the lease agreement, the lessor and the lessee, by creating a framework for their working relationship.

Is the lease amount refundable?

The advance payment or security deposit is refundable at the end of a lease agreement, given that no damage has been done to the leased-out property or no standing rent amount.

CMDA Rules For Residential Building

0
Cmda Rules For Residential Building

Building a residential property involves many complex rules and regulations determined by local authorities and government bodies. CMDA is the primary organization that governs these regulations to ensure sustainability, safety, and urban development. These rules were established in 1975 for the construction and development of residential buildings within the Chennai Metropolitan Area.

This majorly covers a total area being around 1189 sq. kilometers which includes three administrative districts – Kancheepuram, Chennai, and Thiruvallur. 

People involved in residential construction, like homeowners, developers, or architects, are essential to get CMDA Approval. It helps maintain the quality of buildings with regulated land use, building height, and density.

Based on the location, the rules and regulations for residential buildings vary. If you are about to learn particularly about Chennai Metropolitan City, here are the key essentials:

Key CMDA Regulations for Residential Buildings

Regulations for Residential Buildings

Below are the crucial parameters that the builders or developers need to follow:

1) Zoning Regulations

Zoning regulations determine how much land should be used in the specified city. It actively controls the building of structures, and land usage, and properly checks and validates documents like structural stability certificate to make sure they stick to the ground rules. Based on the density and type of residential area, the land use patterns will be dictated. Real estate investors must be aware of the land zoning classifications before starting construction.

2) Plot Coverage

The percentage of the plot that can be covered by the building (including all structures) is regulated.

Depending on the zone, typical plot coverage for residential buildings might range from 50% to 75%.

3) Building Height and Classification

Generally, the height of the building is measured from the ground level. As per the CMDA regulations, the determined height range is 12m, and it shouldn’t exceed 3 dwelling units. The maximum height of residential buildings is regulated based on the width of the abutting road and the FSI/FAR.

Generally, a height restriction of 15 meters is common for residential buildings, but this can vary.

4) Floor Space Index (FSI)

As per the norms, the FSI for residential buildings shall not exceed 0.03, whereas the buildings other than residential shall not exceed 0.015. However, the FSI for commercial buildings is higher than for residential buildings and it can range from 2.0 to 3.0. It may vary based on the location and type of commercial activity.

The permissible FSI/FAR varies based on the zone and plot size.

Typically, FSI for residential buildings ranges from 1.5 to 2.5, but it can vary.

Ensure the total built-up area does not exceed the permissible FSI/FAR.

5) Setbacks

Setback spaces are the open areas located at the sides, rear, or front of a plot or property. The height of the building is a deciding factor for setback spaces in residential buildings. It should be a minimum of 1.35 mts on all sides. The reduction of 0.30 mts from the mentioned setback space is permissible.

Building HeightRear Setback / Side Setback
Upto 7 meters1.0m
7 to 12 meters1.5m
12 to 16 meters2.5m
16 to 18.30 meters3.0m

6) Parking Requirements

A certain percentage of the plot must be left as open space which is not built upon. According to the CMDA regulations, the car parking space in residential buildings should be 5 m long and 2.5 m wide. CMDA officials do not permit the space below this value.

Parking spaces must be provided based on the number of dwelling units or built-up areas. For example, one parking space per dwelling unit or a specified number of square meters.

Environmental regulations, such as rainwater harvesting, waste management, and energy efficiency, are mandatory.

Green building practices and sustainable materials are encouraged.

Conclusion

These regulations are designed to ensure the safety and sustainability of the buildings. Following the estimated process helps to avoid legal complications and ensure safety and comfort. It is also recommended to stay updated on the guidelines of The Chennai Metropolitan Development Authority.

FAQs

1. What is the Minimum Land Required for a Residential Layout?

Most custom home builders start by calculating what is known as the “Land-To-Building-Ratio.” This ratio would be calculated by taking the total square footage of a land lot and dividing it by the square footage of the future home. The CMDA regulations allow applicants or builders to construct houses on land even in less than 860 sq. ft. 

2. How many floors can be built in Chennai?

Residential buildings can go up to 4-5 floors, depending on the FSI, road width, and other regulatory factors. Commercial buildings can often reach 7-10 floors or more. 

3. What is the Plot Size for a Residential Building?

The minimum plot size of an independent house or bungalow is typically around 60 square meters (approximately 645 square feet). In contrast, apartments have a common requirement of around 240 square meters (approximately 2,583 square feet) or more.

4. What is the floor area ratio in chennai?

The Floor Area Ratio (FAR) in Chennai ranges from 1.5 to 2.5 for primary residential areas and can be higher in mixed-use zones. Commercial zones generally have a higher FAR, ranging from 2.0 to 3.25, while industrial zones typically range from 1.5 to 2.0. Special buildings like IT parks and institutions can have FAR as high as 3.5 or more, subject to additional approvals.

False Ceiling Designs for Living Room: Transform Your Space

0
False Ceiling Designs for Living Room

A false ceiling is also known as a drop ceiling. It is an architectural design that has become popular. A false ceiling layer covers duct work, wiring, and beams. It hides them from view, making the ceiling more appealing. 

In this blog, I will share various designs of false ceilings for living rooms. I will also cover the benefits of having them in your home.

Top 10 False Ceiling Designs for the Living Room. 

1. Coffered ceiling.

Description:

Coffered ceilings are elegant. They have compartments that create their classical design. 

Benefits:

Improves the beauty of the room’s design, provides aesthetic value to the room, and gives a sense of majesty. 

Tips:

You can use any available material, such as wood, metal, or drywall. You can use it to build a unique coffered design. 

2. Tray ceiling

Tray ceiling

Description:

Tray ceilings have a sunken centre. They provide a focal point and depth to any room, including the living room and also Ceiling Design For the Bedroom

Benefits:

This makes the room look taller, gives it a bold look, and also makes a statement in the room. 

Tips:

You can also use different materials. For example, dry wall, wood, or metal can be used to make the desired tray design. 

3. Layered false ceiling

Description:

False ceilings with different levels of layers give a new and fresh appearance to the rooms. 

Benefits:

It makes the space more interesting, giving an illusion of depth, and it offers a nice design feature. 

Tips:

To add depth, use diverse materials and textures. Don’t forget about lighting and ornaments, if possible.  

4. Wooden false ceiling

Wooden false ceiling

Description:

Bamboo false ceilings add natural wood to the living room. They make it feel homely and welcoming.

Benefits:

It adds a natural element. It brings comfort and coziness. It also adds an artistic touch to the design.

Tips: When constructing it, use different types of wood, including oak or pine. To enhance the design, you can incorporate features like moldings or trims.

5. Geometric false ceiling

Geometric false ceiling

Description:

The patterns are modern. Shapes like squares, circles, or triangles can complement your interior design.

Benefits:

It provides a modern look. It creates visual interest. It offers a unique design feature.

Tips:

Design a geometric pattern using many materials and textures. You can also add lighting or other features.

6. Recessed Lighting

Description:

The false ceiling has recessed lighting. It offers an elegant and modern way to light the area.

Benefits:

This makes a neat and simple design. It adds sophistication and gives enough light.

Tips:

You can use different types of lighting and fixtures, like LEDs or halogens. You can also add dimmers for more versatility.

7. Coffered ceiling with indirect lighting.

Description:

Coffered ceilings have indirect lighting. They give an elegant touch to the space. They emphasize the ceiling’s design.

Benefits:

It makes spaces more beautiful. It makes them seem fancy and have a special style.

Tips:

There are many materials to choose from such as wood, metal, or drywall to make the unique coffered design.

8. Open Skylight 

Open Skylight

Description:

We install skylights on the false ceilings of the living room. They bring in natural light and make the space look and feel larger. 

Benefits:

It brings in natural light. This makes the space look bigger and adds an interesting design feature. 

Tips:

When picking your open skylight material, you can choose from glass, metal, and wood.

9. Minimalist false ceiling.

Description:

Minimalist designs have a simple look. They do not have much extra decoration. They are suitable for a modern and sophisticated living room. 

Benefits:

It has a simple and plain appearance. This look adds beauty and an artistic feature. 

Tips:

Choose the material for construction, like drywall, metal, or wood. Then, come up with a minimalist design. 

10. Colorful false ceiling.

Description:

False ceilings can have bright colors. They make the living room lively and unique. You can customize them in some way. 

Benefits:

It enhances the look. It adds an element of fun. And, it brings more creativity to the design. 

Tips:

Try to use various colors, textures, and materials to come up with a design that stands out. 

Conclusion

By introducing these top 10 designs, one can easily redesign the living room. They can make it into a chic and cozy space. It will truly mirror the owner’s character and add comfort to the house.