Home Blog Page 75

Types of Stirrups in Construction: Reinforcement and Applications

0
Types of Stirrups

A stirrup is vital in reinforced concrete. It’s a closed loop of rebar that plays a crucial role. Stirrups hold together the main reinforcement, also known as tension (RFT) bars, which lie within a concrete part.

And there are two types of stirrups used in reinforcement. They are closed stirrups and open stirrups. They are used to achieve specific design goals.

The choice between these two types often hinges on the project’s unique demands. 

For instance, closed stirrups look like a rectangle or square. They must confine concrete. It is ideal for high-stress uses like skyscrapers or bridges. 

Open stirrups are different. They have a “U” or “C” shape. They offer more flexibility. They are often preferred in situations that need adaptability. This is the case in construction with complex shapes.

The design’s requirements determine the choice. The designer may change or switch between these stirrup types to ensure good strength and performance.

Discover more about various types of stirrups and their many uses in this in-depth study.

Types of Stirrups in Columns

Types of Stirrups in Construction

1. Single Legged Stirrups (Open Stirrups)

The single-leg stirrups are reinforcing bar holders. They have seen limited use in construction projects due to their restrictions. This is mainly because they are made for binding only two rods. This is a fairly rare need in most buildings.  

For instance, many rods must be secured in a typical concrete foundation. This is to ensure stability and strength. In such cases, the single-leg stirrups would not be enough. Other types, like the double-leg or four-leg ones, would be better.

2. Two-Legged or Double Llegged Stirrups (Closed)

The most widely used stirrup type is the two-legged stirrup. This construction staple requires at least four rods to ensure stability and proper operation. The two-legged stirrup has been crucial for centuries, dating. back to the early days of bridge construction in the 18th century. This two-legged stirrups are used in lintel construction

Imagine a bridge without these vital stirrups. It would be like a spider’s web without its threads. The two-legged stirrup’s design allows for flexibility and movement. It is perfect for structures that need to resist environmental stressors. These include strong winds or earthquakes.

3. Four-Legged Stirrups (Closed)

The four-legged stirrup is a big advance, offering more security and stability than its predecessor. This design comprises two overlapping stirrups. They do not fully enclose the rods but provide a strong support system. Imagine a configuration with eight rods arranged in two rows of four. In this setup, the two stirrups will overlap each other. Each will circle six rods. Both stirrups encircle the four central rods tightly. This setup ensures the best hold. It minimizes the risk of rod slippage or misalignment. This clever design feature improves structural integrity. It also makes installation easier.

4. Six-Legged Stirrups (Closed)

Six-legged stirrups securely hold a beam reinforced with eight bars. In this closed setup, a single stirrup holds all eight rods. It provides a more secure foundation. Imagine a strong, sturdy bridge, its foundation unshakeable. The stirrups, which have six legs, are like a giant metal spider. They support a beam with eight reinforcement bars. Each bar strategically adds extra strength during placement. The bars are made of high-tensile steel. They are like the bridge’s skeletal system. They provide the internal framework needed to bear heavy traffic and harsh weather.

Types of Stirrups in Construction 2

5. Circular Stirrups (Open Stirrup)

When the strengthened column is round, use the circular stirrup. Ancient Greek and Roman architecture frequently used this. This stirrup is designed to hug the curved surface tightly. It even helps to stabilize and sustain the structure. 

For example, the famous Colosseum in Rome dates back to the first century AD. It has round columns that are stirrup-reinforced. They have endured over time. Circular stirrups are useful. It guarantees the column can support the weight of the building. It accomplishes this without weakening the column.

6. Helical Stirrups (Open Stirrup)

Helical Stirrups get their name from their striking similarity to the DNA double helix. This famous structure is a key part of science. This unique resemblance is not superficial; it holds a significant purpose. 

Traditional stirrups wrap around rods in a perfect circle. Helical stirrups coil around them like a spring. They provide better support to primarily circular columns. 

In essence, they are a type of open stirrups. They offer a clear advantage in structural design. They duplicate the twisted, double-coiled pattern of DNA. This makes helical stirrups grip the rods better for a more secure and stable connection. 

This new design element is very useful. It is helpful in projects with circular columns. These columns need extra reinforcement.

Conclusion

If you don’t provide proper stirrup specifications, the building’s spacing may collapse. So, the designer should specify the stirrup spacing along with the structure.

This article covered different types of stirrups used in construction. We hope you now have enough knowledge about it. If you have any doubts about this article, contact us. We will clarify your doubts.

FAR in Construction: Key for Homebuyers and Developers

0
FAR in Construction featured image

When buying land for construction, buyers consider several factors. They range from whether the land is leasehold or freehold. They also include the Floor Area Ratio (FAR) or Floor Space Index (FSI) allowed by the local civic body. FAR is a significant parameter that can alter the built-up space of a property. So, staying updated on the FAR/FSI norms is crucial. The authority in your property’s jurisdiction regulates them.

Let us try to understand it more simply. Let’s learn about the floor area ratio and FSI formulas.

What is FAR in Construction?

FAR in Construction

The Floor Area Ratio (FAR) is the ratio of the total floor space in a building to the total area of the plot the building is on. In other words, FSI or FAR dictates the maximum floor space that someone can construct on a piece of land.

The total floor area of a building, divided by the total area of the plot, yields the FAR or FSI. This numeric value reveals the total buildable area across all floors on a given plot.

The local city government determines an area’s floor-area ratio (FAR) to control the height of buildings based on the land’s size. FAR also governs population density and open space availability. Other factors include environmental impact and resilience to calamity. Simply put, it is the load that the land parcel can safely bear. The load varies by the land’s use: residential, commercial, agricultural, or industrial.

How to calculate Floor Area Ratio (FAR)?

Floor area ratio is the ratio of the total area covered by a building to the plot’s area.For example, for a plot of 10,000 square meters, an FSI of 1 allows a 10,000 square meter building.With an FSI of 1.5, 1,000 sq ft of land allows 1,500 sq ft. 

Here’s the FAR calculation formula.

Floor Area Ratio=  Total Floor Area of the Building / Total Plot Area

Plot area multiplied by floor space index equals built-up area.

Note: FAR of 1.5 is expressed as an FSI of 150%.

Note that the Floor space index (FSI) also applies to commercial buildings.

Why is FAR important for homebuyers?

FAR has a great impact on homebuyers because it directly affects the height of a building. The more floor area, the taller the building will be. 

Imagine a skyscraper in a big city with dozens of floors and hundreds of residents. Homebuyers might face this if they choose a project with a higher FAR and the Right Flooring. Residents share amenities like pools, elevators, and clubhouses in a dense community. This can be overwhelming. 

For example, patients and visitors at a hospital often have to wait in long elevator lines. This can be frustrating. Residents may have to wait to use the pool or gym in a high-FAR residential building. This reduces their quality of life.

How does FAR or FSI affect property prices?

Many homebuyers believe that FAR influences prices. However, it does not. FAR impacts the developer’s project’s profitability. Developers can build more units on land if the FAR is more than a minimum FAR.

FAR is much needed for both developers and homebuyers. Developers must meet the required FAR value to avoid penalties. In the Same time, homebuyers should check the FAR to understand project density before deciding.

What is the difference between floor area ratio and floor space index?

floor area ratio and floor space index

The Floor Space Index (FSI), also called the Floor Area Ratio (FAR), is the ratio of the total built-up area to the total plot area.

FAR and FSI share similar meanings yet exhibit a definitive difference. Both terms describe how a building’s floor area relates to its plot size. But people express them differently. FAR is a ratio, while FSI is an index. It appears as a percentage. 

What is a premium FSI or floor space index?

Criteria for premium FSI:

Road width Premium Floor Space Index
30-40 ft20%
40-60 ft30%
Over 60 ft40%

So, if you have a 30-40 ft wide road, you can build 20% more than the allowed Floor Space Index. But you must pay the required FSI premium.

The Brihanmumbai Municipal Corporation (BMC) recently allowed a 20% premium. It is on the land value at the ready reckoner rate (RR). This is for converting industrial land to commercial or residential use. You can do this when you get the commencement certificate (CC). Technicalities aside, what does this premium payment mean? This applies anywhere. It applies no matter the location, zone, or building type. A premium FSI will allow you to extend the permitted FSI. The premium floor space index is a fee the government pays to enable flexibility.

Land area x normal FSI x premium FSI in percentage = Built-up area

What factors affect the floor area ratio?

The city sets a FAR, or Floor Area Ratio, for each zone, which can vary from town to city.

City regulations and geographical constraints influence it. Some factors affect the floor area ratio. These include property size, building type, and location. So does the availability of amenities. Old city areas have different FARs than new ones.

The city can change the FAR value based on land value and development requirements. More constraints, like porches, driveways, lifts, and service areas, can affect the FAR Value. 

Conclusion

The impact of the floor area ratio on land value is a double-edged sword. A higher floor area ratio can raise a property’s value and this allows an apartment complex to have bigger rentals or more tenants. For example, people want bigger apartments in crowded cities like Mumbai or Bangalore. These apartments fetch higher prices. This can lead to a significant increase in land value. However, a developer who builds a larger apartment complex on one piece of land may accidentally lower the value of an adjoining property. This is especially true if the new construction blocks a great view. The view was once a major selling point for the neighboring property. In conclusion, FAR reshapes the city. It balances land use with livability and sustainability.

FAQS

What does FAR 1.25 mean?

FAR 1.25 stands for Floor Area Ratio (FAR) of 1.25. This means that the total floor area of a building can be up to 1.25 times the area of the plot of land on which it is built. For example, on a 1,000 square meter plot, the maximum allowable floor area would be 1,250 square meters. FAR is a key zoning regulation used to control the density and volume of buildings in a particular area.

What is difference between FAR and FSI?

Floor Area Ratio (FAR) and Floor Space Index (FSI) essentially refer to the same concept but are often used interchangeably in different regions. Both terms indicate the ratio of a building’s total floor area to the area of the plot of land on which it is constructed.

FAR (Floor Area Ratio): This is a general term used to define the maximum allowable floor area of a building relative to its plot size. It is used to control the density and volume of development.

FSI (Floor Space Index): This term is used primarily in India and some other countries to denote the same ratio as FAR. It also governs how much floor area can be constructed on a given plot.

What is Curing in Construction

0
Curing in Construction- feature image (1)

Curing is a crucial process in construction, particularly when it comes to concrete structures. It involves maintaining adequate moisture, temperature, and time to allow the concrete to achieve its desired strength and durability. Let’s dive into what curing is, why it’s important, and how it’s done, along with some real-life applications.

What is Curing?

curing

Curing is essentially the process of keeping the concrete moist and warm enough so that the chemical reactions involved in the hydration of cement can continue. This hydration process is vital because it leads to the hardening and strengthening of concrete.

Curing Types

Water Curing

Water curing means keeping the concrete surface wet all the time. This helps the concrete get strong by preventing it from drying out too quickly.

How It’s Done:

Ponding: This is like creating small ponds on flat surfaces. You build small temporary walls around the area and fill it with water, keeping the concrete submerged.

Spraying: If ponding isn’t possible, you can spray water on the concrete regularly. This is usually done with hoses or sprinklers.

Wet Coverings: Another way is to cover the concrete with wet materials like burlap (a type of cloth) or cotton mats. These covers are kept wet by spraying water on them.

Membrane Curing

Membrane curing involves applying a special coating on the concrete surface that seals in moisture, preventing the water from evaporating.

How It’s Done:

Curing Compounds: These are liquid solutions (like wax or resin) sprayed or painted on the concrete. They form a thin film that locks in moisture.

Plastic Sheets: Sometimes, plastic sheets are laid over the concrete. These sheets act as a barrier, trapping moisture inside.

Steam Curing

Steam curing uses steam to speed up the curing process. This method is especially useful in colder weather or when you need the concrete to set quickly.

How It’s Done:

Enclosed Spaces: Precast concrete elements (like beams or columns) are placed in an enclosed space where steam can be pumped in.

Temperature Control: The steam increases the temperature and humidity around the concrete, accelerating the curing process.

Curing by Absorption

This method involves covering the concrete with absorbent materials that are kept wet. These materials hold water and slowly release it to the concrete.

How It’s Done:

Materials Used: Common materials include sand, sawdust, or hay. These materials are spread over the concrete surface.

Maintaining Moisture: The covering materials are kept wet by regularly adding water to them, ensuring that the concrete stays moist.

Applications of Curing

Applications of Curing

Building Foundations

The Building foundation is the most critical part of any building, providing stability and support to the entire structure. Proper curing of the foundation is essential to ensure it develops the necessary strength and durability. 

Method Used: When it comes to building foundations, water curing is the most common method used. This involves keeping the foundation moist continuously.

Process of Water curing:

Initial Wetting: After the concrete is placed and finished, the curing process begins with an initial wetting phase. The surface is sprayed with water to prevent it from drying out.

Covering: The foundation is then covered with wet burlap, cotton mats, or polyethylene sheets to retain moisture.

Regular Wetting: The covers are kept wet for at least 7 days. This is done by sprinkling water regularly to ensure consistent moisture.

Road Construction

Roads need to be durable and able to withstand heavy traffic loads. Proper curing ensures that the concrete pavement develops the necessary strength and resists cracking.

Method Used: Membrane curing is frequently used for road construction due to its practicality for large surfaces.

Process of Membrane Curing:

Application of Curing Compound: Once the concrete is set, a curing compound (often a liquid membrane-forming compound) is sprayed onto the surface.

Sealing the Surface: The compound forms a thin film over the concrete, which prevents water from evaporating too quickly.

Maintenance: The compound remains on the surface until the curing period is complete, typically 7-14 days. It may need to be reapplied if damaged by traffic or weather conditions.

Bridge Construction

Bridges, especially those exposed to varying weather conditions, require curing methods that can maintain uniform temperature and moisture levels. Proper concrete curing types is crucial to ensure the concrete achieves the strength needed to support heavy loads and resist environmental stress.

Method Used: Steam curing is often used for bridge construction, particularly in cold climates or where accelerated curing is needed.

Process of Steam curing

Enclosure: The precast concrete elements (such as beams and supports) are enclosed in a steam chamber or tented area.

Steam Application: Steam is introduced into the enclosure, raising the temperature and humidity around the concrete.

Temperature Control: The temperature is carefully monitored and maintained to ensure it remains within the optimal range for curing.

Precast Concrete Elements

Precast concrete elements, such as beams, slabs, and columns, need to be cured quickly and efficiently so they can be transported and installed at the construction site without delay.

Method Used: Steam curing is commonly used in precast concrete plants to expedite the curing process.

Process of Steam curing:

Controlled Environment: The precast elements are placed in a controlled environment where steam can be introduced.

Application of Steam: Steam is applied to maintain a high humidity level and elevate the temperature.

Accelerated Curing: The high temperature and humidity accelerate the curing process, allowing the concrete to achieve the desired strength much faster than traditional curing methods.

Importance of Curing

Strength Development: Proper curing ensures that concrete achieves its designed strength. Without adequate curing, the concrete might not reach its potential strength, leading to weaker structures.

Durability: Curing improves the durability of concrete by reducing its permeability. This means that the concrete is less likely to be affected by weathering, freezing and thawing cycles, and chemical attacks.

Surface Quality: Adequate curing prevents surface defects like cracks, dusting, and scaling, ensuring a smooth and even surface finish.

Minimizes Shrinkage: Curing helps in minimizing shrinkage and cracking. Uncured concrete can lose water rapidly, leading to cracks and structural issues.

Conclusion

Curing is a fundamental aspect of concrete construction, vital for achieving the desired strength, durability, and quality of the final structure. By understanding the different methods and their applications in real-life scenarios, construction professionals can ensure their projects stand the test of time. Whether it’s building foundations, roads, bridges, or precast elements, proper curing practices are essential for the long-term success and safety of any construction project.

FAQS

What is the curing time for RCC?

The curing time for Reinforced Cement Concrete (RCC) typically spans 7 to 14 days. Proper curing is essential to achieve optimal strength and durability. During this period, the concrete should be kept moist to prevent cracking and ensure proper hydration of the cement.

Why is curing done for 28 days?

Curing is commonly recommended for 28 days because this period allows concrete to reach its full strength and durability. Although concrete begins to set and harden quickly, it continues to gain strength over time. The 28-day curing period is based on the standard time required for concrete to achieve its design strength, typically around 70-80% of its potential strength.

What is retrofitting in construction

0
retrofitting building

Retrofitting in construction is a crucial technique that involves upgrading and enhancing existing buildings to meet modern standards and requirements. This process can include structural improvements to withstand earthquakes, upgrades for better energy efficiency, or modifications to comply with updated building codes. By using advanced technologies and materials, retrofitting helps extend the lifespan of buildings, improves their safety, and enhances their overall performance. 

This method is essential for ensuring older structures can meet today’s demands without the need for complete reconstruction.

method of retrofitting in construction

What is retrofitting in construction

Retrofitting in construction refers to the process of adding new technology or features to older structures to improve their functionality, safety, and energy efficiency. This can involve structural upgrades, such as reinforcing walls, floors, and foundations, or installing modern systems like HVAC (heating, ventilation, and air conditioning), electrical, and plumbing. 

The goal is to bring older buildings up to current standards without completely demolishing and rebuilding them.

Why is retrofitting needed? 

retro fitting needed

Retrofitting involves improving construction design flaws such as structural weaknesses, outdated designs and noncompliance with building codes in effect today. The capacity of a building to effectively resist certain natural disasters such as earthquakes can be enhanced through retrofitting which would help in saving lives as well as protecting property from damage. 

This can improve the energy efficiency of a structure resulting in decreased energy use and less expensive utility bills. Aside from that, retrofitting may be used to extend buildings’ life expectancy thereby conserving their historical significance and reducing new constructions hence friendly to the environment.

1. Structural Upgrades for Safety

By making structural changes, retrofitting strengthens existing buildings by correcting structural deficiencies or reinforcing critical ones. It is through this process that occupants’ lives are saved from complete destruction during natural calamities and other disasters. Retrofitting offers peace of mind to both the owners and users because it strengthen the building.

2. Adherence to Modern Building Codes

Sometimes, older buildings may not comply with current building codes as well as safety standards. Such structures are made up-to-date by means of retrofitting which makes sure that they meet all latest specifications. This in turn enhances security and avoids potential legal actions as well as insurance claims.

3. Energy Saving Measures

Another aspect of retrofitting is insulation upgrading, window replacement, and HVAC system modernization aimed at increasing energy efficiency in buildings. These improvements reduce power consumption bills for owners. Afterward, this additional expense on retrofitting will be fully recouped by meaningful savings in costs.

4. Extending the Life of a Structure

It can also extend the lifespan of a building by addressing wear and tear, and updating outdated components. By keeping the functionality intact for many years, one can continue using it comfortably without any issues concerning its conditions.Therefore,it also helps to postpone expensive new construction projects until later dates.Hence there is no need to undertake costly new construction work immediately.This helps save money that could have been used in carrying out an immediate new construction project.

5. Historical Value Preservation

Retrofitting offers an opportunity to save older buildings with historical or architectural significance. These buildings can therefore be enjoyed by future generations while modern systems are introduced and original design elements preserved. The balance between old and new ensures continuity of cultural heritage.

6. Environmental Benefits

When people embrace retrofitting instead of new constructions, they reduce the environmental impact caused by construction activities. It saves on resources and limits waste resulting from demolishing old structures before constructing new ones. Furthermore, it also reduces carbon emissions due to the increased energy efficiency of buildings.

Examples of Retrofitting Projects in India

Rashtrapati Bhavan, New Delhi

Rashtrapati Bhavan, the official residence of the President of India, underwent retrofitting to enhance its structural integrity and improve energy efficiency. The project included seismic strengthening to protect against earthquakes and the installation of energy-efficient lighting and HVAC systems. These upgrades preserved the building’s historical value while modernizing its infrastructure.

Victoria Memorial, Kolkata

The Victoria Memorial in Kolkata, a major historical and tourist site, underwent a retrofitting project to address structural issues and prevent damage from natural elements. The project involved reinforcing the foundation and walls, improving drainage systems, and upgrading electrical installations. These efforts ensured the long-term preservation of this iconic structure.

Chhatrapati Shivaji Maharaj Terminus, Mumbai

This UNESCO World Heritage Site underwent a significant retrofitting project to strengthen its structural components and upgrade its facilities. The project included seismic retrofitting, reinforcement of the building’s framework, and modernization of electrical and plumbing systems. These improvements aimed to preserve the historical architecture while ensuring the safety and functionality of the terminus.

Indian Institute of Technology (IIT) Bombay

Source : iitbombay

IIT Bombay conducted a retrofitting project to upgrade several of its old buildings to meet modern safety and performance standards. This included seismic retrofitting to enhance earthquake resistance, energy-efficient upgrades to reduce power consumption, and modernization of infrastructure. The project ensured a safer and more sustainable campus for students and staff.

The Taj Mahal Palace Hotel, Mumbai

Source : tajhotels

The Taj Mahal Palace Hotel underwent a retrofitting project to upgrade its facilities while preserving its historical charm. The project included seismic strengthening, modernization of HVAC systems, and enhancements to fire safety measures. These upgrades aimed to maintain the hotel’s iconic status and ensure the safety and comfort of its guests.

How to Plan a Retrofit

A successful retrofit project requires careful planning. Here are some key steps: 

Check the Building

First, look at the building carefully to find out what needs fixing. This means checking for cracks, weak spots, and old, inefficient systems like windows and heating.

Make a List

Write down all the things that need to be fixed or upgraded. This could include adding new supports, replacing old windows, or installing better insulation to keep the building warm or cool.

Talk to Experts

Ask engineers, architects, and other experts to help you understand what needs to be done. They have the knowledge to make sure everything is done safely and correctly.

Create a Plan

Make a detailed plan that shows what changes will be made, how they will be done, and when. This plan should also include a budget, which is the amount of money needed for the project.

Get Permissions

Sometimes, you need permission from local authorities to make changes to a building. Make sure to get all the necessary approvals before starting the work.

Do the Work

Start the retrofit work according to your plan. Make sure to follow all safety rules and use good quality materials. It’s important to do the job right to ensure the building is safe and efficient.

Check the Work

After the work is done, check everything to make sure it’s done correctly. This may involve inspections by experts to confirm the building is now stronger and more efficient.

By following these steps, you can plan a successful retrofit and make an old building as good as new!

Pros and Cons of Retrofitting

Pros:

  • Improved Safety
  • Energy Efficiency
  • Cost Savings
  • Preservation of Historical Buildings
  • Increased Property Value

Cons:

  • High Initial Costs
  • Complex Planning and Execution
  • Time-consuming
  • Disruption to Occupants
  • Possible Structural Limitations
  • Challenging or less effective.

Conclusion, 

Retrofitting is a valuable approach to enhancing the safety, efficiency, and longevity of existing buildings. By addressing structural weaknesses, upgrading outdated systems, and improving energy efficiency, retrofitting can significantly enhance the functionality and value of buildings. However, retrofitting also presents challenges, such as high initial costs, complex planning, and potential disruptions during construction. Careful planning, collaboration with experts, and a clear understanding of the building’s needs can help ensure a successful retrofit, resulting in safer, more efficient, and sustainable buildings.

Types of windows in building construction

0
Types of windows featured image

Windows are essential in any building as they provide light, ventilation and aesthetic value. Different types of windows are suitable for various buildings depending on their function and design. Here we will discuss different types of windows, their features and detailed practical examples where they are best suited.

5 Types of Windows  in Building Construction

5 types of windows in building construction

1. Casement Windows

Casement Windows

Casement is one of the most common and versatile types of windows. They have hinges on the side hence opening outwardly like a door making them easy to use while offering excellent ventilation. Casement windows can be closed tightly thereby preventing air infiltration and making them energy efficient hence maintaining stable indoor temperatures.

When shut down, casement windows are very difficult to break into because the hinging side is firmly fixed on the frame.

Features:

Hinged at the Side: This means that these types of windows can freely swing open once fully opened.

Open Outward: This means that when opened outside, they do not consume space within a room like other types do.

Good Ventilation and Light: They have an opening large enough to bring in plenty of fresh air and natural lighting.

Applications:

Residential Homes: Casement windows are ideal for residential homes. For instance, these windows can be fully opened in a house with a garden to let you enjoy the garden view while allowing fresh air to come in. They serve well in living rooms and bedrooms where a lot of fresh air and sunlight is needed. Just imagine yourself sitting in your sitting room, sipping tea and seeing a wide-open casement window through which you have a clear view of blooming flowers.

Kitchens: Casement windows and glasses are especially useful for getting rid of cooking smells and steam quickly in the kitchen. If you have a small kitchen, these windows can be opened fully to allow maximum airflow, making the kitchen more comfortable to work in. For example, while preparing hot spicy curry, one can open the glass to let out odor and steam so as to keep your kitchen smelling clean.

Bathrooms: These types of windows also come with frosted or textured glass that provides privacy thus they can be installed in bathrooms. Their good ventilation also helps eliminate any risks of dampness or mildew forming due to moisture build-up inside their rooms. For instance, after taking a hot shower, opening such a window would help expel humid air from there leaving it dry therefore mold-free bathroom.

Home Offices: For those with home offices, casement windows can create a pleasant working environment. The ability to open the window wide allows fresh air to circulate, which can help increase productivity and improve mood. Imagine sitting at your desk, working on a project, while a gentle breeze flows through the open casement window, making the room feel airy and refreshing.

2. Sliding Windows

Sliding Windows

Sliding windows are a popular choice in many buildings because they save space and are easy to use. These windows have two or more sashes that slide horizontally on a track. They save space, easy to operate, and provide good ventilation and natural light. Whether you live in a small apartment, work in a modern office, or need to ventilate a compact kitchen, sliding windows offer a stylish and functional solution.

Applications:

Apartments: When it comes to apartments, sliding windows are ideal, especially in cases where space is a challenge. For instance, one might have a balcony or a tiny kitchen in a small city apartment. This makes them versatile and perfect for limited spaces as they do not occupy any additional space when opened. You can easily slide them open so that you can let some fresh air into your house or allow more light to get in. They also make small rooms brighter because they allow more natural light through the window which makes them feel bigger and less claustrophobic. You could be sitting in your living room of small size, move the window aside for fresh air and sunlight while being sure that you will not damage any furniture.

Commercial Buildings: Sliding windows are also a good fit for offices and commercial buildings. For instance, in a modern office, you might want windows that are easy to operate and clean. Sliding windows provide a sleek and professional look. They are often used in meeting rooms where you want to maintain a polished appearance. Sliding windows also help in maintaining a quiet office environment, as they seal tightly when closed, reducing outside noise. Imagine an office meeting room with a large sliding window, where you can slide it open during breaks to get some fresh air without disturbing the setup of the room.

3. Double-Hung Windows

Double-Hung Windows

Double-hung windows are a classic and versatile window style that fits well in many types of buildings. They have two sashes that move up and down vertically. Here, we will explore the features and practical applications of double-hung windows in detail, 

Features:

  • Two Movable Sashes: Both the top and bottom sashes can move up and down.
  • Vertical Opening: The sashes slide vertically within the frame.
  • Good Ventilation: You can open both sashes to let in fresh air from the top and bottom.


Applications

Living Rooms in Traditional Homes: In a traditional home setting, double-hung windows in the living room give an appealing classic appearance. Imagine for example a warm sitting-room with wooden seats and a fireplace. If the frames are white, these can go well with other items used to decorate the place. Both sashes can be opened on a beautiful day bringing fresh air inside making the room airy and comfortable too. It is possible to open only that top sash during rainy weather so that you keep out rainwater yet there is still circulation of air.

Bedrooms: In bedrooms, double-hung windows are excellent. They have good ventilation that is as such important for a restful night’s sleep. For instance, in a small bedroom, at night you can lift the top sash an inch to allow cool air inside and not worry about security. Then in the morning, you can just open both of them wide enough for sun shine to come into your room giving it a serene and bright appearance.

Kitchens: In a kitchen, double-hung windows can help with ventilation while cooking. For instance, if you are frying food and it gets smoky, you can quickly open both sashes to let out the smoke and bring in fresh air. The ability to open the top sash only can help ventilate the kitchen without letting in bugs or debris from outside.

4. Awning Windows

Awning Windows

Awning windows are hinged at the top, and open outward. They are widely used for airiness and concealment purposes, especially in areas where you want to allow fresh air while keeping off water as well as dirt particles. Since they are situated in higher parts of the building, they give privacy yet still allow light and air to come in.

Applications:

Bathrooms: In bathrooms, ventilation is key. It removes moisture and stops mold. Awning windows are perfect for this purpose. For example, you can place an awning window high on the wall above eye level in a small bathroom. This placement ensures privacy. It also allows steam and humidity to escape after a hot shower. Even if it’s raining, you can leave the window cracked. The awning design will keep the rain out. This helps keep the bathroom dry and fresh. Imagine getting out of the shower and being able to open the window to let out the steam. You would not have to worry about anyone seeing inside or rain coming in.

Basements: Basements are often dark and stuffy. Adding awning windows can greatly improve them. For example, if you have a basement as a living space or a home office, You can install awning windows high up on the walls. They can bring in natural light and fresh air. These windows open outward and are high. They stop dirt, leaves, and debris from blowing into the basement. Additionally, during a rainy day, you can keep the windows open for ventilation without worrying about water entering. This makes the basement feel more comfortable and livable. Imagine working in your basement office with natural light and a gentle breeze, thanks to the awning windows.

Kitchens: Awning windows can also be very useful in kitchens. They help get rid of cooking smells and steam quickly. For example, if you have a small kitchen with little wall space, you can install an awning window. Put it above the sink or stove. This allows you to open the window for air while cooking. It helps keep the kitchen air fresh and clean. Even if it’s raining, you don’t have to worry about water splashing inside. This is because of the way the window opens outward. Imagine cooking a spicy meal and being able to let out the steam and smells without worrying about the weather outside.

5. Bay Windows:

Bay Window

Bay windows are a beautiful addition to any building and these types of windows are used in homes. They project outward from the main walls, creating a small shelf or ledge inside. They consist of a central fixed window and two side windows. Bay windows allow more natural light to enter the room and it offers a wide, panoramic view of the outside.

Applications:

Living Rooms: Bay windows can turn a living room into a bright and inviting space. For instance, picture a snug living room with a bay window that faces the garden. A big central window gives an unhindered view of the garden where one can sit indoors and enjoy nature’s beauty at its best. The side windows may be opened to let fresh air in. At this point, you may choose to place a comfortable couch fitted with cushions on the bay window sill transforming it into your private rest corner. It is also perfect for some tea and reading material. Additionally, the ledge can be decorated with plants or family photos; making it feel like home.

Reading Nooks: Bay windows work well when creating reading nooks. A good example would be if there is a small corner in your home where you can install a bay window making it a cozy reading space. Think of sitting next to the window with enough daylight streaming on your favorite book. So place beneath this window either a comfortable chair or a built-in bench by cushions then along the sides add some shelves for books as well as a little table for my cup of tea making it complete. The sunlight from the bay window casts light on every part of the room thereby making this place brighter; thus motivating me to read more and relax.

Bedrooms: In bedrooms, bay windows can add charm and functionality. For example, in a small bedroom, a bay window can make the room feel larger and more open. You can place a small desk or a dressing table in front of the window, using the ledge as extra storage space for your accessories. The extra light from the bay window can also help you get ready in the morning. Imagine waking up and enjoying the morning sunlight streaming in through the bay window. You can also use the window ledge to display your favorite plants or decorative items, adding a personal touch to your bedroom.

Conclusion

In conclusion, After proper installation, it is essential to thoroughly inspect to ensure it doesn’t fall under snagging. Choosing the right type of window for a building is essential for both functionality and aesthetics. From traditional double-hung windows to modern sliding and casement styles, each type offers unique benefits. Proper selection can enhance ventilation, natural light, and energy efficiency. Understanding the specific needs of a building will help in making the best choice. Investing in quality windows ensures durability and long-term satisfaction.

FAQs

Which window is best for building?

Double-Hung Windows: Offer good ventilation and ease of cleaning, making them ideal for residential buildings.
Casement Windows: Provide excellent ventilation and energy efficiency, suitable for various climates and modern designs.
Sliding Windows: Ideal for spaces where a swinging window would be impractical, offering easy operation and a sleek look.

Why are windows used in buildings?

Windows are essential in buildings as they allow natural light to enter, brightening indoor spaces and reducing reliance on artificial lighting. They also provide ventilation, helping to regulate indoor air quality and temperature. Additionally, windows enhance a building’s aesthetics by offering views and contributing to the overall design.

Best windows for new home construction

The best windows for new home construction are energy-efficient options like double- or triple-pane windows with Low-E glass, which provide excellent insulation. Vinyl, fiberglass, or wood frames are durable and stylish choices depending on your budget and aesthetic preferences.

Types of windows in civil engineering

In civil engineering, common types of windows include casement windows, sliding windows, fixed windows, awning windows, and bay windows. These types vary based on functionality, design, and ventilation requirements in buildings.

What is Slab in Construction? Creation, and Uses

0
Slab in Construction

Slabs are key in building construction. They provide the flat surfaces that form floors and ceilings. Surface pressure is even, with no areas of concentration. They also ensure a building’s stability. Understanding the types of slabs and how they are manufactured can help a lot.

It can aid in making smart choices for building projects. This guide covers what slabs are and how they are made.

What is a Slab in Construction?

Slabs are key in construction. They form the horizontal surfaces in buildings, like floors and ceilings. A slab is a thick, flat plate of concrete. It is usually reinforced with steel bars. It spreads loads over a large area. Slabs are critical. They provide the structure and stability to a building. They spread loads evenly to the foundations and walls.

How are slabs created

How are slabs created

The construction of slabs has several crucial steps. These steps ensure the slabs are durable and fit for purpose.

Planning and Design: The engineers analyze the structure to find the load capacity and design requirements for the slab. Detailed plans specify the type of slab, materials, and reinforcement needed.

Formwork Construction: Formwork is a temporary mold. It holds wet concrete in place until it hardens. You can make formwork from materials like wood, steel, or plastic. It matches the slab’s shape, conforming to exact measurements.

Placing reinforcement: Workers put steel bars or meshes in the formwork. Rebar is their known name. The design specifies where to place them. This reinforcement is crucial for adding tensile strength to the concrete slab.

Concrete Pouring:  Mix the concrete, then, pour it into the formwork. make sure it fills all spaces and evenly surrounds the reinforcement. The concrete is then levelled and smoothed using tools like screed and floats.

After pouring, workers finish the concrete surface to the desired texture. Curing is maintaining enough moisture and temperature. This allows the concrete to reach its full strength. This takes about 28 days. But, strength comes in the first few days.

Uses of the slab in construction

Floors:
Slabs are used to form the floors in multi-story buildings. They provide a solid and stable surface for walking, furniture, and equipment, distributing the load to the beams and columns.

Roofs:
In concrete structures, slabs act as the roof, protecting the interior of the building from the elements like rain, heat, and cold. Roof slabs can also support rooftop activities and installations.

Ceilings:
Slabs serve as the ceiling for the room below. They offer structural integrity while also being a base for aesthetic finishes like false ceilings, lighting fixtures, and insulation.

Foundation:
Slabs are sometimes used in foundation systems, known as slab-on-grade foundations. These are flat, horizontal slabs directly resting on the ground, supporting lightweight structures.

Bridges:
In bridge construction, slabs are used to form the deck, providing the surface on which vehicles and pedestrians move.

Parking Areas:
Slabs are used for multi-level parking structures, providing horizontal surfaces for parking vehicles.

Terraces:
Slabs are used to create open terraces that can be utilized for recreational spaces or services like water tanks and solar panels.

Cantilevered Sections:
In architectural designs, slabs are sometimes used to create cantilevered sections, like balconies or projecting floor areas, extending beyond the walls of the building.

Conclusion

Slabs are key in construction. They give flat surfaces that hold weight and add to a building’s stability. There are many types of slabs. They range from normal ones to innovations like bubble deck and dome slabs. Each type has unique advantages. We tailor these advantages to specific applications. Understanding how slabs are made is key to the process. Knowing the types available can help you choose the right one for your project. This will ensure it has integrity, efficiency, and looks good.

FAQs

1. What is the difference between a slab and a foundation?


A slab is a flat, horizontal surface made of concrete, used as floors or ceilings within a building. A foundation is the lower part of a building. It transfers the load from the building to the ground. Foundations are key for stability. They support the whole structure. Slabs are about providing usable surfaces.

2. How thick should a slab be for residential construction?


Slab thickness for residential construction spans 4 to 6 inches generally. But, the exact thickness can vary. It depends on the load, soil, and design. For areas subject to heavier loads, such as garages, the slab may be thicker, around 6 inches or more.

3D Elevation Designs for Houses: Styles & Techniques

0
3D Elevation Design for House

Have you ever felt awe after seeing the functionality and the attractiveness of a house? Well, then, most probably, 3D elevations are behind these masterpiece homes. 

3D elevation can be used to design both traditional and modern houses. Adding motifs, lines, frames, and colorful visuals are part of 3D elevations. The design is first completed in software and then implemented into real-time models. 

This blog gives details on different types of 3D elevation designs that you can utilize to make your home unique. 

What are 3D Elevation Designs?

3D Elevation Designs are detailed, three-dimensional representations of building exteriors created using specialized computer software. These designs provide a realistic view of how a building will look once constructed, showcasing architectural elements, textures, colors, and materials. By visualizing the structure from different angles, 3D elevation designs help architects, builders, and clients make informed decisions about the aesthetic and functional aspects of a building project.

Different types in 3D elevation designs for houses

Different types in 3D elevation designs for houses

Front Elevation

This is the view of the house from the front. Front elevation includes the design elements visible from the street, like the main entrance, windows, and facade. It’s often the most detailed elevation, as it gives the first impression of the home. This includes the overall appearance of the house from the front, such as wall finishes, textures, and colors.

Side Elevation

A side elevation shows the view of the house from the side. It helps in understanding the depth, height, and profile of the structure. This view includes details like the slope and type of the roof, side windows, side entrances, and any extensions such as garages or side wings. 

The side elevation is useful for visualizing how the house will look in profile and planning extensions or side entrances. It also assists in understanding the sunlight and shade patterns on the sides of the house.

Rear Elevation:

The rear elevation is the view of the house from the back. It shows elements like back doors, windows, patios, decks, and any backyard features. This view helps in planning the backyard and outdoor living spaces, showing how the house connects with the backyard and any rear-facing views. The rear elevation is important for understanding the design and functionality of the back of the house, including outdoor features and landscaping.

Split Elevation:

A split elevation combines multiple views of the house, such as front, side, and rear, into one design. This type of elevation provides a comprehensive view from different angles, showing how different parts of the house connect and transition. Split elevations are useful for getting a holistic view of the house and understanding the overall design and structure from various perspectives.

Isometric Elevation:

An isometric elevation gives a three-dimensional view where the house is rotated to show the front, side, and top simultaneously. This type of elevation highlights clear dimensions and spatial relationships, providing a comprehensive understanding of the house’s shape and structure. Isometric elevations are useful for visualizing the overall structure in three dimensions and understanding how different parts of the house connect.

Axonometric Elevation:

An axonometric elevation is similar to an isometric elevation but uses different scales along the three axes. This type of elevation provides a technical and precise perspective, showing a rotated view with detailed dimensions and spatial relationships. Axonometric elevations are useful for technical drawings and detailed design work, helping to understand the precise dimensions and spatial relationships of the house.

Different types of Styles in 3D elevation designs for houses

Different types of Styles in 3D elevation designs for houses

A 3D elevation design is more than flat drawings. Computer-aided design (CAD) is used to design and visualize the home’s exterior, giving realistic ideas to it. Different types of 3D elevation designs are listed below:

Modern Marvel

The modern 3D designs are a clear representation of clean lines, modest elements, and primarily aim in functionality. These designs have indoor windows that blend effortlessly with the outdoors creating a space for natural air and light. Glasses, woods, geometric floors, and flat roofs are some of the hallmarks.

Timeless Elegance

Timeless elegance mostly involves traditional designs that bring in charm and nostalgia. They include symmetrical facades, warm colored bricks, stone exteriors, intricate designs of cornices, and a welcoming porsche. The designs are inspired from historic buildings that depict the roots and offer a sense of permanence.

Craftsman Comfort

The 3D elevation of craftsman comfort brings in a warm and inviting ambience. The center of the design is focused on wood and stone. This center design is supported by shingle roofs, exposed beams, and decorative brackets. The craftsmanship and compound designs give it a sense of art and quality.

Mediterranean Magic

The Mediterranean designs engulf the sunsets of the sea. Terracotta designs, warm earth tones, rustic tones, and iron palette are included in the designs to elevate the elegance. These  designs play an important role in highlighting the important aspect of the house and bring in a sense of relaxation. 

Rustic Retreat

As the name suggests the designs include an organic aesthetic and natural elements. Thick woods with aesthetic touch, enriched stone accents, textured tiles, and porches that are blurred indoor and outdoor. Most of the designs have a large window that allows natural light to enter the home. It has both eye-catching designs and natural elements.

Mid-Century Modern

The mid century moderns have clean lines, open plane floors, and highlights the outdoor and indoor ambience. Geometric styles and overhanging large windows are the particular highlights of this style. This type of 3D elevations connect the style of surrounding landscape and living space. 

3D Elevation for single floor

A 3D elevation for a single-story building will be added using the same designs as the bungalow elevation. These designs can utilize most of the architectural styles for single-floor elevation houses. The home style that falls into this sector includes ranch-style homes. 

These houses showcase their low-slung silhouette and open floor plans. In terms of layout, the design offers flexibility and is well-suited for those who want to add a modern touch to their single-story building. 

3D Elevation for Small House

As far as small houses are concerned, adding 3D elevation designs will not be a constraint. Small houses can be designed using 3D elevation to increase the space and create an illusion of spacious balconies. For people who are open to eco-friendly houses and those seeking compact, effective houses, 3D elevation can be utilized. 

3D elevation for Duplex Houses

A 3D elevation design for duplex houses creates a distinct 3D model for each unit, bringing out its creative side and virtual appeal. The design elements for duplex houses include color schemes, and the designs are mostly used to attract residents. 

The 3D duplex houses increase the overall aesthetics of the neighborhood. Additionally, eco-friendly elements can also be incorporated into 3D model houses. 

Conclusion

3D elevation designs play a crucial role in highlighting your home. They increase the overall look and make it stand out in the neighborhood. Additionally, adding 3D elevations to duplex and triplex houses makes them functional and allows a personal touch to each floor. Go, book your slot with experts, and give your home a 3D new look. 

FAQs

1. What is a 3D house elevation?


A 3D house elevation is a three-dimensional addition to a two-dimensional building that is executed through a 3D drawing.

2. What is the best simple elevation material?


The best simple materials that you can use to elevate your house are steel, classic wood, metal, brick, and concrete. This helps to elevate your house with minimal designs.

3. What is the cost of 3D elevation houses? 


The cost of a 3D elevation house is 5 lakhs to 5.4 lakhs.

Top 6 Types of Construction Structures : A Comprehensive Guide

0
Construction Structure Types

The world of construction is varied and bustling, with different types of structures built to suit particular needs. Architects, engineers, builders and homeowners must have knowledge on different types of construction so as to make informed decisions about what to construct or purchase for their homes. These structures fall into the range from conventional to contemporary as each has specific properties that make it preferable in certain applications.

Construction Structure Types -2

1. Load-Bearing Structures

Load-bearing structures are the oldest and simplest type of construction. In this type, walls carry the weight of the roof and floors above them down to the foundation. These structures are often seen in traditional houses and small buildings.

Traditional Houses:

For places with abundant natural resources like stone and brick, traditional houses often use load-bearing walls. These walls hold up the roof and upper floors. They spread the load down to the foundation. This technique is easy and cost effective. It best suits single family houses and small residential buildings.

Apartments and Multi-Unit Housing:

Load-bearing structures are also common in low-rise apartment buildings. The walls between apartments are both partitions and supports. They reduce the need for extra framing. This approach maximizes space and minimizes construction costs, making housing more affordable.

2. Frame Structures

Frame structures are also known as skeleton structures. They use a framework of columns and beams to hold up the building. The walls don’t carry the weight and are used mainly to enclose the space.

Residential Buildings

High-Rise Apartments: 

In cities, you often see tall apartment buildings. These buildings use a steel or reinforced concrete frame. The frame is like a skeleton. It holds up the whole building and lets it have many floors. This frame is very strong and can hold up the weight of all the floors above it.

Inside these apartment buildings, the frame allows for large, open spaces. This means the apartments can have spacious rooms and big windows. They won’t have many walls inside to block the view or divide the space. The frame supports the building. The walls inside the apartments are not load-bearing. They can be placed wherever needed for design.

Modern Houses: 

Many new houses are built using a wooden or steel frame. The frame supports the walls and roof, allowing for more design flexibility. This means you can have bigger windows. You can have open living areas and different room layouts. The frame also makes it easier to build multi-story houses. It gives homeowners more living space without needing a larger plot of land.

3. Pre-Engineered Buildings (PEBs)

Pre-engineered buildings are those which have been designed and manufactured through the utilization of high precision techniques such as Computer Aided Design Software (CAD), Building Information Modeling (BIM), and Precision Fabrication at factory premises before being transported to a place where they are put up like puzzles. PEBs boast efficiency, cheapness, and fast speed of erection because once delivered they can be assembled without much trouble involved.

Pre-engineered buildings find wide use due to their effectiveness in terms of time usage and money saving. PEBs serve as factories and warehouses for manufacturing industries. They offer large open spaces for machinery and storage. Quick construction times help businesses start sooner. They are used for retail stores and offices. They allow for flexible design and are used commercially. 

In agriculture, PEBs are good for storage sheds and animal shelters. They are durable and weather-resistant. PEBs are used for fun and learning. They are used in sports halls, gyms, schools, and colleges. They offer fast and customizable solutions for many needs.

4. Modular Structures

Modular structures use prefabricated modules. They are built off-site and then taken to the building site for assembly. This method is gaining popularity for its speed and flexibility.

Commercial Buildings

Office Buildings: Many businesses choose modular ones. They do so, especially, when they need to expand fast. These structures can be built much faster. Traditional buildings take much longer to construct. Companies can have new office spaces ready in weeks, not months. This speed is crucial for growing businesses.

Retail Shops

Modular structures are also used for retail shops. These shops can be set up fast in many places. This lets businesses expand quickly. Modular structure can be easily disassembled and reassembled at a new site if the business decides to move.

Educational and Health Care Facilities

Schools and Classrooms: Modular classrooms are commonly seen in many schools. They solve overcrowding problems rapidly and may serve as temporary or permanent classrooms. This adaptability allows schools to cope with fluctuating numbers of students without causing major interruptions.

Healthcare Clinics: The health sector widely employs modular structures. In case of emergency or provision of services to remote areas, clinics, and medical facilities can be established within a short period. These buildings are built according to strict sanitary requirements and may have required medical equipment installed there.

5. Shell Structures

A shell structure is a thin, curved building element that efficiently distributes loads across its surface. These structures are strong and stable despite using minimal materials, thanks to their unique shapes like domes, cylinders, and hyperbolic paraboloids. 

Shell structures carry loads mainly through compression and tension, reducing the need for heavy supports. Commonly made from concrete, steel, or composites, they are used in various applications, from sports stadiums to storage tanks, due to their strength, efficiency, and aesthetic appeal.

Sports Stadiums

Stadium Roofs: Many modern sports stadiums use shell structures for their roofs. The curved design allows for a wide, open space without many supporting columns, giving spectators an unobstructed view. Examples include the roof of the Sydney Opera House in Australia and the Beijing National Stadium in China.

Airports and Train Stations

Terminal Buildings: Shell structures are often used in the construction of airport terminals and train stations. The large, open spaces needed for these facilities can be easily achieved with shell structures. This moves passengers more conveniently and creates a spacious, airy environment.

Auditoriums and Concert Halls

Acoustic Shells: In auditoriums and concert halls, shell structures are used to enhance sound quality. The curved surfaces help to reflect sound waves evenly. This provides a better sound experience for the audience. This design is often seen in large performance venues around the world.

Religious Buildings

Mosques and Temples: Many religious buildings, especially mosques, use shell structures for their domes. The dome shape is not only aesthetically pleasing but also allows for a large, open interior space. This design is common in Islamic architecture and can be seen in famous structures like the Dome of the Rock in Jerusalem and the Taj Mahal in India.

6. Tensile Structures

A tensile structure is a type of construction where shape and stability are achieved through tension. These structures use strong, Flexible materials like fabric or steel cables that are stretched and anchored to create roofs or canopies. The tensioned elements efficiently distribute loads, making the structure both lightweight and durable. Common examples include stadium roofs, exhibition pavilions, and temporary shelters.

Stadiums and Sports Arenas

Coverage of Roof; often tensile fabrics are used on roofs, such as sports arenas and stadiums. These buildings’ roof is supposed to be expansive and open with a minimal number of columns or supports. Tensile structures employ lightweight yet strong materials allowing large open spaces that are functional and aesthetically pleasing.

Shades and Shelters: Tensile structures make shaded areas in the sports arenas for viewers. They protect people from direct sunlight as well as rain making the experience more enjoyable.

Construction Structure Types-3

Urban Spaces And Parks

Canopies and Pavilions: In many public parks and plazas, you will find tensile structures that act as canopies and pavilions. These structures provide shaded places where individuals can rest, picnic, or attend events while enjoying the outdoors. The easy installation and maintenance of tensile fabric is a result of its lightness.

Walkways and Bridges: Walkways, and pedestrian bridges are also made out of tensile structures. They offer both an appealing and modern design letting people walk through them while appreciating the environment.

Conclusion

Knowing about different building structures is crucial for making the right choices. This knowledge is key for planning and construction. Each structure type has its benefits and uses. It helps in choosing the right method, whether for a small house or a large building.

FAQS

Which is best load-bearing structure?

The best load-bearing structure often depends on the specific application and materials available. Generally, reinforced concrete provides excellent strength and durability for heavy loads, while steel frames offer superior flexibility and support for large spans and complex designs. Timber structures are also highly effective for certain applications, especially in sustainable and aesthetic designs.

What is the difference between load bearing and frame structure?


Load-bearing structures rely on walls to support and distribute loads throughout the building, which limits design flexibility. In contrast, frame structures use a skeleton of columns and beams to bear loads, allowing for more open and adaptable interior spaces. This difference affects both design options and construction techniques.

Mirror Direction as per Vastu

0
Vastu Tips for mirrors

Often overlooked, mirrors play a pivotal role in your interior’s design. It stands as an indispensable tool for your interiors. From creating illusions and aesthetics to maximising natural lighting, mirrors contribute to form and functionality in your homes and offices. Thoughtful incorporation of mirrors will turn your home and office into a visually captivating and functional space. 

According to Vastu Shastra, placing a mirror introduces positive energies to your home, making it an essential décor element. In the opinion of the Vastu experts, proper placement of mirrors welcomes growth and prosperity at home. Besides absorbing the negative energy, it helps in promoting good health for your family.

The Role of Mirrors in Vastu Shastra

Vastu Shastra refers to the practice of the science of architecture and design that originated in ancient India. Vastu focuses on the importance of placing and arranging different objects in your homes and offices so that the space drive and enhance harmony, positive energy, and well-being. Mirrors stand as a primary element in Vastu. The reflective property of your mirror amplifies and redirects energies depending on their placement. Here are the reasons why Vastu experts recommend placing mirrors in your interiors.

Enhances Energy

Mirrors reflect light and energy inside rooms. When you place mirrors within your interiors, they can enhance the flow of prana or positive energy within the space.

Absorbs Negative Energy

Besides imparting positivity, mirrors help in removing negative energy from your home. Experts believe that mirrors absorb negative energies, thereby soaking the negative vibes of Vastu doshas from the surroundings.

Creates Visual Extension

In certain directional orientations, if there is a cut in any specific corner or direction, experts term it a Vastu defect. When you place two mirrors at the end of such a space, it creates a visual extension, improvising the Vastu of your home.

Creates the Illusion of Doubling the Space

When you place a large mirror in a small room, it seems the room doubles its size. It helps in improving the aesthetics of the house along with several aspects of Vastu.

Symbolic Significance

Mirrors symbolise clarity, self-reflection and the ability to see the truth. Therefore, most people consider it a tool for personal growth and self-awareness.

Mirror Placement as per Vastu Shastra in Home and Workplace

Vastu Tips for Placing Mirrors at Home

  1. Dining Rooms

You can beautify your dining rooms with mirrors. According to Vastu Shastra, placing a mirror in the dining area brings good fortune and affluence. When placing the mirror, ensure that it reflects a clear image of your dining table. Moreover, it must brighten the space by reflecting light from the pendant light right above the table. 

Mount the mirror on the opposite wealth of the dining table. It helps improve your health, thereby promoting wealth, food and prosperity within your home. When dining, if the mirror reflects your entire family, it brings prosperity and enhances the love and affection between your family members.

  1. Bathroom

While considering mirror placement, according to Vastu, do not forget your bathroom mirrors. Are you installing mirrors in your bathroom? Do not forget to light up the space with elegance and modern light fixtures. Never place your mirror in the dark corners of your bathroom. Be careful about the direction in which you place your bathroom mirror. It should be in the north or northeast direction.

  1. Bedroom

Your master bedroom must be in the south or southwest direction, dominated by the earth element. Since a mirror is a water element and associated with instability in Vastu, it is best to avoid placing a mirror in the room. Placing a mirror in the master bedroom interferes with the energies of the earth element, thereby creating chaos. However, if you are keeping a dressing table with a mirror in your bedroom, ensure that it does not face the bed or reflect the person on the bed. If possible, cover the mirror with a cloth when not in use. Vastu experts opine that the mirror must not reflect the entrance of your bedroom.

Avoid using designer beds with mirrors on the headrest. It causes restlessness to the occupants. Never add a mirror to the false ceiling of your bedroom. Doing so reflects your bed and floor. Experts recommend avoiding the arrangement, as it causes stress. Furthermore, placing broken or rusted mirrors in the bedroom attracts negative energy. If you have a dressing room attached to the bedroom, place your mirror on the north or northeast wall of the room.

  1. Kid’s Room

Most homeowners and parents install mirrors in their children’s rooms. When installing mirrors in the room, ensure not to place the mirror in front of your kid’s bed. Since mirrors bounce the energy around the bedroom, it might cause restlessness in your child, amplifying their stress. Mirrors often create strange illusions, thereby generating negative energies.

  1. Living Room

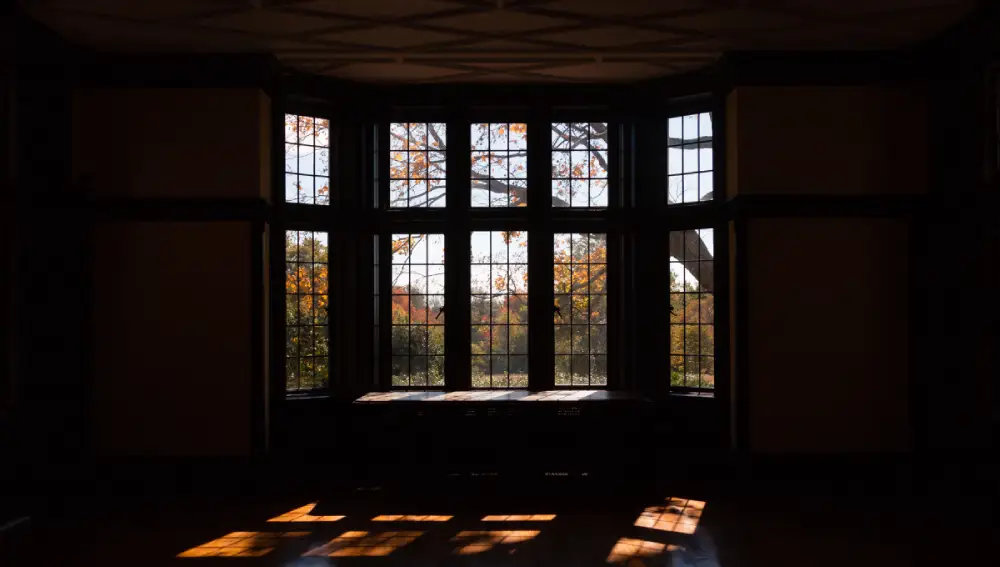
You can place a mirror on the wall opposite your living room’s window. Place it on the north or east wall to maximise lighting during the afternoon. If you have beautiful scenery outside your window, place a mirror opposite the window so that you can see the reflection of the landscape in the mirror. It ensures the flow of positive energy and bliss.

  1. At the Entrance

Most homes have their main entrance opening into the living room. If it is the same with your house, do not place a mirror in front of the entrance or entry gate. A mirror in front of the entrance gate reflects the energy entering your home. You can place your mirror in the foyer, above a console table, to add a welcome touch to your home.

Vastu Tips for Placing Mirrors at Office

If you are placing a mirror in your workplace, positioning it on the north or east wall helps attract positive energies and opportunities. Place a mirror on the wall opposite your desk, as it creates a sense of spaciousness and stimulates creativity. However, you must ensure it is not directly in front of your desk, as your reflection might lead to distractions.

Vastu experts recommend placing a mirror in front of your locker. It helps attract wealth and keep things in the right place. You can also keep a mirror inside your locker. It is an excellent alternative to reflect cash and attract prosperity. However, you must ensure that your mirror is spotless. When placing your mirror in your workplace, ensure that it does not reflect clutter or distractions.

Mirror Vastu: Essential Tips for Positive Energy

To make your home and office Vastu compliant, you must follow certain guidelines regarding placing and choosing mirrors for your residence and workplace interiors. According to Vastu experts, the wrong placement and choice of mirrors stagnate the flow of energy into your home and office. Some of the tips that you must keep in mind with mirror Vastu for positivity and harmony include the following.

  1. Right Mirror Placement as per Vastu

Mirror Vastu has the power to change the energies of your home and office. The reflection plays an important role in mirror placement. Do you have a picturesque view outside the window? Position your mirror opposite to the view. It replicates the beauty of the scenery and positive energy, filling your space with uplifting vibes. Vastu Shastra considers mirrors as the absorbers of negative energy. If your house or office has an object that emanates negative energy, place a mirror in front of the object to draw negative energies from it.

  1. Vastu for Mirror Shapes

When choosing mirrors for your home and office, opt for square and rectangular mirrors. Mirror Vastu considers these two shapes of mirrors auspicious. It is best to avoid going for oval, round and other irregularly shaped mirrors. However, you can choose any size of the mirror, as Vastu does not impose any restrictions on it. You can even create interesting patterns using rectangle and square-shaped mirrors in your living room.

  1. Vastu for Mirror Frames

Vastu Shastra prohibits the use of dark and bright-coloured frames for mirrors and glasses, as they attract and promote negative energy. Instead, use light and gentle colours. If you love including colours in your mirror frame, avoid using red, dark orange and pink frames. Go for subtle colours like white, cream, light blue, light green and brown colours. Ensure to frame your mirrors in wood or metal. Since unframed mirrors have sharp edges, they create negative energies, which is bad for health.

  1. Mirror Vastu Based on Directions

Vastu Shastra recognises eight directions, and each of them is associated with a specific element. These include the following:

  • East: Air
  • West: Space
  • South: Fire
  • Southeast: Fire
  • Southwest: Earth
  • North: Water
  • Northeast: Water
  • Northwest: Water

While placing a mirror in a certain direction proves beneficial, placing it in another direction will bring adverse effects. Directions representing water are ideal for placing your mirror. Let us explore mirror placement as per Vast Shastra for each direction.

  1. Mirror Placement in North, Northeast and Northwest Directions

These three zones represent the water element, making them ideal for mirror placement. You can place round, rectangle or wave-shaped mirrors in these directions. Avoid placing triangular or square-shaped mirrors in this zone.

  1. Mirror Placement in East

Since the east represents the air element, you can place a mirror without any imbalance. Waved and rectangular-shaped mirrors are ideal for this direction. Avoid placing round, square and triangular-shaped mirrors in this direction.

  1. Mirror Placement in West

The west represents the space element, making it an auspicious direction for your mirror placement. Experts recommend placing round or square-shaped mirrors in this direction. You must avoid placing triangular, waved and rectangular-shaped mirrors in this direction.

  1. Mirror Placement in South and Southeast

Both directions represent the fire elements. Since fire and water are opposite to each other, experts recommend placing mirrors in either of the two directions. If you do not have any alternative, try using a rectangular mirror with a brown casing border to mitigate its ill effects.

  1. Mirror Placement in Southwest

The southwest direction represents the earth that absorbs water. Therefore, placing a mirror in this direction will absorb positivity, leading to hardships in life. Placing a mirror on this side often manifests domestic conflicts, hindrances in opportunities, instability and strained relationships. Vastu experts recommend avoiding this zone altogether. However, if you do not have any other option, opt for a square mirror with a yellow border.

  1. Mirror Placement Tip for Entire South Zone

The south zone is not auspicious, and placing a mirror in this zone brings negativity. If you place a mirror in this zone, it is best to keep your mirror covered with a curtain or a veil when unused. It will prevent the spread of negative energy, preserving positive vibes.

Mirror Vastu Do’s and Don’ts

To make the most of your mirror placement in homes and offices and avoid potential disruptions to the flow of positivity, prosperity, and harmony, here are some do’s and don’ts that you must consider.

Dos

  • Opt for a superior quality mirror that offers clear and undistorted reflections. Never choose cracked mirrors, as they interfere with the flow of positive energy in your space.
  • If you are positioning a mirror in front of your home’s entrance, opt for Bagua mirrors, as they ward off negative vibrations. Bagua mirrors are special mirrors with eight trigrams framed in an octagonal-shaped wooden frame.
  • When placing mirrors, avoid placing them on a stand or hanging them. Instead, fix them permanently on your walls.
  • Ensure that your mirror balances all five elements when placing them in your living room and offices.
  • Keep your mirrors clean and smudge-free. You must regularly maintain them for optimum light and energy reflection within your space. 

Don’ts

  • Never use multiple mirrors. Always go for single-length mirrors.
  • Experts advise not to place a mirror in your kitchen, as it might create confusion and disrupt the harmony of your space.
  • Never keep broken mirrors in your space. Try discarding or repairing them immediately, as they attract negative energy and misfortune.

Conclusion 

Mirrors stand as significant tools in Vastu Shastra, influencing the flow of energy within your living and workspaces. When you follow the guidelines and tips for mirror placement comprehended in the guide, you create an environment that will maximise the positive effect and mitigate potential negative consequences.

As a prominent tech-enabled home construction company in India, Brick & Bolt promises to turn your dreams into reality. With their unique blend of creativity, unwavering commitment, and focus on delivering the best in class quality, they turn your construction into remarkable success stories. Whether you are building your new home, renovating your old home or constructing your office, the team of professionals at the organisation understands the importance of Vastu Shastra. With Brick & Bolt by your side, you get Vastu-compliant homes and offices, bringing health, wealth, prosperity and well-being to your spaces.

FAQ

Is a south-facing mirror good?


A south-facing mirror is usually not considered good in Vastu Shastra. Mirrors reflect energy, and if a mirror faces south, it might reflect negative energy back into your home. This can lead to stress or tension. It’s better to place mirrors on the north or east walls, where they can reflect positive energy and create a more peaceful environment.

Where should mirrors be placed for good luck?


For good luck, mirrors should be placed on the north or east walls of your home. In Vastu Shastra, these directions are believed to attract positive energy. Placing mirrors here can help reflect good vibes throughout your space, bringing harmony and prosperity. Avoid placing mirrors facing the south or directly in front of the main entrance, as this might reflect positive energy away from your home.

Home Renovation vs. New Home Construction

0
Home Renovation

A homeowner has to decide between home renovation vs. new home construction, which is an important decision that involves various technical considerations. During decision-making, these factors play a significant role, such as budget considerations, timeframe, and structural integrity of the house. 

Renovating the existing home is an excellent option when you have a particular budget to look after and preserve the original charm of the home while updating it with modern amenities. However, new home construction offers the opportunity to include the latest building technologies. It also allows you to design your home according to your preferences from the foundation. This article by Brick & Bolt will guide you to make an informed decision by comparing the home renovation vs. new home construction including the pros and cons of each option.

Identifying Your Needs: Home Renovation vs. New Home Construction

An extensive assessment of functional requirements, structural integrity, and lifestyle needs is important when analysing the need for home renovation vs. new construction. 

Renovation is suitable for properties with a strong existing framework that supports modern updates and amenities without compromising structural stability. Renovation is an advantageous option for homeowners who wish to retain the sentimental value of their current location. 

On the other hand, new construction is ideal when the existing structure is weak and fails to meet the fundamental living standards or when major customisation is required. This option allows for the use of energy-efficient systems and smart home features. 

Also, below are essential factors that should be considered while constructing a new house- 

  • Load-bearing capacity, 
  • HVAC system efficiency, 
  • Electrical infrastructure, 
  • zoning regulations, etc.  

Analysing these factors ensures that the chosen approach aligns with long-term goals and investment values.

Cost Comparison for New Construction vs. Remodel: Which Is Most Affordable? 

Renovation is generally more cost-effective than new construction. However, it depends on the amount of modifications and the condition of the current structures. The unexpected costs are because of the hidden issues which results in the increased costs.

New construction provides a clear picture of the accurate cost of the project, with estimates provided by builders. Although the initial expenses are high, new builds often give better long-term cost efficiency through modern energy-efficient designs. Also, both options must have emergency funds, and this fund is very important for renovation projects because of the unforeseen challenges.

Thus, budget is of prime importance in the decision between renovating vs. building a new house. The comparison between renovation vs. new build with some aspects is shown in the table below.

AspectsRenovationNew Construction
Initial CostsMinorMajor
Cost EstimationVariable (Hidden costs)Predictable (Builder’s estimate)
Backup FundsNecessary for unexpected issuesLess serious

Timeline Issues: Remodeling vs. Building New Home 

The timeline significantly varies for completing a renovation vs. new construction. Renovation, if the changes are minor, can be completed more quickly than new construction. However, for major renovation projects, the timeline can be longer if there are issues like getting the permits, materials and labour on time.

Although it’s evident that new construction takes longer, mostly from several months to a year or, in some cases, even more than a year. As it is new construction from scratch, including planning, permits, site preparation, and construction processes, the timeline is longer because of the complexity of the work. If you have minor changes and time constraints, you might prefer renovation as it is less expensive and can be done in shorter periods.

AspectRenovationNew Construction
DurationShorter (if small changes)Longer (a few months or a year)
Possible DelaysFor permits and buying materialsPlanning, scheduling,  site preparation, buying materials, permits, etc.
ComplexityLess complexMore complex

Laws and Permits: That You Need to Know 

Renovation vs. new building both need permits and must follow the local building codes and regulations. As renovation can be done in the existing building structure, it needs fewer permits and can be less complex, especially for interior work. While major structural changes or additions require thorough planning and approvals.

For new construction, a whole set of permits, from land use to environmental impact, must be considered, which is time-consuming and expensive. Also, to streamline the process, you need experienced contractors and architects who ensure you adhere to the necessary regulations.

AspectRenovationNew Construction
PermitsFewer permits (Interior work)Wide-ranging (land use, environmental impacts)
PlanningRequired for major structural workMore detailed
ComplexityLess complexMore complex

Design Flexibility: Comparison for Renovation vs. New Build 

One of the main attractions is the flexibility to alter your living space in both renovations vs. building a new house. During renovation, you can upgrade your current home while preserving the charm and features that attracted you in the first place.

In new construction, you have great freedom in design as you can create a home that perfectly matches your needs and visions, with each element designed to suit your tastes. It is a perfect choice if you have unique design ideas or specific needs that cannot be achieved through renovation.

Market Value of Home Renovation vs. New Home Construction 

While talking about the financial effects of renovation vs. construction, consider how each option will affect the house’s market value. The value of the house can be increased by doing renovations in key areas like the living room, kitchen and bathroom.

New construction with modern facilities and sustainable energy features in an excellent location that is well-designed can have a high price and attract a wide range of buyers.

AspectRenovationNew Construction
Design FlexibilityUpgrading the current frameworkComplete freedom from the ground up
Market ValueIncreases with quality renovationHigher because of the modern facilities and sustainable features

Staying Put or Relocating During New Construction vs. Renovation 

Consider your current living situation as they can affect your decision to renovate vs. new build. Renovation can be disturbing depending on how much of the work is involved. Staying in the same house during big renovation projects can be difficult and stressful for residents.

The need to stay in the same place while the work is being done is eliminated when building a new home. However, you will need a temporary place to stay during the time it has been built. It can result in additional costs of renting a place for some period.

AspectRenovationNew Construction
Living SituationPossibly inconvenient if staying during workRequires temporary accommodation
Additional CostsTemporary relocationCost of renting a place during construction

Environmental Effects During Renovation vs. New Construction 

Sustainability has become a growing concern as the wastage of resources is increasing. Renovation produces less waste and needs less demolition, making it a more sustainable choice. Reusing the resources during renovation reduces the demand for new materials.

You can use new green building practices and technologies for your new construction. From sustainable materials, energy-efficient windows and insulations to solar panels, new builds can be designed to meet environmental standards. Thus, both renovation and construction offer ways to prioritise sustainability.  

AspectRenovationNew Construction
Waste GenerationLess waste productionWaste generation might be high, but the possibility of using eco-friendly technology
Use of ResourcesReuses existing structures/materialsCan use new, sustainable materials
Environmental ImpactLow carbon footprintCarbon footprint is high, but designed to meet modern environmental standards

In the end, home renovation vs new home construction has advantages and drawbacks. To make an informed decision, be careful and evaluate your needs, budget, timeline, and personal preferences, ensuring that your home meets your family’s needs for years to come.

Choosing between home renovation vs new home construction is a significant decision. However, the expert team at Brick & Bolt can guide you through the process by offering perfect solutions that will maximize the aesthetic appeal, functionality, and cost efficiency.

FAQ

Is it better to buy and renovate?


Buying and renovating can be a good choice if you want to customize a home and potentially increase its value. It might cost less upfront but could take more time and effort. If you prefer a hassle-free move, buying a ready home might be better, though it could be more expensive. It depends on your budget and how involved you want to be.

What is the most expensive thing when renovating a house?


The most expensive part of renovating a house is usually the kitchen or bathroom. These areas involve costly materials like tiles, countertops, and appliances, as well as plumbing and electrical work. Structural changes, like adding rooms or knocking down walls, can also be very expensive.

Which room in a house is the most expensive?


The kitchen is usually the most expensive room in a house. This is due to the cost of appliances, cabinets, countertops, and plumbing work. Bathrooms are also expensive because of similar factors like fixtures, tiles, and plumbing.