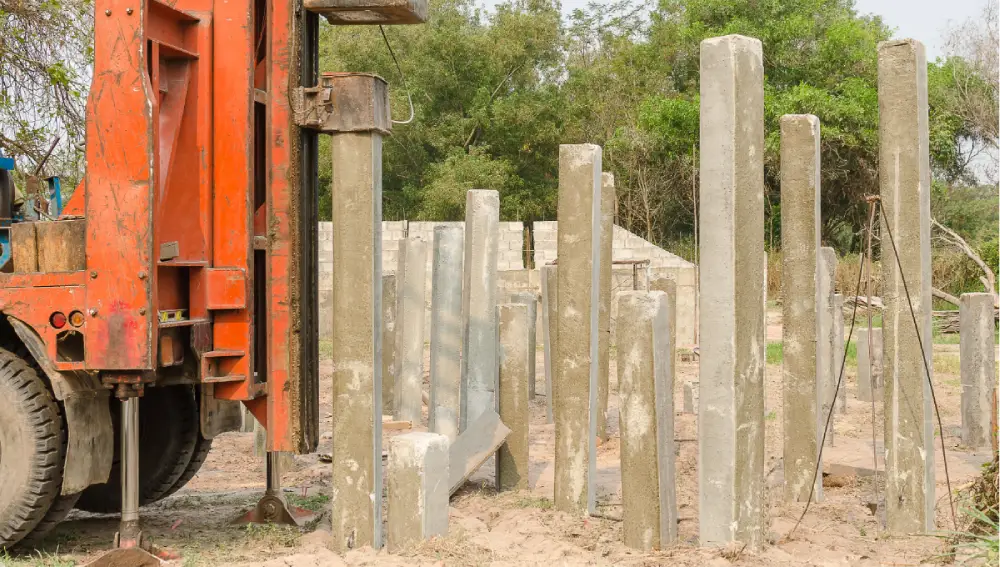
Home Blog Page 72

Shuttering in Construction: A Complete Guide

0
Shuttering in Construction

What is shuttering?

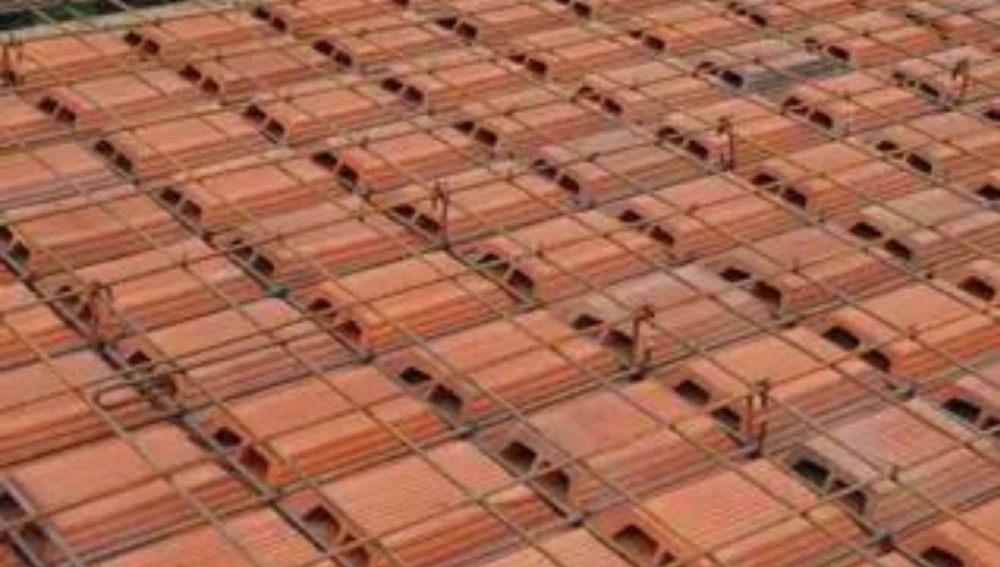
Shuttering or formwork is the temporary or permanent mold used in construction to support the shape of concrete until hardening and award of strength. This becomes very imperative while constructing concrete-based structures like walls, slabs, columns, beams, among others.etc.

Proper shuttering is undertaken so that the correct shape and dimensions are obtained after the pouring of concrete. This would provide a stable framework during the curing process.

Shuttering important in Construction

Why is Shuttering important in Construction?

Construction without shuttering would be like baking a cake without a mold.

It is necessary to shape concrete into desired structural forms such as walls, slabs, columns and beams.This ensures that the concrete sets in correct shape and dimension which reduces the collapse and messy outcome.

Until the wet concrete hardens and has sufficient strength to bear its weight and any additional loads, shuttering supports and ensures the concrete is held in place.

Types of Shuttering In Construction

Different types of shuttering materials and methods are used based on project’s requirements which has unique benefits and challenges. Having a fair knowledge about the types are crucial for selecting the most appropriate formwork for efficient, cost-effective and hig-quality construction.

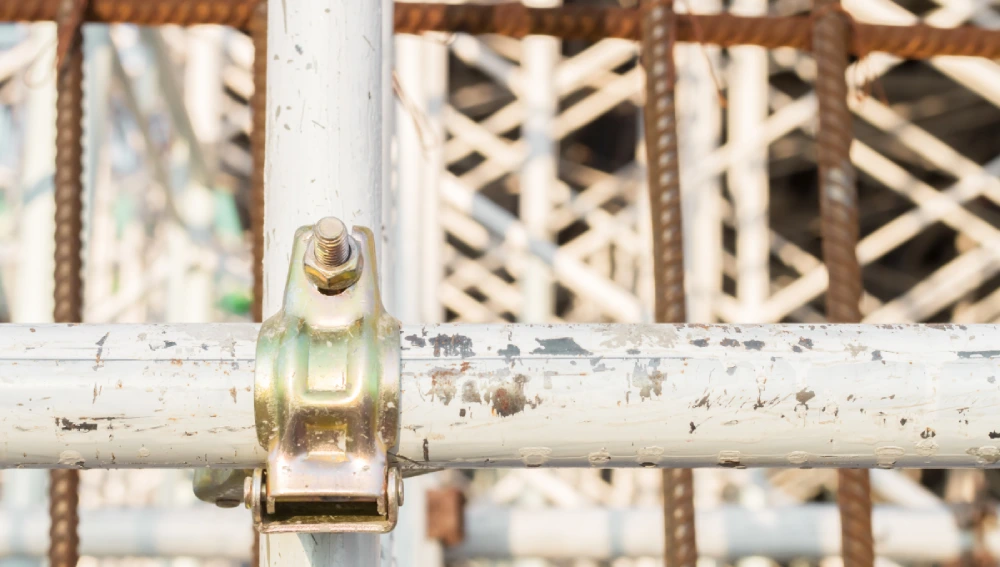
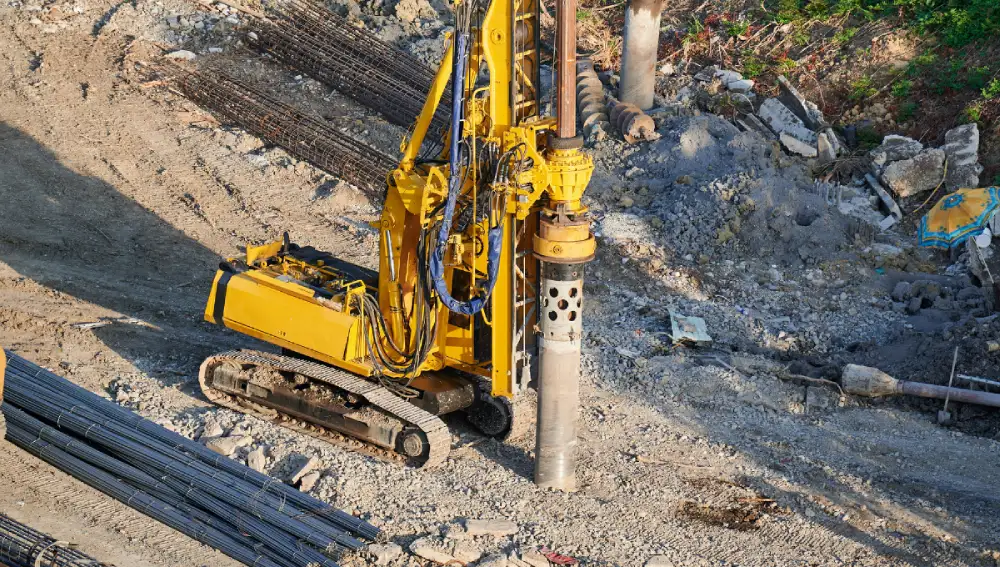
1. Steel Shuttering:

The core material used here is Steel.

This makes it very appropriate for high-rise building, bridge, and major infrastructure constructions due to the strength and reusability of the formwork. 

Shuttering made with steel is highly durable, reusable, and gives a smooth finish than other types of shuttering which is ideal for large projects and repetitive uses.

2. Timber Shuttering:

It is more of wood which is suitable for residential buildings, small commercial projects and where customized shapes are required.

Easy to assemble, remove and can be cut to any size or shape for small projects.

When compared to steel, it is less durable and reusable but prone to warping and damage from moisture.


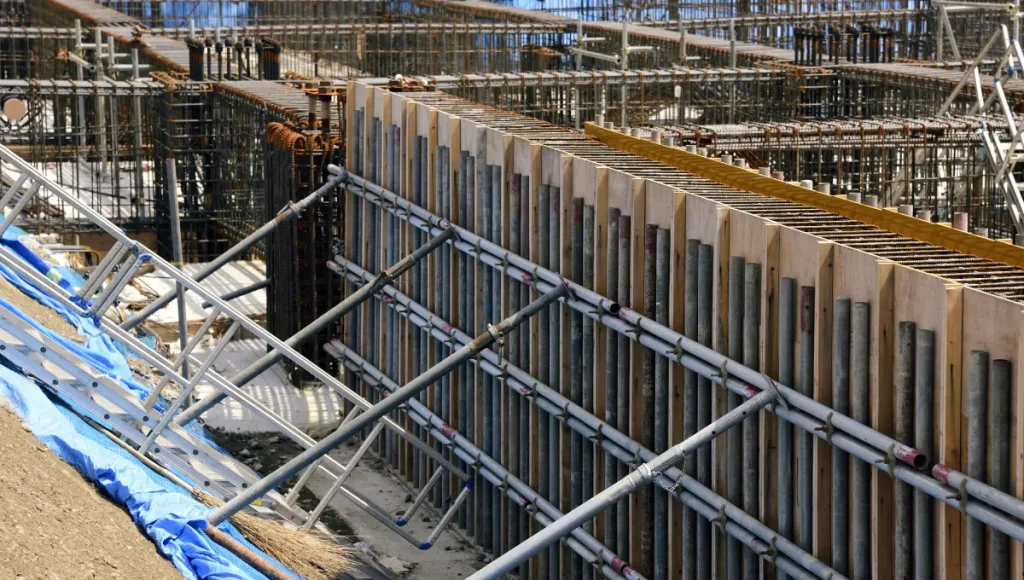
3. Plywood Shuttering:

In this type of shuttering, plywood sheets are often used. 

When combined with timber or steel, it provides a smooth finish for slabs, beams, and columns in both residential and commercial buildings.

Though plywood shuttering is lightweight and easy to handle, it is less durable than steel and can be susceptible to water damage if not properly treated.

 4. Plastic Shuttering:

Plastic shuttering is ideal for repetitive uses in housing projects, water tank and temporary structures. 

Lightweight, easy to handle, and reusable.

However, it’s not as strong as steel, not economical for huge projects. It’s a bit more expensive on the front end.

5. Tunnel Shuttering:

Tunnel Shuttering involves Steel and Aluminium which can be applied in construction of tunnels, subways, drainage system, and underpasses. I.e, Wherever repetitive shapes are essential, this type of shuttering is considered.

Though it is expensive and specialized, it provides a continuous formwork system for constructing tunnels, culverts, and similar structures. 

This requires precise engineering and skilled labor when compared to other types of construction.
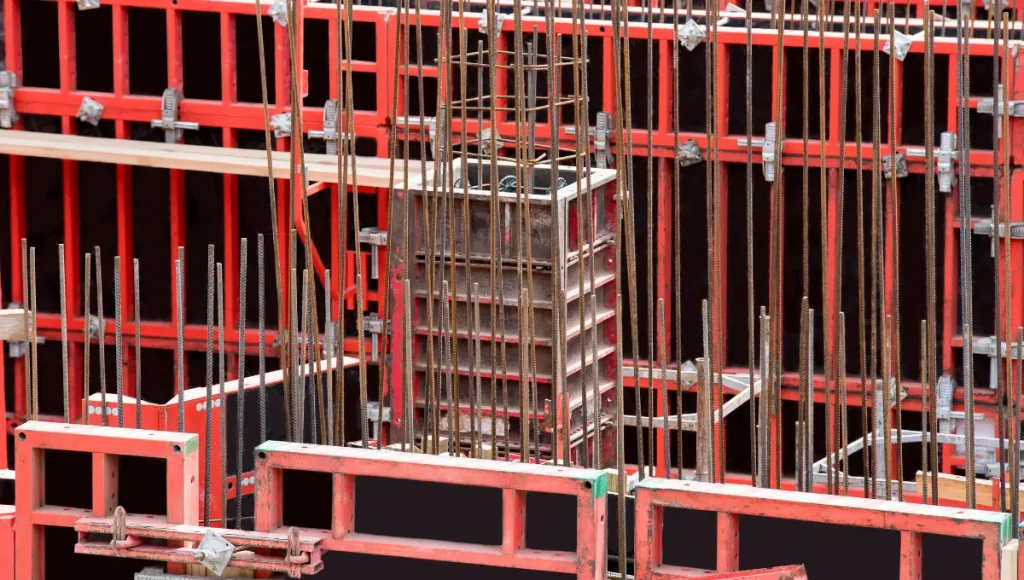
6. Wall Shuttering:

Building a wall should be taken much care as it is initial phase where construction evolves.

In general, for vertical concrete structures in both residential and commercial building this type of shuttering is used. 

It involves steel, timber, or plywood,providing strong and stable support for vertical structures.

Depending on the material, it can be heavy and may require skilled labor for installation.

 7. Fabric Shuttering:

Fabric formwork is used for both cast-in-place and precast concrete applications. Whether for walls, columns, slabs, foundations,or precast elements; fabric formwork enhance the quality and efficiency. 

It is easy to handle and transport. 

Based on the application, material type and construction, Engineers can adopt Woven Fabric shuttering where polyester or nylon involved, Non-Woven Shuttering where chemical, mechanical or thermal process involved, Geotextile fabric, Elastomeric fabric which uses polyurethane or rubber blends and lastly, Reinforced fabric Shuttering which uses additional materials like steel mesh or polymer grids.

Necessary things to consider for shuttering

Necessary things to consider for shuttering

When selecting and using shuttering, several factors need to be considered to ensure the success of the concrete construction project. 

Here are some:

1. Materials Used:

The materials chosen for shutteirng should be strength sufficient to bear the weight and pressure that the wet concrete exerts without deforming or breaking.

Here, strong materials like steel and high-quality plywood make this possible to have formwork reused a number of times.

Being water resistant may prevent swelling, warping, or weakening when exposed to wet concrete. For this, waterproof treated timber or marine plywood, plastic, and metal are preferable.

2. Strength:

The shuttering should bear shards and pressures of wet concrete at any time without deformation or collapse.

Its good to have a check on the formwork material and its design on its capability to bear the imposed load.

For Residential Construction, the formwork should be able to support a concrete pressure of around 1.5 to 2 kN/m² for walls and around 4 kN/m² for slabs.

And for Commercial and Industrial Projects, the requirements may be higher. The formwork need to support pressures of up to 10 kN/m² or more, depending on the height and thickness of the concrete being poured.

3. Watertightness/Less Leakage:

Watertightness is a crucial factor in shuttering. This avoids the leakage of concrete mix, which leads to weak spots and defects in the final structure.

All joints between shuttering panels should be sealed with rubber gaskets, foam strips, or sealant compounds to avoid leakage.

4. Smooth Surface:

The smoothness of the shuttering impacts the quality of the concrete finish. Materials like plywood,timber, plastic or steel, provides a smooth finish and reduce the need for additional surface treatment.

To prevent the concrete from sticking and to achieve smooth finish, a release agent (formwork oil) to the shuttering surface is applied. It is recommended to ensure the formwork is clean and free from any debris, dirt, or previous concrete residue before reuse.

Techniques such as troweling, sanding, or using skim coats can enhance the final finish.

5. Simple Removal:

Shuttering should be designed for quick and easy assembly and disassembly. Modular systems that fit together with minimal effort are ideal which does not consume much time.

Proper bracing and support systems should be done where the use of quick-release mechanisms or clamps to speed up the dismantling process are considered.

6. Consistency:

The formwork is designed according to the project’s blueprints and specifications. This provides the consistent dimensions and shapes throughout the structure.

It won’t end upto planning, Conducting a thorough inspection of the formwork before pouring concrete to avoid placing uneven pressure on the shuttering, regular maintenance schedule to check and repair, and being consistent in size and shape of shuttering will never be overlooked.

7. Rigidity or Stiffness:

The formwork should be rigid and stiff to maintain its shape under the load of the concrete.

It is better to avoid materials that can bend or flex, which leads to deformations in the concrete.

8. Insulation:

Consider the thermal properties of the shuttering material, especially in cold weather conditions.

Proper insulation can help to maintain the desired temperature for the concrete to cure effectively.

9. Safety:

Ensure the shuttering is designed and installed with safety in mind.

Proper bracing and supports are necessary to prevent accidents during the concrete pouring and setting process.

Is Shuttering and Formwork the Same?

Yes, shuttering and formwork are often used interchangeably in construction. Both refer to the temporary or permanent molds used to shape and support concrete until it hardens and achieves the necessary strength. 

The choice of term can depend on regional preferences or specific industry practices, but they essentially describe the same process and function in concrete construction.

FAQs

How can the quality of shuttering work be ensured?

Ensure quality by planning the design, using durable materials, assembling correctly, and inspecting for gaps or misalignments before pouring concrete.

Why is steel shuttering preferred for large projects?

Steel shuttering is preferred for large projects because it is strong, durable, and provides a smooth finish, making it ideal for repetitive use and achieving high-quality concrete surfaces.

Can shuttering be reused in construction?

Yes, shuttering can be reused, especially if made from durable materials like steel, aluminum, or plastic, which can withstand multiple cycles of concrete pouring without losing shape or integrity.

How To Register a Notary Property In India

0
Notary Property

In India, property transactions are notarized on a stamp paper. A notary advocate attests to it, instead of registering it with the government. While this may seem like a quicker and easier process, it is legally invalid for establishing proper title to the property. 

Notaries play a role in some property transactions. But, they only verify identities and witness affidavits and agreements. They cannot be used to establish legal ownership of the property.

If you are considering buying a property that was previously notarized, make sure it is properly registered. Also, check that it has all the necessary documents, including the LRS. Buying property legally is the safest way to avoid trouble and ensure safety.

How To Register A Notary Property In India

Notary Property

Process for Property Registration in India

The property registration process in India involves several key steps:

Identify Jurisdiction

  • The first step is to identify the proper Sub-Registrar’s office that has jurisdiction over the location of the property.
  • This is where you will need to visit to get the sale deed registered.

Prepare Documents

  • Gather all the needed documents for the property. These include the original sale deed, ID proofs of the buyer and seller, and any other relevant paperwork.
  • The sale deed must be prepared on stamp paper of appropriate value as per the stamp duty payable.
  • Required documents typically include
    • Aadhaar card, 
    • Verified copy of the original old sale deed, 
    • Passport-size photos of buyer and seller, 
    • No Objection Certificate copy (Land Ceiling Act), 
    • Latest property register card copy, 
    • Municipal tax bill copy, 
    • Construction Completion Certificate
    • and Recorded agreement between the builder and the original purchaser.

Pay Stamp Duty and Fees

  • Find the stamp duty by finding the circle rate and the transaction price.
  • Stamp duty is a percentage of the property value. It differs slightly by state and is usually 5%.
  • Before preparing the power of attorney, you need to buy non-judicial stamp papers. You use them to pay the stamp duty. 
  • You can buy them online or at the Collector of Stamps of the relevant area.

Present Documents and Verification

  • Take all the needed documents, including the sale deed, to the Sub-Registrar’s office.
  • The Sub-Registrar will then check the documents. They will ensure that both the buyer and the seller are genuine.
  • When all these things are properly in order, the sale deed will be registered.
  • This process might take about 5-7 business days. It would cost around Rs 10000.

Biometric Verification

  • During registration, the buyer and seller must input their finger print.. They must also input other forms of ID, like photographs.
  • This is done to improve security. It prevents fraud and ensures the transaction is real.

Payment of Registration Fee

  • After you do the biometrics, pay the fee at the Sub-Registrar’s office.
  • The fee usually ranges from one percent of the transaction value or Rs 30,000 as per the lower limit.

Collection of Registered Deed

  • Once the registration is complete, a receipt of registration is issued.
  • The registered sale deed will be ready to collect from the Sub-Registrar Office after 2-7 days from the working days.
  • Attend the appointment to get the registered deed. 
  • Take the appointment slip and required documents to the Sub-Registrar’s office on the booked date.

Properties in India are registered under the Indian Registered Act 1908. It ensures the title deeds and authentic documents needed to avoid fraud. They may also be useful.

The buyer must register the property to become its legal owner. The courts cannot accept unregistered documents.

Role of Notary Public in Property Transactions

Role of Notary Public in Property Transactions
  • Verifying all party’sidentities involved in the transaction
  • Witnessing the signing of legal documents related to the property
  • Preventing fraud and ensuring the integrity of the transaction
  • Ensuring compliance with state laws and regulations
  • Serving as an impartial third party to the transaction

Verifying Power of Attorney

If a property transaction involves a power of attorney, the Notary Public plays a vital role. They verify the identities of the person giving the power and the attorney. They also attest their signatures. This ensures that the attorney is acting on behalf of the executant and has the authority to do so.

For example, if an old person is selling their property and has appointed their child as their attorney, the Notary Public will check the IDs of the parent and the child. They will also check that the power of attorney document is valid and properly signed.

Witness for Affidavits

Notary Publics can do this for property affidavits, includingownership or consideration affidavits. An affidavit is a written statement. It is considered as true as verbal testimony. Affidavits are sworn in the presence of a Notary Public, which increases their weight.

For example, a property owner who wants to stand before a court or other legal authority and confirm ownership of a property can do so with an affidavit of ownership. Notary Public should witness the affidavit. The owner will sign the affidavit. The Notary Public will ensure the validity of the signature and the owner’s identification.

Witness for Agreements

Notary Publics can also witness any agreements involving property, like sale or lease agreements. This allows the Notary Public to guarantee the validity of the signed agreement. by witnessing the signatures of all the signatories. This process eliminates potential future conflicts.

For example, the landlord and the tenant may be entering a lease. In this case, they will both sign it in front of a Notary Public. The Notary Public will sign. They will witness the two parties’ signatures. This will make the lease legal and fully enforceable.

Conclusion

The Notary Public has an essential role in property transfers. But, their role is quite limited. It includes identification, witnessing, and curbing fraud. But for one to transfer ownership of the property there must be compliance with the legal procedures of the government.

Follow the right registration process and ensure your property has all the needed legal documents. This will protect your investment and bring peace of mind to property owners in India.

FAQs

Is a notary document enough for property ownership in India?

No, a notarized document alone does not establish legal ownership. The property must be officially registered with the local sub-registrar’s office to be recognized as a legal transfer of ownership.

How long does it take to register a property in India?

The property registration process usually takes 2 to 5 working days after submitting the necessary documents and payment of fees, though this can vary depending on the location.

Types of Roofs in Building Construction

0
Types of roofs

Roofing is an overlooked feature in building construction. It is often designed depending on the location, climatic conditions, and the type of construction. Roofing plays a key role in highlighting the entire building’s features. This blog explains the different types of roofing used in the construction of buildings. 

21 Types of Roofs in Building Construction

Types of roof construction

The overall performance of the building depends on the type of roofing the building has. Twenty-one different types of roofs are used for construction buildings, which are discussed below.

Curved Roof 

As the name states, a curved roof is one of the roofing construction models that has a sheathing and underlying framing, making a gentle curve when looked at from the side. It is an amazingly modern design that can be used for small cottages or bungalows. Shell roofs, barrel vaults, and domes are types of curved roofs.

Flat Roof

Flat roofs are basic designs that need no inclines to navigate, making them easy to maintain and install. These roofs absorb heat in the attic and can be converted to green roofs for plants to grow. 

Gable Roof

A gable roof is the ultimate protection for both the people living there and the building. In this roof type, the two sides of the slope face downward towards the wall. The roof can be of great use in countries that experience heavy snow or rain.

Hip Roof

A hip roof or a hip in a roof is a type of roof where the slope flows downwards on all four sides of the roof from the peak. It is costly compared to the gable roof as it requires more roof materials. 

Gambrel Roof

The gambrel roof contains only two slopes. The upper slope is normally steeper than the lower one. It is mostly seen in 18th-century colonial homes in North American Dutch. It does not decrease the space inside the home but provides better protection to the home. 

Mansard Roof

Mansard Roof

A mansard roof is also known as a French or Curb roof. On the top, the structure remains flat, but on the sides, it has a double slope with a steep pitch. The types of mansard roofs include straight, convex, concave, and S-shaped. Cedar shake shingles are one of the great materials for mansard roofs.

Butterfly Roof

The butterfly roof is a modern contemporary design. In this design, the two roofs are higher in height compared to the centre one. The roof was designed to make sure the water flows exactly into the drainage network. 

Asphalt Shingle Roof

The vital component of an asphalt shingle roof is the asphalt combined with other materials. The roofing contains other materials, namely tar, fibreglass, and granules of asphalt. The flooring consists of two types of warranties: one that comes from the manufacturer warranty and the other that comes from the workmanship warranty from the contractor.

Shed Roof

A shed roof, also known as a catslide, skillion, lean-to roof, or pent roof, is widely used in New Zealand and Australia. These roofs prevent the high-degree rays of sun from entering the home and provide a subtle shade to the home. 

Dutch Roof

It is also known as a gable roof in Britain. On the top of the hip roof, the gable roof is present. It creates a timeless aesthetic for the home.

Blue Roof

The building’s blue roof is normally used to store water temporarily and then release it slowly. It is specifically used to control drainage on roofs. 

Combination Roof

One great example of a combination roof is the gable and hip roof. The hip roof is the ending of the roof, while the gable makes the body. This design is pricey but adds a complex design to it.

Dormer Roof

A dormer is not entirely a roof design, but it highlights the sloping roof by giving the vertical window a space for sunlight. It is mostly used in bedrooms. 

Membrane Roofing

A membrane roof has no slope to it. They have tight water surfaces and can be used in areas where rapid water displacement is required. Different types of membranes are used for specific purposes. 

Metal Roofing

Metal roofs are classified into three types, namely weathering steel, galvalume, and galvanised. These roofs are not native to water and are resistant to corrosion.

Tile Roofing 

Similar to metal roofs, tile roofs have a longer lifespan of more than a hundred years. They can protect from extreme weather conditions, including heat, fire, and rain.

Slate Roofing

A slate is made from metamorphic rocks that are produced from volcanic ash and clay. The slate comes in different colours and can be cut into desired shapes.  They last for a lifetime.

Clerestory Roof

A clerestory roof aims to permit natural light and air. The roofs are placed above eye level for this purpose. It is a classic French-style roof design. 

Jerkinhead Roof

A jerkinhead roof is a gable roof that has two peaked ends and is also called a snub gable. The advantage is that the clipped ends protect from extreme wind and provide stability.

Dome Roof

The Dome roof is yet another classic roof style used in construction. They are built from various materials, namely wood, metal, copper, concrete, fibreglass, and adobe. They can resist strong winds and snow loads.

M Shaped Roof

A M-shaped roof highlights different sections of the roof with a vertical wall meeting the roof pitch. They may not be suitable in areas where there will be heavy rains or snow, as these roofs are not continuous. 

Conclusion 

Make the most of your roof. Make your roofing dictate your knowledge and intelligence through simple yet modern designs. Do contact experts in the field and let your home roofs shine. 

FAQs

1. What are the three main types of roofs?

The three main types of roofs are hip, gable, and flat roofs. 

2. Which is the best roof type?


One of the best roof types could be slate because of its life span of over 15 years. However, tiles or metal can also be used depending on the purpose. 

3. What is the safest roof type?


The safest roof types could be metal roofs, tile roofs, and slate roofs.

Filler Slab Construction: Sustainable, Cost-Effective, and Efficient Building Method

0
Filler Slab Construction

Filler slab construction has received significant attention in recent years. This is due to its sustainability, cost-effectiveness, and structural efficiency. 

This method helps in reducing the amount of concrete and steel. They use locally available materials like eco-friendly materials. 

In this blog, we will see the details of filler slab construction, their working principle, design, composition, planning, process, and their advantages and disadvantages.

What is a Filler slab?

Filler Slab Construction

Filler slabs are reinforced concrete slabs designed to minimize the amount of concrete by replacing it with filling material while simultaneously maintaining structural integrity. These lightweight, low-cost Home Construction Materials help reduce the overall weight and price of the slab. 

The filler materials are normally placed between the steel reinforcement bars, creating.  a ribbed effect.

How does it work?

Filler slabs replace the non-structural portions of traditional concrete slabs with filler materials like titles, clay pots, hollow concrete blocks, or some waste materials like broken bricks or coconut shells. 

The filling materials are placed between the reinforcing steel bars that are arranged in a grid or in any individual bars. This forms a lattice structure, which helps the slabs to maintain their structural integrity And rescues the overall weight and materials used.

Filler Slab Composition

Concrete: 

Concrete is a mixture of cement, sand, aggregate, and water. It is the main structural component of the slab, providing strength and stability. Concrete is mainly used in the top and bottom layers

Filling Material: 

The lightweight materials replace the concrete in the bottom zone. They are non-structural materials like titles, clay pots, or hollow blocks. It helps in filling the space between reinforcement bars.

Distribution Reinforcement:

Steel reinforcements are usually used in the filler materials. This helps in improving the load-carrying capacity and load distribution across the slab.

Top Mesh Reinforcement:

A mesh reinforcement layer is placed on the top of the filler material. They help in improving the tensile strength and also offer additional support.

Bottom Mesh Reinforcement: 

This mesh reinforcement is placed in the bottom of the filler material. They help in the maintenance of structural integrity.

Design and Planning 

The design and planning of the filler slab need to be done with careful consideration. This involves several factors for providing structural integrity and cost efficiency. Some of the important steps involved are:

  • Analysis of load
  • Filler material selection
  • Designing steel reinforcement
  • Designing formwork
  • Designing concrete mix

Step-By-Step Construction Process For Building A Filler Slab

The construction of the filler slab involves various steps. Each step needs to be executed carefully to make the final product strong, durable, and cost-effective. 

Step-By-Step Construction Process For Building A Filler Slab

Formwork Installation

Formwork is a temporary mold in which the concrete is poured. Then the slab is formed. In the case of filler slabs, the formwork must support the concert as well as filler materials.

The steps involved in formwork installation are:

  1. Site preparation
  2. Installation of support
  3. Installation of formwork panels
  4. Securing the formwork

Steel Reinforcement Placement (Grids Or Individual Bars)

The tensile strength required for the slab is provided by steel reinforcement. Some of the placement of steel enforcement are arranged as follows:

Steel grid layout: here the steel bars are arranged in a grid pattern.

Securing steel bars: steel bars are secured by using binding vires at intersections.

Placement of additional reinforcement: additional reinforcement is added if needed if there are any edges, openings, and high-stress areas.

Positioning And Securing Filler Materials

The filler materials are placed in between the steel reinforcement bars. This reduces the amount of concrete used. 

First position the filler materials between the steel bars. Then, use wire or other binding materials for securing fillers in place. At last check the alignment of the fillers.

Concrete pouring and curing procedures

Pouring and curing of concrete are important steps in the construction process. The steps in this process are

  1. Mixing of concrete according to specified design
  2. Concrete pouring
  3. Vibrating the concrete for removal of bubbles.
  4. Levelling the surface
  5. Curing the concrete for 7-14 days. 

Advantages of Filler slab

The advantages of filler slabs include-

  • Reduction of weight as they are lighter than traditional slabs. 
  • Cost efficiency by using less steel and concrete. 
  • Thermal insulation helps in the maintenance of indoor temperatures. 
  • Fast and environmentally friendly construction. They are flexible in design. 
  • They have improved seismic performance and adaptability to local materials.

Disadvantages  of Filler slab

Despite many advantages of using filler slabs, they also have some limitations. 

  • They are complex in design and ,need skilled construction labour They can only be used for a limited time. 
  • There may also be a need for quality control, as poor-quality materials can affect the structural integrity.

Conclusion

The filler slabs offer an efficient and sustainable alternative for building construction. They also help balance structural strength with material savings. For successful implementation, careful planning, designing, and quality maintenance are necessary.

FAQs

1. Can filler slabs provide thermal insulation? 

Yes, the filler slabs can offer excellent thermal insulation.

2. What are the primary components of a filler slab? 


The primary components of filler slabs are concrete, steel reinforcement, and filler materials.

3. Can filler slabs be aesthetically customized?


Yes, the filler slabs can be aesthetically customized with visually appealing patterns and designs

How to make the power of attorney

0
How to make power of attorney

Life can be unpredictable. Think of it you becoming ill or facing an accident and are unable to manage your affairs? One way to prepare for the unexpected and ensure peace of mind is by setting up a power of attorney (POA).

A power of attorney is a legal document that enables you to designate a trusted person to make important decisions on your behalf if you become unable to do so. This person, known as your agent or attorney-in-fact, will have the authority to manage your affairs according to your wishes.

Anyone can face sudden illness or injury. By creating a POA, you take proactive steps to ensure that someone you trust has the power to act on your behalf, safeguarding your interests when you cannot. 

Here’s a guide to help you establish a power of attorney effectively.

Types of POA based on authority

Types of POA based on authority

Before applying for a POA, it is crucial to know the types and other mandatory things. Based on the authority, you have two options of POA:

General POA- This grants broad powers to the agent.

Specific POA: This limits the agent’s powers to specific acts or transactions.

Under these option, the Powers Granted are listed below:

  • Managing real estate
  • Handling bank transactions
  • Making investment decisions
  • Conducting business operations
  • Filing taxes
  • Making legal claims and defenses
  • Personal and family maintenance
  • Health care decisions (if included, sometimes a separate document)

Steps to create a Power of Attorney in India:

1. Decide which type of Power of Attorney to make

There are several types of POAs, each covering different aspects of your life:

Durable Power of Attorney: This type remains effective even if you become unable to make the decision, ensuring your agent can continue to act on your behalf if you cannot make decisions yourself.

Springing Power of Attorney: Only becomes effective when a specified condition is met, like you become unable to make decisions. It can be tricky to determine when these conditions are met, so it’s less commonly recommended for estate planning.

General Power of Attorney: It grants your agent broad authority to act on your behalf in all matters allowed by law, including legal, financial, health, and business decisions.

Financial Power of Attorney: A limited POA that specifically authorizes your agent to manage your financial matters, such as paying bills, handling bank transactions, and filing taxes.

Medical Power of Attorney: Another type of limited POA, this authorizes your agent to make healthcare decisions on your behalf, including medical treatments, medication, and surgical procedures.

While online POA templates exist, it’s highly recommended to consult a lawyer. 

They can help you understand the types of POAs and choose the right POA. They can recommend the one that best suits your needs and circumstances.

2. Choose your Ideal Agent

The person you choose as your agent is critical. They will be entrusted with your money and legal affairs. They may also make your healthcare decisions, depending on your POA.

Your agent should typically be at least 18 years old, but check your state’s specific requirements. Choose someone you trust to act in your best interests and who is capable of making difficult decisions.

Potential candidates, you can consider:

Spouse or Partner: A common choice, especially for a general POA.

Adult Child: A mature and responsible child can be a good option.

Close Friend or Relative: Someone you trust implicitly and who understands your situation.

Lawyer or Financial Advisor: For complex legal or financial matters, a pro can help. They can provide expert help.

Choose your Ideal Agent

3. Define what powers you want to grant to your agent

Medical Decisions: Specify treatments, medications, and names of healthcare providers.

Financial Decisions: This includes managing bank accounts, paying bills, handling real estate, and making investments.

Other Specific Powers: This covers any additional powers related to your business or personal affairs.

4. Obtain and Complete the POA Form

Get the appropriate form for your needs. Many states offer free POA forms, which may be more rigid.

Some Paid services provide customizable forms to fit your specific needs.

Some platforms offer free tools to create POA forms, especially for durable financial and medical powers of attorney.

5. Sign and Notarize the Document

Most states require your signature to be notarized.

Some states require one or more witnesses in addition to notarization. Ensure your agent’s signature is included if required by your state.

6. Distribute Copies of the POA

Your Agent must ensure they have the original or a copy of the POA.

7. Store Your POA Safely

Keep your POA documents secure. Use a fireproof safe, or a safe deposit box, or store them at your attorney’s office.

Otherwise, let your family and trusted person know where to find these documents in an emergency.

8. Update Your POA as Needed

Timely update of POA is much needed as circumstances can change.

Draft a new document with changes inform your former agent and relevant parties about the cancellation and provide them with the updated POA.

Example Power of Attorney Document

This Power of Attorney is made on [Date] by [Principal’s Full Name], residing at [Principal’s Address], referred to as the “Principal”.

I hereby appoint [Agent’s Full Name], residing at [Agent’s Address], as my true and lawful Attorney-in-Fact (referred to as the “Agent”) to act in my name, place, and stead in the following manner:

Declaration

I, [Principal’s Full Name], hereby grant [Agent’s Full Name] the authority to act on my behalf following the powers specified in this document.

Conclusion

We can’t predict the future, but creating a power of attorney helps ensure that your affairs will be managed by someone you trust, no matter what happens. This gives you peace of mind knowing that your personal, financial, and medical decisions will be handled according to your wishes. 

With the right tools and guidance, you can create your power of attorney quickly and securely, making a proactive step toward protecting your interests.

FAQS

Is it mandatory to register a Power of Attorney in India?

Registration of a POA is not always mandatory, but it is required when the POA involves the transfer of immovable property or other significant legal transactions. Registration provides legal validity and protection.

Can a Power of Attorney be used after the death of the principal?

No, a Power of Attorney automatically becomes invalid upon the death of the principal. The agent loses all authority to act on behalf of the principal after their death.

What is Skirting in Construction

0
Skirting in Construction

What is Skirting in Construction

Skirting is a strip of material. It’s usually made of wood, plastic, or tile. which is installed along the bottom of the walls where they meet the floor. It covers the joint between the wall and the floor provides a neat finish and protects the walls from damage.

Importance of Skirting

Importance of Skirting

Aesthetic Appeal

Room Decor Enhancement: Room decor can be improved with skirting. It is a decorative feature on the joint of a wall and the floor. This makes for a smooth transition and enhances the appearance of the space. Skirting may also be designed to suit your room’s décor, whether it is traditional, modern, or minimalist.

Customization: Manufacturers make skirting boards in different materials, colors, and styles. Consequently, homeowners and interior designers have endless possibilities when searching for ideas that match their house designs best. Wood skirting could also be stained or painted having a similar finish as furniture or lighting fixtures. PVC skirting comes in many colors to match walls or floors.

Protection

  • Wall Protection: The main purpose of using skirting boards is to protect walls from damage at low levels. Shoes, vacuum cleaners or collisions cause dents to walls in busy areas where people pass by every time. That way is gone now because of such problems that are common among others.
  • Furniture Damage Prevention: Removal of furniture frequently results in writing and damage on walls. Skirting provides a buffer. It ensures that when furniture is moved, it does not directly hit and damage the walls. This is especially useful in homes with heavy or frequently moved furniture.
  • Durability: In business places or homes where children and animals are found, skirting is made of either PVC or metal which is one of the most suitable materials that can be used to make it because they can withstand a lot of pressure resulting from different destructive activities carried out by human beings. These materials are capable of withstanding a lot of stress hence preserving the walls for a long period.

Concealing Gaps

  • Covering Construction Imperfections: During construction, it is common to have small gaps or uneven edges where the wall meets the floor. Skirting effectively hides these imperfections, providing a neat and polished finish to the room.
  • Seamless Finish: Skirting conceals gaps. It ensures the wall-to-floor transition looks smooth and unbroken. This seamless finish contributes to the overall aesthetic of the room, making it look professionally designed and well-maintained.
  • Maintenance of Clean Lines: Skirting helps in maintaining clean lines in interior design. Straight and even skirting boards can emphasize the shape of a room. They highlight its features and add to a more orderly and appealing space.

Concealing Wiring

  • Hiding Electrical Cables: Modern homes and offices have many electrical cables for power, internet, and entertainment. Skirting can have cable management features. They hide wires, reducing clutter and making the area safer.
  • Easy Access: Skirting boards that conceal wiring also allow for easy access when needed. Unlike wires buried in walls, cables behind skirting can be quickly reached for maintenance or upgrades without damaging the wall.
  • Safety: Exposed wires can be a tripping hazard and pose a risk of electrical accidents. By concealing wiring within skirting, these risks are minimized, making the space safer for inhabitants, especially children and pets.

Types of Skirting

Types of Skirting

There are a number of types of skirting boards that cater for different needs and tastes.

  • Wooden: This variant is made of various woods and can add warmth and an organic look to your interior. There are many ways to finish this product including polishing, painting or varnishing.
  • PVC: It is made from plastic so it is very durable and easy to clean. If you have chosen such a style for your apartment, you can diversify the designs and colors.
  • Metal: These metal skirtings are usually constructed from stainless steel or aluminium. It is commonly used in modern or industrial interiors. The material itself is tough and resistant to damage.
  • Tile: In bathrooms as well as kitchens, these parts match floor tiles while serving as water proofing against walls.

Applications of Skirting

Living Rooms

Suitable Type of Skirting Used: Wooden Skirting

Why Wooden Skirting?:

Aesthetic Appeal: Wooden skirting can add a sense of sophistication and homeliness to living rooms. It is paintable or stainable so that it can be matched or contrasted with other wooden pieces of furniture, doors and floors the room has.

Durability: Wooden skirting is strong enough to resist minor impacts making it the best option for places where people keep moving their furniture most of the time.

For example, in a modern living room with wooden flooring and furniture, there are some wooden skirtings at the bottom of walls. To achieve this uniform elegant look, the skirting was stained dark as per the rich colour of the furniture. It also keeps scuffs away from walls when chairs and sofas are being put in place.

Kitchens

Suitable Type of Skirting Used: Tile Skirting

Why Tile Skirting?

Hygiene: Kitchens are prone to spills and splashes. Tile skirting is easy to clean and will keep looking good over time, making it a hygienic option.

Waterproofing: A tile skirting provides a waterproof barrier preventing water from getting into the walls.

For Example, when in an active kitchen with tiles covering its floor, matching tile skirting extends along the base of its walls. This blending approach not only appears neat and up-to-date but also insulates any water damage on the wall surfaces as well as ease off cleaning after spillages. The choice for tile skirting is made in accordance with the floor tiles that are consistent throughout the kitchen.

Offices

Suitable Type of Skirting Used: PVC or Metal Skirting

Why PVC or Metal Skirting?

Durability: Both PVC and metal skirting are highly durable and can withstand high foot traffic, which is common in office environments.

Concealing Wiring: These materials often come with channels to conceal electrical wiring, keeping the office space tidy and reducing clutter.

For example, In a commercial office space with carpet flooring, PVC skirting with built-in cable management channels is installed. The skirting helps hide numerous computer and telephone wires, creating a neat and organized environment. The PVC material is chosen for its durability and ease of maintenance, ensuring it looks good even with heavy daily use.

Bathrooms

Suitable Type of Skirting Used: Tile Skirting

Why Tile Skirting?:

Waterproof: When you build bathrooms in wet areas, tile skirtings help ensure water does not pass through walls.

Easy to Clean: Cleaning bathroom corners can present a challenge, but tile skirting makes it easier for us to wash them clean when necessary.

For Example, In contemporary bathrooms with ceramic floor tiles, matching ceramic tile skirting is used along the walls. This waterproof option guarantees that showers or sink splatters do not damage adjacent surfaces. Such tile baseboards also tie into an overall bathroom theme perfectly well providing that seamless fresh appearance.

Bedrooms

Suitable Type of Skirting Used: Wooden or MDF (Medium Density Fiberboard) Skirting

Why Wooden or MDF Skirting?:

Aesthetic Consistency: Wooden or MDF skirting can be painted or stained to match the bedroom decor, providing a consistent and pleasing appearance.

Cost-Effective: MDF skirting is a cost-effective alternative to solid wood, offering similar aesthetic benefits at a lower price.

For example, In a cozy bedroom with hardwood floors, MDF skirting is installed and painted in a soft white color to match the room’s trim and furniture. This creates a serene and harmonious environment. 

Hallways and Corridors

Suitable Type of Skirting Used: PVC or Metal Skirting

Why PVC or Metal Skirting?:

High Traffic Resilience: Hallways and corridors experience heavy foot traffic, and PVC or metal skirting is durable enough to withstand constant use.

Ease of Maintenance: These materials are easy to clean and maintain, which is important for high-traffic areas.

For Example, In a school corridor, metal skirting is installed along the walls. The metal skirting is chosen for its robustness and ability to endure the wear and tear of daily student activities. Its sleek, modern appearance also adds to the overall aesthetic of the hallway.

Retail Spaces

Suitable Type of Skirting Used: PVC Skirting

Why PVC Skirting?:

Versatility: PVC skirting is available in various colors and styles, making it suitable for different retail interiors.

Durability: It is resistant to impacts and scratches, which is crucial in busy retail environments.

For Example, In a retail clothing store, PVC skirting is installed along the base of the display walls. The skirting is in a neutral color that matches the store’s interior design. It protects the walls from damage caused by shopping carts and foot traffic, while also keeping electrical wiring out of sight.

Conclusion

Skirting is a key part of interior construction. It is versatile and essential. It provides both aesthetic and functional benefits in many uses. Choosing the right skirting for each area will enhance the look of the space and protect walls. It will also ensure a clean and organized environment. 

Skirting is important in interior spaces. It warms a living room with wood and gives durability to an office with PVC. Tile adds hygiene to kitchens and bathrooms.

FAQs

Why is skirting important in construction?

Skirting serves multiple purposes: it hides the gaps between the wall and the floor, protects walls from damage caused by furniture or cleaning, and enhances the overall aesthetic of the interior space.

Is skirting necessary in all types of buildings?

While not mandatory, skirting is commonly used in residential and commercial buildings for aesthetic purposes and to protect walls. It may not be necessary in industrial or minimalist designs.

How is skirting installed in construction?

Skirting is typically installed after the flooring is laid. It is cut to size and fixed to the wall using adhesive, nails, or screws, depending on the material and the surface. The joints are then sealed for a seamless finish.

Types of Joints in Construction

0
Types of Joints in Construction

When it comes to construction, joints are very important for structures’ strength and durability. They are essentially the areas where dissimilar materials of building adjoin and are necessary to allow motion control, enable expansion and contraction, and maintain integrity in a structure.

Different kinds of joints are used in different construction purposes such as connecting large concrete slabs or framing wooden structures. An understanding of joint types and their uses is what helps builders and engineers create stronger buildings that last longer. The various types of joints employed in constructing buildings are covered by this article.

Different Types of Joints used in Construction

Different Types of Joints used in Construction

1. Concrete Construction Joints

Concrete construction joints are used to join two concrete pours. These joints are needed when concrete pouring is done in stages. This is common in large projects.

  • Large Concrete Slabs: When constructing a large building like a shopping mall, it is not possible to pour the entire floor at once. The construction is done in sections. Construction joints are placed where one section ends and another begins. For example, if you are building a mall floor, you pour one section today and another section next week. The construction joint ensures these sections bond well and act as a single piece, maintaining the floor’s strength and stability.
  • Multistory Buildings: In many cases, each floor is individually cast when constructing tall buildings. For example, in the case of a high rise apartment block, the first storey is allowed to dry before pouring the second floor. It is these construction joints between floors which ensures that each floor line is properly connected leading to overall stability to the building. This is essential for the building to stand up against its own weight as well as external forces like wind and earthquakes.

2. Expansion Joints

Expansion joints allow for material to expand and contract. This happens due to temperature changes. They prevent cracks and structural damage by accommodating these movements.

  • Bridges: Bridges expand and contract due to temperature changes. Expansion joints are placed at regular intervals to allow for this movement. For example, the Bandra-Worli Sea Link in Mumbai has expansion joints that allow the bridge to expand in the heat and contract in the cold. This prevents cracks and damage, ensuring the bridge remains safe and stable.
  • Roadways: Long stretches of concrete roads can crack without expansion joints. These joints are placed at regular intervals to manage thermal expansion and contraction. For instance, highways have expansion joints to prevent the concrete from cracking due to the heat in summer and cold in winter.

3. Contraction Joints or Control Joints

Control joints, also called contraction joints, control where cracks occur in concrete. They do so by limiting shrinkage. These joints are intentionally placed to direct the cracks to a specific location.

Applications & Types:

Control Joints are categorized under two types:

  • Sawed Joint: Created by sawing a groove into the hardened concrete.
  • Formed Joint: Made by placing a strip into the fresh concrete, which is later removed to create a groove.

Concrete Floors: Contraction or control joints are mandatory in large industrial concrete floors because of their ability to prevent random cracking. A good example can be seen with factories that have spacious concrete floors. Such control joints as the concrete is drying will allow for any shrinkage of the flooring along those lines of weakness created when it was still wet, preventing cracking and allowing heavy machinery through.

Pavements: Contraction or control joints in concrete pavements aim at creating pre-determined crack locations. This kind of thing happens usually for sidewalks as well as driveways too . Think about a long drive leading up to a house; there are control points at equal intervals so that any cracks would form across these places keeping it smooth.

Walls: In general terms, there exists some fissure dividing large solid or brick walls into different parts. For example, in a long boundary wall, control joints are placed at intervals to prevent unsightly cracks and maintain the wall’s strength and appearance

4. Joints in Masonry/ Masonary Joints

Masonry joints are vital components in masonry construction, contributing significantly to the structural integrity, durability, and overall performance of masonry structures. These joints, filled with mortar, bind individual masonry units like bricks, stones, or blocks together.

Applications of Masonry Joints

Load Distribution:

Masonry joints are essential for distributing loads evenly across a structure, preventing localized stress that can lead to cracks or failures. In multi-story buildings, bed and head joints ensure that the weight of each floor is safely transferred down to the foundation, maintaining structural integrity. These joints also support superstructures like beams and slabs, ensuring they remain stable and anchored. 

Thermal Movement Accommodation:

Masonry joints like control and expansion joints are vital for accommodating thermal movements due to temperature changes. In regions with significant temperature fluctuations, masonry expands and contracts, which can cause serious structural damage without appropriate joints. Control joints, placed at regular intervals, allow for slight movements, preventing cracks. Expansion joints, filled with flexible materials, provide space for the masonry to expand and contract without stressing the structure.

5. Dowel Joints in Concrete

Dowel Joints in Concrete

Dowel joints use steel bars, called dowel bars, to connect two concrete elements. These joints add strength. They also ensure loads move between the connected parts. Dowel joints are essential in construction for connecting different concrete elements, providing strength, stability, and proper load transfer. These joints use steel bars, known as dowels, to ensure that the connected parts act as a single unit. 

Applications:

Concrete Pavements: In large concrete pavements, straight dowel joints help transfer loads between slabs. For example, consider a long stretch of highway. The concrete is poured in sections, and straight dowels are inserted between these sections. When vehicles pass over, the load is transferred evenly across the slabs, preventing any single slab from sinking or lifting. This keeps the highway smooth and durable.

Industrial Floors: In warehouses or factories with heavy machinery and vehicles, straight dowel joints between concrete slabs provide stability. Assume a giant warehouse where forklifts and trucks continually move bulky stuff. The dowel joints prevent the floor from cracking or becoming uneven.

Sidewalks: For long sidewalks, straight dowel joints ensure the sections remain aligned and prevent shifting. In a busy city, these joints keep the sidewalks safe and even, reducing the risk of tripping or uneven surfaces.

6. Scarf Joints

We use scarf joints to join two pieces end-to-end. We do this by tapering or beveling them and then overlapping them. These joints are commonly used in woodworking and metalworking.

Application

Long Beams: In building traditional wooden houses, long beams are normally required as part of roof support systems. For instance, in an old Kerala house with sloping tiled roofs, long sticks of wood are laid across the shed to support it. When there is not enough timber, scarf joints are used to connect shorter pieces. Gluing and clamping the tapered ends of these pieces produces a strong and continuous beam that can hold up the roof.

Furniture Making: Scarf joints are also used in making furniture such as tables and chairs. For example, if a dining table has a long top made of wood which is too short then there might be a need for scarf jointing. These connections keep the table sturdy while maintaining its aesthetic character by ensuring that the joint is invisible when looked at closely because it becomes integrated into the design of the table itself.

Pipelines: In the construction of long pipelines, metal sections are often joined using scarf joints. For example, in an oil refinery, long pipelines are required to transport oil. Scarf joints ensure that the metal pipes are securely connected, providing strength and preventing leaks. The tapered ends of the metal pipes are welded together, creating a smooth and durable joint.

7. Isolation Joints

Isolation joints, also known as expansion joints or movement joints, are crucial components in construction. They are designed to separate different sections of a structure, allowing for independent movement between these sections. This separation helps mitigate the effects of various stresses such as thermal expansion, contraction, and settlement. 

Technical Applications of Isolation Joints

Thermal Expansion and Contraction:

Isolation joints are crucial for managing the natural expansion and contraction of masonry materials caused by temperature changes. When temperatures rise, materials like bricks and concrete expand; when temperatures fall, they contract. Isolation joints, filled with flexible materials such as foam or rubber, compress and expand to absorb these movements. This flexibility prevents the formation of cracks that can compromise the structural integrity of a building.

Differential Settlement:

Differential settlement occurs when different parts of a building settle at different rates, which can lead to structural damage. Isolation joints are designed to handle this by allowing independent movement between adjacent sections of a structure. For instance, if a heavy multi-story building is constructed next to a lighter wing with different foundation conditions, isolation joints can prevent stress transfer and cracking. These joints ensure that each section can settle at its rate without affecting the other, thereby maintaining the overall stability and integrity of the building.

Conclusion

Understanding the different types of joints in construction is key. They ensure the stability, durability, and looks of a structure. Each joint type has its uses and traits. This makes it good for different tasks, maybe building a house, a bridge, or furniture. Knowing which joints to use will help you make a strong and lasting structure.

FAQS

Where are control joints typically used in construction?

Control joints are typically used in large concrete slabs, such as floors, pavements, and walls, to prevent uncontrolled cracking by directing the cracks along predetermined lines.

Why are expansion joints important in construction?

Expansion joints are crucial because they prevent damage by accommodating the expansion and contraction of materials, particularly in concrete structures, due to temperature changes. Without them, the building materials could crack or warp.

How does a construction joint differ from an expansion joint?

A construction joint is a point where two separate concrete pours meet, allowing for the continuation of construction work. An expansion joint, on the other hand, is specifically designed to absorb movement and prevent cracks due to temperature changes or structural shifts.

Uses of Glass in Modern Construction: Benefits and Types Explained

0
Uses Of Glass In Construction

Glass has become a very essential material in modern construction. Due to its esthetic appearance and functional benefits, glass becomes one of the most crucial components of modern architecture. 

In this blog, you will learn about the uses of glass in construction, its benefits, and types normally used.

Application of glass in construction 

As technology advances, the applications of glass in construction continue to expand. From functional uses like windows and doors to advanced technologies like smart glass and solar glass and whatnot.

Windows and Doors

Glass windows and doors are fundamental in any building. They allow natural light to enter the building interior, which not only reduces artificial lighting consumption but also adds to interior comfort.

type of glass 1

They also allow ventilation and outside views, enabling a better relationship with the outdoors.

Curtain Walls

They provide structural support, tightness against weather conditions, and aesthetic appeal.

Notably, curtain walls also enable energy efficiency due to provisions for controlled daylight penetration and are designed to reduce significant heating and cooling loads.

type of glass 2

Spandrel glass

Basically, a spandrel is a portion or part of a curtain wall system. In a multi-story building, it also entails the floor slabs and covers, concealing structural components of a building like vents, columns, floors, HVAC systems, and plumbing. They are often fabricated with opaque glass, metal panels, or stone.

Their application offers aesthetic continuity and may be insulated to improve the thermal performance of buildings.

Skylights

It gives another level of an aesthetic and a cool look to your house. Skylights are a type of windows installed in the roofing to let in natural light into a building’s interior areas where it is totally impossible to fit in conventional windows.

type of glass 3

They reduce energy costs and, in addition, could offer ventilation where they are operable. Skylights are particularly popular in residential, commercial, and industrial buildings.

Additionally, they also provide passive solar heating and reduce the cost of heating in colder climates.

Glass Floors and Staircases

Glass used for flooring and staircases create open appearances and are modern look that add to architectural designs. They are used in both residential and commercial settings. They enhance the visual appeal and allow light to penetrate into multiple levels of a building.

type of glass 4

Facades

Glass facades in exterior completely change the appearance of building, making it more attractive. These are used in modern architecture to create a sleek, contemporary look for buildings. Unlike other type of glass, it provides thermal insulation, soundproofing, and weather resistance while allowing ample natural light to enter the building.

A proper combination with other materials like metal or stone creates unique and visually striking designs for buildings.

Types of glass for construction

Annealed Glass

Annealed glass  is commonly used for windows and doors in both residential and commercial buildings, as well as for interior partitions that do not require additional strength or safety features. It is produced by slowly cooling molten glass to remove internal stresses, resulting in a smooth, flat surface

It has moderate strength and can be easily cut and processed. It is typically available in thicknesses ranging from 3 mm to 19 mm.

Float glass

Float glass, also called soda lime glass or clear glass is widely used in various applications, including canopies, shop fronts, glass blocks, railing partitions, display cases, and furniture. 

It is produced by floating molten glass on a bed of molten metal, typically tin, which results in a clear and flat surface. Its modulus of rupture is 5,000-6,000 psi. It is available in standard thicknesses ranging from 2mm to 20mm. By its chemical composition, it consists of 72% silica, about 14% of soda, around 10% of lime, and minor amounts of other compounds. It is also a base material for further processing into tempered, laminated, and coated glass products. Due to its high transparency, it can cause glare. It is used in making canopies, shop fronts, glass blocks, railing partitions, etc.

Tempered Glass

Tempered glass is created by heating annealed glass to approximately 620 degrees Celsius and then rapidly cooling it. This increases its strength by about four to five times compared to annealed glass. 

This makes it highly tough and is thus used very widely in shower doors, glass doors, and automotive side and rear windows. The strength in tempered glass is high from the tempering process, and upon breakdown, it shatters into small blunt pieces to ensure low injury.

Laminated Glass

Laminated glass is composed of two or more glass panes bonded together by an interlayer—usually made from polyvinyl butyral (PVB) or ethylene-vinyl acetate (EVA). This construction ensures that, when broken, the glass retains its fragments, providing enhanced safety and security.

This form of laminated glass is widely used in safety glazing applications, which take in skylights, overhead glazing, and railings, and also in security glazing applications, for example, bank teller windows and display cases. Laminated glass comes with tuned strength plus extra acoustic insulation and UV protection.

The thickness of laminated glass, therefore, varies depending on the number of glass layers and the thickness of the interlayer, which makes it a versatile choice for many various safety and security needs.

IGUs

It is composed of two or more glass panes separated by an air space and hermetically sealed at the edges. The space between the panes may additionally be filled with an inert gas like argon or krypton to enhance the thermal performance.

IGUs are frequently installed into energy-efficient windows for residential and non-residential applications, to afford comfortable degrees of thermal insulation. They are also fitted into curtain walls to offer energy efficiency through large glass facades. 

Technical specifications for IGUs include very low thermal conductivity, hence greatly enhancing energy efficiency.

Tinted glass

It has added colorants that absorb some of the sunshine. It helps in the reduction of glare and solar gain. It thus eases the amount of solar exposure entering the building and thus, to a large extent, will assist in the reduction of cooling loads.

Tinted glass is also popular in car glass to offer comfort and privacy. In terms of technical specifications, tinted glass has a variable visible light transmittance (VLT) based on the class of tint, and a lower solar heat gain coefficient (SHGC) compared to clear glass, which duly reduces the ingress of heat.

Advantages of Using Glass in Buildings

• Reducing the need for artificial lighting and energy consumption, glass allows daylight to penetrate the building. Advanced glazing, including Low-E coatings and insulated glass units, improves thermal insulation, thus reducing heating and cooling costs.

• Due to excellent sound insulation, guaranteed by the dampening of sound vibrations by the laminate, it is compatible with all noisy areas, which is more appreciable in urban environments, ensuring comfort in acoustics within a building.

 • Glass can also be designed to meet particularly individual needs through various colors, textures, and finishes to create a tailor-made style suitable for customer wants.

Conclusion

Beyond its aesthetic allure, glass offers remarkable versatility. The adaptability makes it an essential material in both residential and commercial architecture. In urban landscapes crowded with steel and concrete, glass introduces lightness and fluidity, bridging the gap between the built environment and the natural world. The future of construction will undoubtedly see glass taking on even more significant roles, integrating advanced technologies like smart glass that can adapt to our needs in real-time. 

FAQs

How does glass contribute to energy efficiency in buildings?

Energy-efficient glass, such as double-glazed or low-emissivity (low-E) glass, reduces heat transfer, keeping buildings cooler in summer and warmer in winter. This lowers energy consumption for heating and cooling, making buildings more sustainable.

What is FSI in Construction?

0
Floor Space Index

Have you ever wondered why understanding the terms in real estate is very important?

When buying or selling a property knowing the terms with in-depth knowledge is a must. It will also apply to property developers. One of the important terms in construction is FSI (Floor Space Index). 

Let us see the brief explanation of FSI in this article.

What is the FSI – Floor Space Index?

Floor Space Index

FSI, simply known as Floor Space Index. It is a crucial parameter in urban planning and construction. It governs the maximum floor area constructed in a given plot.  FSI is expressed as a ratio of the total floor area of a building to the total area of the plot. 

For instance, an FSI of 2.0 means that the total floor area can be twice the size of the plot area.

Every state has its unique rules and regulations for FSI. The population density and urbanization of a particular area define its FSI. 

It can be divided into two categories namely High rise and Low rise. 

Both had their unique limits and privileges. FSI helps in governing urban development. Sticking to the limits of FSI helps in commanding building density and infrastructure, and maintaining the overall plot area.

Here’s a table specifying the FSI limits by Brick & Bolt:

CategoryFSI LimitDescription
Residential (Low-rise)1.0 to 1.5Suitable for single-family homes or low-rise apartments with 1-3 floors.
Residential (High-rise)2.0 to 3.5Applicable for multi-story residential buildings with more than 3 floors.
Commercial (Retail)1.5 to 2.5Ideal for shopping centers, malls, and standalone retail outlets.
Commercial (Office)2.5 to 3.5Designed for office buildings, business parks, and corporate headquarters.
Mixed-use Development2.0 to 4.0Combines residential, commercial, and retail spaces in a single development.
Industrial1.0 to 2.0Suitable for manufacturing units, warehouses, and other industrial facilities.

As we operate in various cities across India, each with specific Floor Space Index (FSI) limits, here are the FSI limits for some key cities:

CityAreaFSI Limit
BengaluruCentral Business DistrictUp to 4.0
Other areas1.5 to 2.5
MumbaiGeneral residential areas1.33
Bandra-Kurla Complex, Nariman Point3.5 to 5.0
ChennaiResidential buildings1.0 to 1.5
Commercial buildingsUp to 3.0

Calculation of FSI

Calculation of FSI

For building a sustainable and well-planned construction, adhering to FSI regulations is necessary. For performing the calculation of FSI, you need a simple FSI formula. 

{FSI= Total covered area/ Plot area

FSI= 1000 square meters/ 500 square meters

The FSI value is 2}

From the above formula, the resolved FSI value is 2. And so the total floor area should not cross twice the size of the plot area.

Exemptions from FSI

As per governing rules, some parts of the building construction are exempted. They include stairways, lift rooms, Water closet areas, high tanks, unique structures, and passages. 

It can also apply to parking areas, caretaker rooms, watchman booths, and facilities for servants and drivers. These exemptions cannot impact the calculated FSI value.

What is Premium FSI?

Premium Floor Space Index is the additional construction floor area that can be purchased from the local municipal corporation. If developers exceed the standard FSI limits set by the local authorities, it enables them to add more floors or build additional space on smaller plots of land. Even if you need to add more floors on small land, you can apply for Premium FSI. The Municipal Corporation uses this fund for further infrastructure development of government authorities. 

How to Apply for Premium FSI:

Step 1: Developers must submit a formal application to the local municipal corporation, detailing their project and the additional floor area required.

Step 2: Upon approval, developers are required to pay a premium fee to the municipal corporation. The fee structure and rates vary depending on the location and the governing body’s policies.

Even with Premium FSI, developers must comply with all other zoning laws, building codes, and safety regulations. 

The additional floor area should not compromise the structural strength of the building or the quality of life for residents.

Calculation of Premium FSI

First, calculate the standard FSI value by multiplying the plot area by the FSI limit

FSI= Plot area x FSI limit

FSI= 500 square meter x 2

Standard FSI= 1000 square meters (twice the size of the regular plot area)

Premium FSI= Total FSI – standard FSI

Premium FSI= 1500 square meters- 500 square meters

Premium FSI= 500 square meters

You may pay the additional fee for the Premium FSI of 500 meters.

Benefits of FSI

The key advantages of FSI are as follows:

  • Estimate the potential development of the plot area or building can be concluded using FSI. You can also measure the key performance of the plot or the building and the future investment plans.
  • Must follow the local municipal guidelines rules and regulations for building construction to avoid penalties.
  • FSI helps in utilizing the spaces wisely.
  • It can also be important for urban development. 
  • For investment and construction plans it can be a base for decision-making.

Challenges in FSI

The five important factors that affect the Floor Space Index (FSI) are as follows:

  • Regional Rules:

The local municipal corporation sets the regional FSI rules and regulations. They are the authorized persons to handle construction-related work. They define FSI limits, height restrictions, land use, and building works. 

  • Infrastructure:

The FSI limit directly affects the infrastructure of the building. It impacts the nearby areas covered under the FSI limits.

  • Environmental factors:

Factors such as open space requirements, gardens, and other ecological parks can affect FSI. The authorities have the right to deny or support the natural resources.

  • Road facility:

The small narrow road and the larger building setbacks greatly affect the FSI limit.

  • Type of the Building:

Different buildings have different FSI limits. Industrial, commercial, and residential type of buildings affect the FSI limits largely.

Conclusion

In conclusion,  the increased FSI limits allow the developers to build more new constructions. It also supports renovations of old buildings into new properties. The Premium FSI allows anyone to extend their land space and construct more buildings. It plays a vital role in the decision-making process for an investor, a builder, or a buyer.

FAQ’s

1. What is FSI?


FSI in simple terms means Floor Space Index.

2. What is the difference between Premium FSI and FSI?


FSI in common means maximum permissible area whereas Premium FSI means additional space purchased from the authority.

3. What does FSI of 2 mean?


It defines the total floor area cannot exceed the limit of twice the size of the plot area.

4. In Tamilnadu how much FSI is allowed for constructing a building?


For residential buildings, the maximum construction area FSI is limited to 2.

5. How is FSI calculated?


The simple formula for FSI calculation is given below:

FSI= Total covered area/ Plot area

FSI= 1000 square meters/ 500 square meters

The FSI value is 2.

What is Piling in Construction & Its Types

0
Piling in Construction

Piling is a cornerstone of the construction industry that secures the foundation of a building before beginning the infrastructure on top. It is a key tool that contractors can use to enhance the safety and reliability of any project.

Pile foundations are designed by considering the soil type and load conditions. They are excellent at carrying heavy loads in tall structures and can be constructed from different materials, including steel, timber, precast, or in-situ concrete, with ideal characteristics. 

With this article, you can learn about piling in construction and its categorization in detail:

What is Piling in Construction?

Piling in Construction

In general, piling in construction is a process of driving long, slender columns into the ground to add fundamental support to the structures. To ensure structural stability, piling transfers the load of the building deeper into the rock layers or stable soil. 

Its weight, circumference and shape vary from one another based on the demand of the construction project and soil condition. Pile foundation distribute the weight or load of heavy construction equally to a wider surface area. It particularly works well for high-rise buildings, structures on water or soft ground, and bridges. 

Types of Piling Used in Construction

Before starting construction, contractors can decide on the piling types to enhance the foundation strength. This is based on certain significant conditions of the construction area such as climate, soil type and other relevant factors. 

With that information, they consult with architects and decide the suitable piling type. It is categorized by either the materials or the purpose of the design.

Piling Types Based on Functions

Piling Types Based on Functions

Sheet Piles

It is a kind of driven piling made with a series of interlocking steel sheets. A permanent or temporary retaining wall can be created on a construction site where extensive excavation is required. 

Sheet piling is quite budget-friendly and best-suitable for areas where temporary soil retention is essential. The sheets can be reused at different construction sites once the ground work is done.

Friction Piles

Friction piles looks cylindrical and is capable of handling more weight. A friction pile uses its full height to transfer the loads that the structure generates into the soil. The amount of load that the friction pile can handle is directly proportional to its length.

Bored Piles

Bored piles are established for construction areas where large holes are made in the ground and filled with concrete. Compared to other piling types, this is very effective and distributes the load equally below the ground, which is ideal for structures, including bridges and flood protection. 

Driven Piles

Driven piles are hammered into the ground before constructing a building with the use of vibration. This is well-suited for soil that includes contaminants, non-cohesive soils, and the ground with a high water table. 

This piling type is not suitable for saturated or silty soils where the area has a poor drainage capacity. It typically includes materials such as steel, concrete, and timber.

Mini Piles

Mini or micro piles are for smaller areas where the access is restricted to install mini-sized piling rigs. It has many options based on the domestic and commercial development of that particular city.

Piling Types Based on Material 

Timber Piles

Timber pile is a prime choice for piling beneath embankments and long cohesion piling. It is essential that the timber should be in a good condition, ensuring it will not be attacked by insects. 

​​Steel Piles

Steel piles are extremely strong and capable of holding high amounts of stress, often used to create H-piles. It works well with end-bearing piles that come in numerous sizes to meet the demands of different construction projects. 

Steel is the most suitable material for constructing highway bridge piers; however, it is susceptible to corrosion and doesn’t provide consistent friction.

Applications of Piling in Construction

Piling is a critical technique used in various applications that ensures the durability, stability, and support of buildings. Here’s a breakdown of key applications:

Building Foundations

Piling creates strong foundations for buildings or structures, specifically for areas with unstable or weak soil. By transferring the building loads equally to deeper, it remains safe and secure. This is well-suited for commercial structures, high-rise buildings, and other related construction areas.

Bridges and Flyovers

These structures usually require robust support and deep foundations to handle high dynamic loads and withstand the forces of heavy usage. Piling distributes loads to the ground and supports the elevated sections with enhanced durability and stability.

Marine Structures

Marine structures like offshore platforms, docks, jetties, or piers strongly depend on piling for stability. They provide essential support to these structures to withstand the harsh marine environment. The challenging conditions are unavoidable including tides, corrosive saltwater, and water currents.

Advantages of Piling

Improved Load Distribution: Effectively transfers the load into the ground, deeper soil layers.  

Versatile Applications: Works well for diverse soil conditions and various construction projects.

Minimized Settlement: Reduce the risk of structural damage and uneven settlement.

Durability: Ensures high resistance to environmental factors and long-lasting support.

Environmental Adaptability: Efficient in handling challenging environments like seismic or waterlogged areas.

Conclusion

Piling in construction is an essential technique for building construction, ensuring the durability and stability of structures for a long time. From the foundations of houses to expansive bridges, piling withstands any harsh environmental conditions and challenges. The contractors are about to choose the wise option based on the condition of the construction site and the type of project involved.

FAQs

1. Where piling is commonly used?


Piling is best suitable for constructions such as bridges, flyovers, building foundations, and marine structures like retaining walls, docks, and offshore platforms.

2. How do you choose the right piling for construction?


The choice of pile depends on certain significant factors including environmental conditions, soil type, load requirements, and some specific needs of the construction project.

3. What are some common challenges in piling?


When using piling in constructions, you need to uncover some common challenges such as dealing with difficult soil conditions, vibration control, and ensuring accurate alignment of piles.