Home Blog Page 71

What are the Types of Scaffolding in Construction

0
Scaffolding

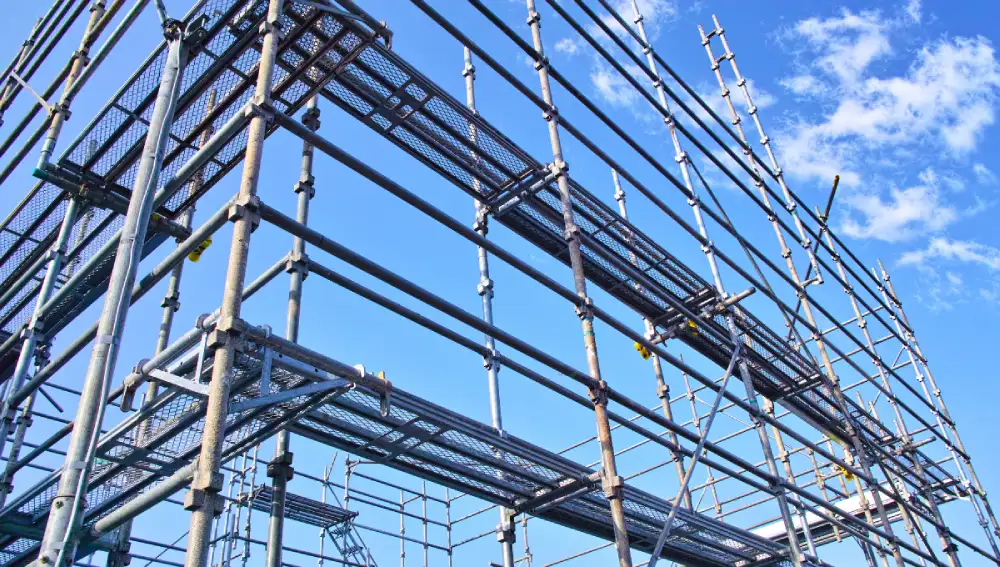
Scaffolding is a framework or temporarily raised structure to support workers to construct or repair in hard-to-reach places. It may be buildings, bridges or any other complex construction area, this is the method that has been followed since the first structure. A properly built scaffolding is safe to access and holds the weight of workers and their equipment.

It ensures the safety, convenience and efficiency of construction work. People often get confused with Centering and scaffolding Even though scaffolding is widely categorized, new variants come often. Some of the most common and popular types of scaffolding used in construction industries are listed in this article.

Scaffolding

Types of Scaffolding in Construction

Scaffolding is paramount to constructing any building structure. Based on the specific needs of the project, the types may differ. Each has unique qualities and benefits; you can choose the wise option.

Single Scaffolding

Single scaffolding also known as bricklayer scaffolding stands parallel to the wall with vertical supports. The ledgers and horizontal support joined to the standards at a vertical angle. Putlogs are nothing but holes connected for support to the building or structure. In the earlier days, this method was carried out with bamboo or timber. Later, they used steel pipe as standard and have not been used in the construction industry often.

Double Scaffolding

Double scaffolding is popularly known for stone masonry works, often called mason’s scaffolding. It provides stronger support to the construction work compared to single scaffolding. However, creating holes for putlog anchoring is quite challenging. The first row of this scaffolding sits parallel to the wall while the second sits away from the first. Cross and rakers act as additional support to the entire structure.

Suspended Scaffolding

Suspended scaffolding is best suited for window cleaners, painters and repair positions. In general, people who work on top heights can make use of this type. Chains and wires suspend this type of scaffolding, instead, the lever or electric system is used to adjust the platform as needed.

Steel Scaffolding

Steel scaffolding is quite easy to construct and dismantle and requires very little effort. It supports adheres together with couples, extremely durable, sturdier and fire-resistant comparatively than other types of scaffolding.

System Scaffolding

It is often referred to as modular scaffolding primarily includes horizontal and vertical pre-engineered components connected together in a systematic way. This is specifically efficient and more likely to be used in most of the construction areas across the globe. System scaffolding is categorized into various types, some may withstand heavy load conditions and some for smaller scaffold structures. The types include:

  • Cuploack systems scaffolding
  • Kwikstage scaffolding
  • Haki scaffolding
  • Staircase towers

Wooden and Bamboo Scaffolding

These are the most commonly used scaffolding found in many structures across the world. It is notable for its eco-responsible and flexible nature. Professional technicians and designers construct this structure through layers and make it safe for workers and their equipment.

Swing Set or Suspended Scaffolding

Although this structure is not being built from the ground, still plays a crucial in the scaffolding type. It is primarily used to give support to the scaffolders and their supplies. The swing set contains a platform that is suspended by a cable system, it can climb up and down to the required heights. It will be a cost-saving method while working on very tall structures like building maintenance and improvements.

Patented Scaffolding

Patented scaffolding is integrated with special couplings to offer exceptional support together. It benefits more from a steel composition containing height-adjustable brackets according to the working nature of employees.

Scaffolding Safety Tips

Scaffolding Safety Tips

Safety tips for workers are a primary concern. We can witness a huge range of injuries and accidents because of carelessness. So, these are the significant safety tips essential to follow:

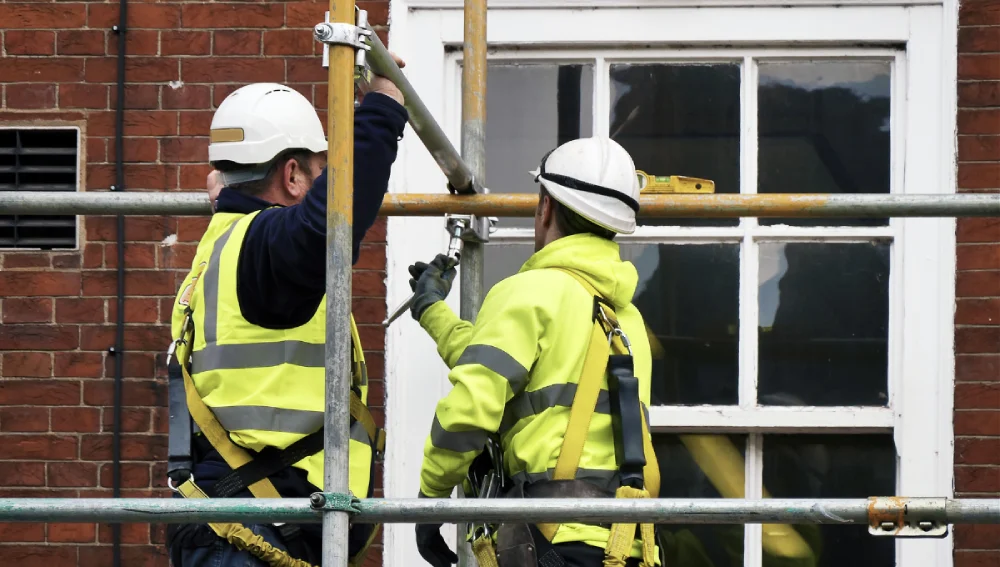
Need Proper Equipment

PPE (Personal Protective Equipment) is essential, especially when working in construction areas at height. Workers need to wear a hard hat on scaffolds to avoid injuries from falling objects. Incorporating non-slip footgear, tool-tether lanyards and hand-protecting gloves to improve working-at-height safety.

Being Aware of Load Limits

Manufacturers are required to be aware of the load limits when designing and constructing any type of scaffolding. Unfortunately, it may break, collapse or fail which would cause severe injuries to the workers on or near the scaffolding. So, it is always good to integrate capacity safety cushions to avoid placing excessive load limits.

Train the Employees

Working at top height is not an easy practice, employees need proper training to recognize, use and control the scaffolding. They should be given with essential knowledge regarding materials and handling to reduce hazards.

Proper Manufacturing

Follow the manufacturer’s instructions when involved in the manufacturing process of the scaffold. Here are some of the common safety checklists:

  • Guardrails are super secure; the top rails are placed above the platform at 38-45 inches.
  • Footings provide good support to the loaded scaffold, which should be on level or solid-ground
  • Platforms should be decked and fully planked with proper toeboards, guardrails, and midrails.

Conclusion

This article explains to you the type of scaffolding that plays a major role in the construction industry, you can choose the wise option as per your requirements. However, it is paramount to ensure that essential safety precautions are enabled to avoid causing any unfortunate accidents and injuries.

FAQs

1. Why is Scaffolding important in construction?

Scaffolding provides a safe and stable platform for workers to perform tasks at height and facilitates efficient work.

2. When is steel scaffolding preferred over other types? 

Steel scaffolding is a suitable option for heavy duty construction projects due to its extended fire resistance, strength and durability. Compared to other scaffolding types, it is pretty easy to construct and dismantle. 

3. Which type of Scaffolding is best for Tall Buildings?

Suspended scaffolding is ideal for handling tall building construction or repair work, it can be adjusted to various heights suitable for workers.

Swimming Pool Construction Cost

0
Swimming Pool Construction Cost

One thing that excites all age groups in a house is a Swimming pool. Building it in your own space or projects can be a great investment that can add value to the property as well as enjoyment for your family. It adds a cool look to your house and gives a luxurious feel of vacation all the time. However, knowing the costs is a crucial part. It ensures your project stays within budget and meets your expectations. This article covers many factors related to swimming pool construction costs. It also covers financial options and resources. These will help you make informed decisions. 

What is the minimum cost to build a swimming pool?

The cost of constructing the pool ranges from a minimum to a specific amount.  depends on the size, type, and location of the pool. In-ground pools cost $20,000 to $50,000 and Above-ground pools cost $3,000 to $15,000 in other countries. 

Swimming Pool Construction Cost in India

The cost of building an ordinary swimming pool ranges from 1.5 lakh to 3.5 lakh Rupees in India. It completely depends on the type of pool, materials used, location, size, and other additional features. You need to have Legal Requirements for building a swimming pool in India The cost may also be higher in Mumbai than in Delhi. But, it may be slightly lower in cities like Bangalore and Pune.

If you’re planning to build one, the main pool types you should be aware of are concrete pool, fiberglass pool and vinyl liner pool.

Let’s dive in about the price range based on the pool types.

Concrete Pools:

Not common but concrete for the pool is made of cement, water, and a mix of sand and aggregate(stone or gravel). In this type of pool, the shell is created by spraying either gunite(a dry mix with water) or shotcrete (already wet). It takes around 28 days to harden. An average concrete strength should be 3500-4000 psi(pounds per square inch).

This costs approximately Rs.10 to Rs.16 lakhs for a pool size of 2400 to 3500 sq. ft. 

Concrete Pools

Pros and cons of concrete pools

Concrete pools are well-known for their durability and can last for decades with proper maintenance. This consumes time, effort and money. However, it has its corresponding pros and cons. When comes to pros,

  • It is ideal for large and deep pools due to its excellent structure and integrity.
  • The interioros of concrete pools can be customized with materials such as pebbles, glass, plaster, tiles, and other aesthetic options.
  • These type of concrete pool is the best choice for heavy usage areas like public pools, resort, theme parks etc.
  • They are easy to repair. If there is any crack or damage, it can be patched without any hassle.

The main drawbacks of concrete pools include  the following factors:

  • Though it is durable, it is more expensive when compared to a vinyl or fibreglass pool.
  • It takes more time to install which can be extended from weeks to months than other pool types.

Fiberglass Pools

These are pre-fabricated pools manufactured in factory, carried to the installation site and placed into a pre-dug hole. The shell can be in different shapes and sizes of user’s choice. This take around 3-5 days for installation. In India, the average cost of a Fiberglass pool is Rs. 2000- Rs. 3500 per square feet depending on the size of the pool. 

And for 288 square feet(24ft x 12ft), the typical cost is around Rs. 7 lakh to Rs. 10 lakh. Adding features like a heating system, lightings and custom design might raise the cost.

Fiberglass Pools

Pros of Fiberglass pools

  • Easy to install which is completed in a matter of days. 
  • It doesn’t need much maintenance when compared to other types of pools.
  • They are resistant to algae growth which makes cleaning the pool easier.
  • It is known for its non-abrasive surface which is gentle on the skin and provides a comfortable swimming experience.

Cons of Fiberglass pools

  • The initial cost is higher than vinyl pools.
  • Fiberglass pools size more than 16 ft are difficult to transport via road, thus large pools may not be suitable in this type.
  • If the pool surface gets damaged, it requires specialised technicians which increases  the repair cost and time.

Vinyl Liner Pools

For homeowners, it is a popular choice as it is less expensive than any other type of pool which are built in concrete or inter glass materials. It is made of PVC membranes and these sheets are used as the interior surface.The supporting frame is made from steel, aluminum, or polymer materials.

The main components of Vinyl liner pools are the pool base, wall panels, coping, and steps. 

For a pool size of 2000 to 3500 sq. ft, it costs up to  Rs. 6 lakhs to Rs. 10 lakhs 

Pros of Vinyl Liner Pool

  • Vinyl liner pools are generally less expensive to install than concrete or fiberglass pools. This makes them an attractive option for budget-conscious homeowners​.
  • It is smooth that is gentle on the skin which makes it a comfortable option for swimmers​.
  • It can be customized to various shapes and sizes compared to fiberglass pools​.
  • High resistance to algae growth, making it easier to maintain compare d to concrete pools.

Cons of Vinyl Liner Pool

  • These pools have a low initial cost but require liner replacements every 5-10 years.
  • There is a higher possibility of tears and punctures from sharp objects or pets which require repair or replacements.
  • It may not withstand environmental conditions like heavy weather conditions.
  • It degrades over time due to UV rays, pool chemicals and other exposures.

Factors that can affect the swimming pool construction cost

Pool Size

The size of the pool is one of the most important factors affecting construction costs. Larger pools require more materials, labor, and time to build, which increases the overall cost.

For Example:

Small Pools ranges around 10ft x 20ft where the cost is less due to reduced material and labor requirement. 

When it comes to medium and large Pools i.e. 20ft x 40ft, it have moderate costs, based on the size and material needs.

Pool Material

The type of material used for pool construction greatly influence the cost. Price varies based on the materials and the maintenance requirements.

For Example: 

Concrete is most expensive of other materials whereas Fiberglass is typically more affordable than concrete but more expensive than vinyl. And Vinyl liner is less expensive at initial set up but requires  repair or replacement if there is a damage.

Pool Type

There are two types of pools. In-ground ones are built into the ground. Comparatively, Above-ground ones are cheaper. Another common type of fiberglass and vinyl liner pools are more cheaper than those concrete pools.

Location

Costs vary based on the city or region. Urban areas like Mumbai or Delhi have higher labor and material costs compared to smaller cities.

In specific, difficult-to-access locations may incur additional costs for transportation and site preparation.

Labor Costs

The availability and cost of skilled labor vary by region. More complex pool designs require highly skilled workers, which increases costs.

This depends on the chosen location and the employees’ expertise. In India the cost of labour for swimming pool construction varies from Rs. 100/- to Rs. 200/- per sq feet and it varies with the duration of construction.

Soil Type

Different soil types such as clay, sandy, or rocky soil can impact excavation costs. Rocky or sandy soils may require additional work and reinforcement, increasing overall costs​.

Hard or rocky soils require more intensive excavation equipment and labor, which delays the project and increases the costs.

Groundwater Level

High groundwater levels can complicate the construction process, requiring additional measures to manage water ingress and ensure the pool’s stability. This can increase costs​​.

It may require proper waterproofing to prevent seepage into the pool structure and adds to the overall cost.

Financial Ideas to Construct a Swimming Pool

The options are primarily using savings. It also include taking a home equity loan or line of credit. You could also get a personal loan. Some pool companies may provide financing for pool construction. It can make pool construction more feasible.

How Brick & Bolt will help you to build a swimming pool

Brick & Bolt is a marketplace that helps homeowners with reputable and skilled contractors for different home renovations including swimming pool construction. By using Brick & Bolt, you can:

  • Get accurate cost estimates for your pool construction project
  • Find vetted and reliable contractors who specialize in swimming pool construction
  • Receive personalized guidance and support throughout the construction process
  • Make sure you complete your project on time and within your budget.

Conclusion

Constructing a swimming pool entails some considerable cost, however, it is also a worthy investment to incorporate into a home. When you know the building’s construction cost and its factors, then it is easier to make right decisions. You can avoid going overboard with the construction expenses. 

FAQs

1. How much is it to construct a swimming pool in Chennai?

It is hard to set a price for building swimming pools in Chennai. This is due to many factors. But, the price generally varies from 1. 5 to 3. 5 lakh rupees.

2. How much area is required for a swimming pool?

Generally, you will need at least 470 square feet for small pool, around 1080 square feet for a medium pool and 1880 square feet for a large pool. It is mandatory to check with the local regulations before planning to build a pool. Through this, you can allocate the space around the pool for amenities, decking etc.

3. What is the cheapest pool you can build?

The cheapest type of pool you can build is an above-ground pool. These pools are more affordable than in-ground pools due to their simpler construction, easier installation, and reduced material costs.

4. What is a good size swimming pool in meters?

Depending on the compact size for a swimming pool in meters, it is in the range of 6m x 10m; (20ft x 33ft) to 8m x16m; (26ft x 52ft). The ideal size is seemingly relative to the amount of space one could allocate, cost provision, and use of the pool.

5. What is the biggest cost of building a pool?

The largest cost of a pool construction is usually the pool which may contribute to more than the 60% of the total construction cost. Other major expenses that are usually incurred in construction include the digging of trenches, water and other utility connections, wiring among others and planting of trees.

Sliding Wardrobe Designs with Loft

0
Sliding Wardrobe Designs with Loft

Lofts and attics!  

Those hidden gems tucked away in the upper reaches of our homes are often overlooked and underutilized. But what if I told you that these unassuming spaces hold the key to unlocking a whole new world of storage, style, and functionality?

This blog shares the secrets of how sliding wardrobe designs can transform your loft into a true sanctuary of organization and aesthetic bliss.

Unlocking the Potential of Loft Spaces

Potential of Loft Spaces

Picture this: you’re standing in the middle of your loft, gazing up at those slanted ceilings and wondering, “How on earth am I going to make the most of this space?” It’s a common problem faced by homeowners and designers. 

But fear not, my friends, for the solution lies in the versatile and visually stunning world of sliding wardrobes.

Loft spaces can be tricky to navigate. They have unique architectural challenges and limited space. But with the right sliding wardrobe design, you can extend a big goodbye to the small and congested lofts. It is now possible to welcome the minimalist chamber that makes maximum use of the space.

Sliding Wardrobe Designs for Lofts

Imagine a wardrobe system that hugs the shape of your loft. It effortlessly blends form and function. That’s the beauty of sliding wardrobe designs. They are customizable to fit the unique quirks and angles of your space. 

Gone are the days of settling for off-the-shelf solutions that just don’t quite cut it. Sliding wardrobes let you use vertical space. They have tall, floor-to-ceiling units. These units make the most of lofty ceilings. 

And the real showstopper? 

Mirrored sliding doors create the illusion of depth, making your loft feel instantly more spacious and airy. The various types include: 

1. See-Through Sliding Door Wardrobe: 

Features clear/frosted glass panels. They showcase your wardrobe and create an illusion of more space. Adds a contemporary touch to your loft.

2. The Wood Brown Combo Sliding Wardrobe: 

Combines wooden frames with brown accents. It brings a natural and cozy atmosphere and offers ample storage. Adds warmth and elegance to your loft.

3. White Glossy Sliding Wardrobe with Loft: 

Modern and minimalist design with a glossy white finish. Maximizes storage capacity without compromising style, great for any loft interior.

4. Glossy Black 3-Door Sliding Wardrobe: 

Bold and dramatic presence, adding sophistication. The three-door design provides easy access to clothing and accessories.

5. Japanese-themed wooden sliding wardrobe: 

It is inspired by Japanese aesthetics. It showcases simplicity and functionality. Blends natural wood components with minimalist lines, cultivating a tranquil and Zen-inspired ambience.

6. The Distinct Printed Pattern Sliding Wardrobe Look: 

Features printed patterns on sliding doors. They add color and personality. A statement piece complementing various interior styles.

7. Sliding Wardrobe with Bright Colours and Patterns for Kids’ Room: 

Vibrant and playful design with bright colors and fun patterns. Offers ample storage while adding a youthful and energetic vibe to kids’ rooms.

8. The Rustic Country Design Sliding Wardrobe: 

Embraces a charming farmhouse style. It has rustic finishes, distressed wood, and vintage hardware. Adds a cozy and nostalgic touch to your loft.

9. The Elegant Victorian Design Sliding Wardrobe: 

Exudes elegance and sophistication with proper details, finest carvings, and luxurious finishes. Infuses your loft with timeless elegance and splendor.

Sliding Wardrobe Designs for Lofts

Things to Consider while Choosing the Right Sliding Wardrobe for Your Loft

  • Budget: Set your budget upfront. This will help you narrow your options and focus on designs that fit within your financial limits. 
  • Materials: Choose high-quality materials. They ought to appear visually appealing and withstand the test of time. Popular options include wooden veneers, laminates, and glass. 
  • Size: Measure the available space in your loft and choose a sliding wardrobe that fits perfectly with the dimension, ensuring efficient use of the area. Customizable options can help you maximize storage capacity. 
  • Style: From modern and minimalist to rustic and elegant, there’s a wide range of options to choose from.

Loft Conversion and Bedroom Design Tips.

  • With the help of windows alone, the creative use of a loft could be mind-blowing. They fill the surroundings with warm light and give the impression of a more extensive room.
  • But are you ready for more peculiarities, such as slanted walls and low ceilings, which also refer to this category? In this way, the storage designs could be combined with the interior decor. This adds a touch of creativity to ensure that storage does not overpower the decor. 
  • Think of built-in shelving. 
  • Moreover, the appropriate and interesting cabinet and lighting can focus on the loft’s individuality.
  • Add to the wardrobe’s sleek lines and clean look. Do this with carefully chosen decor and furnishings. 
  • Mix and match textures, colors, and patterns. They add depth and personality to your loft. Do this while ensuring a cohesive and striking look. They can make all the difference in creating a truly livable loft space. 

Sliding wardrobes with loft offer several benefits:

1. Increased Storage: 

You can use it for seasonal, bulky, and other items. It keeps your loft organized and clutter-free.

2. Seamless Integration: 

They blend with the existing interior seamlessly. They create a unified and appealing look. This look enhances your loft’s appeal.

3. Illusion of Larger Space: 

Sliding wardrobes with mirrors or tempered glass door visuals the space of the loft than it actually is. It tends to open up the space or make it appear lighter or larger than it is.

4. Versatile Styling: 

The sliding wardrobe designs are diverse, starting with the contemporary type and ending with the rural one. They are numerous and thus you can easily get that which is suitable to the style of your loft.

Conclusion: 

Thus, sliding wardrobes have limitless possibilities. Therefore, wait for what? Now is the time to transform your loft and make it the best among all your friends and neighbours.

What are the benefits of installing a sliding wardrobe in a loft space?

Sliding wardrobes are ideal for loft spaces because they don’t require additional space to open like hinged doors. This makes them perfect for rooms with limited floor space and low ceilings.

How do sliding wardrobes enhance the functionality of a loft?

Sliding wardrobes maximize space efficiency by using vertical space for storage and eliminating the need for clearance space required by traditional doors. This can be particularly beneficial in a loft where floor space is often at a premium.

Simple Compound Wall Design Pattern

0
simple compound wall design pattern

Benefits of a Simple Compound Wall Design

Cost efficiency

Simple compound walls basically only need a few materials and also less labour cost. This can reduce the overall costs of construction. This makes them an economical choice for the owners of property who are looking to secure their area without financial burdens. 

Easy construction

The nature of the simple designs makes them easy to build easily. Few complications mean fewer mistakes. 

Low maintenance

They are minimalistic in nature. This makes them easier to maintain. Thus this reduces the maintenance costs.

Aesthetic appeal

The minimalistic designs can be visually appealing. They give a clean and modern look. Simple designs can blend into different architectural styles. This helps in increasing the overall appearance of the property.

Types of Simple Compound Wall Designs

Types of Simple Compound Wall Designs

Plain Concrete Wall

The pain concrete wall is easy to build and durable. This type of compound wall gives a modern and sleek look. It can be left as it is or it can also be painted or changed according to the exterior of the property.

Brick Wall

The brick walls are classic and they give excellent security. They can be built in different patterns like English bonds or stretcher bonds. They add a subtle design element and also maintain simplicity.

Stone Wall

stone compound walls give a rustic look and are robust. Stones of different shapes and sizes can be arranged in a pattern that can provide strength and appeal.

Metal Fencing with Concrete Base

Combining the metal fencing with a concrete base can give security as well as visibility and airflow. This design can be functional and also aesthetically pleasing. They are suitable for modern properties.

Materials Used in Simple Compound Wall Designs

The materials used in simple compound wall designs are concrete, bricks, stone and metals.

  • Concretes are versatile materials used for construction purposes. They provide longevity and strength to the walls. 
  • Bricks are building materials used from ancient times. They are known for their aesthetic appeal and durability. They come in different ranges of sizes, shapes and colours. 
  • Stones are strong and weather-resistant materials. They are a good choice for compound walls.
  • Metals like iron or steel can be used in fencing. This provides a modern look. They are strong and durable. They can be designed into different styles that complement the concrete base.

Design Considerations

Height and Thickness: this determines the needs of security and local building regulations. A normal residential compound varies from 5 to 8 feet in height.

Foundation: this is important for the wall stability. The normal depth must be 2 to 3 feet depending on the type of soil and wall height.

Finishing: the options for finishing include painting, plastering or just about leaving the natural texture of the material as it is. Finishing can increase the appearance of the wall. They also give protection in different weather conditions. 

Security Features: adding barbed wire, spikes, or electronic surveillance can be done in the walls.

Steps to Build a Simple Compound Wall

Steps to Build a Simple Compound Wall

Some steps need to be followed for building compound walls. Planning and designing, laying the foundation, constructing the wall and finishing touches.

Cost Estimation

The cost of building a compound wall can be made by calculating three types of expenses.

Material Costs

The cost of bricks, concrete, stones or metals can be estimated based on the design and dimension of the wall. The costs can differ based on the quality and availability of the material.

Labour Costs

Simple designs need less labour. There will be a low cost when compared to complex designs. 

Additional Costs

In this cost, the cost of getting permits, finishing materials and additional security features will be added. It is also good if you can keep a budget for any unforeseen situations. 

Conclusion

A simple compound wall design can give various benefits. That includes cost efficiency, easy construction, low maintenance and good looks. By selecting a proper material and design you can create an attractive and durable camping wall. That helps in increasing the security of your property.

FAQs

1. What is the best material for a simple compound wall?

Concrete, bricks, stones, and metals are good choices. This mainly depends on your needs and preferences.

2. How much does it cost to build a simple compound wall?

The cost differs based on materials, labour, and design complexity. It will be better to get a detailed estimation from the contractor.

3. How long does it take to build a compound wall?

Construction time can differ from a few days to a few weeks. This depends on the size and complexity of the wall.

4. What are the common maintenance issues with compound walls?

Cracks, weather damage, and dirt buildup are common issues. This can be managed by maintaining it regularly.

Royal Texture Paint Designs For Hall

0
Royal texture paint design for walls

The aesthetic appeal is important in interior design. One of the most efficient methods to improve the beauty of hall spaces is by using royal texture paint. This blog gives you an overview of the royal texture paint designs for halls.

Why Choose Royal Texture Paint for Halls?

Using royal texture paint for the hall is not only about adding colours. It is also about providing a visual experience. This can help in increasing the overall ambience of the hall. Some of the reasons why you need to choose royal texture painting for halls are:

  • Aesthetic appeal
  • Durability
  • Versatility
  • Concealment of imperfections
  • Environmental benefits

Popular Royal Texture Paint Designs for Halls

Popular Royal Texture Paint Designs for Halls

The texture choice can impact the ambience of the hall. Some of the designs that are popular in royal texture paint designs are, 

Marble Finish

Marble finish texture paint acts like a luxurious and timeless look for marble. This can add a sense of grandeur and luxury to a hall of any type. Colours like White, beige, grey, and black are good choices that can look perfect with natural marble. The addition of veins in contrasting colours enhances the look.

Metallic Finish

This type of royal texture paint provides a modern look to halls. This also reflects the light that creates a shimmering effect that changes according to the angle of view. Some of the popular choices of colour are silver, gold, bronze, and copper. When these colours are added with darker shades they can give a dramatic effect. 

Rustic Finish

The rustic finish offers a natural and earthy look. They bring warmth and character to the hall. They mostly look like natural materials such as stone or wood. The tones like brown, terracotta, and muted greens are good choices. These colours can increase the natural and rugged look. 

Stucco Finish

Stucco finish texture paint is based on Mediterranean architecture. It provides a smooth appearance that is elegant as well as timeless. Colours like soft pastels, warm neutrals, and creamy whites are suitable.

Geometric Patterns

They often give an artistic touch to the halls. This design mixes the texture along with the structure’s patterns. They provide a unique visual appearance. Some colours that are bold like navy, emerald, and crimson can be used. Also, monochromatic schemes of different shades can be used if they are in the same colour. 

How to Choose the Right Royal Texture Paint Design

Right Royal Texture Paint Design

There are several considerations involved in choosing the right texture paint design.

  • Size of the hall: larger halls can handle bold designs wall paint while smaller halls can look better from light and simple texture. 
  • Lightning: natural lighting or artificial lighting can affect the looks of texture and appearance of colour. For example, a metallic finish can be used in dimly lighted halls. 
  • Existing decor: be sure that the texture that you have chosen goes well with existing furnishings and decors. 
  • Personal style: make sure to add your personal preferences. The overall theme and your preference can provide you with guidance.
  • Maintenance: some textures may need more maintenance compared to others. So consider the maintenance chile choosing a textured design. 

Application Process of Royal Texture Paint

There are various steps involved in the application of royal paint texture. They are 

  • Preparation– first clean the surface of the wall to remove dirt. Then repair if there are any cracks or holes. Apply a primer for better adhesion of paint. 
  • Coating the base– first Apply a base coat that matches the lightest colour in your chosen texture design. Then dry it.
  • Texture Application– use tools like trowels, sponges, or brushes to apply texture paint. The desired pattern can be applied by small working sections for the maintenance of uniformity. Blend colours and layers as needed until you achieve the desired effect
  • Finishing Touches– once the texture paint is dried, apply a protective sealant. Touch up the areas that need refinement. 

Maintenance Tips for Royal Texture Paint

The maintenance of royal texture paint needs regular care. Some of the maintenance tips are cleaning regularly, Handling Stains, Repainting and Touch-Ups, using furniture pads to avoid scratches and also avoiding hanging heavy objects directly. 

Conclusion

Royal texture paint gives a luxurious look. It can enhance the hall ambiance with some royal Ceiling Design. By having an understanding of different types of texture you can choose the correct one. With proper maintenance and application, you can have a gorgeous look that leaves an everlasting impression on your hall. You can make various designs according to your preferences. 

FAQs

1. Why is royal texture paint suitable for halls?

Royal texture paint enhances the aesthetic appeal and ambience of the hall.

2. What colors work well with marble finish texture paint?

White, beige, grey, and black with contrasting veins.

3. How does metallic finish texture paint affect the hall’s look?

Metallic finish texture paint reflects the light. Thus it creates a shimmering effect that can change with the angle it is viewed.

Types of Ventilation Systems for Buildings

0
Types of ventilation

Ventilation is an important aspect of building design, ensuring indoor air quality, thermal comfort, and energy efficiency. As with any other type of systems, there are several types of ventilation systems with their strengths and weaknesses. So, in this blog post, we will take time to discuss some of the most popular ventilation systems.

Types of Ventilation Systems for Buildings

Natural Ventilation

natural ventilation

Natural ventilation relies on the natural movement of air to provide fresh air and remove stale air from a building. It is an energy-efficient and cheap way to vent air. But, its effectiveness depends on different factors:

Factors Required In Order For Natural Ventilation

Building Design

In natural ventilation, a significant emphasis is paid to the appearance of the building. Things like the location and size of the windows, doors, and other openings control air movement. Properly orienting openings can mean larger windows on the perimeter walls. This is especially true when they open on to the spaces. It results in good air movement and thus standard ventilation.

Climate

Also, local climate and weather significantly affect natural ventilation. For instance, buoyancy-driven natural ventilation depends on the temperature difference. It’s commonly referred to as stack ventilation. It uses the difference to drive air flow from inside to outside.

Human Behavior

The use of natural ventilation can also be affected by the behavior of the occupancy of the building. For example, outdoor pollutant levels may be high or there may be a need to control ventilation. In such circumstances, installing mechanical systems of ventilation may suffice.

Mechanized Fan Ventilation

Mechanized Fan Ventilation

Mechanized fan ventilation systems use fans to actively move air in and out of a building. These systems can be further divided into several categories:

Smoke Ventilation

  • This applies to public buildings. By law, they must have smoke ventilation if there is a fire. 
  • Doing so helps remove thick, condensed smoke. Smoke is the biggest killer in fires. It also provides a clearer escape route for trapped people.
  • Smoke ventilation systems are designed to remove smoke and hot gases in the event of a fire. 
  • They are usually installed in tall buildings, shopping malls, and other large structures. They help people evacuate safely and aid firefighters.

Supply Ventilation

  • Supply ventilation works differently. It increases the pressure inside the building, forcing  external oxygen into the building through a fan. 
  • Supply ventilation systems have more control over the supply of air than exhaust systems. 
  • Pressurization of the building makes supply ventilation systems work well. They reduce outdoor pollutants in the living area. 
  • They are usually placed in the living room and bedrooms. Fresh air enters the house and removes dust and other pollution. 

Exhaust Ventilation

  • Exhaust ventilation systems work by under-pressurizing buildings. This means that the inside air pressure is lower than the outside air pressure. 
  • It circulates air. Stale air leaves through an exhaust. It passes through ducting to the outside. It is then replaced by fresh air from another source, often another air ventilation, and such a system is known as a vented system. 
  • One main advantage of exhaust ventilation systems is that they are simple, cheap, and easy to install. 
  • They usually have a single fan to which the exhaust point is connected. 

Balanced Ventilation

  • To avoid the bad effects of exhaust and supply ventilation, we can use a better design. It does not pressurize or depressurize the building. 
  • Instead, they aim to input and output the same volume of air. They do this by placing at least two fans and two duct systems at the best spots across the room. 
  • A balanced ventilation system keeps room pressure slightly positive or negative. This can be done by adjusting the rates of supply and exhaust ventilation. 
  • For instance, a slight negative room pressure is limited by exhausting 10% more air than the supply in cold conditions. This reduces the chance of intermediate condensation. 

Conclusion

In conclusion, the choice of ventilation system for a building depends on many factors. These include energy efficiency, indoor air quality, and cost. By understanding the types of available ventilation systems and their pros and cons, building owners and designers can choose well. They can then prioritize the health, comfort, and well-being of building occupants.

FAQ

What are the three 3 basic methods for ventilating buildings?


The three basic methods for ventilating buildings are:

Natural Ventilation: Utilizes natural forces like wind and thermal buoyancy to circulate air without mechanical systems. Open windows, vents, and louvers are common examples.
Mechanical Ventilation: Involves the use of fans, ducts, and ventilation systems to control airflow, often used in HVAC systems for consistent air quality.
Hybrid (Mixed-Mode) Ventilation: Combines both natural and mechanical ventilation to optimize energy efficiency and comfort, automatically switching between modes based on conditions.

What are the 3 C’s of ventilation?


The 3 C’s of ventilation are:

Control: The ability to manage the airflow and maintain consistent indoor air quality.
Comfort: Ensuring that the ventilation system provides a comfortable environment by regulating temperature and humidity levels.
Cost: Balancing the effectiveness of ventilation with the financial aspects, ensuring energy efficiency and cost-effectiveness in operation and maintenance.

What are the 4 types of natural ventilation?


Cross Ventilation: Air flows across a space from one side to another through openings.
Stack Ventilation: Uses the buoyancy of warm air rising to create airflow through vertical openings.
Single-Sided Ventilation: Air enters and exits through the same side, typically in smaller spaces.
Wind-Driven Ventilation: Utilizes wind pressure to move air through openings like windows or vents.

How to Calculate Total Built-Up Area from Plot Area

0
How to calculate total built up area from plot area

Calculating the exact size of a property is crucial. It’s key for home buyers, real estate developers, and construction pros. The built-up area sets the most construction allowed on a plot of land. It is an important metric for rules and pricing. 

This blog post covers the built-up area and the formulas to calculate it from the plot area. It also includes real-world examples and common FAQs.

How to Calculate Total Built-Up Area from Plot Area

Understanding Plot Area and Built-Up Area

  • The plot area is the overall area of land occupied by the building or structure. 
  • It encompasses the space of the building and any auxiliary structures that may exist, for instance, carports and other structures. 
  • Built-up Areas which is the overall area or the space in the building that is enclosed by walls. 
  • It involves the floor space, including the carpet space, the walls and other interior spaces of the building such as balconies and terraces as well as exterior façade or outside space. 
  • This is the maximum construction space allowable to be constructed on the identified land space or plot. 
  • In that locality, there are MEAS Rules like Floor Space Index (FSI) or Floor Area Ratio (FAR) through which the plot area is proportional to the built-up area. 
  • FSI/FAR defines the allowable built-up area to the plot area that is permissible according to the local planning authorities.
Calculate Total Built-Up Area from Plot Area

Components of Built-Up Area

The formula to calculate the total built-up area from the plot area is:

Built-Up Area = Carpet Area + Wall Area + Balcony Area + Terrace Area

Let’s break down each of these elements in detail:

What is Carpet Area

The carpet area refers to the net usable indoor floor space within the property, excluding the thickness of the walls. This is the actual livable area that can be occupied.

For example, if a room measures 10 ft x 12 ft and the wall thickness is 1 ft on each side, the carpet area would be:

Carpet Area = (10 ft – 2 ft) x (12 ft – 2 ft) = 8 ft x 10 ft = 80 sq ft

Wall Area

The wall area includes the space taken up by the internal and external walls of the building structure. This is typically around 10-15% of the total built-up area.

For example, if a wall is 20 ft long, 10 ft high, and 1 ft thick, the wall area would be:

Wall Area = 20 ft x 10 ft x 1 ft = 200 sq ft

Balcony Area

Any covered or open balconies that are part of the building structure are included in the built-up area calculation. 

For example, if a balcony measures 8 ft x 5 ft, the balcony area would be:

Balcony Area = 8 ft x 5 ft = 40 sq ft

What is Terrace Area

Roof terraces, open-to-sky spaces, and other outdoor areas are part of the building. They count towards the total built-up area. 

For example, if a terrace measures 20 ft x 15 ft, the terrace area would be:

Terrace Area = 20 ft x 15 ft = 300 sq ft

What is Plot Area

The plot area refers to the total land area on which the building is constructed, including the footprint of the main structure as well as any additional structures like garages or sheds. This is the total land parcel that is purchased or owned.

For example, let’s say you have a rectangular plot of land that measures 50 feet by 100 feet. The total plot area would be:

Plot Area = Length x Width

Plot Area = 50 feet x 100 feet

Plot Area = 5,000 square feet

Plot Area

What is Exterior Living Area

Outdoor spaces like gardens, pathways, and landscaping are part of the property but not within the building. They are considered exterior living areas. These are not included in the built-up area calculation.

How is the carpet area different from the built-up area?

The key difference between carpet area and built-up area is that the carpet area only counts the net usable indoor floor space. The built-up area includes more, like walls, balconies, terraces, and outdoor living areas.

Here’s a comparison of the two:

MetricIncludesExcludes
Carpet AreaNet usable indoor floor spaceWall thickness, balconies, terraces
Built-Up AreaCarpet area, wall area, balcony area, terrace areaExterior living area

How many square feet is built-up area?

Typically, the built-up area is 15-30% more than the carpet area. For example, if the carpet area of an apartment is 1,000 sq ft, the built-up area would be between 1,150 sq ft to 1,300 sq ft.

Plot coverage calculation :

To calculate plot coverage, divide the building footprint area by the total plot area and multiply by 100:
Plot Coverage (%) = (Building Footprint Area / Plot Area) x 100

Conclusion

By understanding the key components that make up the built-up area and the formulas to calculate it, home buyers, developers, and professionals can make informed decisions and avoid potential pitfalls.

FAQs

1. What is the percentage of built-up area?

The built-up area is generally 15-30% more than the carpet area. So if the carpet area is 1,000 sq ft, the built-up area would be 1,150 sq ft to 1,300 sq ft.
The exact percentage can vary depending on factors like:
– Wall thickness.
– Number and size of balconies and terraces.
– Exterior living area included in the property.

2. How much plot area can be used for construction?

In this case, the FSI (Floor Space Index) allows for a 1,500 sq ft building. However, the plot coverage restriction limits the ground floor to 500 sq ft. The remaining built-up area would need to be distributed across additional floors.

What is a Built-Up Area?

0
Built-Up area

Ever wondered what the term built-up area mentioned alongside carpet area or usable area in property advertisements meant? You could also see this term in blueprints and project specifications documents used by architects and engineers. In simple terms, the term built-up area indicates the usable area and the enclosing wall area in total. 

Before purchasing or renting a house or other building, it is important to know the terminologies involved in the construction field to stay aware of what you are getting into and escape any kind of fraudulent schemes.

Built-up area, super built-up area, carpet area, and other terminologies help understand and evaluate the floor plans of a building. This article will guide you through the term-built-up area and its associated terms.

What is a Built-Up Area?

Also known as plinth area, a built-up area refers to the total floor area of a building, including the carpet area, wall area, balconies, or terraces attached to it. 

Built-up areas are usually larger than carpet areas up to 30% as they include wall area an other floor areas like the balconies. It does not include commonly shared areas like hallways, staircases, or lobbies.

It is highly recommended to understand build-up areas as it will greatly help with comparing property sizes and evaluating price structures.

In short, the built-up area can be summarized in the following simple equation:

Built-up Area = Carpet Area + Area of Walls + Area of Balcony

Built-Up Area

What is Included in a Built-up Area?

Generally, the built-up area includes the carpet area in the usable space section and wall thickness, balconies, and terraces (if attached) from the non-usable space section.

  • A carpet area is simply the area within the enclosed walls of your building that you can cover with a carpet. It is the usable space and excludes the wall area. 
  • The wall area indicates the thickness of the wall, both interior and exterior, to usable space.

Other areas included in the built-up area include:

  • Balconies and terraces that are directly connected to the apartment or usable space.
  • Utility areas that dedicated to laundry or storage.
  • Small attached store or room useful for additional storage.

What is Excluded From a Built-up Area?

The built-up area primarily focuses on the enclosed space surrounding the property’s walls. The areas it excludes include:

  • Common areas shared by all the residents in the building, such as hallways, staircases, lobbies, elevators, security rooms, and others.
  • External amenities which include swimming pools, open parking spaces, parks, playgrounds, and gardens.
  • Unusable spaces like shafts for ventilation or elevators that are not functional for living.

Why Built-up Area Matters?

Understanding the built-up area of a building matters a lot, and the reasons are as follows:

  • To understand the usable space: The built-up area will give a clear picture of the total usable space compared to the advertised area.
  • To compare accurately: Built-up area will help compare properties fairly, especially when the layouts differ.
  • To make informed decisions: Evaluating the price structure of the building through the built-up area can help you identify the efficiency of the layout and make the final purchase decision.
  • To improve transparency in pricing: By understanding the total built-up area, you can avoid possible confusion over larger advertised area dedicated to walls or balconies and question the pricing based on usable and non-usable areas.
  • To avail loans: Most often, financial institutions consider built-up areas to qualify clients for availing loans.
  • To assess property value: Investors often take into account the built-up area to evaluate the property value in terms of rental income or future resale value. 
  • To plan the usage of the available space: The built-up area gives you a clear understanding of the available carpet area and the non-usable area and helps plan furniture placement and interior design.
Built-up Area Matters

Difference Between Carpet Area, Built-Up Area, and Super Built-Up Area

TermCarpet AreaBuilt-Up Area (Plinth Area)Super Built-Up Area
DescriptionThe usable floor area within the walls of a building.The total enclosed area within the outer walls of a property.The total area for which a buyer is charged, including the built-up area and proportionate share of common areas.
FocusFunctional living space.Total enclosed space within your building or apartment.Total chargeable area.
Included AreasSpace covered by flooring (excluding walls).Carpet area, wall area, balconies (sometimes terraces), and other utility spaces.The entire built-up area and the proportionate share of common areas like lobbies, hallways, elevators, security room, and others.
Excluded AreasWalls, balconies (sometimes), common areas, and external amenities.Common areas like lobbies and hallways and external amenities like pool, park, and others.External amenities like swimming pool, park, garden, and the like.

Conclusion

The RERA (Real Estate Regulatory Authority) regulations in India mandate the disclosure of carpet area, built-up area, and super built-up area to the buyers to provide a clearer picture of the total sole ownership space and co-ownership space. In case you are denied disclosing cost structure based on carpet area, built-up area, and super built-up area, you can approach a relevant authority regarding it.

Be sure to go through the details on the carpet area, built-up area, super built-up areas, and the relevant cost structure before purchasing a property.

Wishing you the very best in your building purchase!

FAQs

1. For what area will I be charged?

You will be charged for the super built-up area most of the time. This area includes the total built-up space and the common areas shared by all the residents, like lobbies, hallways, elevators, and others.

2. Is the built-up area larger or smaller than the carpet area?

The built-up area is always larger than the carpet area. Generally, the built-up area is larger than the carpet area by 20-30% due to the inclusion of wall area and other areas.

3. What to do if a developer is charging property price as per the built-up area?


The RERA regulations in India mandate the pricing of properties based on carpet space. In case you are charged for property price based on built-up area, ask for the disclosure of cost structures based on carpet area and super built-up area as well and ensure that there are no hidden costs associated with common area maintenance.

What is Super Built-up Area?

0
Built-Up house

Super built-up area reveals the extent of a piece of property that is on the market for purchase and sales. It includes the carpet area and the proportionate share of the intermediate and upper floors and corridors. In this blog, we will discuss what is super built-up area, how it is computed at and why it is so important in real estate business.

What is Super Built-up Area?

The Super Built-up Area refers to the total area of a property, including the carpet area (usable area within the apartment) and the proportionate share of common areas such as corridors, staircases, lobbies, elevators, and amenities like the clubhouse or garden.

What’s Included in Super Built-Up Area?

Carpet Area

1. Carpet Area: The living area of the apartment is measured from the internal walls of the rooms. It excludes the external walls, common areas, and private balconies or terraces.

2. Common Areas: This includes reception areas, corridors, staircases, lifts/escalators and hallways. These include shared spaces in the building or development. They, like clubhouses, pools, and other fun facilities, are also part of this category.

3. Balconies and Terraces: They are limited to the living area. They are an essential part of the building.

4. Wall Thickness: The size occupied by the internal and external walls of the apartment.

How to Calculate Super Built-up Area?

So, the super built-up area is the carpet area plus the additional area. The additional area is the share of the open areas for common use. 

Formula to calculate the super built-up area is:

Super Built-up Area = Built-up Area + Proportionate Share of Common Areas

  • In this scenario, lets consider the super built-up area is 1,500 square feet, which represents a 25% increase over the 1,200 square feet carpet area.
  • Consider two apartments on the same floor: Apartment A covers 1,000 square feet in built-up area, while Apartment B spans 2,000 square feet.
  • The total common area for the floor is 1,500 square feet.
  • The developer uses the apartments’ built-up area ratio (1:2) to divide the common area. This is how they find each apartment’s super built-up area.
  • Consequently, Apartment A gains an additional 500 square feet of common area, and Apartment B receives 1,000 square feet.
  • Thus, Apartment A’s super built-up area is 1,500 square feet. It has 1,000 square feet of built-up area and 500 square feet of common area.
  • Apartment B’s area is 3,000 square feet. It has 2,000 square feet of built-up area and 1,000 square feet of common area.

Alternatively, the super built-up area can also be calculated using the carpet area and the loading factor:

Super Built-up Area=Carpet Area×(1+Loading Factor)

To find the proportionate share of common areas, developers use a concept called the “Loading Factor.” 

Suppose the carpet area of a property is 1,200 square feet, and the loading factor is 25%. To calculate the super built-up area, we can use the formula:

Super Built-up Area=Carpet Area×(1+Loading Factor)

Super Built-up Area=1,200×(1+0.25)

Super Built-up Area=1,200×1.25

Super Built-up Area=1,500 square feet

What is the Loading Factor?

The loading factor is the recommended percentage added to the carpet area. It accounts for common areas and other shared spaces in the building or development. It is mostly shown as a percentage or ratio.

Formula to Calculate Loading Factor

The formula to calculate the loading factor is:

Loading Factor = (Super Built-up Area ÷ Carpet Area) – 1

For instance, if the super built-up area of a property is 1,500 square feet and the carpet area is 1,200 square feet, the loading factor would be:

Loading Factor = (1,500 ÷ 1,200) – 1 = 0.25 or 25%

This means that the super built-up area is 25% more than the carpet area.

Why Super Built-Up Area Matters

Super Built-Up Area Matters

1. Accurate Pricing: The super built-up area is the basis for calculating the price of a property. Because of this, the super built-up area assists the buyer to settle for the right price in avoiding overcharging.

2. Comparison of Properties: Comparing the prices of various properties is related to the super built-up area. It helps buyers find the best value for their money.

3. Compliance with RERA: According to RERA rules, one must reveal the actual area of the premises. This is the area mentioned at the time of registration or the agreement. The clients should be able to know these facts to be able to offer compliance with the law.

4. Resale Value: The super built-up area is a key factor in determining the resale value of a property. Buyers should consider the total area. This is important for judging a property’s long-term investment potential.

5. Rental Calculations: Landlords and tenants can use the super built-up area to calculate the rent per square foot. This ensures a fair and clear rental agreement.

Conclusion

Understanding the subtleties of the Carpet area and Super built-up area helps with decision-making, bargaining, and following rules. In this blog, we have seen what super built-up area is. Also, we have checked how it is calculated and its relevance to construction and real estate.

Beading in Construction: A Complete Guide

0
Beading in Construction

In homes, beading is commonly used in interior trim and molding. For instance, the edges of wooden door frames, window frames, and baseboards often feature beading to add a decorative touch. 

Beading can be a decorative element , adding it on building features makes it more aesthetic. It also plays a practical role in protecting the vulnerable areas such as corners of wall, ceilings, arches, etc. 

Let’s have a look at the detailed information on what beading is in construction.  and how it makesthe wall building strong.

What is beading in construction?

What is beading in construction

Beading in construction means adding a thin or rounded edge to the walls and corners of the building, which can have either a decorative or functional purpose.

Two Types of Beading

  • Decorative Beading
  • Functional Beading

Decorative Beading:

As we saw earlier, beading adds a touch of style to various building elements. It’s like adding curvy or thin edges. Having a thin rounded molding running along the edge of siding or trim panels, which makes it visually more good.  It can be used in many parts of the house such as doors and windows, flooring, and furniture to enhance the overall aesthetic.

Applications:

Doors and Windows:

Wooden beading can frame doors and windows, giving them a polished look. For example, in traditional Indian homes, you might see carved wooden beading around the door frames, adding a classic touch. The carved beading could feature intricate patterns like floral designs or geometric shapes, which add an artistic flair to the entryway. This not only enhances the beauty of the door but also highlights the craftsmanship involved.

Flooring: 

Wooden beading can be used where the floor meets the wall. It covers the gap and gives a neat finish. Imagine a beautiful wooden floor in your living room with matching wooden beading, making the room look seamless and well-finished. The beading hides any gaps between the floor and the wall, preventing dust and dirt from collecting in the small spaces. It also adds a warm, cohesive look to the room, tying the floor and walls together visually.

Furniture: 

It aAdds detail to furniture like cabinets and shelves. For instance, a wooden cabinet with carved beading along the edges can turn a simple piece of furniture into an elegant one. The beading can feature subtle curves or more elaborate designs, enhancing the cabinet’s visual appeal. This is often seen in high-end furniture pieces where the added details signify quality and attention to detail.

Two Types of Beading

Functional Beading:

Functional beading serves practical purposes in construction and interior design. These beading types not only enhance the aesthetic appeal but also provide essential functional benefits like sealing, protection, and support. 

Applications

Furniture: Plastic edge beading on furniture like tables and desks protects the edges from chipping and damage. For example, a study table with plastic beading along the edges will be more resistant to knocks and bumps, making it last longer.

Walls: Metal edge beading is often used on corners of walls in high-traffic areas to prevent damage. In commercial buildings like offices and schools, metal beading on wall corners helps protect them from constant wear and tear, keeping the walls looking neat and tidy.

Tiles: Plastic beading around the edges of floor tiles provides protection and prevents chipping. This is particularly useful in kitchens and bathrooms where the tiles are prone to damage from heavy use and moisture.

Concrete Structures: Flexible rubber beading in concrete joints allows the material to expand and contract with temperature changes without cracking. In a large concrete driveway, rubber beading between the slabs ensures that the concrete can move slightly without causing cracks or breaks.

Building Facades: PVC beading in the joints of the exterior wall building accommodates movement due to thermal expansion. This is particularly useful in high-rise buildings where temperature changes can cause significant expansion and contraction.

Pipelines: Expansion beading in pipelines prevents damage caused by temperature-induced expansion. For example, water pipelines with rubber beading in the joints ensure that the pipes can expand and contract without leaking or breaking.

Bridges: Steel beading in bridge joints helps distribute the load and provides additional strength. In a large suspension bridge, steel beading ensures that the weight of the vehicles is evenly distributed, preventing structural failures.

Buildings: Aluminum beading in building frames adds support and stability. For example, in a high-rise building, aluminum beading in the structural framework helps support the weight of the floors and walls, ensuring the building remains stable and secure.

Roofing: Load-bearing beading in roofing structures helps support the weight of the roof tiles and prevents sagging. In a residential home, using steel beading in the roof framework ensures that the roof remains sturdy and can withstand heavy loads like snow or debris.

Types of Functional Beading

Angle beads:

L-shaped beadings are also known as Angle beads. Usually these are applied to the corners,They take the hit from bumps, scrapes, or bangs, preventing the corner itself from getting damaged or chipped.

Expansion beads:

Large areas of drywall can crack easily, especially as a building settles. Expansion beads are like tiny, hidden bridges inside the drywall. They allow the drywall to move a little without causing cracks to appear on the surface.

Parting bead:

Beading can create a clean separation between different materials like drywall and trim, it acts as a guide for the sashes ensuring they slide up and down smoothly.. It prevents windows from getting rubbing and makes them easier to use.

How does beading make the wall building strong?

Beading itself doesn’t directly impact the overall structural strength of a wall. Wall strength relies on their core building materials like bricks, concrete, or wooden studs for strength. However, beading can play a supportive role in some cases:

Indirect Protection:

Corners are vulnerable points and cracks can spread if left unchecked. Angle beads can prevent the corners and support the wall’s structural integrity.

Improved Stability:

Expansion beads used in drywall construction can contribute to a wall’s stability in a specific way. These beads allow for slight movement in the drywall due to temperature changes or settling. 

This flexibility helps prevent cracks in the drywall surface, which can weaken the overall structure if extensive. However, it’s important to note that expansion beads themselves don’t directly add strength; they simply allow the existing structure to manage slight movements better.

Is beading and molding the same in construction?

Definitely not, beading and molding in construction is not the same, though they are closely related. They can sometimes be used together, and both contribute to the overall look and feel of a building. 

Here’s a breakdown of the key differences:

Similarities:

  • Both are used to enhance the aesthetics of a building.
  • Both can be made from similar materials like wood, metal, or PVC.
  • They are often applied along edges or transitions between materials.

Beading vs Molding vs Trim: Differences 

    FeatureBeadingMoldingTrim
SizeNarrow stripWider than beading, can varyWider than beading, can vary significantly
ProfileRounded profile (always)Can be rounded, flat, or have complex shapes and detailsFlat, rounded, or complex shapes and details
Primary PurposeDecorative or FunctionalDecorativeDecorative (primarily), some functional benefits
Decorative ApplicationsMolding with a bead profile on siding or trim panels – Decorations on doors, archways, or ceilingsAdds visual interest, definition, and a finished lookCovers gaps, creates transitions, adds visual interest, provides a finished look (baseboards, crown molding, casing, chair rails)
Functional ApplicationsCorner protection (angle beads) – Crack prevention (expansion beads) – Material separation (parting beads)None (may indirectly protect by adding visual definition)
Can offer some protection by adding rigidity.
MaterialsWood, metal (galvanized steel), PVC (plastic)Wood, plaster, MDF, PVCWood, MDF, PVC, plaster
OverallSimple, single rounded profile – Can be used for both aesthetics and protectionMore complex profiles, wider variety – Primarily for visual appealWider range of decorative possibilities, more variation in size and profile

At last, the choice between molding, trim and beading depends on the specific needs of the project. Trim offers a wider range of design options for a more decorative focus. Beading can be a great choice for balancing aesthetics and functionality with a simpler profile.

Beading in construction is commonly used in ?

Beading in construction refers to a thin strip of material, typically made from wood, plastic, or metal, used to provide a decorative or protective finish to the edges or corners of surfaces such as walls, doors, windows, or ceilings. It is commonly used in plastering to create smooth edges, in tiling to finish off edges, and in windows and doors to secure glass panels and improve their appearance.

How do you install beading in construction?

Measurement: Measure the area where the beading will be installed to ensure a precise fit.
Cutting: Cut the beading to the required length using a saw or cutting tool appropriate for the material.
Fixing: Attach the beading to the surface using nails, screws, or adhesive, depending on the material and the application.
Finishing: Once secured, the beading can be painted or varnished to match the surrounding surface for a seamless look.

What materials are commonly used for beading in construction?

Beading in construction is commonly made from materials such as wood, PVC (plastic), aluminum, and steel. Wooden beading is often used in traditional or decorative applications, while PVC and aluminum are popular for modern constructions due to their durability, ease of maintenance, and resistance to moisture and corrosion.