Home Blog Page 63

Quick Setting Cement: A Comprehensive Guide to its Manufacture and Uses

0
Setting Cement

Starting with a new material or technique in construction might be frightening, but don’t worry! This blog examines quick-setting cement, a useful tool in construction settings that move quickly. This page contains all the knowledge you need to understand quick-setting concrete. Let’s get started!

What is Quick Setting Cement?

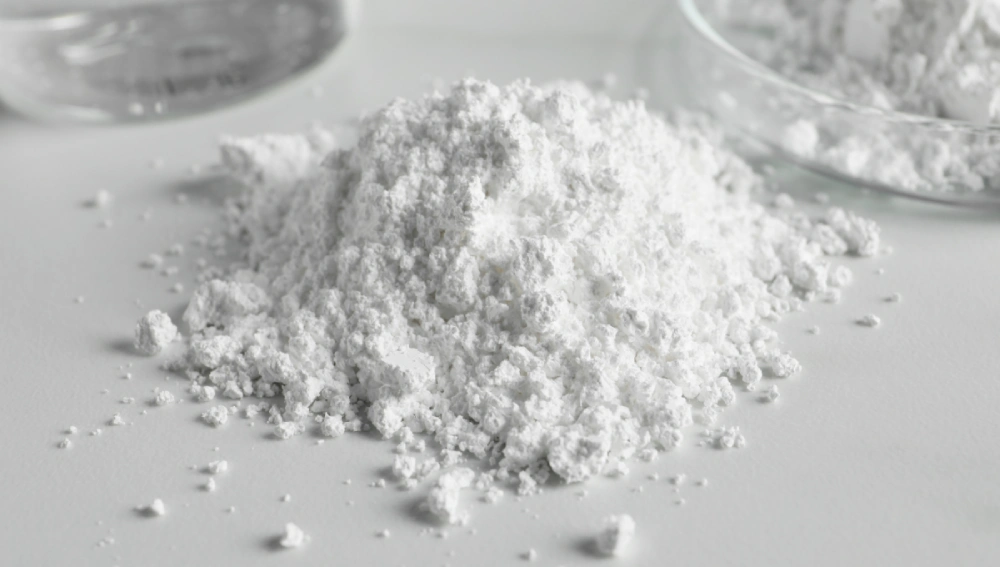
A special type of Portland cement, known as quick-setting cement, or fast-setting cement or rapid-setting cement is prepared for construction works where short periods of setting times are required. It possesses high strength, rapid setting, and very low drying shrinkage. It hardens after mixing with water and becomes a stone in 30 minutes. 

Manufacture of Quick-Setting Cement

Manufacture of Quick-Setting Cement

The preparation of quick-setting cement requires a definite technique that is followed to achieve the fast setting characteristics of the product. 

Here’s an overview:

  • Raw Material Preparation: The main input materials – limestone, clay and shale are extracted from the ground in the raw form as boulders and are crushed into a fine powder.
  • Mixing and Grinding: To the powdered raw materials additives such as aluminum sulfate and gypsum are added in the right proportion to regulate the setting time of the cement.
  • Heating in a Kiln: The mixture is heated in a rotary kiln at high temperatures to produce clinker, the solid substantial.
  • Clinker Cooling and Grinding: This hardened material is cooled and is then reduced into a fine powder. Other components of gypsum and additives are introduced to further adjust the characteristics of cement products.
  • Packaging: Finally the quick-setting cement is exhibited in bags, or other large vessels that are utilized to transport, and distribute cement.

Components of Quick Setting Cement

The secret to quick-setting cement’s charm is in its special formula. The following are the main components that set it apart:

Portland Clinker: Portland clinker is a key component of Portland cement. It is made by heating limestone and clay in a kiln and then finely ground to create cement. Portland clinker typically comprises about 95% of the cement’s weight, providing its strength and setting properties.

Aluminum Sulfate: This additive quickens the setting and strengthening process when added in amounts ranging from 1% to 3% of the clinker weight.

Gypsum: Gypsum is added in limited proportions such as 3%-5% of the weight of cement to slow down the process of setting of cement and prevent it from early hardening.

Additives: To regulate the rate of hydration and enhance overall performance, certain chemicals like Calcium Chloride, Superplasticizers, Retarders, Pozzolans are utilized.

To guarantee that quick-setting cement lives up to its name, each of these components is essential.

Quick Setting Cement Properties & Uses

Quick Setting Cement Properties & Uses

Let’s take a look at the properties and uses of quick-setting cement:

Properties of Quick Setting Cement:

  • High Strength: Within an hour and a half it achieves a compressive strength of 6000 PSI.
  • Fast Setting Time: The first set is completed within 5-10 minutes while the final set takes 30 minutes.
  • Reduced Shrinkage: Without shrinkage-reducing admixture, this type of cement exhibits shrinkage as low as 200 microstrains in 28 days.
  • Durability: While quick setting cement minimizes maintenance, it maximizes lifespan with its strong performance.
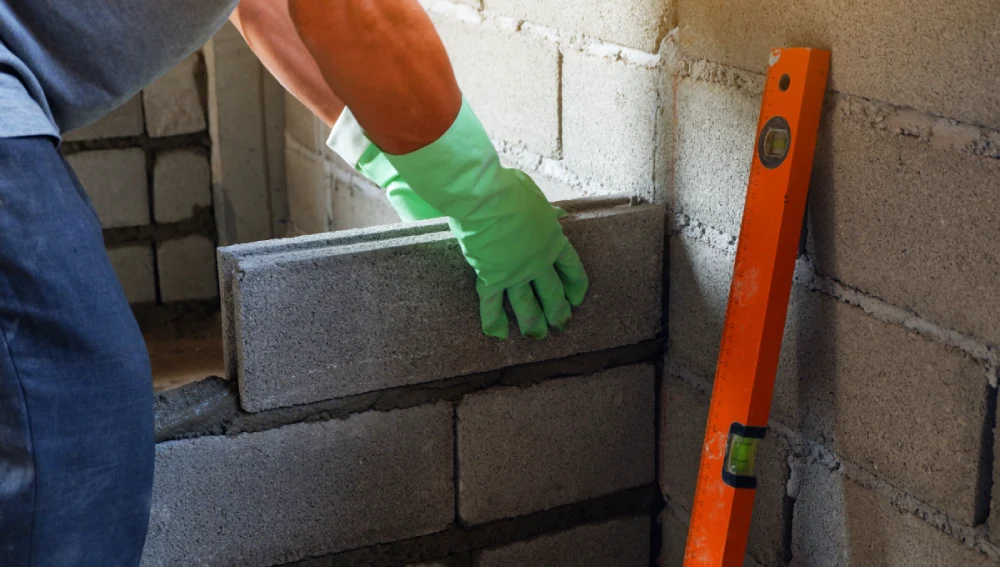
  • Versatility: Suitable for various uses, from underwater requirements to emergency repairs.

Uses of Quick Setting Cement:

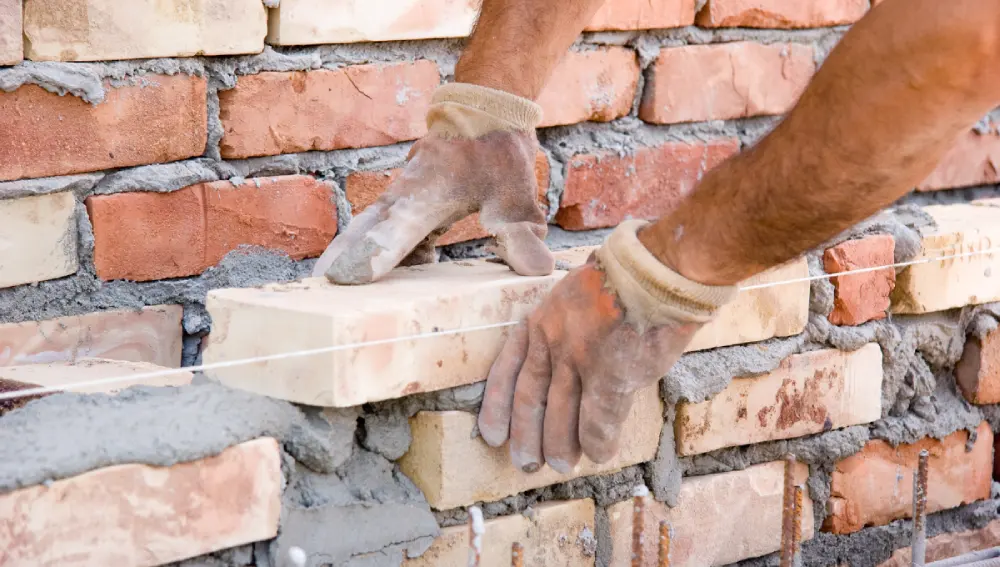
  • Bridge Construction: Ideal for quick construction and repairs.
  • Underwater Engineering: Works well in submerged environments without washout.
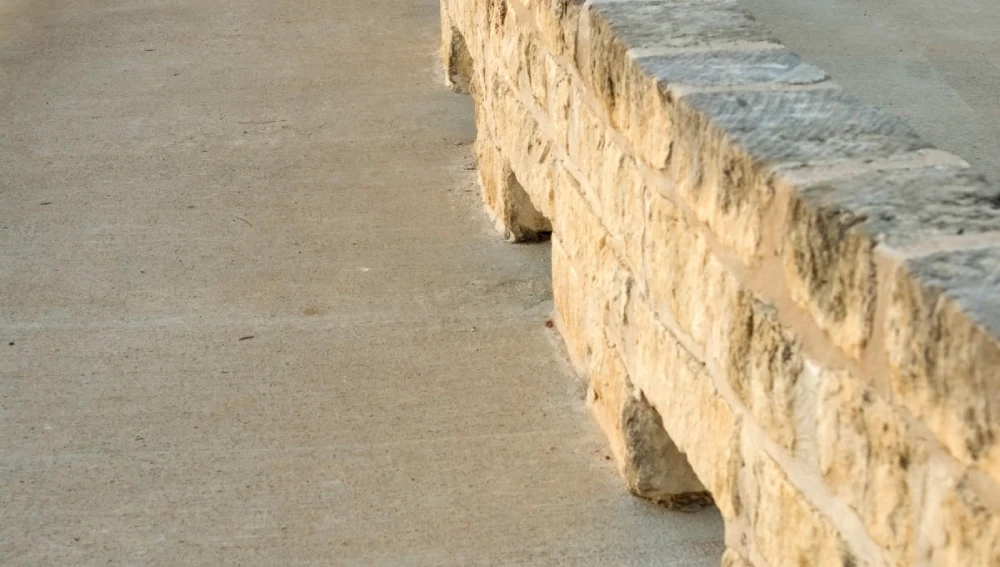
  • Concrete Steps and Curbs Repair: Perfect for fast repairs in urban areas.
  • Cold or Rainy Weather Construction: Suitable for low-temperature conditions where standard cement might fail.
  • Military and Emergency Projects: Used in military engineering, airport runways, bridges, tunnels, precast elements, and culverts.

How to Use Quick Setting Cement

It therefore makes a lot of sense to recommend quick-setting cement for all structures that need repair within the shortest time possible and at a lower cost. But there are certain guidelines which have to be followed while using it. The following are some conditions one has to follow while working with this cement:

  1. Preparation: Read the instruction manual available with the quick-setting cement and follow the mixing ratio. This will help avoid unnecessary clumps.
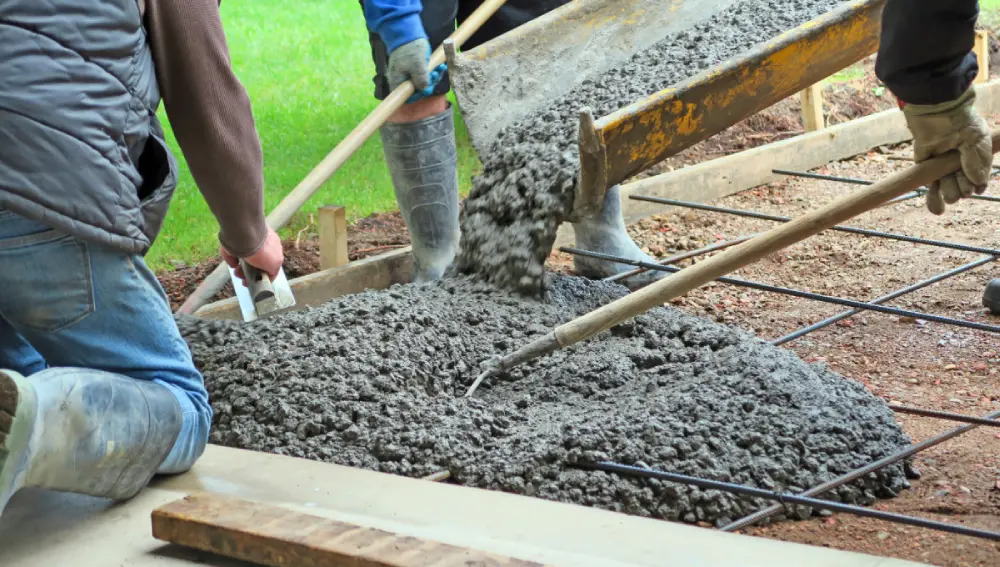
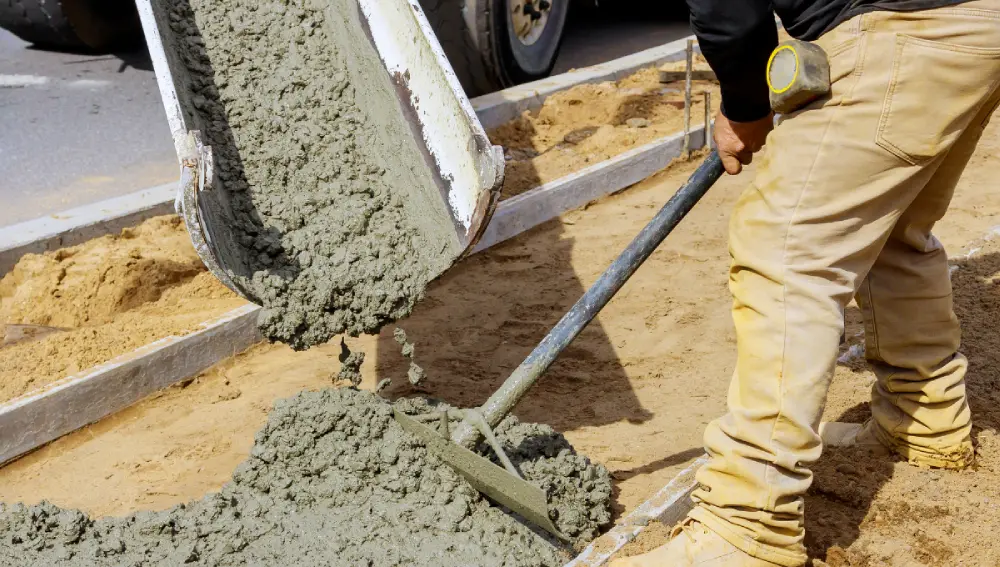
  2. Mixing: Always mix the cement near the working site as it tends to harden very quickly. Mix cement in small quantities to avoid the risk of premature hardening. Try not to mix for more than 10 minutes.
  3. Application: Apply the mixture quickly, as the setting process begins almost immediately. Use standard tools to shape and smooth the surface.
  4. Temperature Caution: Be careful when working with quick-setting cement in temperatures less than or equal to four degrees, as it can lead to freezing.
  5. Curing: Allow the cement to cure naturally. Avoid disturbing the surface during this time to ensure optimal strength.

With these steps, you can achieve a high-quality finish in record time!

Features of Quick Setting Cement

Understanding the Features of quick-setting cement will help you use it effectively:

  • Yellowish and brown color distinguishes quick-setting cement from other types of cement.
  • Proper mixing and application ensure weather-resistant properties.
  • It can be used effectively for plastics, metals, woods, as well as concrete. 
  • Quick-set cement can be used in underwater construction as it contains waterproofing additives that ensure that the structures do not absorb water. 
  •  This may be used indoors and outdoors. 

Quick Setting Cement Vs. Rapid Hardening Cement Vs. Ordinary Portland Cement

Choosing the right type of cement can be confusing, but we’re here to clear things up! Here’s a simple comparison:

PropertyQuick Setting CementRapid Hardening CementOrdinary Portland Cement
Setting TimeFastest among the three, with the initial set in 5-10 minutesFaster than Ordinary Portland but slower than Quick SettingSlowest setting time
Strength Growth RapidEarly strength gain, 6000 PSI within 1.5 hoursHigher early strength due to lime and C3S contentGradual strength gain over weeks
ShrinkageLow shrinkage, as low as 200 microstrains in 28 daysModerate shrinkage Large dry shrinkage, making concrete prone to cracking
Use CaseUrgent Projects, underwater and low-temperature environments.Precast concrete construction, road engineering Standard construction projects

Conclusion

Understanding the differences between the various cement types as explained above, will help you choose the right cement for your specific project needs. Since it sets rapidly and increases strength quickly, quick-setting cement is revolutionary in the building sector. For cold-weather areas, emergency repairs, or underwater jobs, this cement can be your first pick. You may make wise judgements and complete your building projects with excellence if you are aware of its qualities and uses.

Frequently Asked Questions (FAQs)

1. What are the benefits of quick-setting cement?

The main use of quick setting cement is for construction works that require quick setting due to its fast drying nature. It takes about 5-10 mins to start setting and fully sets within 30 mins.

2. Is rapid-hardening cement the same thing as quick-setting cement?

Even though both are quicker in terms of their setting time, they are different and used in different ways.

3. What is the most effective use of quick-setting cement?

Quick-setting cement works well when you need immediate results. It sets quickly, so it’s great for underwater buildings, emergency fixes and projects with tight deadlines.

4. Can you use quick-setting cement in cold weather?

Yes, because quick-setting cement sets rapidly and lowers the chance of freezing before hardening, thus performing well in cold climates.

5. How should I mix quick-setting cement?

To stop early hardening, mix quick-setting cement in small batches near where you’re working and follow the instructions as specified on the packet.

Expansive Cement: Types, Properties, and Applications 

0
Expansive Cement

Expansive cement stands out among hydraulic cements due to its ability to expand a bit as it sets and hydrates. This expansion proves useful in many construction projects, as it helps cut down on shrinkage and cracking, resulting in structures that last longer and perform better. This piece takes a deep dive into expansive cement, covering its varieties, characteristics, uses, and perks, giving readers a full picture of how it fits into today’s building world.

What is Expansive Cement?

Expansive cement is made to expand after it sets, unlike regular Portland cement, which tends to shrink as it hardens. The growth is kept in check and happens in the hydration process. The cement gets this quality by mixing in certain compounds that react with water to create expansive ettringite crystals.

Types of Expansive Cement

Types of Expansive Cement

Expansive cement comes in three main varieties, each boasting unique characteristics and uses:

  1. Type K Expansive Cement: This type has Klein’s compound as its expanding part. Klein’s compound consists of calcium sulfoaluminate, dicalcium silicate, and gypsum. People often use Type K to build structures that need to shrink less and last longer, like bridges and factory floors.
  2. Type M Expansive Cement: Type M uses calcium aluminate cement and calcium sulfate to expand. It’s used for grouting,  and fixing things because it expands and hardens fast.
  3. Type S Expansive Cement: Manufacturers create this type by adding calcium sulfate to Portland cement. This causes it to expand when it hydrates. Construction teams often use Type S to repair and restore concrete. It helps new concrete stick to old surfaces.

Properties of Expansive Cement

Expansive cement has several special features that set it apart from regular Portland cement:

  • Expansion: Expansive cement’s main feature is its ability to expand during its initial setting phase. This growth helps to reduce the natural shrinking of cement, lowering the chance of cracks forming. 
  • Strength: Expansive cement has the same or even more crushing strength than regular Portland cement. This makes it good to use in building structures.
  • Durability: With reduced shrinking and cracking, buildings made with expansive cement last longer. They’re not as easy for water to get into and for environmental damage. 
  • Shrinkage Compensation: People design expansive cement to make up for shrinkage when it dries. This makes it perfect to use when you need something to keep its size and shape.

expansive cement uses

Applications of Expansive Cement

Builders use expansive cement for many types of construction projects. Its special features make it helpful in different ways:

  1. Structural Concrete: Expansive cement influences structural concrete projects. You’ll find it on bridges, dams, and highways. It helps cut down on shrinkage cracks and makes structures last longer.
  2. Grouting: Expansive cement is  perfect to use for grouting. It’s great to anchor bolts and fill in voids. It creates a snug fit and forms a strong bond.
  3. Repair and Rehabilitation: People often choose expansive cement to fix up and restore structures. It sticks well to existing concrete and gives a lasting, crack-free surface.
  4. Industrial Floors: Factories use expansive cement to build floors with fewer joints and less cracking. This makes the floors stronger and cheaper to maintain.
  5. Pre-stressed Concrete: Expansive cement’s controlled growth makes it a good fit for pre-stressed concrete. It helps keep the reinforcement tight and makes the structure more solid.

Benefits of Expansive Cement

Expansive cement has an edge over regular Portland cement in several ways:

  • Crack Reduction: Expansive cement fights shrinkage, which means less cracking. This leads to structures that last longer and look better.
  • Improved Bonding: Expansive cement sticks well to existing concrete surfaces. This makes it a great choice to fix up and restore buildings.
  • Enhanced Durability: Buildings made with expansive cement tend to last longer. This is because they crack less and bond better.
  • Increased Flexibility: Builders and engineers can use expansive cement for different projects. It works well for structural concrete, grouting, and repairs.

Limitations of Expansive Cement

While expansive cement offers many advantages, it also has some drawbacks:

  • Cost: Expansive cement typically costs more than regular Portland cement, which can make a project more expensive overall.
  • Complexity: Using expansive cement might require special knowledge and skills, as you have to control the expansion to avoid problems.
  • Availability: You might not find expansive cement in all areas, which limits its use in certain places.

How Expansive Cement Works

The growth of ettringite crystals during hydration causes expansive cement to expand. These crystals develop and exert expansive forces within the concrete matrix, offsetting the natural shrinkage that happens as the cement dries. To achieve controlled expansion, experts balance the proportions of calcium sulfoaluminate, calcium sulfate, and other compounds in the cement.

Mixing and Placing Expansive Cement

Mixing and placing expansive cement needs close attention to detail to ensure it performs well:

  • Mixing: You should mix the cement with water as the manufacturer tells you to, making sure it’s all blended well. The ratio of water to cement plays a big role in controlling how much it expands, so you need to watch this.
  • Placing: You need to put expansive cement in place and pack it down to stop it from prematurely setting and to make sure it expands all through the concrete.
  • Curing: To get the desired expansion and strength, proper curing is essential. You should keep the concrete damp for a set time to stop it from shrinking as it dries and cracks.

Comparison with Ordinary Portland Cement

Expansive cement is different from ordinary Portland cement in several main ways:

  • Shrinkage Compensation: Ordinary Portland cement shrinks as it cures, but expansive cement expands. This growth helps reduce cracks and boost strength.
  • Bonding: Expansive cement sticks better to old concrete surfaces. This makes it a good choice to fix and restore projects.
  • Applications: You can use Portland cement for many things. But expansive cement shines where you need to offset shrinkage and increase strength.

Environmental Considerations

The production of  expansive cement, like that of other cement varieties, affects the environment. It releases carbon and uses up resources. But structures built with it last longer and need less upkeep. This might balance out some of these effects in the long run.

Future Trends in Expansive Cement

Construction companies will want more expansive cement as they focus on building things that last and don’t harm the environment. Scientists keep working to make expansive cement perform better and be kinder to nature. This means builders and engineers might choose it more often.

Conclusion

Expansive cement is a useful and valuable material in today’s construction, offering unique benefits like less cracking better bonding, and longer-lasting structures. Though it costs more and needs special knowledge to use, its advantages make it a great choice for many uses, from concrete construction to fixing and upgrading projects. As the building industry keeps changing, expansive cement will become more important in creating durable structures that will last into the future.

Calculating Construction Cost Per Square Foot in India 

0
Construction Cost

Getting a home built is a life-defining aspiration for numerous people. However, property owners in India are often faced with the question of how much it will cost to build a house. This blog provides a comprehensive guide on how to calculate construction costs at the current market rates in India, to enable prospective home-builders to estimate the house construction cost. Please note that all costs mentioned in this blog are rough approximates and can vary widely based on the location of construction, design complexity, and site conditions.

How to Calculate the first floor construction cost per square feet

For calculating the cost of construction per sq ft for a house, it is first essential to estimate the total built up area in square feet. This can be calculated with the following steps:

  1. Preparation of floor plans: The built-up area may be difficult to predict accurately without first finalising the house floor plans and design. In case an estimate is required before the floor plans are ready, plans prepared for a similar size and with similar requirements can be sourced online as a reference for calculation.
  2. Floor-wise calculation: Check the square foot area of each individual floor, these numbers are generally mentioned in the architectural drawings. If not, measure the length and breadth of the house on each floor and multiply these to get the area. Sizes of individual rooms can be calculated and added in case of irregular plan shapes.
  3. Summing up: Add the built-up area of each floor to obtain the total built-up area.

Note: Carpet area and built-up area differ significantly. Built-up area (considered for cost calculation) includes area taken up by the thickness of all walls, columns and other unusable spaces, while carpet area denotes the actual usable area. For ground floors or basements, generally, even uncovered/ unwalled spaces such as parking lots are added since these also require foundations. Generally, areas of other open spaces like terraces and balconies combined with built-up areas are known as super built-up area and are considered to be half of their actual areas for calculation of total built-up area, because these cost less than normal rooms to build.

Construction Cost per Square Foot in India As Per Construction Stages

Having an estimate of the cost at each stage of construction can help in financial planning and ensure continuity in the process. Different stages of construction affect the construction price per square foot, as explained in the following section.

  1. Pre Construction Stage

A portion that is generally neglected while calculating home construction costs is the cost of pre construction processes, including architectural and structural design, site surveys and soil testing. Architectural design details out all the creative aspects of a home, such as floor plans and elevations.Structural design provides details on the load supporting elements of a house, such as beam and column sizes, foundation design and amount of steel required. This is usually done on the basis of soil testing and site survey reports, which provide details on soil capacity and site conditions respectively. 

The approximate costs for these are as below:

AspectApproximate cost in ₹
Architectural Design 20-150 per square foot
Structural Design 5-100 per square foot
Site Survey₹2000 to ₹15000 (lump sum amount)
soil Testing₹5000 to ₹25000 (lump sum amount)

A site survey to determine the correct site boundaries and contours can cost a lump sum amount of ₹2000 to ₹15000, while soil testing costs can range between ₹5000 to ₹25000, depending on the agency and methods of conducting these.

  1. Construction Stage

During construction, various factors affect the total construction cost, such as:

  • Contractor’s Cost

Different contractors charge different percentages of total cost as their profit and have different rates for each aspect of construction. Generally, a contractor’s profit is considered to be around 10% of the total construction cost, while another 10% is set aside by them for overhead costs, adding up to a total cost of 20%.

  • Cost of Services (Electrical and Plumbing)

For house construction, electrical and plumbing costs, including labour and material, are considered to be 9% each, meaning the cost of services is around 18% of the total construction cost. 

  • Labour Cost

The cost for different types of labour, such as masonry, carpentry, concreting, shuttering and steel bar bending, vary widely, depending on the demand, market condition, time consumed and skills required. However, in general, labour cost is around 40-50% of total construction cost.

  • Material Cost

Material costs can vary widely depending on the type, quality and choice of building materials. However, material cost generally is around 50-60% of total construction cost. The type of materials used for constructing a house can be broadly classified into three categories. 

Type of MaterialPercentage of total cost required
Structural Materials50-55%
Doors, windows and other openings4-8%
Finishing Materials45-50%
  • Structural Materials

Structural materials are those that are used for constructing the main frame of the building, including the foundation, floor and roof slabs, walls and columns. The use of different materials for the main structure can widely affect the construction cost. For example, bricks or concrete blocks can be used for building walls. While brick walls cost around ₹150/sq ft (in elevation) to build for a 4” thick wall, concrete block walls may cost between ₹100-120/sq ft.

  • Doors, Windows and Other Openings 

The total surface area of windows in a house can be considered to be around 10-20% of the floor area. Materials selected for doors, windows and other openings can have a huge effect on construction costs. For example, UPVC window rates may start from ₹300/sq ft, while wood window prices start from ₹1000/ sq ft. If we consider a 100 sq ft area of windows in a 1000 sq ft house, this results in a cost difference of ₹70,000 between the two material choices.

  • Finishing Materials

There are hundreds of finishing materials available in the market today, with widely varying costs. Some types of plastering are normal cement plastering can cost around ₹40-₹60/ sq ft, while lime plastering can cost ₹100-200/ sq ft, Similarly, the cost of flooring starts from ₹25/sq ft and can go up to ₹5000/ sq ft.

  • Miscellaneous Costs 

Various other factors, such as water tanks, borewells, cladding materials and underground sumps, can affect the construction rate per square foot and consequently the overall cost. These can add up to 10-20% to the total cost of construction.

To sum up, the costs incurred during the construction stage of a project can be denoted as follows:

ComponentPercentage of total cost required
Contractor’s charge20%
Labour cost40-50%
Material cost50-60%
Services cost (including labour and materials)18%

Calculating Total Cost of Constructing a 100 sq ft Room in India

Assuming that a room of 10’x10’ with a standard height of 10’ and no RCC columns needs to be added to an existing house, the approximate construction cost can be calculated as follows:

Components Low-range cost (₹)Mid-range cost (₹)High-range cost (₹)
Walls (volume ~ 260 cubic ft for 9” thick walls)52000 (alternate material at ₹200/cft)65000 (blocks at ₹250/cft)78000 (brick at ₹300/cft)
Windows (at 15% of floor area= 15 sq ft)4500 (UPVC at ₹300/sq ft)9000 (Aluminium at ₹600/sq ft)22500 (wood at ₹1500/sq ft)
One door (3’x7’ size)6000 (UPVC)25000 (Honne wood)45000 (Teak wood)
Roof slab (RCC 6” thick)11000 (at ₹220/cft)13000 (at ₹260/cft)16000 (at ₹320/cft)
Flooring material3000 (at ₹30/sq ft)7000 (at ₹70/sq ft)12000 (at ₹120/sq ft)
Plastering (surface area ~ 350 sq ft)14000 (at ₹40/ sq ft)21000 (at ₹60/sq ft)42000 (at ₹120/sq ft)
Painting (surface area ~ 350 sq ft)8750 (at ₹25/sq ft)14000 (at ₹40/ sq ft)24500 (at ₹70/ sq ft)
Electrical fittings and labour (at roughly 9% of total cost)100001600026000
Overheads and miscellaneous100001600020000
Total cost119250186000286000

Therefore, the cost of constructing a room on an existing building can generally start around ₹1193/sq ft. However, this is just an approximate estimate that can vary widely depending on various factors such as material choices, site location, selection of contractors and site conditions. For new constructions, additional costs of site preparation, excavation, foundation and floor slabs need to be added to this cost. 

Calculating Total Construction Cost for a 1000 sq ft House in India

In India, construction cost for basic homes generally starts from ₹1800/sq ft, while luxury home costs can go up to even ₹10000/ sq ft. A few price ranges along with what these prices include, are shown below to obtain the cost of constructing a 1000 sq ft home in India.

Low range cost (at ₹1810/sq ft)Mid range cost (at ₹2250/sq ft)High range cost (at ₹3000/ sq ft)
Architectural services20,00050,0001,00,000
Structural design services5,00010,00025,000
Material cost8,55,00010,44,00013,65,000
Labour cost 5,70,0006,96,0009,10,000
Contractor’s profit1,80,0002,25,0003,00,000
Overheads and miscellaneous1,80,0002,25,0003,00,000
Total cost 18,10,00022,50,00030,00,000

Similarly, prices of construction per square foot can be estimated to obtain the total construction cost for different sizes of houses. However, costs can vary based on the size and scale of a project, as very small houses have a higher cost due to difficulty in availability of labour for small jobs. For example, the construction cost for a 1200 sq ft house per square foot may be lower than that of a 500 sq ft house.

Home Construction Cost Calculator

The above methods can be used to gain a rough idea of the rate of construction per square foot for the given areas and type of construction. However, Brick & Bolt’s Construction Cost Calculator can be used to procure more accurate estimates of construction costs for homes. This calculator will produce estimates based on customisable options for structural materials, finishing materials, types of services required, site location and various other aspects.

Brick & Bolt is a tech-enabled construction company with 4500+ completed residential projects which conducts 470+ quality checks at every construction stage to ensure the best quality for your house. With 3200+ customisable designs to tailor your home to accommodate your desires and provision of end-to-end construction services, Brick & Bolt is a pioneer in the real estate industry. Contact Brick & Bolt today to construct your dream home at the lowest market price!

Intellectual Property Rights in Architecture: Protecting Design Innovations

0
Intellectual Property Rights

Architecture involves the design of floor plans, elevations, 3D views and numerous other aspects requiring careful thought. Architects spend valuable time ensuring that their designs are innovative and specific to the requirements of each client and project. One of the common problems faced by them is the copying and use of their designs by rival organisations for monetary benefits. Intellectual Property Rights offer an efficient way of protecting the artistic innovations of architects by preventing their use and misuse by anybody other than the rightful owners. 

Read on to learn more about what exactly Intellectual Property Rights are, their types, significance, process of application and consequences of violation. 

What are Intellectual Property Rights?

An Intellectual Property (IP) can refer to any type of intangible asset created by application of the mind, including but not limited to literary and artistic work, designs, inventions, symbols, emblems, titles and pictures. Intellectual Property Rights (IPR) are legal registrations to certify the ownership of such properties and prevent their misuse. They guarantee the rights of the owner to use and sell their designs for specific and defined periods of time and violation or infringement of these rights can lead to prosecution and imposition of serious penalties on offenders. In the architecture industry, the IPR definition incorporates ownership only for design innovations and not for construction methodologies.

Importance and Benefits of IPR

Registration of IPR provides several benefits that make them an important asset for designers, including architects, such as:

  • Ownership of Design Innovations

An IPR is a legal certification that a person or organisation is the rightful owner of specific intellectual properties, including architectural designs, and therefore retains the right to reproduce, sell or use his/her work as required or desired. 

  • Protection of Business

Intellectual Property Rights prevent rival organisations or any other individuals from copying, using or misusing registered designs for commercial gains. This helps architectural organisations with original and innovative ideas to retain their market share and preserve design integrity.

  • Financial Benefits

An IPR helps the rightful owner increase his/her monetary gains by marketing, selling, licensing and international exporting of their designs. It can also be used for obtaining funding from private or government organisations and banks.

Types of IPR Protections

Intellectual Property Rights for architecture in India are protected mainly by three governing Acts. 

  • Copyright Act (1957)

A copyright can be granted to “any building or structure having an artistic character or design, or any model for such building structure”. All non plagiarised, original architectural works or designs can be registered for copyrights. 

  • Trademark Act (1999)

A trademark, commonly called a watermark, is defined by Indian Law as “a mark capable of being represented graphically and which is capable of distinguishing the goods or services of one person from those of others”. This can include logos and other distinguishing graphics used by architectural studios or organisations and are important business assets. 

  • Designs Act (2000)

This is similar to the Copyrights Act, but also provides protection to architectural designs that have been produced more than 50 times, in which case the Copyright Act becomes invalid. A design under this Act is defined as “a shape, configuration, pattern, ornament or composition of lines or colours applied to any article which may be two or three dimensional”, thus covering all forms of architectural designs. 

Process of Applying for IPR 

The Controller General of Patents, Designs and Trademarks handles IPR related to the Design Act and Trademark Act, while the Copyrights Office under the Government of India (GoI) handles rights with respect to the Copyright Act. Each of these Acts has different processes of application, as explained below.

  • Registration of Copyrights

The Copyrights office affiliated to the Human Resources Department of GoI collects applications for registration of copyrights which can be submitted offline or online. Applications must include the appropriate identity proofs of applicants along with copies and documents of the design works. The application is then scrutinised and verified by the department, after which a registration certificate is issued. The process can take around 30 days for completion and cost around ₹500 for each design work. 

  • Registration of Trademarks

Applications for registering trademarks can be submitted to the Trademark Registry of India online. After submission, the department scrutinises and verifies the validity of the application documents and then publishes it in the Trademark Journal, which is open to objections from third parties for three months. In case of no objections, the trademark is officially registered. The whole process can take around 18 months for completion and costs between ₹4,000 to ₹10,000 for each registration. 

  • Registration Under the Design Act

For registering under the Design Act, applications must be submitted to the Patents Office, accompanied with the requisite identity proofs and copies of design documents. It is then scrutinised by the Controller General of Patents, Designs and Trademarks and published for public scrutiny. Registration of the design is completed in case of no objections being raised. This process can cost around ₹1000 to ₹4000 and the registration is valid for a period of 10 years with a provision for renewal for an additional five years.

Consequences of IPR Infringement

Infringement refers to the use of intellectual properties without the consent of the rightful owners. In India, cases of infringement or violation of IPR can be filed in civil and criminal courts. Civil cases can be filed for violation of all types of IPR, while criminal cases can be filed only for Trademark and Copyright violations. 

Civil courts can order authorised personnel to enter the premises of the accused (only in serious cases) along with the seizure and destruction of infringed material. They also award financial remedies to compensate for the loss in profit and for damages caused. 

Criminal courts impose more serious punishments to offenders, including imprisonment of up to 3 years along with fines ranging from a minimum of ₹50,000 and going up to ₹2 lakhs. 

Architecture is a field that is an intersection between art and science, creativity and technology. While science and technology cannot be restricted and must be given free reins to ensure development, artistic and creative innovations need to be protected by their owners. This is essential to give value to the efforts of designers and foster innovative thinking. Intellectual Property Rights thus encompass a way to protect artistic creations and punish those who misuse them, preserving the respect and integrity of these innovations that have intangible values. 

A Comprehensive Guide to Damp Proofing Your Home

0
Damp Proofing

For everyone, home is their personal space, where they will get the utmost comfort. All want their dream home to be safer and attractive. They can spend a hefty amount to increase the beauty of their precious living space. But the dampness is similar to the virus attached to their dear home. As a homeowner, you must know about dampness. In today’s blog of Brick & Bolt, you are going to identify dampness, recognise its causes, learn how to dampproof your home and deal with existing damp issues.

What Is Damp?

Damp is the presence of excess moisture or humidity in a room or a building. It is generally seen in walls, floors, or ceilings. It can cause a huge issue to the buildings infrastructure and for the health of people living in that building. 

What are Different Types of Damp?

Generally, there are three major types of dampness:

  1. Rising Damp
  2. Condensation Damp
  3. Penetrating Damp

1. Rising Damp

Rising dampness is a comparatively rare damp condition affecting the ground floor walls. It is caused due to the capillary action, where the moisture content from the ground level moves upwards through the walls. Normally rising dampness is initially noticed due to the damage it drives to the internal walls of your house. The affected wall. An observable stain appears on the wall in the shape of a tide mark at the point where the groundwater has reached. 

2. Penetrating Damp

Penetrating dampness is due to the water leaking through walls. This is mainly caused due to faulty guttering, roof leakage, or cracks in external walls. This issue can be easy to solve if you can identify the cause. It can take some time for the moisture to evaporate.

3. Condensation Damp

This is the most general type of dampness, Which is as easy to remove as it forms.  When humid air comes in contact with a cold surface such as a wall, window, mirror, etc.—condensation happens. Tiny drops of water occur because the moisture in the air is too much for it to hold. Airborne water vapor can originate from plants, human respiration, and even naturally. Even though you can’t see it, your house has it. Water vapor is harmless and freely floats throughout your home. It only starts to get more problematic when it comes into contact with something cold. The best method for getting rid of condensation dampness is ventilation.

What are the Indications of Damp Problems?

You can easily find the dampness in your home. The following are some of the indications to look out for:

Musty Smell

Most of the time, damp issues expose themselves because of their musty smell. If your nose is sharp enough, you can easily identify this smell in the damped areas such as walls, floors, and ceilings.

Peeling Wallpaper or Paint

Damping walls can cause paint to fade, wallpaper to peel, and crumbling plaster. Keep an eye out for these indicators, especially if plaster is crumbling at the base of walls, as this may indicate rising dampness. 

Visible Mold Growth

One of the most obvious indicators of moisture in the house is mold. On walls, ceilings, and around the frames of windows and doors, visible black mold will form due to the dampness. It may be dangerous if ignored, especially for people who have respiratory conditions like asthma.

Damp Ceilings, Walls, and Stains

If your walls or ceilings feel wet to the touch or if you notice spots on plaster that are brown or yellow, you probably have a damp problem.

Rotting Skirting Boards

Rotten wood, such as skirting boards, may indicate the presence of rising humidity. If rising moisture takes hold, damp skirting may also begin to separate from the wall or crumble underfoot, and wooden floorboards may start to rot. 

What are the Damp Prevention Techniques?

When you compare treating the dampness with prevention, it is always easier and cost-saving. The following are some major prevention strategies you can apply:

  • Proper Ventilation: Make sure your house is properly ventilated. Particularly in the bathroom and kitchen areas, as they are high-moisture areas. You can use exhaust fans and different types of windows or proper air circulation.
  • Maintaining Gutters and Downspouts: Regularly check the gutters for cleanliness and well-being. If not, repair to prevent water from overflowing and seeping into walls.
  • Addressing External Ground Levels: Always ensure the ground level around your home slopes away from the foundation to avoid water accumulation.
  • Water-Repellent Treatments: You can apply waterproof sealants to exterior walls. It will be more helpful if you live in high rainfall area.

What are the Damp Proofing Solutions?

The following are the commonly used damp proofing techniques:

1. Damp-Proof Courses (D.P.C.)

The DPC (Damp Proof Course) stops groundwater from seeping into the walls and causing damage to your home. The optimal placement of the DPC is at the plinth level for buildings with a basement, or at least 15 cm above ground level for buildings without a plinth level. A DPC might be vertical or horizontal. All masonry walls, whether load-bearing or partitioning, often have a DPC layer installed underneath them. A damp-proof membrane (DPM) is a membrane material that is applied to prevent moisture transfer. Polyethylene sheeting is often used beneath a concrete slab to prevent moisture absorption by capillary action.

2. Waterproof Surface Treatments

The surface treatment aims to fill in the pores of the material that has come into contact with moisture by applying an external or internal thin layer of substance that repels water. Dampness can be effectively avoided with external treatment. Many surface treatments are used on both the internal and visible surfaces, including pointing, plastering, painting, and distempering. Lime cement plaster (1:6)—a mixture of one part of cement and six parts of lime—is the most widely used treatment to keep the walls dry. Sodium or potassium silicate is commonly used as a water-proofing ingredient in surface treatments.  

3. Guniting

Guniting is a dry-mix shotcrete technology that improves water resistance and prevents dampness. A thick, rich mix of cement mortar (1:3) or fine aggregate mix is applied on exposed walls and pipe surfaces. On that surface, the applied mortar hardens, strengthens, and repels water. This method of damp proofing is very useful during structure retrofitting and repairing old concrete works or monument structures.

4. Cementation or Pressure Grouting

Cementation is a dampproofing method, where a cement, sand, and water combination is pressurised, grouting into the ground’s fissures, voids, and cracks in the structural element. This treatment is typically applied to the foundations to prevent moisture intrusion. This method is also used to build water cut-offs to stop seepage, restore structures, and consolidate the earth to increase bearing capacity.

Conclusion

Dampproofing is a major aspect of the longevity and health of your home. Every rupee you spend on your home construction is priceless. You must understand the dampproofing techniques to avoid dampness in your home. By understanding the various types of dampness, you can easily identify and address these issues early. By considering the symptoms of dampness, such as rotting wood, musty odours, peeling paint, visible mold, and wet walls, you can start to use dampproofing solutions. Regular inspections and maintenance are essential to keep your living space dry, safe, and comfortable. 

For more detailed advice and professional assistance, consider consulting with experts like Brick & Bolt. Taking proactive measures against dampness will ensure your home remains a secure and pleasant haven for years to come.

Low Heat Cement and its Uses

0
Low Heat Cement

Low-heat cement is an essential material used in the construction industry,mainly in large-scale infrastructure projects. It is well known for its hydration properties and low-heat generation. This blog provides details regarding low-heat cement and its uses. 

What is Low Heat Cement?

Low Heat Cement

Low-heat cement is a type of Portland cement, characterized by low heat and hydration properties. Here the low heat and hydration properties refer to the release of less amount of heat during the reaction between water and cement. 

In standard Portland cement, this reaction can release comparatively more heat, which can lead to thermal cracking, mainly in large concrete pours. Low-heat cements are primarily formulated to release less heat, making them ideal for large concrete structures like dams, bridges, and foundations.

Low Heat Cement Composition

Low-heat cement is made to achieve lower heat of hydration. Its primary components are as follows and as compared with ordinary Portland cement (OPC):

  • Tricalcium silicate is lowered by about 20 to 30% compared to OPC (40 to 50%).
  • Dicalcium silicate is increased by about 40 to 50% compared to OPC (20 to 30%).
  • Tricalcium aluminate is limited to less than 5% compared to OPC (10%).
  • Tetracalcium aluminoferrite remains the same as OPC (8 to 12%).

These changes can help in reducing the heat of hydration, which normally ranges from 60 to 80 cal/g in low heat cement compared to 90 to 100 cal/g in OPC.

The reactions normally involved in the hydration process are,

C3S + H2O → C-S-H + Ca(OH)2 + Heat

C2S + H2O → C-S-H + Ca(OH)2 + Heat

The decrease in the Tricalcium silicate and dicalcium aluminate helps reduce the heat of hydration. The heat of hydration for low-heat cement normally ranges around 260 J/g. This is important in mass concrete pours as there will be temperature differences that can lead to internal stress forming cracks.

Properties of Low-Heat Cement

Properties of Low-Heat Cement

Some of the properties of low-heat cement and their standard values are given:

  • Specific Surface Area – 250 m2/kg Min
  • Initial Setting- minimum 60 minutes
  • Final Setting – 600 minutes to 720 min and up to a maximum of 12 hours
  • Compressive Strength at 7d – 13.0 MPa Min
  • Compressive Strength at 28d – 42.5 MPa Min
  • Breaking Strength at 7d – 3.5 MPa Min
  • Breaking Strength at 28 d – 6.5 MPa Min
  • Hydration heat at 3d – 230 KJ/kg Max
  • Hydration heat at 7d – 260 KJ/kg Max
  • Hydration heat at 28d – 314 kJ/kg Max

Heat of Hydration

The lowered Tricalcium silicate quantity and increased dicalcium silicate amount can produce lower heat of hydration. It is crucial for large concrete pours as their internal temperature can rise and cause cracking.   

Setting Time

Low heat cement has a longer setting time when compared to OPC. The initial setting time varies from 60 minutes to 90 minutes and the final setting time varies from 10 hours to 12 hours. This  is helpful in large-scale projects and  gives more time for the placement of concrete, thus reducing the risk of cold joints. 

Strength Development in low-heat cement

The strength development in low-heat cement happens at a slower pace compared to ordinary Portland cement. This means that while it takes longer for the concrete to gain strength initially, the final strength achieved is comparable to that of ordinary Portland cement. Normally, the 28-day compressive strength of low-heat cement ranges from 30 to 50 MPa, depending on the specific mix design and curing conditions.

The proper mix design may include a water and cement ratio of 0.35 to 0.45. Some supplementary cement materials like slag or fly ash can help in reducing the heat of hydration. Proper curing conditions like maintenance of mixture and temperature control are important for optimal strength development.

Uses of Low-Heat Cement

Construction of Dams

There is a need for a large amount of concrete for the construction of dams, which may produce a significant amount of heat. Hence the usage of low heat cement can decrease the peak temperature, preventing cracking or thermal stress. The Hoover Dam is an example for dam construction carried out using low-heat cement.  

Large foundations

As large foundations need large concrete pours for their construction,the usage of low-heat cement can help ensure uniform temperature distribution. This reduces the differential thermal expansion and cracking. The foundations of skyscrapers and other large industrial structures can be considered as examples. 

Bridge Piers and Decks

Bridges and decks need highly durable cement that can resist thermal cracking. Hence low-heat cement can be used for their construction. This provides necessary properties to ensure long-term structural integrity. Millau Viaduct in France is an example for construction using low-heat cement.

Retaining walls

Retaining walls are built to resist high lateral earth pressures. By using low-heat cement, these structures can be crack-free and also maintain their load-bearing capacity.

Nuclear power plants

Safety and durability are significant in nuclear power plants. Here,low heat cement can be used to build the containment structures. The reduced generation of heat can help maintain structural integrity in extreme conditions. 

Advantages of Low-Heat Cement

Reduced Thermal Cracking

In mass concrete structures, using low-heat cement helps reduce the risk of thermal cracking. This is important for projects that include large volumes of concrete. Here, the rise in temperature because of hydration heat can be substantial.

Improved Durability

As the strength develops slower in low heat cement, it helps in long-term durability. The structures that are constructed using this cement may have less microcracking. Also, it helps in reducing forms of damage that endanger long term service life. 

Improved Workability

The extended setting time can help in improved workability. This is more beneficial for large-scale projects, as concrete placement and finishing need time. 

Cost-Effectiveness

Even if the initial cost may be slightly higher, the reduced risk can help in maintenance. The risks like thermal cracking are reduced and durability is increased. So using low-heat cement can help reduce the maintenance and repair costs for the lifetime of the structure. 

Others

The other advantages include the resistance to sulfate corrosion and ruptures. They have good lasting performance and anti-seepage. The increased workability and pouring capacity can help in marine concrete works, hydraulic concrete works, and so on.  

Conclusion

Low heat cement has become an essential material for large scale constructions. They provide benefits in technical and economic settings. They can reduce thermal cracking, and increase durability and workability. Their composition and characteristics give advantages of ensuring integrity and longevity. By understanding the uses and benefits of low-heat cement, engineers and construction professionals can improve the performance and lifespan of constructions. 

FAQs

1. Why is low-heat cement used in construction?

They are used to decrease the risk of thermal cracking. This is mainly in large concrete structures.

2. Why is low-heat cement used in dams?

Low-heat cement is used in dams to help in balancing the temperature rise. It is because of the low heat of hydration of this type of cement.

3. What are the initial setting times and final setting times for low-heat cement?

The initial setting time is over 60 to 90 minutes. The final setting time ranges from 10 to 12 hours.

4. What are the primary components of low-heat cement?

The primary components in low-heat cement are tricalcium silicate, tricalcium culminate, dicalcium silicate, and tetracalcium aluminoferrite.

5. Why are retaining walls constructed with low-heat cement?

Retaining walls are built using low-heat cement for preventing cracks and maintaining load bearing capacity under lateral earth pressure.

White Cement vs Plaster of Paris – Comparative Analysis

0
Plaster of Paris (POP) and White Cement

Regarding interior and exterior finishing in construction, both Plaster of Paris and white cement are considered two prominent materials. Each has its unique properties, applications, and advantages. Understanding the differences between Plaster of Paris and white cement can help select the right material for specific needs. 

This blog offers a detailed comparison between Plaster of Paris (POP) and white cement and their properties.

Are Plaster of Paris and White Cement Identical?

Although both POP and white cement are used in construction works, they have differences in key properties. Plaster of Paris is commonly used because of its fast setting time and is commonly used for artistic works. Its low strength and high water absorption capacity make it less durable when compared to white cement.

White cement is made of cement-based materials and it takes a long time to set. However, it offers a hard and durable finish. It is commonly used in construction for filling, binds, and leveling surfaces because of its durability and strength.

Composition

Plaster of Paris

Plaster of Paris (POP)

Plaster of Paris is composed of gypsum and the main element is calcium sulfateIt is obtained by heating calcium sulfate hemihydrate to 300 degrees Fahrenheit in the presence of water. 

The chemical reaction is,

CaSO4 (2H2O) + heat (150 degree Celsius) →​ CaSO4​ .1/4H2O + 3/4H2​O 

If the gypsum is heated at a 393K temperature, the water molecule evaporates, and plaster of Paris is made. Meanwhile, if Plaster of Paris is mixed with water, it converts into gypsum.

White Cement

White Cement

White cement is a Portland cement type and as the name suggests, it is distinctly white in colour. Calcium carbonate and clay are the main materials in white cement, but it also contains small amounts of manganese oxide and iron oxide. The production of white cement involves a controlled burning process at an approximate temperature of around 2642 degrees Fahrenheit. Then followed by cooling and grinding, white cement is obtained. 

Difference between Plaster of Paris and White Cement

AspectPlaster of Paris (POP)White Cement
CompositionMade from gypsum, which is heated to form a fine powder.Made from limestone and clay, containing more lime and iron oxide.
Setting Time
Sets quickly, around 20-30 minutes.
Initial setting time is 45 minutes, and the final setting time is 8-10 hours.
StrengthLower compressive strength (5-15 MPa).Higher compressive strength (20-50 MPa).
ColourWhite or off-white in appearance.Pure white, with a whiteness of around 80-84%.
DensityLower density (700-900 kg/m³).Higher density (1400-1500 kg/m³).
DurabilityLess durable and prone to cracking over time.Highly durable and resistant to moisture.
Moisture ResistancePoor; not suitable for damp or wet areas.Excellent; suitable for both interior and exterior applications.
UsesUsed for ceilings, moldings, and decorative work.Used for wall putty, waterproofing, and tile fixing.
FinishGenerally more affordable.More expensive than POP.
ApplicationEasy to apply, ideal for quick projects.Requires more effort and time for application.

Applications

Plaster of Paris

  • Architecture and Decorations: POP is used in creating intricate decorative items such as false ceilings, mouldings, and cornices. This helps in producing artistic and creative finishes in buildings. 
  • Art: POP is used for crafting detailed sculptures. It gives a smooth and workable medium that can give finishes similar to wood or stone.
  • Medicine: In the medical field POP can be used for making casts and molds. It forms an orthopaedic cast to mobilise broken bones, thus providing a sturdy and supportive structure. 
  • Fireproofing: POP is used in various fire protection and fireproofing products. It helps to reduce the fire spread in buildings.
  • 3D Printing: In recent years POP has been used in 3D printing as it helps in creating detailed and precise models. 

White cement

  • Building Projects:When white cement is combined with colour pigments, it gives striking visual effects without any compromise to structural integrity. It is also used in ornamental pillars and false ceilings.
  • Custom floors: Combining white cement with marble powders, marble chips, and colour pigments gives limitless possibilities for custom designed floors.
  • Filling gaps in tiles: White cement can be used to fill the gaps in ceramic, vitrified tiles, and marble floors. Adding this makes the floor appear like a monolithic slab and the most difficult task is to remove the white cement in the tiles
  • Sealant: White cement can be used as a sealant for gaps that occur when installing bathroom fixtures and other plumbing fittings.

Advantages and Disadvantages 

Advantages Of Plaster of Paris

Plaster of Paris is durable and lightweight. It has low thermal conductivity and excellent fire resistance, acting as a heat insulator. It adheres well to fibrous materials and provides a smooth, firm surface for painting, preventing alkali attacks and chemical reactions. It offers a decorative interior finish with the ability to be molded into various shapes.

Disadvantages  of Plaster of Paris

Plaster of Paris is more expensive than cement or cement lime plaster. It requires a professional application and is not suitable for exterior finishes due to its slight solubility in water and inability to withstand excess heat, which can lead to an untidy appearance.

Advantages of White Cement

White cement provides exceptional durability and strength. It has a pure white colour that gives aesthetic appeal and design flexibility with a range of colour options. The low alkali content helps in reducing chemical reactions and improves lifespan. Additionally, the reflective properties of white cement help in keeping outdoor surfaces cool. 

Disadvantages of White Cement

White cement is more expensive than grey cement due to its production methodology. Maintenance has to be done carefully as it tends to be discoloured or stained easily. White cement must be handled with proper professionals and if the curing process is improper, then it affects the colour and durability. Additionally, the reflective properties of white cement may cause glare.

Plaster of Paris and white cement are important in construction, and each has its specific applications. Plaster of Paris can be used for quick setting, lightweight, and decorative uses, while white cement provides strength, durability, and aesthetic appeal. 

It is important to understand their properties before applying them practically to ensure the desired outcome from your work.

FAQs

1. Which material is more suitable for intricate artistic work?

Plaster of Paris is more suitable for intricate artistic work.

2. Which material is known for its smooth finish?

Plaster of Paris is known for its smooth finish.

3. What is one advantage of white cement in hot climates?

White cement’s reflective properties help keep surfaces cool in hot climates.

4. What is a key advantage of Plaster of Paris in construction?

A key advantage of Plaster of Paris is its quick setting time.

5. Which material has a higher compressive strength?

White cement has a higher compressive strength.

NRI real estate investment in india: A Complete Guide with Legal Considerations

0
Indian Real Estate for NRIs

NRIs always look for opportunities to purchase properties in India. There is no doubt that the real estate market in India is continually booming over the years and offers your best ROI. This is what turns various real estate investments in India for NRIs. When you tap on constructing the property at the right location at the right time, you can expect to get the best returns. 

Therefore, you should not hold back for long; instead, take the step towards seeking NRI investment options in Indian property and play the right bet that offers you exceptional returns. 

Whether you are looking to construct commercial space for residential buildings, there is lots of room and investment opportunities for NRIs. Despite all these facilities and NRI investment options in Indian property, there are still long loaded debates on investing options for NRIs in India. 

Here, we have prepared a guide to investment opportunities and Legal considerations for NRI real estate investment. 

Importance of Purchase Real Estate Property for NRIs in India

Various real estate market growth figures are one of the attractive reasons for NRIs to invest in the Indian real estate market. This is just one of the various other reasons that make investing in the real estate market in India worth your attention. Here are several other reasons that turn NRI to buying property in India

High Returns on Investment

The Indian real estate market is renowned for offering more significant returns on investment and has continued to show a surge in growth over the years. Rapid urbanisation, exceptional growth in middle-class incomes, and ongoing infrastructure development have led to growth in the real estate market. 

The end value of properties in various metropolitan and tier-2 cities in India has seen even 10X returns, which makes them the go-to benefits of investing in Indian real estate for NRIs. 

Portfolio Diversification

The Indian real estate market opens the door for NRIs looking to diversify their investment portfolios. Real estate investment works as your armour in protecting against the growing economic crisis and inflation. Economic disparity is unpredictable and can hit you anytime but when you have your investment in properties, you will never be down on money. 

Support your family and future stability

NRIs who live in foreign countries away from their families always look ahead to support their families financially. This makes investing in the real estate market the most convenient option, as you can support your family, give them financial stability for retirement, or give them suitable retirement plans. Investing in the Indian real estate market is your way to build an empire and enjoy your retirement days. 

Regulatory Reforms and Government Initiatives

The government and local real estate authorities in India always strive to maintain transparency and security in the real estate market. RERA plays a crucial role in contributing to high-end accountability and transparency and protecting the rights of investors in the real estate market. 

Best Investment Options to Buy Property in India for NRIs 

Metropolitan Cities

Metropolitan cities are the perfect destination for purchasing property in India. There are several metropolitan cities in India where the demand for residential and commercial properties is unstoppable. Mumbai, Delhi, Bangalore, etc., are some of the best cities for NRI property investment in India. 

These cities will never disappoint in offering promising investment opportunities in India for NRIs. From luxury apartments to independent houses, NRIs are sure to find the best investment opportunities in metropolitan cities.

Vacation Homes 

Vacation homes are the perfect investment opportunities for NRIs in India, which is very helpful, especially for those who love to travel. Various destinations like Kerala, Uttarakhand, etc., are some of the best places to look for vacation homes. 

This will not only provide convenience while travelling between cities but also allow you to make a significant amount of money by renting it out. Vacation homes in hill stations are a perfect opportunity to create a revenue stream with no limits to growth. 

Commercial Real Estate

Growing demand for office space, shopping malls, and industrial properties in India has led to commercial real estate being the perfect investment for NRIs in India. A commercial property can generate a greater rental income and offer long-term capital growth. Metropolitan cities have growing business districts, as do smaller cities with developing commercial hubs. Commercial properties in prime locations have become increasingly attractive investments with the growth of corporations, co-working spaces, and retail centres.

Must know Legal Considerations for NRIs to buy properties in India 

Property Types

Foreigners are permitted to purchase residential and commercial property in India. However, unless inherited or gifted, they are not permitted to get agricultural land, plantation properties, or farmhouses. To ensure compliance with Indian laws, it is crucial to understand this restriction. To prevent any property dispute, NRIS must make sure that the property adheres to the legal requirements before purchasing it to avoid legal issues.

Regulatory Requirements

Complying with regulatory requirements is an ideal legal consideration while completing the investment deal in India. To facilitate the investment process, it is essential to have Indian bank accounts to carry out property transactions in India. 

Purchase funds must be transferred through regular banking methods or from their non-resident external (NRE), non-resident ordinary (NRO), or foreign currency non-resident account (FCNR). The Foreign Exchange Management Act regulations must be followed to make the investment legal.

Implications for taxes

Property sales by NRIs in India are subject to capital gains tax implications for NRIs investing in Indian real estate. The tax on short-term capital gains (on properties held for less than two years) depends on income tax slab rates, whereas indexed rates apply to long-term capital gains. However, rental income from property is subject to tax under Indian law. Considering the tax puzzle, it is important for NRIs to understand the tax implications for NRIs investing in Indian real estate on Indian tax laws in order to comply with them.

Funds Repatriation 

It is possible for NRIs to repatriate property sales proceeds after paying taxes. A foreign exchange fund can be used to purchase the property without any limits on remittances of principal. However, the sale proceeds can only be repatriated when they were purchased using rupees. Repatriation rules must be understood by NRIs to ensure their funds are managed efficiently and without legal consequences.

NRIs have the golden opportunity to earn and prosper with the Indian real estate market investment opportunities on the rise. Brick & Bolt, the best construction company in India, acts as your go-to partner in constructing the property for your needs. Whether you are looking to develop vacation homes in Bangalore, a corporate office in Delhi or residential houses in Chennai, we can help you exceed your construction requirements with world-class amenities. 

Our team of real estate developers never disappoints in constructing the best property for your dream investment in India. 

So do not wait before your favourite location fades up, contact us today and get your head towards best construction. 

A Comprehensive Guide to Masonry Cement

0
A Comprehensive Guide to Masonry Cement

Masonry cement is a significant material that is used for mortar in the construction of masonry. It’s properties, composition, and applications make them unique compared to  other cement types. It is used in various applications making it indispensable in the construction industry. This blog will explore the details regarding composition, properties, and other information about masonry cement.

What is Masonry Cement?

Masonry cement is a type of cement designed for use in the construction of brick, block, and stone structures. It is mainly composed of Portland cement, which provides early strength, along with air-entraining agents that enhance plasticity and water retention. The formulation often includes hydrated lime or other inert fillers and additives, which contribute to the cement’s overall performance by increasing water retention, workability, and durability.

The primary function of masonry cement is to bond bricks, blocks, and stones together, ensuring both structural integrity and an aesthetically pleasing finish. 

Masonry cement

Composition of Masonry Cement

Masonry cement primarily consists of a blend of Portland or blended hydraulic cement, along with some plasticizing materials like limestone or hydraulic lime, and  other additives. All the added materials help in improving the properties of masonry cement. To ensure the consistency of cement, all these materials are proportioned in the cement manufacturing plant. 

Masonry cement is produced by incorporating a substantial quantity of either active or inert blended materials, along with slaked lime, into Portland cement. This type of cement is characterized by its enhanced workability and ability to retain water, although it haslower strength compared to other types.

Additionally, masonry cement can be created using active mixtures such as fly ash combined with lime or gypsum. The various grades of masonry cement available include 225, 275, and 325, and others.

Applicable Standards

Masonry cements adhere to ASTM C 91 standards, specifically designed for masonry applications. They are used to create ASTM C 270 mortars in types O, N, S, and M, meeting either property or proportion specifications. The sand used with masonry cement for these mortars must comply with ASTM C 144 standards.

Properties of masonry cement

Properties of masonry cement

Physical properties 

ASTM-91 is the standard specification for masonry cement. There are 3 main types:type S, type N, and type M masonry cement, each have differentphysical properties according to ASTM C-91.

  • Fineness: The fineness of the cement that is residue present on a 45 µm [No. 325] sieve, maximum of 35% is withthe range of 24 in all the S, N, and M types of masonry cement, and the autoclave expansion is 1.0 for all the 3 types. 
  • Setting Time: The initial setting time is 2 hours for Type N and 1.5 hours for Types S and M, while the final setting time is uniformly 24 hours across all types.
  • Compressive Strength: The comprehensive strength of 7 days psi for N type is 500, S type is 1300, M type is 1800 and the comprehensive strength of 28 days psi for N type is 900, S type is 2100, M type is 2900.  
  • Air Content: The minimum volume of air content is 8% in all three types of cement and the maximum volume of air content is 21% in N type and 19% in S and M type. 
  • Water Retention: The water retention flow after the suction is 70% in all three types. 

Other properties

Workability

Workability is the mortar’s ability to cling to head joints, smoothly slide off the trowel, and support masonry units. Good workability, maintained over time (known as board life), is essential for quality construction. Adding plasticizers in masonry cement improves workability, board life, and water retention.

Strength

Masonry cement simplifies batching and ensures consistent mortar strength, exceeding ASTM C 270 standards. High-strength types S and M are ideal for special applications like load-bearing and below-grade masonry. Bond strength, crucial for construction, is influenced by unit and mortar properties, ambient conditions, and workmanship. Most masonry cements achieve flexural bond strengths over 690 kPa (100 psi).

Durability

Durability factors include freeze-thaw resistance, drying shrinkage, sulfate attack resistance, water absorption, and soundness. Generally, masonry cement mortars excel in these areas, particularly in freeze-thaw resistance, due to controlled air content, outperforming non-air-entrained Portland cement-lime mortars.

Water Permeance

Water permeance in masonry depends on design and workmanship. Single wythe masonry is prone to water penetration, making proper joint filling, tooling, flashing installation, and cavity cleaning crucial. Masonry cement mortars’ excellent workability, strength, and durability ensure watertight construction, supported by extensive laboratory and field performance.

Masonry Cement Manufacturing Process

Due to its low strength, masonry cement is not suitable for use in reinforced or structural concrete. Instead, it finds applications in industrial and civil building masonry, plaster mortar, and cushion concrete, and others.

Depending on the requirements, the manufacturing process of masonry cement can vary. Here are three methods commonly used:

Masonry Cement Based on Fly Ash:

It is composed of 65% fly ash, 18%  clinker, 11%  lime, and 6%  gypsum. These materials are combined and ground in a cement ball mill. This method uses fly ash to convert waste materials into a building material and helps in promoting environmental sustainability.

Composite Masonry Cement:

It is composed of 0 to 45% cement, 5 to 50% quicklime, 0 to 20% gypsum, 0 to 10% sodium sulfate, and 40 to 90% industrial waste residue.

Industrial waste residue and gypsum are dried and mixed according to a specific formula, then ground in a ball mill to achieve a fineness where 2 to 10% remains on a 4900-hole sieve.

Iron Tailings-Based Masonry Cement:

It is composed of iron tailings, high calcium coal ash, slag, sodium sulfate, early strength agents, fly ash, or coal cinder. This method involves mixing these materials, offering benefits like reduced investment, lower costs, and simpler technology.

The manufacturing process of masonry cement shares similarities with other types of cement, involving several key steps:

  1. Crushing
  2. Raw Materials Grinding
  3. Homogenization
  4. Clinker Production
  5. Cement Grinding
  6. Packing and Shipping

This structured process ensures that masonry cement meets the necessary standards for various construction applications, providing a reliable and cost-effective material for builders.

How to Apply Manstory Cement

Successful masonry cement application requires careful adherence to good workmanship principles, such as properly filling head and bed joints, careful placement of units, and appropriate joint tooling. Adjust construction procedures and schedules for extreme weather conditions and ensure proper cleaning. 

Fresh mortar should be mixed as needed to prevent stiffening. If the mortar becomes stiff, restore workability by adding water and remixing, though avoid using mortar over 2.5 hours old. Minimize cleaning by practicing good workmanship, dry brushing after tooling, and removing mortar splatter promptly with nonmetallic tools. If cleaning solutions are necessary, ensure compatibility with masonry units.

Uses of Masonry Cement

Cement mortar is essential in construction for various applications:

  • Cement mortar fills gaps between bricks and stones and provides a soft, even bed for brick and stone layers.
  • It protects joints and surfaces in brick and stone masonry and fills pipe joints effectively.
  • It can improve the appearance of a structure by hiding open joints and creating a uniform look.
  • Cement mortar is suitable for seismic zones as it has adhesive properties.

Conclusion

Masonry cement is a crucial and adaptable material in the construction sector. Its properties, like improved workability, water retention capability, and durability, make it suitable for a wide range of masonry projects.

FAQs

1. What are the ASTM standards for masonry cement? 

ASTM standards for masonry cement is ASTM C 91.

2. What is the initial setting time for type S masonry cement? 

1.5 hours.

3. Can masonry cement be used in seismic zones? 

Yes, it is suitable to be used in seismic zones as they have adhesive properties.

4. Can masonry cement be used for structural concrete? 

No, because of its lower strength, it is not suitable for structural concrete.

How Much Steel is Required for a Column? A Comprehensive Guide to Column Reinforcement Calculation

0
Steel for home construction

Are you considering to build your new dream home? Then, the column will become the major focus point. The column is a very important factor for the stability and load-bearing capacity of the structure. But sometimes you wonder, “How much steel is required for a column?” Irrespective of the residential, commercial, or industrial structure purpose, one must know the steel requirements to design a cost-effective proper column design.

In today’s blog on Brick & Bolt, you will get a clear idea of the different factors influencing column steel quantity and its requirements.

What is a Column?

Columns are also called Pillars in construction. It can be defined as the structural elements that transfer loads from a slab of the structure to its foundation and to soil. They are placed vertically. Column rebar or Steel within the concrete columns supports different types of construction structures.

Longitudinal and Transverse Reinforcement

The total steel included in a column can be divided into two major components:

1. Longitudinal reinforcement: These are the vertical bars that run the length of the column. They are included to carry axial loads and bending moments. The minimum longitudinal reinforcement ratio in the column should not be less than 0.8%.

2. Transverse reinforcement: Generally known as ties or stirrups, these are horizontal bars used to tie around the longitudinal bars. They control the buckling of the longitudinal bars, provide confinement to the concrete core, and withstand shear forces. The minimum spacing between the stirrups, i.e., the pitch of transverse reinforcement, should not exceed 250 mm.

The amount of transverse reinforcement is typically specified as a minimum percentage of the longitudinal reinforcement or as a maximum spacing requirement.

Factors Influencing Steel Requirements

For determining the amount of steel required for a column, you have to consider the following major factors:

  • Load-bearing capacity: The column should be able to bear both dead and live loads of the structure safely. (Dead load is the permanent weight of the structure, and live loads are the movable weights such as the weight of occupants, furniture, or equipment.)
  • Column dimensions: The shape of the column and the column dimensions, such as height and width, will decide the amount of steel required.
  • Building codes and safety factors: The minimum steel requirements and necessary safety margins depend on the local building codes and regulations and industry standards. Make sure to obey them.
  • Type of construction: The rebar in column depends on the type of construction. It varies from a reinforced concrete structure to a steel frame building.
  • Environmental conditions: Different weather conditions like wind loads, seismic activity, and potential for corrosion can influence the quantity of steel.

Guidelines for Reinforcing Concrete Columns

The following are the major guidelines:

  • Generally, a column’s minimum diameter of longitudinal reinforcement is 12 mm. If the column is rectangular, there should be at least four steel rods. But, if the column is circular, there should be at least six rods.
  • The minimum longitudinal reinforcement ratio in the column should not be less than 0.8%. At the same time, the maximum percentage of steel rods used in the column should be at most 6% if the column contains lapped steel rods. However, if there is no lapped rod, we can use a maximum of 4% steel rod.
  • The lapping of longitudinal bars should be in an alternate way with a minimum of 48D overlapping.
  • Proper development length should be provided in the column’s main and side bars. The development length can differ from 2 feet to 3 feet.
  • The stirrups in the steel should be at least 7 mm. 
  • The minimum spacing between the stirrups, i.e., the pitch of transverse reinforcement, should not exceed 250 mm.
  • Proper hook length should be provided in stirrups. Hook length may vary from 2.5 inches to 3 inches. The hook should be bent at an angle of 135°.
  • The maximum spacing between the two columns can be 16 feet. The minimum size of the column should be 9″ x 9″.
  • The minimum cover to reinforce the column should be 40 mm. A clear cover in concrete is provided to protect the rebar in the column from rusting and prevent the steel bars from buckling while loading on it.

Column Reinforcement Requirement

Steel reinforced concrete columns, the higher quantity of steel in the column may cause the column to be brittle. At the same time, lower steel in the column makes it weak enough to bear the tension force. The amount of steel required is commonly represented as a steel column reinforcement percentage of cross-sectional area. This is known as the reinforcement ratio. The general formula is:

Steel Area = Reinforcement Ratio × Column cross-sectional area

How to Calculate Steel for Column? 

Let’s consider an example of calculation:

Take a square concrete column with dimensions of 12 inches × 12 inches and a height of 10 feet. 

Cross-sectional area of Column= 12 in × 12 in = 144 sq in

Assuming a reinforcement ratio of 2%:

Steel area required = 2% × 144 sq in = 2.88 sq in

This steel area can be achieved using various combinations of reinforcing bars, such as four #8 bars (4 × 0.79 sq in = 3.16 sq in) or six #7 bars (6 × 0.60 sq in = 3.60 sq in).

How to Optimise the Steel Usage?

The following are the modern design strategies that can help optimise steel usage in columns:

1. Computer-aided Design: 

Advanced software allows engineers to model and analyse structures more accurately. So that they can able to create more efficient designs.

2. High-strength Materials: 

By considering the use of higher-strength concrete and the best steel for house construction, you can lessen the overall quantity of steel required.

3. Performance-based Column Design:

The performance-based design focuses on the structure’s behaviour under different loading conditions. It can help you choose the most efficient construction materials.

If you are a homeowner or professional builder who is involved in construction; you must know about the steel requirements for columns. By considering this, you can build an effective column design. You can achieve a balance between safety, efficiency, and cost-effectiveness in your construction project. To understand in more detail, you can visit the nearby construction company in Jaipur, such as Brick & Bolt. It offers comprehensive solutions for your building needs. Their expertise lies in making your dream home a reality with a commitment to excellence; they guide you through every step of the construction process.