Home Blog Page 60

A Comprehensive Guide on Hydration of Cement

0
Hydration of Cement

Cement hydration is a chemical reaction that normally takes place when cement is mixed with water. 

The fine, loose, and plastic cement combined with water will undergo an exothermic reaction, losing its plasticity and beginning to harden. 

It primarily takes place to enhance workability and increase the durability and strength of the concrete. This blog explains cement hydration in detail.

Understanding the Hydration of Cement

The hydration process is a procedure in which the cement becomes one hard mass or a slurry after adding water. Introducing water to the cement leads to an exothermic reaction where a high temperature of about 60°C is reached. This process forms a mixture of calcium aluminate and calcium silicate hydrates in any form. 

The density of water on the surface of the cement permits the process of hydration to stay for at least weeks. 

Phases of the Cement Hydration Process

Cement Hydration Process

There are five different phases the cement undergoes in the hydration process to reach its desired strength. A closer look at the phases is listed below:

1. Initial Mixing Reaction

At first, when cement comes in close contact with water, the temperature starts to reach peaks. The alumina in the cement reacts with the water molecules and releases ions, namely sulphate and calcium. These ions form an aluminate hydrate also known as ettringite. The energy released from these chemicals is the reason for initial peaks in temperature. 

2. Dormancy

As the name indicates, dormancy means that the initial stage has come to an end, but a surface coating starts to develop. At the dormancy stage, the hydration process starts to slow down as there is not enough access to the water molecules. The concrete surface remains in a fluid state, whereas the amount of hydrated concrete keeps on increasing in a steady state. 

This phase is specifically used for transportation. However, the length of fluidity depends on the type of concrete used, its mix, and the transport length. Hence, it is important to optimise the concrete mix before transferring, and this phase ends with the initial setting of concrete. 

3. Strength Acceleration 

As heat increases and the hydration process starts to continue, the strength of the cement begins to increase. The reaction between calcium silicates leads to the formation of silicate hydrate, or CSH. The CSH partly impacts the strength of the cement formation. At this stage, it is important to note the temperature change. In the case of mass concrete application, the internal temperature should be below 70 degree celsius. Temperatures above this are not recommended. 

4. Speed Reduction 

As the maximum temperature is reached in the previous phase, the acceleration of the hydration process decreases. The process doesn’t come to a halt as there are still free particles available, but the reaction rate is reduced. 

The framework around the concrete can be removed at this stage as the desired strength is achieved. This can be achieved only by optimising and monitoring the internal temperature, time, and maturity of the concrete. 

5. Post Formwork

The final phase of the hydration process, the chemical process, slowly comes to an end. The formwork can now be easily removed, and the final durability and strength can be reached in a few weeks or months. 

Primary Products of Hydration

Primary Products of Hydration

During the process of hydration, there are several chemical products released that play a major role in concrete formation. 

Calcium Silicate Hydrate 

The calcium silicate gel is the initial product of the cement hydration process, which is important for the binding process. However, there is no predetermined ratio for the CaO and SiO2 processes. The general line is that about 50–60% of the hydrated product reaches this range. The gel fills the gap between the aggregates and cement particles, leading to the formation of a dense matrix of concrete. 

Calcium Hydroxide (Ca (OH)2)

Calcium hydroxide is another product that is released during the process, contributing to about 20 to 25% of the solidified volume of the cement paste. The calcium hydroxide, if maintained at a pH of 13, prevents corrosion during the reinforcement process. This protection is the primary and only role of the chemical product. 

Ettringite

When the hydration process occurs at full acceleration, the cement may form cracks in it. To prevent this process, gypsum is added, which reduces the solubility and controls the flash setting character. 

The sulphate from gypsum reacts with other chemicals, leading to the formation of calcium aluminate sulphate, which is also known as ettringite. 

This is used before the hardening process and hence does not affect the strength of the concrete or have any harmful effects on it. 

Conclusion

In summary, the hydration of cement plays a crucial role in giving the concrete its rigidity. However, the structural rigidity and strength of the end products also depend on the time, chemicals, and optimisation of temperatures.  Having optimised generation of hydration of heat ensures structural stability and durability. 

FAQs

1. What are the stages of cement hydration?

The cement hydration process has five different phases, namely the initial mixing reaction, dormancy, strength acceleration, speed reduction, and steady development.

2. What generally is the hydration of cement?

Cement hydration is an exothermic chemical reaction that occurs on mixing water with cement.

3. What are the factors that affect cement hydration?

The factors that influence the cement hydration process are time, temperature, curing stage, and composition of chemicals.

Everything You Need to Know About the Fineness of Cement

0
fineness of cement

What is the fineness of the cement?

The fineness of cement is defined as the measurement of the cement particle sizes and the specific surface area (SSA). It is usually calculated in square meters per kilogram and denoted as m²/kg. Cement fineness plays a crucial role in defining the factors that influence strength and quality. 

Cement fineness influences and controls various cement properties. This includes the rate of evolution of heat, the rate of gain of strength, and the rate of hydration. The common value of the fineness of the cement is around 300–400 cm2/kg.

How to measure the fineness of cement?

measure the fineness of cement

There are two common methods used to determine the fineness of cement. They are, namely:

  • The Blaine air permeability test 
  • The sieving method. 

The Blaine air permeability test involves determining the specific surface area by measuring the fineness of hydraulic cement. The specific surface area is the total surface area of all the cement particles in one kilogram of cement. It is expressed in square meters. When the specific surface area is greater, the finer the cement is.can be.

The sieving process involves the cement sample being strained through a standard IS sieve. The weight of the cement molecules that are larger than 90 microns is determined. The total percentage of retained cement particles is then calculated. In general, the fineness value should be less than 10% for the construction cement. 

W2 represents the weight of the cement that passes through the sieve with a particle size of 90 microns. Calculate the fineness using the formula: 

Fineness = (W2/W1) * 100. 

Factors Affecting the Fineness of Cement.

Factors Affecting the Fineness of Cement

Grinding Process 

The grinding process has a significant effect on the fineness of the cement. It controls the efficiency and has an impact on the final product of the cement. A variety of factors influence the desired cement particle size. It includes the type of mill, duration of grinding, and other grinding aids.

Clinker Composition 

The chemical constituents of clinker are the cement’s primary ingredient. It affects how efficiently it can be ground to a chosen fineness. The types and ratios of minerals in the clinker affect the grinding process. Clinker is made up of four minerals that create strong mechanical bonds when reacting. These minerals are dicalcium silicate (20–25%), tricalcium silicate (50–60%), tricalcium ferro aluminate ((6–10%), and tricalcium aluminate (6–10%). These influence the durability and strength of the cement.

Cement Type

  • Ordinary Portland Cement (OPC) usually requires finer grinding to achieve early strength and has a fineness ratio of 10%. It’s commonly used in building bridges, highways, and other structures.
  • Rapid hardening cement, also known as High-Early Strength Portland Cement, has a fineness ratio of 3–5%. It gains strength faster than OPC, but its final strength is only slightly higher.
  • Low-heat cement Has a fineness ratio of 5%. It’s similar to Portland cement but has a different chemical composition that generates less heat while setting.
  • Portland Pozzolana Cement (PPC): A hydraulic cement made by mixing Portland cement with pozzolanic materials like fly ash or silica fume. It may need less grinding and fineness than OPC.
  • Type II cement: Its fineness can be adjusted during grinding to reduce the heat of hydration. This is useful for mass pours like bridge abutments or dams. 

Cement Storage Conditions

The requirements under which cement is stored influence its fineness. Inappropriate storage, such as exposure to water, can lead to clumping and cause an effect on the particle size distribution.

Cement Quality Control

Continuous quality control measures throughout the manufacturing process, including constant monitoring of grinding parameters and adherence to standards,are needed to achieve and maintain the desired fineness.

Limitations on the Fineness of Cement 

  • Particle size: The particles of the cement when sieved should not exceed 90 microns, following IS standards.
  • Fineness modulus: The fineness modulus of cement is generally represented in percentage. It should not exceed 10%. In the case of >10%, it increases the rate of hydration and causes shrinkage, which makes it prone to react with alkali aggregators. This can cause cracking of the cement, expediting its deterioration.
  • Specific surface area: The standard fineness of cement is generally obtained by measuring its specific surface area. It is typically around 300–400 square meters per kilogram.
  • Grade requirements: 
  • 43-grade cement: required minimum fineness is 225 square meters per kilogram
  • 53-grade cement: required minimum fineness is 370 square meters per kilogram

Factors affected by the fineness of cement. 

  • Hydration rate: The finer the particles of the cement, the faster it reacts with the water. The fineness helps to increase the rate of hydration. The surface area for hydration is relatively larger in the finer cement. This helps to speed up the process of developing strength. The particle size fraction below 3 microns has the biggest effect on one-day strength, while the 3–25 micron fraction has the biggest effect on 28-day strength.
  • Strength gain: A larger surface area for hydration, will provide faster strength gain and development. Increased fineness of cement can provide a larger surface area. For example, in one study, the finest cement particles (C60) had a compressive strength of 57.4 MPa at 3 days, compared to 48.7 MPa for the coarsest particles (C30).
  • Setting times: When compared to the coarser particles, the finer cement requires a shorter setting time due to less heat of hydration. Fineness affects the performance of the concrete.
  • Workability: Finer cement can improve the workability of cement, but it may also need more mixing water to gain the required consistency. This could rather lead to increased shrinkage upon drying. To check whether the cement attained the proper consistency you need to do a cement consistency test  
  • Bleeding: Bleeding is defined as the separation of water from concrete. The solid materials in cement settle at the bottom of the surface due to gravitational pressure. This separates water and the solids of the cement. The fineness of cement can decrease bleeding in concrete. This is due to the slower rate of sedimentation process. The worst case of bleeding can be up to 20%.

Conclusion

The fineness has an important bearing on the cement. To achieve optimal performance, a proper understanding of the relationship between the fineness of the cement and the concrete properties is required. The fineness of the cement can make it easily blend with other components. It also provides better cohesion and adhesion between the components of the mortar. It is also crucial to know the calculated fineness of the cement. This helps to determine if the cement is finely grinded or not.

A Comprehensive Guide on the Uses of Gypsum in Cement

0
Uses of Gypsum in Cement

Cement is extensively used in the construction industry. Gypsum is used as a hardening agent in cement. Gypsum is a non-sulfate, soft mineral that can be mined and extracted globally. When used in construction materials, it helps to enhance their workability, durability, and resistance to cracking. 

The global gypsum production amounted to 160 million metric tons as an estimate in 2023. Gypsum occurs naturally between the sedimentary rock layers. The largest producer of gypsum in the entire world is China. In India, approximately 4.3 million metric tons, a small fraction of the world’s production (160 million metric tons) of gypsum, are estimated to be extracted from the mines.

In 2024–2025, cement production is estimated to increase by around 491 MT, of which the cement industry alone will need 19.6–24.6 MT. Gypsum is an important element that has many uses in cement, read on to learn more about it.

What is Gypsum?

Gypsum

Gypsum, popularly known as a common sulfate mineral, has significant commercial importance worldwide. It is mostly made of calcium sulfate dihydrate. The chemical formula is CaSO₄·2H₂O. Gypsum is commonly found in between the layers of sedimentary rocks. It is often used with many other minerals, such as celestine, dolomite, calcite, anhydrite, halite, sulfur, and aragonite. Gypsum, when dry, contains calcium (23%) and sulfur (17%). 

Uses of Gypsum in Cement

Uses of Gypsum in Cement

Gypsum acts as a binding agent in the cement and. controls various factors in it. It is also used in the walls where fire protection is required since it .has a natural fire-resistance property. Let’s look at its uses. 

Hydration Process:

Rate of hardening: 

During the final grinding process of the cement, gypsum is added. This should only be done once the clinker has cooled down during the cement manufacturing process. Gypsum also helps in controlling the rate at which the cement hardens. After the cement is mixed with water, the gypsum helps in preventing the setting of cement immediately. This gives sufficient time for mixing, transporting, and fixing the concrete.

Gypsum as a coolant: 

Cement  contains constituents of sulfates and aluminates, which.  generates heat upon mixing with water. Gypsum controls this heat of hydration and becomes a coolant in the cement.

Improves the cement strength: 

Gypsum produces hydrating products like ettringite, which results in denser composition of concrete. This, in turn, adds  compressive strength to the cement.

Refining the structural pores:

Gypsum can help in the morphological development of the cement structure. It refines the cement’s structural pores and improves the microstructure of hydration.

Setting time regulation

Gypsum helps in preventing the flash setting of the cement. It slows down the cement setting time, allowing space for other processes. How can it be done? When molasses solutions are added, they react with the gypsum to retard the hardening time. 

Workability

Gypsum in cement reduces friction between its particles, thus resulting in a mix with higher smoothness and improved workability.

Durability

Gypsum increases the durability of cement structures or elements by providing improved resistance to chemical attacks by sulfates and alkali-silicates. 

Effects of Gypsum in the cement 

Effects of Gypsum in the cement 
  1. The C-S-H (calcium-silicate-hydrate) morphology: By modifying the morphology of C-S-H, the durability and strength of the cement can be enhanced. It is done by using supplementary cementitious materials like fly ash or slag. 
  1. Controlling the reaction of tricalcium aluminate (C3A): Calcium sulfate also known as gypsum during grinding, can be added to clinker to control the reaction of C3A and prevent flash setting. 

Flash setting is when C3A reacts directly with water and sets instantly. The hydration reaction of C3A shifts when gypsum is present and ettringite is formed instead of platey calcium aluminate hydrates. The more gypsum that’s added, the more the C3A reaction can be retarded. However, if too little sulfate is added, the aluminate peak may occur before the tricalcium silicate (C3S) peak, which can make the C3S peak smaller and broader.

  1. Boosting strength after hydration: This can be achieved by optimizing the water-to-cement ratio, utilizing high-performance admixtures, and ensuring appropriate curing conditions in cement.
  1. Reducing curing time: Gypsum can help reduce the cement curing time. These can quicken the hydration process, allowing the cement to gain strength more quickly.

Gypsum in construction works

  • Gypsum fiberboard is used as a decorative plaster or building plaster for walls and ceilings. It offers good sound insulation, impact resistance, and humidity resistance.
  • Gypsum plaster: can be applied to smooth or rough surfaces to create a smooth interior finish that’s resistant to cracking and shrinking and is a good base for paints and other wallcoverings
  • Plasterboard: A type of wallboard made from gypsum and paper that’s easy to work with and strong and can be used to patch holes or cracks or replace entire sections of walls
  • Gypsum-based self-leveling screed: Also known as gypsum concrete underlayment, this is a commonly used product that can be used in all types of projects, from renovations to new construction

Conclusion

Gypsum plays an essential role in the manufacturing of cement. It contributes to the strengthening, workability, setting time, and durability of the cement. The careful use of gypsum in cement production leads to enhanced performance, improved longevity, and advanced construction practices, making it an essential component in the construction industry. It has various advantages that are beneficial when added to cement.

Understanding the Raw Materials for Manufacturing Cement

0
Cement-Manufacturing

Cement in the construction industry is a key constituent used as a binding agent worldwide. It plays a crucial role in the real estate industry, and its roots can be traced back to ancient Greece and Rome. It is used in concrete and mortar for binding during construction. 

In 2023, 4.1 billion tons of cement were estimated to have been produced worldwide. The first cement manufacturing plant was set up in Madras in 1904 in India. In terms of cement production, India ranks second behind China. About 65% of cement’s total consumption is in India, which has the biggest housing and real estate sectors. The growth of the cement industry also leads to economic development as there is an increasing demand for construction and other infrastructural activities. Read on to learn about the raw materials that are used to manufacture this essential material.

Raw Materials Used in the Manufacturing of Cement

raw materials

The preparation of cement using the raw materials involves the following process:

  • Step 1: Mining -The extraction of raw materials such as limestone and clay from mines and quarries. 
  • Step 2: Grinding process- These raw materials are grinded and crushed into a fine powder-like form. This is called raw material.
  • Step 3: Clinkerization– The raw material is blended in specific proportions and calcined in a rotary kiln at gradually increasing temperatures, from 600 to 1450 °C. The hot clinker is then removed from the kiln and cooled using a grate cooler. 
  • Step 4: Cement grinding and storage- The cooled clinker with gypsum is finely ground in a cement mill to form the hard cement. The other raw materials are added during the grinding process. 

The raw material added during the grinding process defines the quality of the cement. Therefore, the raw materials determine the cement grade. Let us discuss in detail the various raw materials that are used in the production of cement.

1. Limestone

Lime stone
  • Limestone is the key element of cement. It contains nearly 85–95% calcium carbonate (CaCO₃). 
  • 75% of  cement is limestone, which is thus the component of cement.
  • It contains impurities such as silica, alumina, and iron oxides.
  • For cement manufacturing, high-grade limestone is preferred

2. Clay

Clay
  • 30 to 40% of the cement is clay. It can also be used as SCM (supplementary cementitious material), in cement and concrete. It can improve strength and durability comprehensively. It reduces carbon dioxide (CO2) emissions.
  • The clay contains a mixture of silica (SiO₂), alumina (Al₂O₃), and iron oxide (Fe₂O₃). Therefore, it contributes to providing the necessary silica and alumina in the cement.
  • The moisture content of clay should be minimal for the process to be efficient. For cement clinker phases to form, clay is essential.

3. Shale

Shale
  • Shale is similar to clay and can function as  an alternative. It is composed of clay minerals, quartz, and organic matter. It provides comprehensive strength.
  • It is widely used in clinker formation.  
  • It is an alternative source of silica and alumina. Shale is required for the cement manufacturing process.

4. Sand

sand
  • Sand in cement is used to adjust the ratio of silica.
  • The sand composition has a silica content greater than 95%
  • The silicate phase contributes to the strengthening of the cement. It requires essential content of the silica.
  • Silica sand is 5–10% of the total raw mix.

5. Iron Ore

_Iron Ore
  • Iron ore contains 30–70% iron oxides like hematite (Fe₂O₃) and magnetite (Fe₃O₄). It gives color and strength to the final product of cement. 
  • The iron ore is like a rock or mineral from which the iron can be easily extracted. 
  • It contains sulfur and phosphorus, which are very minimal impurities
  • This contributes to 0.5–6% of the cement raw material.
  • The iron ore helps lower the melting temperature of the raw mix.

6. Gypsum

  • Gypsum contains 70–90% calcium sulfate dihydrate (CaSO₄·2H₂O). It is a soft sulfate mineral, which . usually controls the setting time of the cement when added to the clinker. 
  • It should be highly pure, as any impurities can affect the quality of the cement.
  • Gypsum is around 3–5% of the entire product. It is added to the final grinding process of the cement during its manufacturing.
  • Gypsum allows proper handling and placement, which helps control the setting time. In this way, the cement will not set too fast.

7. Fly Ash

Fly ash
  •  Fly ash is a byproduct of coal-burning power plants that can be used in concrete as a supplementary cementitious material (SCM).
  • It reduces cracking as it ensures a longer setting time. Fly ash also helps to enhance the durability and workability of concrete.
  • It is composed of 0–60% silica (SiO₂), 15–30% alumina (Al₂O₃), and 5–10% iron oxides (Fe₂O₃). It also reduces the heat of hydration, making it long-lasting.
  • It is composed of 0–60% silica (SiO₂), 15–30% alumina (Al₂O₃), and 5–10% iron oxides (Fe₂O₃). It also reduces the heat of hydration, making it long-lasting.

8. Blast Furnace Slag

Blast furnace
  • Blast Furnace Slag has hydraulic properties and is a byproduct of steel manufacturing. It is obtained from the production of iron in a blast furnace.
  • Ground Granulated Blast Furnace Slag (GGBFS) is a supplementary cementitious material. It contains 30–40% silica (SiO₂), 8–18% alumina (Al₂O₃), and 40–50% lime (CaO). It improves the cement properties and reacts with water to form cementitious compounds.
  • Slag improves sulfate resistance as well as the overall performance of the cement.

9. Bauxite

Bauxite
  • Bauxite, also known as red mud, is the by-product of alumina processing.
  • Bauxite contains a high aluminum content (30–60%). It is also a sedimentary rock. It enhances the formation of calcium aluminum oxide compounds.
  • It is typically used in types of cement like high-alumina cement.  During the reproduction of cement, it is used as a raw and pozzolanic material.
  • It also helps to reduce the melt formation temperature by 200 degree Celsius by adding 2-10% of bauxite residue. 

Conclusion:

In conclusion, the role of cement in the modern world is irreplaceable in the construction industry. Cement has widely evolved from its early origins to its modern role in sustainable development. As it articulates its strength and enduring value, cement has consistently proven its reliance. India has a high quality and quantity of limestone deposits. Therefore, the cement industry has great growth potential.

Can You Use Wood Primer on Walls?

0

Choosing the right primer is crucial to achieving a perfect painting finish for a project. The primary function of any primer is to ensure that paint adheres to the surface in the correct way. This gives the paint a smoother surface for the topcoat and also helps to increase its endurance. One question that commonly arises is whether wood primers can be used on walls. 

This blog will give you an understanding of wood primers and their suitability for surfaces of walls. 

Understanding Wood Primer

Wood primers are the undercoat preparation that must be used on wood before applying paint. It serves as a base and enhances paint adherence and endurance. The layers of defense that can protect wood from moisture and UV radiation are called wood primers. Additionally, they aid in shielding paint from harm and extending its lifespan.

Making a uniform base using wood primer can give a smooth surface that can be used for topcoats of paint. Wood primers can dry quickly and can be applied easily, making it a convenient choice for professionals as well as DIY enthusiasts. Wood primers are available in different sizes and colors in the market. 

Key Ingredients

Wood primer is a specialized coating composed of key elements that work together to prepare wood for painting. The foundation of a primer is resins, which bind it to the wood. These can be derived from various sources like alkyd, acrylic, or shellac. To ensure smooth application and drying, solvents are added, which can be either water or oil-based. While optional, pigments can be included to enhance coverage and mask imperfections. Finally, additives like antifungal agents or UV protectors boost the primer’s overall performance.   

Properties of Wood Primer

The magic of wood primer lies in its properties. It creates a uniform surface, allowing the paint to adhere strongly, extending the paint job’s life. By sealing the wood, it prevents moisture damage and rot. For woods with tannins, certain primers can block stains from seeping through, maintaining the paint’s color integrity. Also, primer can help in concealing the flaws of the surface, thus reducing the multiple coats of paint. Properly primed walls can make the paint more durable and resistant to damage.

Key Benefits of Wood Primer

Sealing the Wood: The uneven pores are sealed using wood primer, that prevents uneven absorption of paint.

Improving Adhesion:  wood primers can create a strong bond between the wood and paint to get a finish that lasts longer.

Smoothing Surfaces: wood primers can hide small blemishes and give a smooth base for topcoats.

Blocking Stains: It prevents dark spots or tannins from seeping through the paint.

Color Correction: It ensures consistent color coverage, especially when switching from dark to light shades.

Weather Protection: For outdoor use, it shields wood from moisture and decay.

Uniformity: It creates a consistent surface for easier and better paint application.

Can You Use Wood Primer on Walls?

Wood primer can be applied to walls, but it’s not the optimal choice. While it can provide a base for paint, numerous factors must be considered before its use on walls, such as:

Preparation of Surface: the wall must be clean, and smooth, that is free of any imperfections. 

Drying Time: Before the application of coatings, allow the wood primer to dry completely. 

Primer Compatibility: Wood primer might not effectively seal or block stains on wall surfaces like drywall.

Application: Apply the primer evenly according to the manufacturer’s instructions.

For ideal results, a wall-specific primer is generally recommended. It’s designed to address the unique characteristics of wall surfaces, providing better adhesion, coverage, and durability for your paint.

Differences Between Wood Primer and Wall Primer

FeatureWood PrimerWall Primer
PurposeSeals wood, prevents stainsSeals wall surfaces, creates even base
AdhesionStrong bond to woodGood adhesion to walls
DurabilityResists wood permeabilityNot specifically designed for wood
Stain BlockingBlocks wood tanninsOften blocks stains and marks on walls
Primer typesOil-based, shellac-based, water-basedDrywall, stain-blocking, multi-purpose

Pros and Cons of Using Wood Primer on Walls

Using a primer on walls can offer certain benefits, but it’s essential to weigh these against potential drawbacks:

Advantages

Improved Paint Adhesion: Wood primer helps paint stick better to the wall, enhancing durability.

Surface Sealing: It effectively seals porous surfaces, preventing paint absorption and reducing the need for multiple coats.

Stain Prevention: Wood primer can block stains from seeping through the paint, especially helpful on surfaces with underlying stains.

Smoother Finish: It creates a softer base for paint, minimizing the appearance of surface imperfections.

Disadvantages

Limited Surface Compatibility: Designed for wood, it might not be as effective on other wall materials like drywall.

Extra Time and Effort: Applying wood primer adds an extra step to the painting process, which is more time consuming than the use of normal wall primers

Higher Cost: Using separate primers and paint can be more expensive than all-in-one paint products.

Potential Application Issues: Excessive primer can hinder paint adhesion and cause chipping.

How to Apply Wood Primer to a Wall

Preparing Your Wall

Wood primers are primers made especially for wood surfaces; they might not work as well on walls as they would on actual wood. It’s critical to understand that a flawless and long-lasting finish may be achieved with the proper primer selection and application. To ensure optimal primer adhesion, lightly sand the entire wall and wipe away dust. Protect floors and trim with drop cloths and painter’s tape.

Applying the Primer

Thoroughly stir the wood primer before use. Begin by applying primer to edges and corners with a brush. For larger areas, use a roller in a W or M pattern for even coverage. Allow the primer to dry completely as per the manufacturer’s instructions. Lightly sand the dried primer to smooth it out, then wipe away dust. If needed, apply a second coat of primer.

Cleaning Up

After completing the priming process, clean brushes and rollers immediately. Carefully remove painter’s tape and dispose of drop cloths.

Conclusion

While wood primer can be applied to walls, using a wall-specific primer is generally recommended for optimal results. Primers that are designed specifically for the surface of wood are wood primers, and they may not be able to give the same performance on walls as in wood. It is important to know that the correct selection of primers and their application can provide a durable and flawless finish.

FAQs

Can I use wood primer on the walls?

While it’s possible, wood primer is not ideally suited for walls. Wall primer is generally recommended for better results.

Can wood primers be used outdoors?

Yes, many wood primers are formulated for outdoor use to protect wood from adverse effects of weather.

Can primers be used on any surface?

While not always required, primer is generally recommended for better results, especially on porous surfaces or when covering dark colors of the undersurface.

Cement Blocks for Flooring: Durable and Versatile Solutions

0
Cement For Flooring

The history of cement starts from over 6500 BC. Evidence displayed that the regions of Jordan or Syria used concrete floors and in buildings. However, the ancient Romans were the first ones to create proper cement and used it in almost all their construction. 

Cement can also be used in flooring as it can resist wear, fire, water, odour, and bacteria. Moreover, they don’t cause scratches and are easy to clean. In India, the cost of concrete per square foot ranges between Rs. 40 and Rs. 400. Hence, cement play a crucial role in flooring, and this blog explains its use in detail.

Types of Cement Flooring

There are different types of cement flooring to look at before selecting the type of cement for your floors.

Polished Concrete 

Polished concrete is a type where the naturally sturdy concrete adds a little touch of luxury to the house. To get polished concrete, the constructor uses the standard 5:1:5 ratio of cement, sand, and aggregate. 

These components are then ground into fine paste with the right equipment, creating polished and glassy concrete floors. These floors can withstand spills and contamination and can resist any damage.

Stained Concrete

Stained concrete in its natural form remains plain without any designs. However, by adding acid-based stains, different types of designs and patterns can be created, making them suitable for commercial or residential places. Moreover, the designs and colours are customisable according to the owner. 

The colour will not chip, change, or deteriorate as it penetrates deep into the concrete and remains in it. These concrete floors require low maintenance; however, waxing once in a while can retain the shine and add aesthetics to the interior of the building.

Terrazzo-Style Concrete

Terrazzo, a composite material made from chips of marble, quartz, granite, or glass set in concrete or epoxy, adds a stylish and durable touch to flooring. This style of concrete flooring is classy yet durable. The terrazzo finish permits the floor to achieve a distinct finish and design. Terrazzo is a little different from polished concrete.

In terrazzo, the concrete slab is covered with epoxy, and the aggregate is ground and then polished at the end. However, polished concrete is just a slab.

The terrazzo style of concrete flooring is at least 30% stronger than normal concrete flooring. They offer a wide variety of customizations and cover the benefits of concrete.

Epoxy Flooring

The epoxy type of concrete takes the game of flooring to the next level. They are designed not only to resist everyday activity but also to resist stains, moisture, microbes, and chemicals. 

Epoxy does come in different forms, namely flaky, quartz, and metallic. Epoxy flooring is one of the versatile flooring options, as it creates shine, goes well with lighting, and is also slip-resistant. 

The flooring can be used in the kitchen, bathroom, or other rooms that require water-resistant flooring. 

Pros and Cons of Cement Flooring

Cement flooring has its own positive and negative sides, and a glimpse of them is described below:

Pros of Cement Flooring

Durability

Concrete floors are sturdy materials that are environmentally and commercially used by the majority of people in construction. The flooring material can support heavy furniture, scratches, and elevated temperatures. When compared to other flooring materials, they require less maintenance.

Range of Designs

Cement floors come in different designs and colours and can offer you a range of luxury touches to your house. Concrete can incorporate acid-based stains and paints that give them vibrant colours, while rubber stencils can add texture to them. They can be used to create beautiful combinations of durability and sophistication. 

Incorporation of Heat in the Floors

The concrete, when poured over a slab, has options to introduce heat cables or water tubes that create warm floors during winter days or cool floors during summers. 

Disadvantage of Cement Floors

Hardness

Cement floors are hard, and not everyone finds them comfortable. Moreover, cement floors are heavy and can be a good catch for buildings on the lower floors; however, when they have to be used on the second floor, then the overall building should be able to sustain it. Hence, it is important to decide based on the overall factors of your building.

Collect Moisture 

Cement flooring may experience damage if there is water movement down to the foundation. They can collect the water, which over time may affect the paint and get damp. 

Environmental Susceptibility

Cement flooring as a whole is a reusable and biodegradable material. However, the making of cement releases enough energy to generate a lot of carbon dioxide. So, they may be environmentally unsustainable. 

Conclusion

In summary, cement flooring is a good option with numerous benefits. The cement materials used in flooring are durable, prevent microbial growth, resist scratching, and resist fire. However, cement flooring is still on the rise and gaining traction, mainly among people who have pets. There are certainly advantages and disadvantages to cement flooring, and one must opt for the type with careful consideration. 

FAQs

Is cement flooring better than tiles?

Compared to tiles, concrete flooring can withstand wear and tear; apart from that, it is resistant to fire and requires less maintenance compared to tiles. 

Is concrete flooring a cheaper option?

Polished concrete floors are indeed cheaper compared to hardwoods. This makes concrete floors a high-traffic option compared to other materials.

Can a second-story building support cement floors?

Not all buildings can support concrete floor elevations; however, when the building is still in the planning phase, the architect can decide on the option of incorporating it and make the required additions. 

Cement Sheet Leakage Solution: Effective Fixes and Tips

0
Cement Sheet Roof Leakage Solution

Leaky cement sheet roofs are one of the common problems seen in both commercial and residential spaces. About 80% of property owners complain about some kind of leakage in roofs. This blog covers all you need to know about the causes, steps, and how to prevent leakage in your roofs. 

The Causes of Leakage in Cement Sheet Roofs

To seal the damaged roofing, it is vital to understand or find the cause that leads to leakage. Determining the source of leakage will help to understand the causes that will allow the owners to take the next steps. There are different causes of cement sheet roof leakages; an overview of some are described below.

Flashing

Roof flashing is a metallic material that is found in roofs to prevent direct water from entering the area. It is generally added between joints between different materials or angles to prevent leakage from those points. However, improper flashing can damage the connection between the roofs. 

Moreover, older flashing tends to lift during storms or due to age, which leads to the formation of gaps. The water from these areas enters the house through the attic.

Clogs in Gutters

Gutters carry water from the roofing systems and make sure they are not stagnant in one place. However, when there is damage or blockage in gutters, they tend to collect the water and lead to leakage and seepage as time passes. 

The problem in gutters could be solved if you regularly inspect for any leaves, glass pieces, or materials that are sticking out from the pipes and blocking them. 

Erosion in Chimney

Chimneys can be the primary area where erosion takes place, and this is because chimneys require large holes in the roofing. They are also surrounded by different materials to ensure safety and prevent water from leaking. 

However, different materials could bring in new issues, namely corrosion in the chimney area due to moisture collection. It is important to inspect the area at least twice every year to prevent leaking. 

Gaps in Joints

Cement sheet roofs are generally created by joining multiple sheets or panels together by bolting or screwing. The holes around these screws or gaps between sheet joints allow space for water leakage or seepage into the building.

Other causes of leaking

One common and well-known cause of leaks is cracks or holes in the roof that develop over time. This allows penetration of water mainly during rainy weather. 

Insufficient sealing in skylights or around vents can also lead to leakage in cement sheet roofs. It is crucial to understand the root cause of the problem and repair it swiftly to avoid further issues.

Steps to Repair Leakage in Cement Sheet Roofs

The primary step is finding the exact location of the leakage. Then fill the gaps caused by any cracks or holes by applying a layer of roof concrete or mortar. 

Once this is completed, a primer is applied to smooth the layer and promote adhesion. To prevent leaks, an elastomeric seal is used at the final step. There are different ways and steps to stop leaking in cement sheet  roofs.

Regular Roof Inspections

It is important to appoint a roofer to check the condition of roofs and their quality. They inspect for any potential clogs in drains, minor cracks, or areas required for resealing. 

When the problem is identified, then they can be solved. Do not neglect small issues, as they can lead to bigger troubles in the future. Repair them immediately and save your money.

Clean the Area

Keep the area that needs any repair clean. Removal of dirt or other materials will help to improve adhesion and seal the area effectively. You can use a brush or other scrapping material to remove leaves or dirt from the area of repair. Once it is cleaned thoroughly, the next steps can be followed. 

Fill the Holes

To fill a concrete roof, it is vital to have specific repair materials and tools. After cleaning, use a roofing cement or mortar to carefully fill the area that is damaged on a larger scale. 

For smaller cracks, use elastomeric sealant or caulk, as they are more appropriate filler materials. Give the materials the time to stabilise. 

This is an important step that will prevent further water leakage. Make sure to do regular inspections and repair the roof to avoid major problems.

Roof Primer

Once you have filled the cracks, the next step is primer application. Primer is an inevitable step. Primer in the roof helps to strengthen the bond between the surface of the roof and the sealant. Hence, applying a primer ensures protection and prevents further leaking of water. 

Roof primers also contribute to expanding the lifespan of cement sheet roofs, and they do require some time to dry. Do read the procedure and follow the instructions carefully.

Elastomeric Sealant

Elastomeric sealant makes sure that the roof is protected in the future. They are packed with excellent waterproofing properties and make sure that the roof doesn’t leak in the future. 

The primer makes sure that the area is now ready for sealant adhesion. The primer and the elastomeric sealant create a durable layer that seals water from entering the building. 

Measures to Prevent Further Leaks

There are certain steps owners can take to prevent leaks in the future, and they are explained below:

Regular Maintenance

One common way to avoid leaks is to inspect the area frequently. Clean the drainage, clean the roof, and apply water-proof coating when necessary. Ensure regular repairs are taken care of. 

Proper Drainage

When water collects and is clogged in your roof, it leads to leaking. Make sure that the drainage system is seamless and remove any debris if present. Frequently inspect the gutters and downspouts to ensure proper drainage and avoid further risks. 

Don’t Skip Waterproof Coating 

Waterproof coatings such as primer and elastomeric sealants help to prevent water leakage. They also form a strong bond with the roof surface and protect the building from damage. 

Addition of a Secondary Layer

Adding another layer below or above the cement sheet roofs can help in prevention of water leakage and seepage. This layer can consist of any material such as terracotta tiles, PVC based roofing sheets or even just a teflon coating which acts as an additional barrier against water. 

Conclusion

Water leaks in cement roofing sheets are common damages that may occur over time or due to the influence of environmental conditions. Make sure to repair them when you spot small damage and seek the help of a professional. Give your roofs time to establish a strong bond with other materials and inspect them regularly.

FAQs

How to stop cement sheet  roof leakage?

To stop concrete roofs from leakage, make sure to spot the exact point and add roofing cement, primer, and adhesives to fix the crack. 

Is there any permanent solution to prevent leakage?

If your roof needs a major fix, you can just apply a layer of silicon directly to the existing roof; this increases the roof coating performance. 

What is the best waterproof material?

Sealants are the best waterproof materials, as they can reflect UV light and also protect the roof from water damage.

Decoding Cement Composition: A Comprehensive Guide to Ingredients and Properties

0
Cement Composition

Cement is the most common building material used in construction because it has binding properties which help in the formation of concrete and mortar, and impart strength to the structure. The properties of cement depend on its composition. Understanding cement composition requires knowing what functions the constituents perform in the making of cement. Through adjusting quantities of cement ingredients, the desired quality of cement can be achieved during the manufacturing of cement. This blog brings you deep insights into the types of cements, their compositions and properties as well as their ingredients.

Cement Composition and Their Functions

The following are cement compositions and properties:

  • Major Cement Chemical Components
  1. Calcium Oxide (CaO)
  2. Silica (SiO2)
  3. Alumina (Al2O3)
  4. Iron Oxide (Fe2O3)
  • Minor Cement Chemical Components
  1. Gypsum (Calcium Sulfate)
  2. Magnesia (MgO)
  3. Alkalis (Sodium and Potassium Oxides)

Major Cement Chemical Components and Their Functions

The basic materials of cement or raw materials employed in the production of cement are as follows:

  1. Calcium Oxide (CaO): Also known as lime, CaO makes up most of the cement. It comes from materials with calcium, like limestone, chalk, or shells. The strength and binding properties of cement are due to the presence of lime. The accurate amount of lime in cement is crucial, as too much lime can make cement unstable, and a small quantity of lime can affect the strength of cement and its setting time.
  2. Silica (SiO2): Silica is derived from sand, clay, or rocks. When mixed with water, it allows cement to harden, contributing to its durability. Silica also helps form calcium silicates, which are responsible for the ultimate strength of concrete.
  3. Alumina (Al2O3): It comes from clay, bauxite, or recycled aluminum. Alumina helps cement resist chemical attacks from sulfates and acids and withstand high temperatures. It also aids in forming calcium aluminates, which are responsible for the initial setting and early strength of cement.
  4. Iron Oxide (Fe2O3): Obtained from clay, iron ore, or scrap iron, iron oxide gives cement its characteristic grey color. It acts as a fluxing agent and helps reduce the melting temperature of raw materials, making cement manufacturing relatively easy. 

Minor Cement Chemical Components and Their Functions

The main ingredients form cement’s core, but there are some other minor cement mineral compositions, which are: 

  • Gypsum (Calcium Sulfate): Gypsum is added to cement to slow down its setting, keeping it workable for a longer time. Gypsum reacts with tricalcium aluminate, slowing down the hydration process.
  • Magnesia (MgO): A small amount of magnesia helps in improving the strength of cement. However, the high quantity of magnesia can cause cement expansion and crack due to the formation of magnesium hydroxide.
  • Alkalis (Sodium and Potassium Oxides): These elements impact cement’s strength and setting time. When alkalis are present in high amounts, they can react with aggregates, leading to concrete deterioration over time.
    Cement Ingredients Percentage:

Cement Ingredients Percentage

The most commonly used type of cement is Portland cement. The Portland cement composition ratio is approximately:

  • Calcium Oxide (CaO): 60-67%
  • Silica (SiO₂): 17-25%
  • Alumina (Al₂O₃): 3-8%
  • Iron Oxide (Fe₂O₃): 0.5-6%
  • Magnesium Oxide (MgO): 0.1-4%
  • Sulfur Trioxide (SO₃): 1-3%
  • Alkalis (Na₂O + K₂O): 0.4-1.3%

The Compounds of Cement

During the manufacturing of cement, four main compounds are formed. These compounds of cement are present in different proportions and roles to play. They are as follows:

  1. Tricalcium Silicate (C3S): It is responsible for cement’s early strength development. It hydrates quickly and greatly contributes to the initial setting of cement.
  2. Dicalcium Silicate (C2S): Despite its slower hydration than C3S, C2S is responsible for cement’s ultimate strength. It also adds to concrete’s overall strength and durability.
  3. Tricalcium Aluminate (C3A): It hydrates quickly and is responsible for initial setting time of cement. It reacts very fast with water, giving immediate strength but producing high amount of heat of hydration. However, it makes cement prone to sulfate attack.
  4. Tetracalcium Aluminoferrite (C4AF): C4AF contributes to the colour of the cement and provides some strength. It works as a fluxing agent during clinkering process. It also helps to build the microstructure of cement.

Cement Compounds Percentage and Ratio:

The typical composition ratio of these compounds of cement can vary, but a common formulation is:

  • Tricalcium Silicate (C3S): 50-60%
  • Dicalcium Silicate (C2S): 15-25%
  • Tricalcium Aluminate (C3A): 5-10%
  • Tetracalcium Aluminoferrite (C4AF): 5-15% 

These percentages are carefully managed throughout the manufacturing process to ensure that the end product has the necessary qualities. The careful monitoring of the cement composition ratio ensures that the finished product meets precise standards for strength, durability, and setting time. 

The Manufacturing Process of Cement:

Manufacturing cement is a tough process and is composed of the following stages:

  1. Raw Material Extraction: Limestone, clay, and other materials are quarried and transported to the cement plant.
  2. Crushing and Grinding: The raw materials are crushed and ground into a fine powder called as the raw meal.
  3. Clinker Formation: The raw meal is heated in a kiln at temperatures of about 1450°C forming clinker (small nodules of partially fused material).
  4. Grinding: The clinker is cooled down and then ground together with gypsum to produce cement. Fly ash, slag or limestone might be added to change some properties of final cement.
  5. Storage and Distribution: After manufacturing it is packed and stored in bags and then distributed.

The cement composition is a complex combination of raw materials and chemical compounds. Understanding cement composition is crucial since each constituent has unique features. The exact cement composition ratio of influences cement’s performance capabilities, making it a versatile material in the construction sector. Engineers and construction professionals can make informed selections about cement composition and qualities to get the required results in their projects. The management of cement ingredients percentage and ratio throughout the manufacturing process assures the creation of high-quality cement that fulfils the building industry’s unique requirements.

Types of Walls Used in Construction

0
Types of Walls Used in Construction

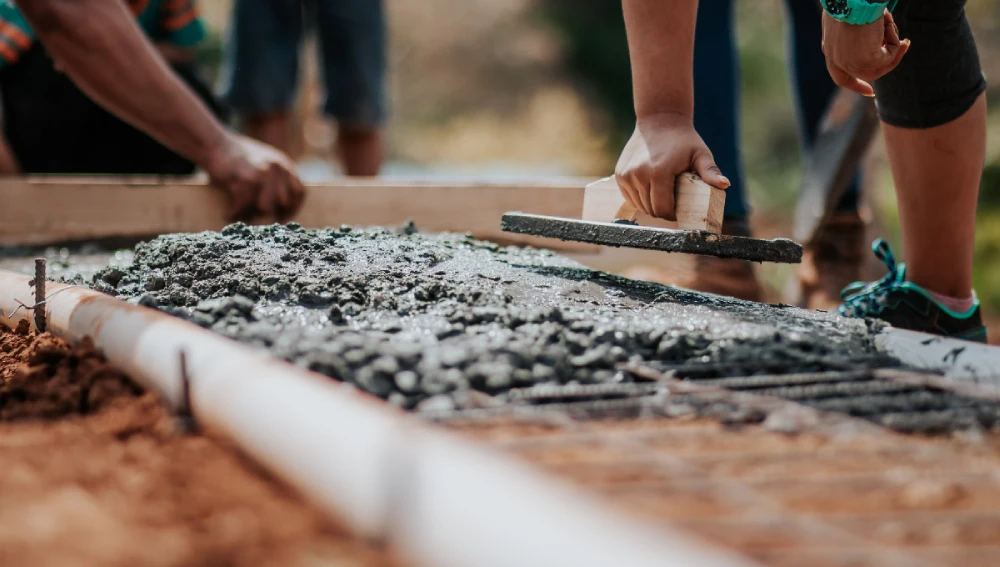
A structural component that separates a space into 2 sections and also gives safety and shelter is a wall. These walls can be categorized into inner walls and outer walls. The main purpose of the inner wall is segregation of spaces and shelter is given by the outer wall. The differentiation and understanding of the wall types are necessary for engineers, architects, or any person to make decisions for construction. 

This blog intends to give a detailed overview of the various wall types in construction, discussing their purposes, materials, construction methods, and scientific and technical considerations.

Overview of Wall Types

1. Types of walls based on loading:

  1. Load bearing
  2. Non-load bearing

2. Types of walls based on function:

  1. Shear walls
  2. Retaining walls
  3. Partition walls
  4. Fire walls
  5. Cavity walls
  6. Curtain walls

3. Types of walls based on materials:

  1. Precast walls
  2. Masonry walls
  3. Gypsum board walls

1.Types of walls based on loading:

Load-Bearing Walls

Load-bearing walls can also be called structural walls as they support the building weight by transferring loads to subsequent structural members. This helps in ensuring structural integrity and stability. These walls are vital in the maintenance of stability.

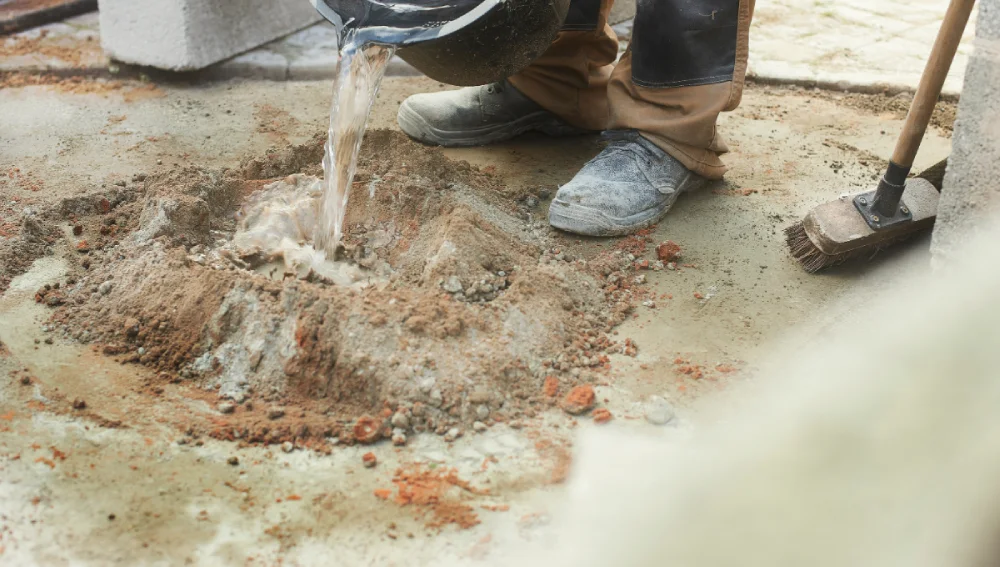
The materials generally used in the construction of load-bearing walls are 

  • Brick
  • Stone 
  • Concrete

In this type of wall, the construction technique must be precise. The plans must have layouts for the distribution of the weight of the building uniformly.

Load distribution and stress analysis are vital in designing load-bearing walls. Engineers use these analyses to ensure that walls can handle the building’s weight. Retaining walls, and managing lateral earth pressure, are also considered load-bearing.

Load-bearing walls are commonly found in old buildings that have thicker walls and also in some walls in modern buildings that can provide support. Retaining walls can be considered as an example of load-bearing walls that can manage pressure from soil and also prevent erosion.

Non-Load Bearing Walls

Non-load-bearing walls do not provide any support for structural weight and they are mainly used for separating the spaces in the building. They can be made of lightweight materials like

  • Wood 
  • Metal studs 
  • Drywall

The non-load-bearing walls are around four to six inches thick. They can be modified easily or can be removed without impacting the structural integrity of the building.

In modern buildings, non-load-bearing walls are used due to their flexibility in interior design. They allow for easy space reconfiguration and are often used in office spaces and homes to create separate rooms or open layouts. 

Innovative designs include glass partitions for transparent barriers and movable panels that enable dynamic space usage. Their ability to incorporate insulation and soundproofing also enhances their functionality in various applications.

2. Types of Walls Based on Function:

Shear Walls

Shear walls are mainly designed to resist lateral forces like earthquakes, wind as well as soil pressure, thus helping in the maintenance of building stability. They transfer these forces from the upper floors to the foundation, preventing excessive movement. 

Typically constructed from reinforced concrete, steel, or wood, shear walls vary in thickness and height depending on building requirements and expected forces, often ranging from 8 to 14 inches thick. 

Proper design includes incorporating rebar for added strength and adhering to engineering standards and building codes. For example, overhead water tanks use shear walls to resist wind and water pressures. 

Effective shear wall design ensures structural integrity, especially in high-wind or seismic areas, emphasizing the importance of precise engineering and adherence to local regulations.

Retaining Walls

Retaining walls are important in civil engineering as they are used for the stabilization of soil at different heights and to prevent erosion. They are mainly used in creating level areas in slopes, controlling runoff, and also managing earthquakes. 

Key types of retaining walls include gravity walls, which rely on their weight to resist soil pressure; cantilevered walls, which use a lever mechanism for support; and anchored walls, which are reinforced with anchors for additional stability.

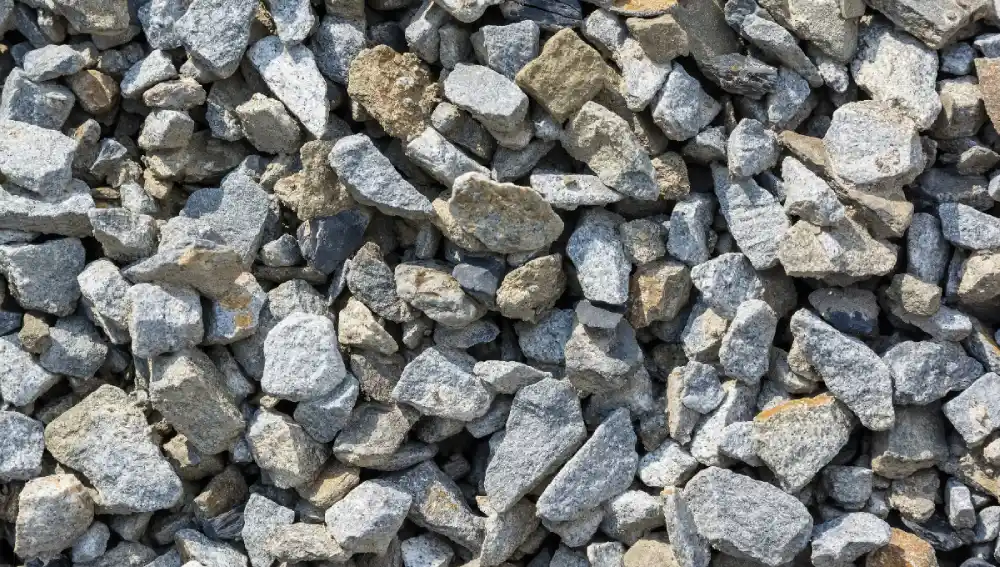
Effective retaining wall construction involves careful soil mechanics, drainage design, and stability analysis to handle lateral earth pressure. Some of the materials used for making retaining walls are,

  • Reinforced concrete 
  • Masonry 
  • Stone

The construction methods are mostly combined with drainage systems like geotextiles and perforated pipes that help in the management of hydrostatic pressure. Appropriate design and selection of material can help in ensuring the durability and functionality of the walls under different environmental conditions.

Partition Walls

Partition walls are non-load-bearing interior walls designed to divide larger spaces into smaller, functional areas without supporting structural weight. Commonly constructed from gypsum board, glass, or metal, these walls offer flexibility in creating separate rooms or areas in both residential and commercial buildings.

The thickness of partition walls typically ranges from 3 to 6 inches, and their height usually matches the ceiling height or is adjusted for privacy and aesthetics. Partition walls can be quickly installed using techniques such as modular systems or framed construction, which allows for efficient and adaptable space planning.

Applications include room divisions, office layouts, and retail spaces, where they can enhance privacy, acoustics, and visual appeal. Their ability to be easily modified or relocated adds to their versatility in various building projects.

Firewalls

A firewall is a fire-resistant barrier designed to prevent the spread of fire within a building or between structures. Subdividing a building into fire-resistant sections such as firewalls can help to contain fires, allow the occupants time to evacuate, and limit damage.

Firewalls are typically made from concrete, concrete blocks, or reinforced concrete. They may also use materials like Speedpanel or Fyrcheck plasterboard. These walls must meet local fire safety codes, including specific fire-resistance ratings and structural stability requirements. They are designed to withstand heat flux and prevent fire from spreading through gaps or penetrations.

Firewalls are essential in commercial, industrial, and residential buildings. They are used to separate different fire zones, protect high-value equipment, and comply with building codes to avoid additional fire safety measures like sprinklers.

Examples include concrete tilt panels for high-rise buildings, Speedpanel for modular walls, and Fyrcheck plasterboard for cost-effective solutions. These designs ensure robust fire protection and comply with performance-based standards for various fire scenarios.

Cavity Walls

Cavity walls have 2 layers of masonry that have gaps between them for improving the insulation capacity and moisture control ability. The outer layer is generally made up of brick or stone and the inner layer is made up of concrete blocks or bricks.  The cavity is normally 4 cm to 10 cm and they are filled with insulating materials like mineral wool or foam for improvement in thermal efficiency.

Construction involves creating two separate leaves connected by metal ties to prevent moisture transfer. For draining water, weep holes are attached to the outer layer. For the prevention of condensation and energy efficiency, it is necessary to have proper insulation and air barriers. 

Energy consumption can be reduced with the help of cavity walls as they minimize heat loss by thermal performance, which helps in lowering heating and cooling costs. They also give sound insulation and reduce moisture ingress which helps in the comfort and durability of the building.

Curtain Walls

The curtain wall is a non-load-bearing wall that is made of glass or metal that surrounds the building structure and provides an extra barrier against the weather. Commonly curtain walls hang from the floors of buildings, rather than between the floors. They are often used in high-rise commercial buildings and modern architecture to maximize natural light and create a sleek, transparent exterior.

Curtain walls can be made of,

  • Aluminum frames 
  • Glass panels
  • Composite panels 

The construction of curtain walls includes prefabrication, that is, components are assembled in the factory and then can be installed on the site. The main technique involved is using aluminum or steel frames for support and glass for the facade. This system is designed mainly for managing thermal performance and water drainage.

One of the examples of curtain walls is the Crystal Palace in London, which shows the historical significance and ongoing evolution of curtain walls in architecture. Modern examples demonstrate their role in energy efficiency and aesthetic design.

3. Types of Walls Based on Materials:

Precast Walls

Precast walls are concrete panels cast in molds and cured off-site before being transported and installed on-site. This method reduces defects due to controlled conditions and speeds up construction.

Common materials include concrete with optional reinforcement, often enhanced with insulation or other finishes. Techniques involve casting concrete in reusable molds, curing them, and using bolted, welded, or dowel/anchor bolt connections for assembly.

Precast walls offer excellent thermal resistance, moisture protection, and fire safety. They also provide durability and acoustics similar to traditional concrete wall and brick walls. Proper joint design is crucial to accommodate thermal expansion and prevent moisture infiltration.

Precast walls are widely used in modern buildings, providing structural efficiency and aesthetic flexibility. Notable examples include commercial and institutional buildings where speed of construction and low maintenance are critical.

Masonry Walls

Masonry walls are constructed from individual units of brick, stone, or concrete blocks, joined together with mortar. This method has been essential in construction for centuries due to its robustness and durability.

Materials generally used in masonry walls are,

  • Brick
  • Stone
  • Concrete Blocks

Construction Methods used are,

  • Traditional Masonry: Involves stacking and bonding units with mortar to create strong walls.
  • Reinforced Masonry: Includes steel reinforcement to enhance structural integrity, crucial for load-bearing applications.

Masonry walls are known for their compressive strength, durability, and thermal mass, which contribute to their ability to support structures and regulate indoor temperatures efficiently.

Masonry is used extensively in residential buildings for both structural support and aesthetic appeal. It also plays a significant role in load-bearing structures due to its strength and stability.

Gypsum Board Walls

Gypsum board walls are often referred to as drywall. They are lightweight and versatile structures made from gypsum panels mounted on metal or wood frames.

Materials used in gypsum walls are,

  • Gypsum Board: A fire-resistant, lightweight material that provides a smooth surface for interiors.
  • Metal Studs or Wood Framing: These components form the underlying framework to which gypsum panels are attached.

Construction methods used in gypsum walls are drywall installation in which the panels are cut to size and fastened to the frame with screws or nails. Taping and finishing, is another method where joints between panels are taped and covered with joint compound to create a seamless finish.

Gypsum board walls are valued for their fire resistance and ease of installation, which reduces labour costs and construction time. The material is also cost-effective compared to other wall systems.

These walls are widely used for interior partitions and ceilings in both residential and commercial buildings, benefiting from their lightweight and adaptable nature.

Conclusion

Walls can be considered as an important component in construction and each type has its own role. That is, some walls provide structural support to the building, while other types help in the division of space in the building and some give protection from fire. By knowing these differences, it will be easier for people to select the correct materials and methods for construction.

FAQs

What materials are commonly used in partition walls?

Partition walls are often made from gypsum board, glass, or metal.

Why are precast walls beneficial?

Precast walls reduce construction time and defects due to controlled off-site conditions.

What materials are used for firewalls?

Firewalls are typically made from concrete, concrete blocks, or reinforced concrete.

How do retaining walls manage soil pressure?

Retaining walls use design methods like reinforcement, cantilevered mechanisms, and anchors to manage soil pressure.

Acrylic Wall Putty Vs. Wall Putty

0
Acrylic Wall Putty Vs. Wall Putty

Adding putty to your walls is a very important step when constructing a building. It gives your wall strength and durability and helps it remain damage-free for a longer period. 

There are two types of wall putties you can choose from for your walls: acrylic wall putty and cement wall putty. Both of these are highly useful and have their own advantages and disadvantages. The trick here is to know when and where to use each of them. 

In this article, we will learn all about these two types of putties and understand them clearly. This can help you choose between the two. 

What is Acrylic Wall Putty?

Acrylic wall putty is a water-based, alkali-resistant putty made of acrylic materials. It is considerably more expensive than cement wall putty. However, it is more water resistant, gives a smoother finish, and has higher durability. 

Acrylic wall putty can be used on both exterior and interior wall surfaces. It gives a smooth wall that can be painted on without any cracks or flakes. 

One of the main advantages of acrylic wall putty is its drying time. It dries within a short period of 30 minutes and can be painted soon after. 

What is Cement Wall Putty?

As the name implies, cement wall putty is made of cement. This is also applied to walls to give a smoother and longer-lasting finish that can be painted after drying. 

Cement wall putty is commonly used in masonry wall surfaces and when there are huge gaps or cracks on walls. The putty is white in color, giving a clear and smooth canvas for painting. 

Cement wall putty is water resistant and is good at preventing cracking and flaking. 

Advantages And Disadvantages Of Acrylic Wall Putty

Advantages Disadvantages
Highly water resistant. Ideal for areas that get wet often, like bathrooms, kitchen, etc. It can be more expensive than cement wall putty. 
Provides a smooth and flawless finish.It is not as strong as to be applied on big cracks or holes. 
Dries very quickly, within 30 minutes.—-
Bonds well with various surfaces like plaster and masonry.—-
Suitable for both outdoor and indoor wall surfaces.—-
Gives an even, shiny look after painting and extends the lifetime of the paint.—-

Advantages And Disadvantages Of Cement Wall Putty

Advantages Disadvantages
Less expensive than acrylic wall putty. A budget-friendly option.Has lower water resistance and is not suitable for humid or wet areas.
It is very strong and durable and can be used to fill big cracks and holes. Has a longer drying time of 4 to 6 hours. It is not suitable if you wish to quickly complete the process. 
Easily available in most stores. Most suitable for indoor wall surfaces.
Has a higher resistance to wear and tear. Requires additional sanding for a smoother surface. 

Factors to Consider When Choosing Wall Putty For Your Home

As you can see, both acrylic and cement wall putty have their own advantages and disadvantages. So, how do you decide which one to use for your home? 

Having some determining factors can help you with that. Below are some important factors to consider when choosing between acrylic and cement wall putties. 

The type of surface

Both acrylic and cement wall putty work well on different types of wall surfaces. For example, both acrylic and cement wall putty can be used on plastered walls. However, for masonry and concrete walls, cement putty is often the best choice among the two. 

Location

The location of usage plays an important role in the type of wall putty you can use. If your locality is highly prone to rain or your selected room easily gets wet, it is best to use acrylic wall putty as It is highly water-resistant and has a long life. 

Budget

Acrylic wall putty can be more expensive than cement wall putty. If you want to lower the overall costs and go for a budget-friendly option, choose cement wall putty. 

Desired finish

Acrylic wall putty can give you a smoother and flawless finish than cement wall putty. Cement putty is best for textured finishing but requires additional work. Choose the putty based on how you want the end product to look. 

Drying time

If you are on a tight schedule and wish for quick work completion, acrylic putty is the best choice for you. It dries within 30 minutes of application. Cement wall putty takes about 4 to 6 hours to dry and is suitable for a strong and durable finish. 

Quality

Whether you choose acrylic or cement wall putty, its quality is very important. Choose putties from a reputable brand with a good track record and customer satisfaction. 

Conclusion 

From the above article, you must have understood that both cement and acrylic wall putties have their own advantages and are best for use in certain areas. 

Before choosing the wall putty for your home, consider the factors we discussed above and determine the purpose and area of application. You can also consult a professional and choose the right type of putty for your home. 

FAQs

1. Does acrylic wall putty crack?

Acrylic wall putty is strong and durable, which makes it highly resistant to cracks and flakes. It is also water resistant, making it a good choice for application in areas where the walls can get easily wet. 

2. Can we use wall putty to fill cracks?

Yes, wall putty can be used to fill cracks and holes on wall surfaces and give it an even and smooth finish. You can paint the wall and make it seem as if the crack was never there before.