Home Blog Page 58

How to Make Wall Putty

0
How to Make Wall Putty

Wall putty is an essential building material, mainly used to smooth walls before painting.​ It enhances the longevity of walls by strengthening paint adherence and ensuring a perfect finish. The complexities of creating wall putty, its many uses, the materials required, its chemical composition, and the precise procedures for both application and preparation will all be covered in this extensive blog.

Understanding Wall Putty

Wall Putty

Wall putty is a fine powder primarily made from white cement,supplemented with polymers and minerals. It is essential for filling wall imperfections and creating an even canvas for paint. Utilizing wall putty enhances wall protection against stains, mold, and cracks, offering a polished and durable finish.

Types of Wall Putty

Wall putty is needed for achieving a smooth and even walls for painting, during renovations. It can hide imperfections and give a polished finish. Some of the different types of wall putty are,

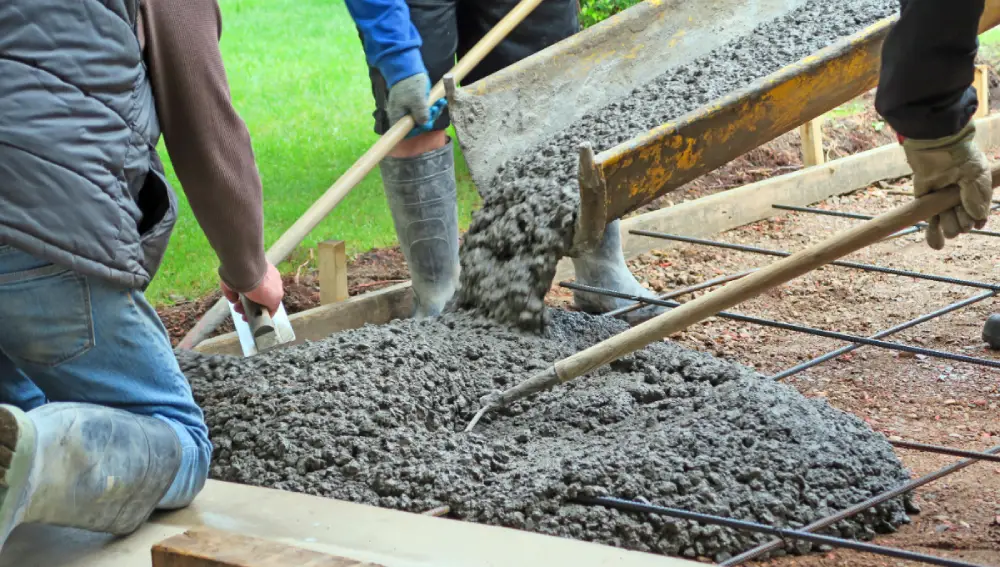
Cement-Based Wall Putty

It is used in construction projects and renovation projects. It is a smooth white paste that is applied to walls before painting. This is made of cement, additives, and white cement, making it easy to apply. It can be used for interior and exterior walls. 

Acrylic-Based Wall Putty

Acrylic wall putty is used for repairing and smoothing walls before painting. They are made by mixing acrylic polymer with talc, calcium carbonate, or any quartz fillers. It is water-resistant and can be used for the exterior and interior of walls. They help in preventing algal or fungal growth on walls.

Gypsum-Based Wall Putty

It is made by combining gypsum powder, additives, and minerals. They offergood adhesion properties and provide a smooth finish for interior walls. It is fire-resistant and can be used in areas prone to fire.

Polymer-Based Wall Putty

Polymer-based wall putty is a coating material that can be used for preparing or repairing walls before painting. It involves polymers like vinyl acetate or acrylic to improve adhesion, water resistance, and flexibility. 

Ready-Mix Wall Putty

Ready-mix wall putty is a premix, it does not need any additional ingradients. They are generally used oninterior walls, as they can provide a smooth finish and are easy to use.

Materials Required for Making Wall Putty

  • White Cement: Act as a binding material in wall putty. 
  • Polymers: Improve adhesion and flexibility
  • Dolomite Powder: Gives consistency and smoothness
  • Fillers: Improves workability and texture.
  • Additives: Enhance various properties like antifungal, dispersion , water resistance, and so on. 

Wall Putty Manufacturing Process

The typical composition of wall putty is white cement to dolomite, in a ratio of 1:4. For example, in a 5-ton batch of putty, 1 ton is white cement (BD: 1100 Kg/m3) and 4 tons is dolomite (BD: 950 Kg/m3), along with various minor ingredients.

The manufacturing process involves four steps, namely:

Unloading and Storing Raw Materials: 

Raw materials arrive in bags ranging from 25 kg to 1000 kg. Small bags are emptied using bag-slitting equipment, while larger bags use an electric hoist and bag massager system. Materials are then pneumatically conveyed to storage silos, where their capacity is determined by the desired stock levels. Silos include fluidized cones and bin activators to prevent blockages.

Ingredient Weighing and Batching: 

Specific proportions of ingredients, as per the formula, are crucial for quality. Weigh hoppers with cells are placed beneath the silos, and screw conveyors transport materials to the weight hopper, which doses them to the charge hopper via rotary airlock valves.

Transmission of Raw Materials to Charging Hoppers: 

Raw materials are directed to charge hoppers using diverters in the conveying line. The conveying air velocity is maintained between 25-30 meters per second, with capacity and distance determining the blower size.

Blending and Combining: 

Materials are transferred from the charge hopper to a blender/mixer via a screw conveyor. Mixing takes 15-30 minutes, after which the putty is sent to a packing machine and then moved to the storage room.

Application Techniques for Wall Putty

Application Techniques for Wall Putty

Surface Preparation

The surface must be clean, dust-free, and dry. Any loose paints, dust, grease, oil, etc from the wall must be removed. Prepare a clean surface so that the wall putty can attach properly.

Apply Primer (If Necessary)

To create a stable surface, a primer can be added, mainly if the surface is in poor condition, new to painting, or stained.

Mixing

Mix wall putty according to the manufacturer’s instructions. Typically 2:1 ratio of water and putty powder is recommended. It has to be mixed for at least 15 minutes to ensure it is free of lumps. 

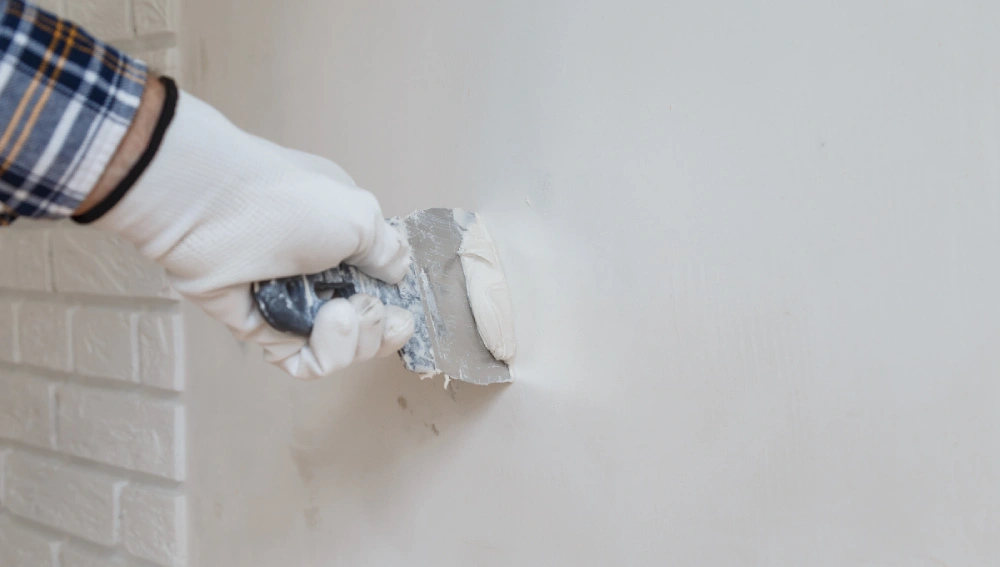
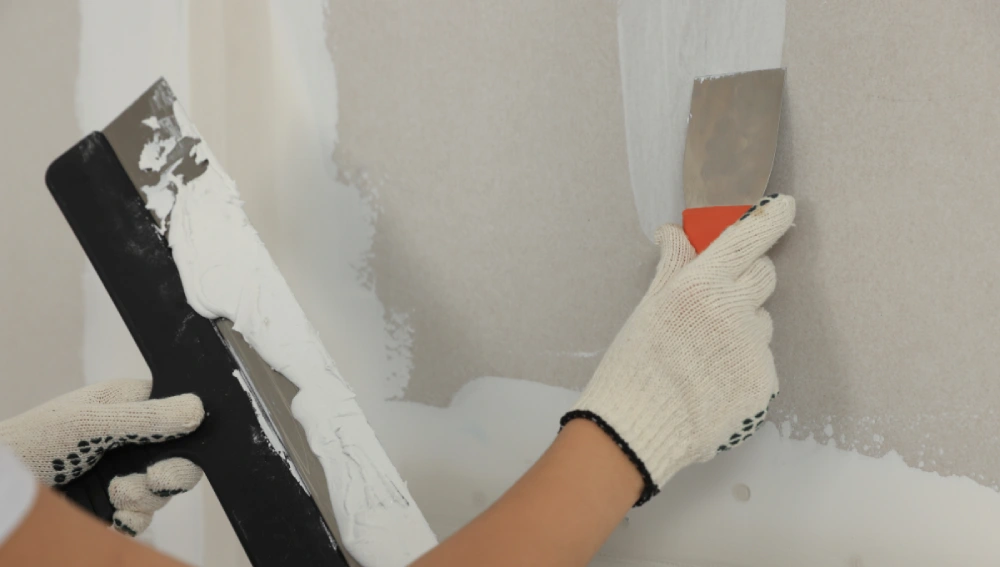
Apply the First Coat

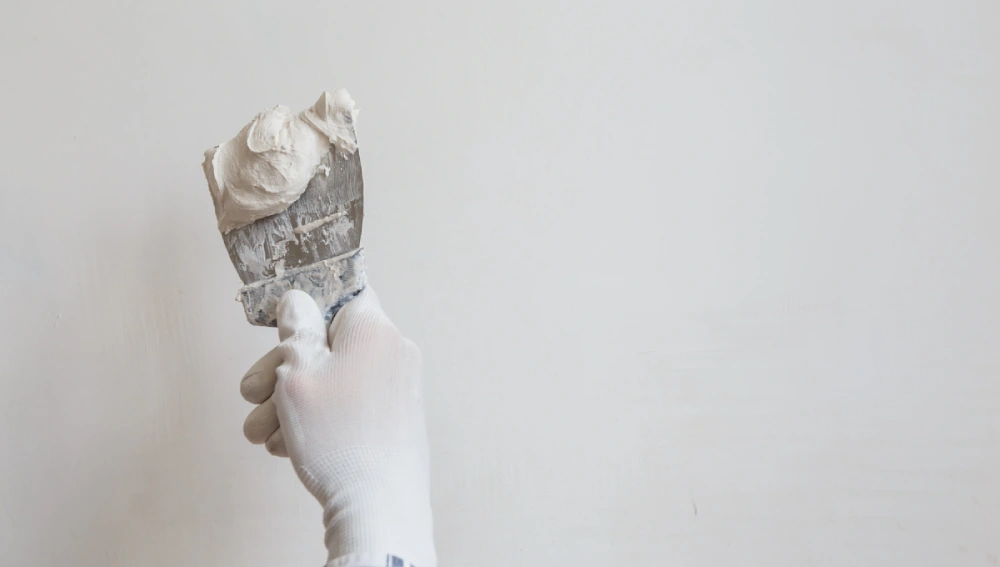
Using a putty blade, spatula, or trowel, apply the first coat of putty vertically from bottom to top, or start in a corner and spread uniformly. Aim for a thin, consistent layer, without worrying about perfect smoothness at this stage.

Drying

Allow the first coat to dry completely, it may take more than 6 hours. It will be good if the manufacturer’s recommendation is followed.

Sanding

After the first coating, there may be some imperfections, for that, just use sandpaper to wipe the surface after drying.

The Second Coat

Apply the second coat of wall putty, which should be thinner than the first. Spread it uniformly, aiming to further refine and smooth the surface.

Dry Again

Let the second coat dry completely. Patience is crucial; ensure the putty is thoroughly dry before moving on to the final step.

Final Sanding

After drying the second coating, the final sanding will be carried out. A sand block or fine sandpaper is used for obtaining smooth and even surfaces. Rub the surface with a damp sponge to remove dust, and carefully inspect the wall.

Painting 

With your wall perfectly prepared, you can proceed with painting. Apply your chosen paint using appropriate techniques and tools. The smooth surface achieved through the application of Homesure wall putty will ensure a professional and polished paint finish.

Advantages and Disadvantages of Wall Putty

Advantages

  • Enhanced Strength: The application of putty helps improve the tensile strength of the walls.
  • Extended Durability: By forming a protective layer, wall putty contributes to the longevity of the wall.
  • Cost Efficiency: It can lower overall painting costs, as less paint is needed after applying wall putty, thus reducing material expenses.
  • Durable Finish: Wall putty resists flaking and damage, effectively filling cracks and providing a smooth, glossy finish.
  • Improved Color Accuracy: It creates a smooth, white base that helps achieve the desired paint shade.

Disadvantages

  • Application Challenges: Working with wall putty can be difficult.
  • Single Use: Once mixed and hardened, wall putty cannot be reused.
  • Need for Skilled Labor: Applying wall putty requires trained professionals to achieve the best results.
  • Mechanical Mixing Required: Hand mixing is not practical as it takes longer and can lead to rapid drying, so mechanical tools are necessary for preparation.

Conclusion

Wall putty is a vital component in construction, enhancing wall surfaces before painting. A wall putty is crucial for any painting project, ensuring walls are smooth and even. This blog outlines the types, materials, and preparation processes for making wall putty. 

FAQs 

1. Are there any disadvantages to wall putty?

Challenges include the need for skilled labor and that it cannot be reused once mixed.

2. Can wall putty be applied to any surface?

It is best applied to clean, dry, and prepared surfaces for optimal adhesion.

3. How can I ensure a professional finish when applying wall putty?

Following proper application techniques and allowing sufficient drying time will ensure a professional finish.

4. Is wall putty suitable for exterior walls?

Yes, specific types of wall putty, like acrylic-based, are designed for exterior applications.

5. How does wall putty affect paint color?

Wall putty provides a smooth, white base that enhances the accuracy and appearance of paint colors.

Consistency Test for Cement: All You Need to Know

0
Consistency Test of the Cement

Cement is a commonly used product in the construction industry. It is finely made into a paste by mixing with water. The consistency of this paste is important because it determines the strength of the construction. Consistency can be determined by a standard consistency test, which regulates the water needed to make a cement paste. This test is important for construction because it helps evaluate the cement’s workability and setting time. Let’s understand the concepts in detail.

What is the Consistency Test for Cement?

Consistency Test of the Cement

The consistency test for cement is a laboratory procedure determining the amount of water to be mixed with cement to ensure workability and strength. The water quantity required is generally 25–30% by weight of the cement. This test can calculate the setting time and the development strength of the cement and is especially  used in hydraulic construction.

Why Should You Do Cement Consistency Tests?

The consistency test is critical to providing quality and workability conditions for the cement. These predictive results allow the builders and engineers to evaluate the construction’s durability and strength. The consistency test’s main purpose is to assess the correct amount of water required to make the cement paste at the right consistency ratio. Too much water can make the paste runny, and the cement setting time toois long. When there is less water than required, the mixture becomes too hard and difficult to work with.

Standard Consistency Test for Cement

Several factors affect the consistency of cement paste. It includes chemical composition, fineness, temperature, etc. The standard consistency test for cement is a laboratory procedure. This test is most suitable for hydraulic construction and can evaluate the cement’s strength development and setting time. The consistency test can be done in the following way, as explained in the next section

Procedure for Conducting the Standard Consistency Test of Cement

Procedure for Conducting the Standard Consistency Test of Cement

1. Apparatus required: Vicat Apparatus.

Start the test by using the Vicat apparatus.

It is usually 10 mm in diameter and 50 mm in height.

The condition for standard consistency is that the plunger can penetrate to a depth of 33–35 mm from the top of the mold.

2. By using the rod:

A rod can be used to obtain the normal consistency of the cement paste.

Upon releasing the rod, the paste should retain its normal consistency.

Within 30 seconds, the paste should settle to a point about 11–100 mm below the original surface.

3. Trial paste:

Before using  the entire cement, do a trial with a small quantity. 

This helps determine the right percentage to get the right results.

The ideal consistency is oatmeal-like thick. There should be no dry patches and not too much water.

The right consistency is essential for the project to be successful.

4. Procedure:

The Vicat apparatus has a 10 mm-diameter plunger held straight. 

Two needles will then penetrate the cement paste freely. The cement is placed in the mold.

The penetration is measured on a vertical scale ranging from 0 mm to 50 mm.

The percentage of water needed to produce standard consistency is the amount that allows the plunger to penetrate 33–35 mm from the top. 

5. Standard Conditions:

The test should be conducted at a standard temperature of 27±2 °C. 

It must have a constant humidity of 90%. 

Conclusion

A cement consistency test is a crucial step in ensuring the quality and workability of cement in construction projects. The test determines if the cement has the correct amount of water, which is important for the strength and durability of the cement paste.

  • Too much water: The paste becomes too runny and takes longer to set.
  • Too little water: The paste hardens too quickly and sets at the wrong time. 

Therefore, it is essential to ensure the right cement consistency, in order to guarantee the quality and durability of construction.

FAQ

1. How do you test the consistency of cement?

It can be tested using the Standard Consistency test for cement. 

2. What is a good consistency for cement?

The ideal consistency of cement is more similar to a peanut butter-like or oatmeal-like consistency. Water quantity must be 25-30% by weight.

3. What test is commonly used to determine the consistency of concrete?

The slump test is the most common way to know the consistency, or workability, of cement concrete. It’s an affordable and fast test that can be used to measure the concrete’s consistency.

Rapid Hardening Cement – Its Significance and Applications

0
Rapid Hardening Cement

Introduction

Rapid-hardening cement is an advanced cement variant created to achieve high early strength. It is specifically designed for situations where quick hydration is essential, such as construction in cold weather conditions, road repairs, and precast concrete production.

This specialized cement typically includes a higher percentage of tricalcium silicate (C3S), allowing structures to obtain substantial strength within 24 hours. Traditionally, RHC reduces the curing period, making it indispensable for projects requiring early load-bearing capability.

This article uncovers the properties, applications, and price range of rapid-hardening cement. Read to learn more.

What is Rapid Hardening Cement (RHC)?

Rapid Hardening Cement

Rapid hardening cement (RHC), also called High Early Strength Portland Cement (HSPC), is formulated to achieve high early strength. RHC can be used for certain water-exposed structures, but it should generally be avoided in underwater scenarios due to the risk of shrinkage cracks.

Notably, RHC has a setting surface of greater than 3,250 cm²/g and can potentially reach a higher load-bearing capacity in a short period. It performs better than normal cement, acquiring the desired strength in less than 3 days. In comparison to normal Portland cement, it is heated at a higher temperature under more controlled conditions.

The key difference between RHC and OPC is the amount of tricalcium silicate (C3S), a component extracted from limestone. It enables cement to achieve high early strength.

Properties of Rapid Hardening Cement

It is one of the most commonly used cement types for structures that are more likely to earn higher strength and durability. Here are some of the important properties listed that make it stand out:

  • As stated, the higher amount of tricalcium silicate (C3S) in RHC contributes to quick strength gain, and its setting surface is greater than 3250 cm2/gm.
  • It is light in texture compared to ordinary Portland cement.
  • RHC gains determined strength in as few as 3 days.
  • The initial setting time is 30 minutes.
  • The final setting time is 600 minutes.

Composition of Rapid Hardening Cement

Composition of Rapid Hardening Cement

Rapid-hardening cement contains an excessive amount of lime, which contributes to gain strength. In addition to that, the cement also includes a fixed percentage of silicate, aluminum, along with iron compounds. Refer to the composition in detail:

  • 15% of dicalcium silicate (C2S)
  • 60% of tricalcium silicate (C3S)
  • 8% of tetracalcium alumino-ferrite (C₄AF) of the total weight of cement
  • 10% of tricalcium aluminate (C3A)

The Significance of Using Rapid Hardening Cement

Here are some major advantages of rapid hardening cement you need to know:

  • Quick Achievement of High Strength: Rapid hardening cement allows structures or concrete to achieve the desired strength quicker than ordinary Portland cement. It typically takes 3 days, whereas OPC requires a minimum of 7 days.
  • Reduce Damages Due to Cold Weather Conditions: Faster hydration is an add-on advantage of RHC. Due to that, the structures can protect themselves from the high risk of frost damage. When dealing with highly water-exposed construction areas, concrete can harden quickly and properly, even in hectic cold conditions.
  • Earlier Formwork Removal: Because of its faster strength gain, formwork is more likely to be removed earlier. The concrete structures made from rapid-hardening concrete contribute to faster construction and reduced formwork rental costs.
  • Faster Construction Work: Beyond early strength gains, RHC accelerates the project timelines. Any kind of structure can take significantly less time to complete.
  • Lower Shrinkage: Compared to other cement types, RHC has a lower shrinkage rate. This is because the faster hydration process reduces the amount of water that evaporates over time, avoiding the risk of shrinkage cracks.
  • Enhanced Durability: RHC contains high resistance against cracks and chemical attacks such as sulfate. It makes the structure or building much stronger and more durable.
  • Lower CO2 Emission: Rapid hardening cement consumes a lesser amount of fuel, resulting in reduced emissions of carbon dioxide, thus making it environmentally friendly.

Applications of Rapid Hardening Cement

  • Precast Concrete Elements: RHC is a prime choice for manufacturing precast concrete elements like poles, slabs, and pipes. Its quicker hardening time promotes production cycles and a well-finished final product.
  • Road Repairs and Pavements: Rapid hardening cement is often used in road repairs and pavements, which allows for earlier reopening, minimising disruption. Due to its easily strengthening characteristics, there is no possibility of cracking and shrinkage.
  • Cold Weather Concrete: RHC is primarily introduced to be used cold climates where the standard cement requires a long time to set and harden due to lower temperatures. The rapid strength gain of RHC reduces the risk associated with cold weather, ensuring the integrity of the concrete.
  • Industrial Floors: RHC is best for constructing industrial floors due to its early load application. It’s fast-setting nature, making it ideal for commercial buildings, warehouses and factories where the uninterrupted workflow is essential. 

Rapid Hardening Cement Price

Compared to OPC, rapid hardening cement is quite expensive and used for construction projects that require quick strength in India. The price range of RHC can vary for every region where it is manufactured. However, the average price falls between Rs. 200 and Rs. 450 per bag.

In Conclusion

Rapid-hardening cement is highly strong and durable, ensuring the lifespan of structures exposed to harsh weather conditions. It is a perfect match for fast-paced construction projects where the budget is not a big constraint. With its complete understanding, you can use it for suitable projects and benefit in all aspects.

FAQs

1. When should you consider RHC?

RHC is a primary choice for projects that require:
Early removal of formwork
Shorter construction timelines
Extraordinary performance in cold weather conditions
High early strength

2. How does rapid-hardening cement achieve faster strength gain?

RHC contains a greater amount of tricalcium silicate extract from lime compared to OPC. It is a major component added during the manufacturing process that contributes to cement’s higher strength. They accelerate the hydration process with an increased setting surface of 3250 cm2/gm.

3. How can you achieve extra rapid hardening cement?

Intergrinding calcium chloride (CaCl2) with rapid hardening cement allows achieving extra RHC. Meanwhile, the percentage of (CaCl2) during the manufacturing process shouldn’t exceed 3%.

A Comprehensive Guide on Two-way Slab Reinforcement

0
Two-way Slab Reinforcement

In a two-way slab, beams or load-bearing walls support the slab on all four sides. It is specially designed to resist bending along both directions. In such slabs, the reinforcement must resist moments and should be able to take a proportionate amount of load in all directions in order to distribute the load equally. Two-way slab reinforcement is essential for buildings to withstand heavy loads. It also prevents the slab from cracking and failing.

Basic Concepts of Reinforcement in Two-Way Slabs

Basic Concepts of Reinforcement in Two-Way Slabs

Reinforcement Ratio: 

The minimum reinforcement for mild steel should be 0.15 of the total cross-sectional area in any direction. In the case of the deformed high-strength bars, there should be at least 0.12% of minimum reinforcement. 

Reinforcement Type: 

Two-way slabs have two layers of bar reinforcement. They are usually perpendicular to each other. The extra bars are supplied along with the crank bars, whereas the main bars are cranked at a 45-degree angle. 

Main Reinforcement: This refers to the steel bars that run parallel to the shorter side of the slab and support maximum loads. A maximum of 1 to 2% of the gross sectional area can be reinforced with main rebars. In one-way slabs, the load distribution happens only in one direction.

Secondary/ distribution Reinforcement: These bars are generally placed parallel to the longer side of the slab and act as supplementary rebars. 

Reinforcement Design Methods: 

Two-way slab bars can be designed in two ways: the direct design method and the equivalent frame method. Both methods can be used for flat plates, flat slabs, and two-way slabs with beams.

Direct Design Method: This method is followed when the panel sizes are regular. It is used for slabs without any openings. A set of empirical formulas is used to evaluate the desired reinforcement.

Equivalent Frame Method: This is used for mostly irregular slabs with more openings. These are more accurate and are used for extracting detailed moment distributions. This method involves modeling the frames of the slab as a series. Then it is analyzed using the principles of structural analysis.

Steps for Designing Two-Way Slab Reinforcement   

Steps for Designing Two-Way Slab Reinforcement   
  • Step 1: Determine the Slab Thickness: The slab’s original thickness can be calculated using empirical formulas or guidelines. Once determined, the minimum thickness requirements of the slab are compared to building codes. This is based on the span length and the type of load used. 
  • Step 2: Load Calculation: There are two kinds of loads. These include dead loads and live loads. The things that do not move in their place yet have a fixed position are referred to as dead loads. On the other hand, anything that keeps moving is considered a live load. The dead load is calculated by multiplying the concrete density and thickness by any other permanent loads. Some examples of live loads include human users of the space and furniture. 
  • Step 3: Determine the moment and the shear forces: There are two methods. This is called the direct design and the coefficient method. The most common one for two-way slab reinforcement is the direct design method. In this case, the slab is divided into strips, such as columns and middle strips. Therefore, the moments can be calculated. Column strips represent the part of the slab located next to a column. The middle strips refer to those lying between columns. Moment calculations using coefficient method codes are based on various slab conditions.
  • Step 4: Reinforcement Determination: These help to determine bending moments and load distribution. Main reinforcement bars ensure the resistance of a slab. This is computed from bending moments. Distribution bars are added for crack control purposes. It is also to ensure that loads on the slab are distributed evenly.
  • Step 5: Detailing of reinforcement: Determine the spacing and the diameter of rebars. This is based on structural standards and requirements. Also, ensure the proper placement of the cover to prevent corrosion and maintain durability.

Technical and Practical Aspects of Reinforcement in a Two-Way Reinforcement Slab:

  • The spacing of bars in two-way slab reinforcement must meet the code requirements. It should generally lie within 150–200 mm.
  • To prevent corrosion, adequate cover is necessary for slabs. This would typically range from 20–30 mm.
  • The diameters of rebars generally vary between 8 mm and 16 mm according to design needs.
  • Based on the  design, appropriate bending should be done for anchoring and hooks.
  • A particular key drawing detailing the position, size, and spacing of bars need to be supplied.
  • Cover blocks are used to provide proper cover for the reinforcement.

Conclusion:

Main and secondary reinforcements are balanced when it comes to a two-way slab system. It entails careful load distribution as well as structural integrity in both directions. At the same time, the details of location about its placements are crucial. When talking about slab durability, it is important to consider that its reinforcement has a major  impact on its behavior. On top of this, designing demands an understanding of load calculations and moment distributions while strictly following structural design codes for safety reasons and optimum performance. It is advisable to consult structural or civil engineers to determine the necessary slab reinforcements to ensure structural stability and strength.

Difference Between a Sale Deed and a Conveyance Deed

0
Difference between a sale deed and a conveyance deed

To understand real estate transactions, one must differentiate between Sale Deeds and Conveyance Deed.Both documents have a big impact on transferring property ownership, but they serve different purposes and have different legal effects. This article will explain what sets these two deed types apart, what they contain, and how they work in property transactions.

What is a Sale Deed?

Sale Deed

Sale deed is a legal document that essentially holds the key and acts as evidence of the transfer of the ownership  from the seller to the buyer. This document  is crucial in any property transaction,  since it affirms that the sale has been made,  defining the property’s specifics and the agreed sale price. Typically, people draw up a sale deed after both parties have agreed to the sale’s terms and conditions.

Key Parts of a Sale Deed

  • Parties Involved: This part contains the names, addresses, and other significant details concerning the buyer and the seller.
  • Property Description: It provides  detailed description of your property by providing information on its details, dimensions, surroundings, and location.
  • Sale Consideration: Reflects the price at which both the buyer and the seller of the property decided and the mode of payment to be made by the buyer.
  • Transfer of Title: A simple statement to indicate an act of conveying the property by a seller to a buyer.
  • Encumbrances: If you are purchasing the property through a loan by a financial institution or anybody, information on whether there is any encumbrance like mortgages or any other claim to the asset/property or the fact that the asset/property is clear of any such encumbrance.
  • Possession: The particular calendar date on which  the buyer gets the right to own the property.
  • Covenants: Several things are stated by the seller about the condition of the property, and the rights granted to the buyer
  • Witnesses: People who witness the signing of the deed append their signatures to it.


Conditions Which You Need to Fulfill in Drawing a Sale Deed

  • Stamp Duty: In order for a sale deed to be legally valid, it is important to pay the stamp duty at the rates applicable in the state wherein the property is situated. The stamp duty is calculated based on the property’s market value or the sale consideration, whichever is higher.
  • Registration: The sale deed must be registered at the local sub-registrar’s office in order to lawfully transfer the property to the buyer. The process of registration involves the payment of appropriate registration charges and will also mandate the submission of other supporting documents like ID proofs, property tax receipts, and certificates, and other relevant documents. The act that mandates this registration is the Indian Registration Act, 1908 and the registration process governing property transactions of a certain value. 

Why a Sale Deed Matters

  1. Legal Ownership: It turns the buyer into the new legal owner of the property.
  2. Fraud Protection: It guards both sides by documenting the sale conditions and preventing potential disputes.
  3. Loan Processing: Banks and lenders require a sale deed to confirm ownership when they process home loans or mortgages.

What is a Conveyance Deed?

Conveyance Deed

The term conveyance deed does not have a very narrow meaning, and it mostly remains for any document that may be used in any litigation procedure and for a deed of the demise of an interest in property from one person to the other. While a sale deed is utilized to convey the property, conveyance documents can comprise gift deeds, exchange deeds, and lease deeds, among others.

Key Parts of a Conveyance Deed

  • Parties Involved: The names, addresses, and other essential details of the seller and buyer.
  • Property Description: A complete rundown of the property changing owners.
  • Type of Transfer: The way the property is handed over, like through a purchase, present, rental, or exchange.
  • Consideration: The value of the transfer, which might be cash or something else.
  • Transfer of Title: A straightforward statement showing the ownership shift from the seller to the buyer.
  • Encumbrances: A mention of any current claims or rights on the property.
  • Possession: The date the new owner will receive the property keys.
  • Covenants: Various promises the seller makes about the property.

Types of Conveyance Deeds

  1. Sale Deed: Hands over property ownership through a sale.
  2. Gift Deed: Transfers ownership of property as a gift without any money exchange.
  3. Lease Deed: Gives property rights for a specific period in return for rent.
  4. Exchange Deed: Let two parties trade properties.
  5. Relinquishment Deed: Surrenders one’s portion of an owned property.

Legal Requirements to Create a Conveyance Deed

  • Stamp Duty: The conveyance deed needs stamps based on current rates.
  • Registration: To become valid, you must register the deed at your local sub-registrar’s office.

Why a Conveyance Deed Is Important

  1. Legal Transfer: It records the change in property ownership, protecting the rights of both parties.
  2. Clarity and Openness: It sheds light on the terms and conditions of the transfer.
  3. To Prevent Arguments: It spells out the rights and responsibilities of the people involved, helping to avoid disagreements.

How Sale Deed Differ from Conveyance Deed

FactorsSale DeedConveyance Deed
ScopeA type of conveyance deed that legally transfers ownership of a property from the seller to the buyer.This type of deed includes all documents that transfer ownership rights of property, including gift deeds, exchange deeds, and sale deeds.
PaymentIn general, the buyer pays the seller for the property.Financial transaction, depends on the type of conveyance (e.g., gift deed might not involve payment).
UsageUsed specifically for the sale and purchase of property between two parties.Used for various types of property transfers, including sale, gift, exchange, lease, and mortgage.
Nature
It is a binding agreement betweentwo parties for property sale with legal implications.
It covers a wider range of property transfers, encloses many legal mechanisms beyond just sale.

Scope:

  • Sale Deed: People use this to sell and transfer property ownership.
  • Conveyance Deed: This covers more ways to transfer property, such as selling, gifting, leasing, and exchanging.

Payment:

  • Sale Deed: Always requires money as payment because someone sells the property.
  • Conveyance Deed: This can require money or other forms of payment, depending on how the property changes hands.

Usage:

  • Sale Deed: A person uses this when they sell the property.
  • Conveyance Deed: People apply this to transfer various types of property, not just for sales.

Nature:

  • Sale Deed: This involves a buyer and a seller.
  • Conveyance Deed: This can include different parties such as a gift-giver and a recipient in a gift deed, or a landlord and tenant in a lease deed.

Conclusion

Knowing the distinction between a sale deed and a conveyance deed matters a lot in property deals. People use a sale deed, which is a type of conveyance deed, when they sell the property. A conveyance deed, however, includes many different ways to transfer property. These documents have a key part to play in shifting property ownership and protecting the rights of everyone involved. People need to carry out, stamp, and register these deeds to make sure the deal is legal and safe.

FAQs

1.  Is it possible for the transfer to be documented be both as a sale deed and as a conveyance deed?

Yes. A Sale Deed is a type of deed in which property is transferred for sale. A conveyance document can be referred to as a document of sale, but in some instances, there are conveyance documents that are not documents of sale.

2.  Do I still need to register the sale deed?

Yes. To make it legal, you need to have the sale deed registered at the sub-registrar office of the local area. This procedure entails such costs as stamp duty and registration fees.

3. What are the consequences of not registering a sale deed or conveyance deed?

If someone doesn’t register a document for selling or transferring property, the law won’t recognize the new owner. This can lead to arguments and legal trouble because the rules don’t see the deal as valid

A Comprehensive Guide on How to Apply White Cement to Walls

0
How to Apply White Cement to Walls

Want to give your walls a fresh bright look? White cement might be just what you need. This article details out how to put white cement on your walls. It doesn’t matter if you’re after a modern style or just want clean, tough walls. We’ll cover it all. Let’s begin!

What is White Cement?

Before we get into how to use it, let’s talk about what white cement is and why so many people like it for their walls.

White cement is like regular cement but with one main difference: it’s bright white in colour. This colour comes from using raw materials with low iron content. It is used  in construction and decoration because it gives a clean elegant appearance. It works well for everything from structural projects to fancy finishes.

Apply White Cement to Walls

Why Use White Cement?

  • Looks Good: It creates a clean modern look that suits both new and old walls.
  • Strong and Long-lasting: It matches regular cement in toughness, so it will last a long time.
  • Many Uses: You can apply it to different tasks, from plastering to using it as a base for paint.

Process for Applying White Cement on Walls

a) Getting Started: What You’ll Need

Before you begin, get all the stuff you’ll need:

  • White cement
  • Clean water
  • Sand (if you’re mixing plaster)
  • Mixing bucket
  • Trowel or spatula
  • Sandpaper
  • Protective gear (gloves, goggles, dust mask)
  • Measuring tools
  • Paintbrush or roller (if you’re finishing with paint)

b) Preparing the Wall

  1. Check the Wall: Look at it for cracks, holes, or loose parts. Fix major problems before you begin.
  2. Clean Up: Get rid of dirt, dust, or old paint. A clean wall helps things stick better.
  3. Patch Up: Use a good filler to fill cracks or holes and wait for it to dry.
  4. Sand the Wall: Use sandpaper to smooth out rough areas. This allows the white cement to stick well.
  5. Moisten the Surface: Use a brush or spray bottle to wet the wall a bit. This helps the white cement to adhere better.

c) Mixing the White Cement

  1. Follow the Ratios: Look at the package to see the correct mixture , you’ll need 1 part white cement and 2-3 parts sand for plastering.
  2. Mixing: Put the white cement and sand in your bucket then add water bit by bit. Mix until you have a smooth paste without lumps. It should be thick but easy to spread.
  3. Let It Rest: After you mix it, leave the paste alone for a few minutes to get the air bubbles out, then mix it again.

d) Applying the White Cement

  1. Put on a Base Coat: Start with a thin layer of white cement if your wall feels rough. This helps you get an even finish. Use your trowel to apply the cement. 
  2. Spread the Cement: Move from the top of the wall to the bottom. Try to keep it about 2-3 mm thick.
  3. Make It Smooth: As you proceed, use your trowel to smooth the surface. Work on small areas to keep it even and stop it from drying too.
  4. Clean Up the Edges: Don’t forget the edges and corners. Use the trowel to create clean lines and smooth transitions.
  5. Let It Dry: Give the cement time to harden as per the manufacturer’s instructions (generally  a full day). Don’t touch or move it while it’s setting.

e) Adding the Final Touches

After the white cement dries, you may want to put some finishing touches:

  1. Sanding: If you notice any bumps or flaws after it dries, sand the surface with fine-grit sandpaper.
  2. Dust Off: Clean the wall with a damp cloth to get rid of any dust from sanding.

f) Painting

  • Get the Wall Ready: If you’re going to paint over the white cement, put on a primer first. This helps the paint stick better and gives an even colour.
  • Paint: Pick a good paint and put it on with a brush or roller. Let each layer dry before you add another.
  • Seal: If you like the natural look of white cement, you can put on a clear sealant to protect the surface and make it last longer.

Tips to Succeed

Process for Applying White Cement on Walls
  • Keep an eye on the weather: Make sure to put on white cement when it’s not too hot or cold. The temperature has an impact on how it hardens.
  • Be careful when you mix: Get the texture just right. It needs to be thick enough to stick to the wall but easy to spread.
  • Don’t waste time: Mix the amount of cement you can use at a time before it starts to get hard to avoid throwing any away.

Problems You Might Face and How to Fix Them

  • Cracks: Cracks might show up if you put on too much at once or it doesn’t dry properly. Try to apply thinner coats and make sure it dries evenly all over.
  • Uneven Surface: To fix a bumpy finish, use your trowel to smooth things out as you go. You can also sand it down after it dries to even it out.
  • Poor Adhesion: If the cement doesn’t  stick right, double-check that you prepped and dampened the wall. Also, make sure you mixed it correctly.

Conclusion

There are several reasons why coating  your walls with white cement gives your room a fresh look, plus it’s stronger. If you require to renovate an old wall or start anew, here are steps for doing it like a pro. The result will be walls which look great and serve you for long if at all preparations and mixing are done properly.

Frequently Asked Questions

1. How long does it take for white cement to dry?

White cement needs about 24 hours to dry, but this can change based on how thick you put it on and how warm it is. It’s a good idea to look at what the manufacturer  says about drying times.

2. Can I apply white cement over painted walls?

You can put white cement on painted walls, but check if the paint is in good shape first. Clean the wall and take off any paint that’s coming loose. You might need to sand the painted surface a bit to help the white cement stick better.

3. What should I do if the white cement mixture starts to set before I finish?

If the mix begins to harden before you’re done applying it, you’ll have to throw it out and make a new batch. White cement can start to get hard fast so mix as much as you can use within the time.

Understanding the Differences Between White Cement and Wall Putty

0
Difference Between White Cement and Wall Putty

White cement and wall putty are two materials builders and DIY enthusiasts often use. They have different purposes and unique traits. Knowing how they differ can help you pick the right one for what you need to do.

What is White Cement?

White Cement

It is simple to recognize the special variety of Portland cement known as “white cement” due to its pure white hue. This is made using low concentrations of manganese oxide (MnO2) and ferric oxide (Fe2O3). Its manufacturing involves the use of gypsum, clay, and limestone.

Properties of White Cement

  1. Color: The white shade makes it perfect for uses where looks matter.
  2. Strength: White cement is as strong as regular Portland cement, so it’s tough and dependable for many building projects.
  3. Setting Time: It takes a reasonable time to set, which gives you some leeway when you’re using it.
  4. Resistance: It stands up well to adverse weather and sunlight so you can use it outside without worry.

Uses of White Cement

  • Architectural Finishes: White cement plays a role in decorative finishes, terrazzo flooring, and ornamental concrete products because of its attractive color.
  • Tile Grouting: People use it to grout tiles to match or complement the tile color.
  • Precast Products: The production of precast architectural panels, balustrades, and sculptures often involves white cement.
  • Surface Coatings: It is used in reflective paints and coatings for roads and pavements.

What is Wall Putty?

Wall putty

Wall putty is a fine white powder. Manufacturers create it by mixing white cement, polymers, and fillers. It is used to get walls and ceilings ready for painting after plastering, where it helps to create a smooth even surface. Properties of Wall Putty

  1. Smoothness: Wall putty makes walls smooth, getting rid of any flaws on the surface.
  2. Adhesion: It sticks well, which helps the paint stick better to the wall.
  3. Water Resistance: Wall putty offers some protection against water by keeping the paint safe from dampness.
  4. Flexibility: It bends a little, which helps stop cracks from forming on the painted surface.

Uses of Wall Putty

  • Surface Preparation: Wall putty is used mainly to get walls ready for painting and fill cracks, holes, and flaws.
  • Paint Base: It gives a good base for paint, which makes the paint look better and last longer.
  • Smooth Finish: People use wall putty to make interior and exterior walls smooth. This makes the paint job look better overall.

One significant advantage of wall putty is that it provides a white base. This white layer ensures that any chosen paint color is clearly visible and vibrant on the wall, preventing discoloration caused by underlying structural materials. This makes the final paint color more accurate and true to its intended shade.

Key Differences Between White Cement and Wall Putty

Composition

  • White Cement: Limestone, clay, and gypsum make up white cement. It has little iron and manganese to keep its color.
  • Wall Putty: White cement, polymers, and fillers form wall putty. These parts work together to make it smooth and sticky.

Purpose

  • White Cement: It is used to build and decorate and . gives strength and looks good.
  • Wall Putty: It is used  to get walls ready for painting and . makes surfaces smooth and sticky.

Application

  • White Cement: Builders apply it to make things look nice, fill gaps in tiles, and make precast products.
  • Wall Putty: Painters apply it on walls and ceilings to make them smooth before painting.

Strength and Durability

  • White Cement: It’s strong enough to hold up buildings and can bear heavy loads.
  • Wall Putty: It doesn’t make building components stronger. 

Color and Finish

  • White Cement:This type of cement is finely ground and has a smooth texture. It’s used in construction where color and finish are crucial. White cement provides a clean and bright surface, but it is generally coarser compared to wall putty.
  • Wall Putty: This material is also white but has a much finer, smoother texture. It’s specifically designed to fill in minor surface imperfections and create an even base for painting. However, it is generally not visible after painting.

Setting or Drying Time

  • White Cement: White cement typically sets in about 30 to 60 minutes, depending on the specific product and weather conditions. This moderate setting time makes it suitable for various applications.
  • Wall Putty: Wall putty dries usually within 3-6hours, allowing you to paint over. Advantages and Disadvantages

Advantages of White Cement

  • Looks Good: Its white color makes it a good fit for decoration and building design.
  • Lasts Long: Has great strength and stands up to adverse weather, which is perfect for outdoor usage
  • Useful in Many Ways: People can use it in numerous ways, from ready-made products to coatings on surfaces.

Drawbacks of White Cement

  • Price: White cement costs more than regular Portland cement because it needs extra work to get its color.
  • Not Always Needed: Its main plus is its color, which you might not need for every job.

Advantages of Wall Putty

  • Smooth Finish: Makes surfaces smooth and enhances the paint finish.
  • Better Sticking: Helps paint stick to walls better and cuts down on paint peeling or flaking risks.
  • Fights Water Seepage: Gives some shield against dampness, which can make the paint last longer.

Drawbacks of Wall Putty

  • No Added Strength: Wall putty doesn’t make walls or ceilings stronger.
  • Susceptible to Damage: Wall putty can be prone to chipping or cracking over time, especially in high-traffic areas or in extreme temperature conditions.

Picking Between White Cement and Wall Putty

Your choice between white cement and wall putty hinges on the following factors :

  • What Your Project Needs: Figure out if you need something strong or just something to smooth out surfaces.
  • How Much You Can Spend: Think about how much the material and the labour will cost for each choice.
  • How You Want It to Look: Decide if how the material looks matters for what you’re doing.

Conclusion

White cement and wall putty are different materials. They have different ingredients, uses, and features. White cement works best when you need something strong and good-looking. When it comes to preparing surfaces for painting, wall putty is the best option. Knowing the differences and the uses of these two coatings will help you pick out the most appropriate one. Generally, applying wall putty is a necessity in the construction process, while the use of white cement is only optional and purely for aesthetic purposes.

FAQs

1. Can white cement be used in place of wall putty?

White cement has some uses similar to wall putty, like smooth surfaces, but it doesn’t stick as well or make surfaces as smooth. Wall putty is made just to get surfaces ready for paint and works better for this job.

2. Is wall putty waterproof?

Wall putty isn’t waterproof, but it keeps out some water, which helps shield the paint from moisture and damp air. To get even more protection, it’s smart to use good-quality paint and sealer over the putty.

3. How long does it take for wall putty to dry?

Wall putty takes about 3 to 6 hours to dry. This depends on the thickness of each coat, weather conditions and room temperature. Hence, the best thing is to wait for at least 24 hours before painting over wall putty in order to ensure it has set completely.

Will the Patta Change Automatically after Registration

0
Will The Patta Change Automatically After Registration

Property transfer is a complicated and time-consuming process. However, the initiative by Tamil Nadu’s e-service platform offers automatic patta transfers. But it also depends on the documents and the changes in them. This blog explains in detail the automatic patta change process.

Patta

A patta is an important legal document that denotes the owner of a particular piece of land. , This document is issued by the revenue department and serves as proof of ownership by including the survey number, location, and other details. To obtain a patta we need to meet the Land Eligibility Criteria in Tamil Nadu

Patta

Advantages of Patta

There are several advantages to having a patta, which are listed below:

  • Legal Security: The patta is a legal document and can be used as evidence in cases of conflict
  • Financial Transactions: The patta will help facilitate financial transactions, such as mortgages, loans, and property sales.
  • Development Rights: The patta can be used as a legal document to get permission for land development. 

Land ownership is one of the vital documents because in India, land ownership and financial facilities are complex procedures; hence, having a patta will help you solve land-related affairs. 

Traditional Process of Patta Transfer

In the traditional patta process, the owner must apply for a patta after purchasing a property separately. The individual has to submit the required documents, such as Aadhar, PAN, or passport. 

Moreover, the applicant has to be physically present at the local Tahsildar office. Once the document is submitted,  approval can take up to a week or a month. This mainly depends on the workload in the office. 

Recent Changes in the Patta Process in Tamil Nadu

Recent Changes in the Patta Process in Tamil Nadu

In recent years, the government of Tamil Nadu has incorporated much of its property registration online. One of the primary achievements is that Patta ownership can be transferred automatically upon registering the property.

Instant Patta Transfer

In the year 2024, the state of Tamil Nadu introduced and implemented a process where the patta can be automatically updated after purchasing and registering a property. 

However, this update occurs only if the land extension remains the same. This could also mean that the property does not require a subdivision, and the changes will appear on the patta immediately after registration.

The link between the revenue portal and the registration portal makes sure that the new owner’s name is updated in real- time. By updating details, such as  survey number, town/village, or taluk, the online patta can be downloaded within minutes.

Advantages of Automatic Patta Transfer

There are several advantages to  automatic Patta transfers, and they are listed below:

  • Time-saving: The automatic Patta transfer process eliminates the need for a separate application process and saves both  revenue officials and buyers’ time.
  • Transparency: When the revenue portal is linked with the registration, it offers transparency in the property transaction. The buyers can verify and change the information on the patta online, decreasing the fraudulent chances.
  • Convenience: Once the title transfer is completed, the buyer will receive a confirmation alert. This makes sure that the property is transferred to the right person, making the process user-friendly.
  • Legal Validity: The online patta that contains only the QR code does not require additional attestation and is legally valid. 

The Online Patta Transfer Process

The online Patta transfer involves the following process:

  • Login to the given Tamil Nadu e-Services website: https://eservices.tn.gov.in/eservicesnew/index.html.
  • Provide the basic details and register your account by submitting the necessary details.
  • Once the account is opened, you can start by submitting the application process to the local revenue office 
  • Upload required documents, such as the registered sale deed, identity proof of the new owner, encumbrance certificate, previous patta document, and property tax receipts, to the e-portal for verification.
  • After submission of the documents in the portal, an online fee of Rs. 100 has to be paid for processing the application. 
  • Once you click the submit button, the verification will be done, and if all the requirements are met, then the patta will be issued in the name of the new owner.

Limitations of the Online Automatic Patta Transfer Process

The automatic Patta transfer process has its limitations; the details are listed below:

  • Subdivisions: iIf the property has a subdivision, then the owner mustshould apply for property transfer through e-Seva service points. The process may take up to thirty days. 
  • Pending Application: The primary drawback  of the process is not having enough surveyor staff. There are still around two lakh pending pattas in the state, and this means you have to keep all the documents right to get pattas seamlessly. 
  • Seller’s Patta: The automatic process is possible only if the seller has an individual patta or the buyer has to apply for one separately.

Steps to Check the Patta Process

To check the status of the application process, the procedure is a straightforward:

Go to the official portal: https://eservices.tn.gov.in/eservicesnew/home.html

Details: Enter the details, such as sub-division, taluk, or town, in the portal.

Download: Once all the details have been entered, then the patta can be downloaded. 

Conclusion

The automatic Patta transfer process is an efficient and seamless way of obtaining a legal land property document. However, there is also a clear challenge in getting a patta through an online portal. The happy news is that if all the documents are present, then the patta will be transferred within hours to the new owner’s name and can be downloaded within a few hours. 

FAQs

1. Will Patta change automatically?

Yes, pattas change automatically if there are no subdivisions and the previous owner already has a patta.

2. What is the cost of changing the patta?

The cost to change a patta online is around one hundred rupees. 

3. How many days after registration will the patta be issued?

The patta will be issued normally after ninety days following the completion of the online application, details, and fee.

4. What is the validity of the patta?

The patta validity is for four long years. On the other hand, if you have a house patent, then the validity remains until the property stands.

Calculating Construction Cost in Bengaluru: All You Need to Know

0
Construction Cost in Bengaluru

Bengaluru is one of the fastest growing cities in the world, with persistently increasing demand for housing every year. Thousands of homes of various types and styles are built in the city every month to accommodate the changing aspirations of prospective home buyers. With multiple contractors and agencies in the city quoting largely varying costs, it can be a daunting task to verify the validity of construction rates while ensuring that construction quality is not compromised. Read on to learn all you need to know about construction costs in Bengaluru, along with the factors that affect it. 

Factors That Affect Construction Costs in Bengaluru

Numerous physical, environmental and political factors affect the home construction cost across various regions. A few of the specific factors influencing construction costs in Bengaluru are explained below. 

  • Site Location

Bengaluru is a very large city, thus the location of the site inside the city is a major factor that affects the home construction cost. Material transportation costs for sites in the centre of the city may be high (as materials are generally manufactured on the city outskirts). However, labour costs will be higher for isolated sites or sites far away from the city centre. Accessibility to the site with adequate road sizes and quality are also important. For example, sites with small abutting roads will require manual labour for excavation since they cannot be accessed by large vehicle excavators, this consequently increases the total construction cost. 

  • Size of Project

In Bengaluru, very small houses can cost higher to construct than larger projects. This is because it is difficult to find labour for small projects since the profits are low, but the resources required (such as equipments, machinery and time) may remain the same. However, very large projects often have high construction costs per square foot, due to the use of premium materials and luxury finishes. 

  • Complexity of Design

Design complexity and construction methodology are major indicators to estimate construction cost. Standard designs with rectilinear shapes and repeating floor plans are quick and easy to execute, thus reducing the overall construction cost. Meanwhile, complex or irregularly shaped floor plans and facades, along with intricate detailing and innovative features—such as skylights, cladding elements, kinetic facades and extensive ornamentation—consume time, require expensive materials and skilled labour for execution. These elements can thus have far reaching effects and prominently increase the construction cost per square foot in Bengaluru.

  • Material Selection

Selection of materials for the structure and finishing significantly impact home construction cost. Materials such as sandstone may be available at very low costs in Rajasthan, but the same stone may be very expensive in Bengaluru due to the high transportation cost over long distances. It is thus important to select materials that are locally and easily available to ensure cost reduction and enhance sustainability.

  • Local Regulations and Conditions

The building plan approval process in Bengaluru requires various documents to be submitted to the municipal corporations such as BBMP (Bruhat Bengaluru Mahanagara Palike) and BDA (Bengaluru Development Authority). Electrical and water supply connections must be obtained through BESCOM and BWSSB. All of these processes entail specific costs, which may be subject to variation based on the site location and present political conditions. 

Estimating the Average House Construction Cost in Bengaluru

Construction cost per square feet in Bengaluru varies widely depending on the factors explained above. For estimation, it is first necessary to calculate the total built-up area of a house, which can then be multiplied with the square foot rate to obtain total cost of construction.

Prices in Bengaluru generally start at ₹1800/sq ft for basic construction, while luxury home construction costs can even go beyond ₹10,000/sq ft. A few examples for calculating cost are represented below:

Size of House (Built-up area)Low-range cost (at ₹1810/sq ft)Mid-range cost (at ₹2250/sq ft)High-range cost (starting at ₹3000/sq ft)
500 sq ft₹9,05,000₹11,25,000₹15,00,000
1000 sq ft₹18,10,000₹22,50,000₹30,00,000
2000 sq ft₹36,20,000₹45,00,000₹60,00,000
5000 sq ft₹54,30,000₹67,50,000₹90,00,000

The figures mentioned above are only indicative and are variable depending on the numerous site conditions and specific project requirements. 

In general, the above mentioned square foot construction cost is made up of the following components:

ComponentPercentage of total cost required
Architectural design charges2-10%
Structural design charges0.3-1%
Contractor’s charge20%
Labour cost40-50%
Material cost50-60%
Services cost (plumbing and electrical work including labour and materials)18%

Cost of Building a 1000 sq ft House in Bengaluru

Considering the general values explained above, the total cost of constructing a 1000 sq ft house in Bengaluru can be calculated as:

Low range cost (at ₹1810/sq ft)Mid range cost (at ₹2250/sq ft)High range cost (starting at ₹3000/ sq ft)
Architectural services (₹20 to ₹100/sq ft)20,00050,0001,00,000
Structural design services (₹10 to ₹25/sq ft)10,00015,00025,000
Material cost (~60%)8,50,00010,44,00013,65,000
Labour cost (~40%)5,70,0006,91,0009,10,000
Contractor’s profit (~10%)1,80,0002,25,0003,00,000
Overheads and miscellaneous (~10%)1,80,0002,25,0003,00,000
Total cost 18,10,00022,50,00030,00,000

These costs are subject to market variation based on design complexity and materials used. 

House Construction Cost Calculator

The steps explained above can be followed to obtain rough estimates for building construction costs in Bengaluru. However, Brick & Bolt’s Construction Cost Calculator can be used to procure more accurate estimates of costs for building a house in Bengaluru. This calculator will produce estimates based on customisable options for structural materials, finishing materials, types of services required, site location and various other aspects.

Brick & Bolt is a tech-enabled construction company with 4500+ completed residential projects which conducts 470+ quality checks at every construction stage to ensure the best quality for your house. With 3200+ customisable designs to tailor your home to accommodate your desires and provision of end-to-end construction services, Brick & Bolt is a pioneer in the real estate industry. Contact Brick & Bolt today to construct your dream home at the lowest market price in Bengaluru!

Is an Adangal the Same as A Register?

0
Is Adangal And A Register The Same

Is an adangal and a register the same? The answer is NO An adangal focuses primarily on agricultural land, whereas the register concentrates mainly on land ownership. Learn about the differences in this blog and proceed with the required document.

Adangal

An adangal is a legal document that is provided by the Village Administrative Officer (VAO). The adangal is also called village account No. 2, which is a record maintained by the VAO. 

These details are maintained in the Adangal of Tamil Nadu.

The adangal has the following details in it: 

  • Patta lands
  • Wet lands
  • Dry lands
  • Manavari
  • Assessed Wastelands
  • Poramboke Land

Purpose of an Adangal

Purpose of an Adangal

The village administrative officer keeps track of crops on the land, the number of trees in the government land, and maintains all the records on the crops every month. 

This is how the adangal maintains the timeline of the ownership and usage of the property. It  also indicates that the property title held by  the government is valid and is not subjected to any other use. 

Expanded Records in an Adangal

The adangal has a wide range of details and is explained below:

  • Extend of Land: The total area that the owner has. 
  • Land Type: The land type, whether it is dry, wet, or irrigated.
  • Crops Grown: The type of crop that is grown on the land including the area under cultivation.
  • Water Sources: The type of irrigation source used for crop cultivation. These can be canals, wells, or dams.
  • Details of Tenancy: In case the land is leased out, then the address and details of the tenants are recorded
  • Mutation: The change of land ownership or use of the land is mentioned in the adangal.

An adangal aerve as a comprehensive guide to the cultivation of lands. 

What is the Use of Adangal?

Use of Adangal

Adangal is an important document that can help in times of  crisis.

Emergency Harvesting

In case of sudden floods or drought, knowing the type of crops in the field facilitates emergency harvesting . This will help to minimize further loss and safeguard food supplies.

Recovery Monitoring

After a disaster, Adangal can be used to track the agricultural lands. This helps to monitor the changes before and after the crisis, make changes to the recovery of the land, and make informed decisions on the future plans.

Farmer Compensation

If the crops fail due to natural calamities, the adangal certificate that outlines the type of cropland in the area will help farmers get compensation or insurance. 

Protecting Crop from Black Marketing 

An Adangal can also help safeguard crops from being sold on the black market, ensuring that farmers receive fair prices.

Register

A register is a legal document that denotes a person’s legal right over a property. A register is widely known as ‘patta.’ The patta is taken care of by the revenue department, and in the state of Tamil Nadu, the patta can be applied for and downloaded offline or online. A register is also known as Village Account No. 1.

Details in a Register Record

A patta or  register will contain the below details in the form:

  • Ownership of Land: It contains the names of the legal owners.
  • Survey Numbers: A survey number is a unique number  that is given to the piece of land.
  • Land Classification: In the land classification, the details of whether the land is commercial, residential, or agricultural are mentioned in the register. 
  • Boundaries: The exact extension of the land with precise measurements is mentioned in the patta.
  • History of Ownership: In case there are any changes in ownership over time, the historical records are maintained in the patta.
  • Revenue Details: The revenue details contain the payment and land taxes.

The Use of Register in Crisis

The patta protects the owner from a lot of legal crises.

Compensation and Insurance Claims

When a landslide or earthquake occurs, the register, or patta, can be used as a legal document verifying the ownership. This document helps in verifying ownership and provides financial assistance to the deserved owner, helping in the recovery of their financial state.

Protection from Fraudulent Activity

During crises, people can take advantage of the situation and grab the property fraudulently. The patta is the document that will help the rightful owner gain his ownership back from unauthorised claims.

Loan Facilitation

A register will help with the easy credit of loans and help secure financial setbacks. Moreover, it is a legal document that will be useful  in case of any problems.

Difference Between Adangal and Register

CharacteristicsAdangal (Village Account No.2)A Register (Village Account No.1
PurposeThe purpose of an adangal is to maintain a record of agricultural land and the activities associated with it.A patta, or register is a record of the ownership of land. 
Primary FunctionIt contains information on tenancy, patterns of cultivation, and crops.It is a legal document on the history of ownership.
ContentThe details about the crops, irrigation, lease details, and extent of cultivation are noted in the adangal. The register contains the details of the land owner, survey number, and classification.
Information on Revenue It does not include the details of revenue directly.It includes information on taxes, and payments.
Maintenance AuthorityThe adangal is maintained by the Village Administrative Officer (VAO) or any local authority. The patta is maintained by the revenue department or the  land record office.
Changes in Documentation It denotes the changes in crop cultivation and land use.It denotes the changes in land ownership and legal boundaries.
Geographical VariationsThey are known by different names across districts, such as ‘Pahani’ in Karnataka.It is known as register or Patta across the country.
Survey NumbersThey may include the survey numbers that are linked to specific land plots.To legally determine the land, a precise survey number is used.

Conclusion

In summary, both adangal and register are entirely different documents with distinctive functions. The register is maintained by the revenue department and focuses on land ownership with precise numbers. On the other hand, the Adangal is taken care of by the Village Administrative Officer, and it focuses mainly on crops or agricultural land. It is essential to understand the difference and apply for the required document.

FAQs

1. What will happen if the property is not registered?

If the property is not registered, in case of any conflicts, you cannot defend your ownership since the absence of the document is legally invalid.

2. What constitutes an adangal copy?

The adangal copy can be a photocopy of the original certificate that contains crop grown, agricultural pattern, tenant details, and the details of ownership.

3. What is the difference between adangal and register?

The key difference between adangal and register is that register takes care of land ownership and is maintained by the Department of Revenue. The adangal is a document that will focus on agricultural land and is maintained by VAO.