Home Blog Page 57

Hydrophobic Cement: Your Key to Stronger, Longer-Lasting Structures

0
Hydrophobic cement

Material selection is crucial when one wants to construct permanent structures. Hydrophobic cement is one such transformative substance that influences the way people undertake construction projects. Notable for its ability to repel water, it is beneficial in places where moisture can cause difficulties. Let’s look at the unique characteristics of hydrophobic cement and why it is invaluable for various construction requirements.

What is hydrophobic cement?

Hydrophobic Cement

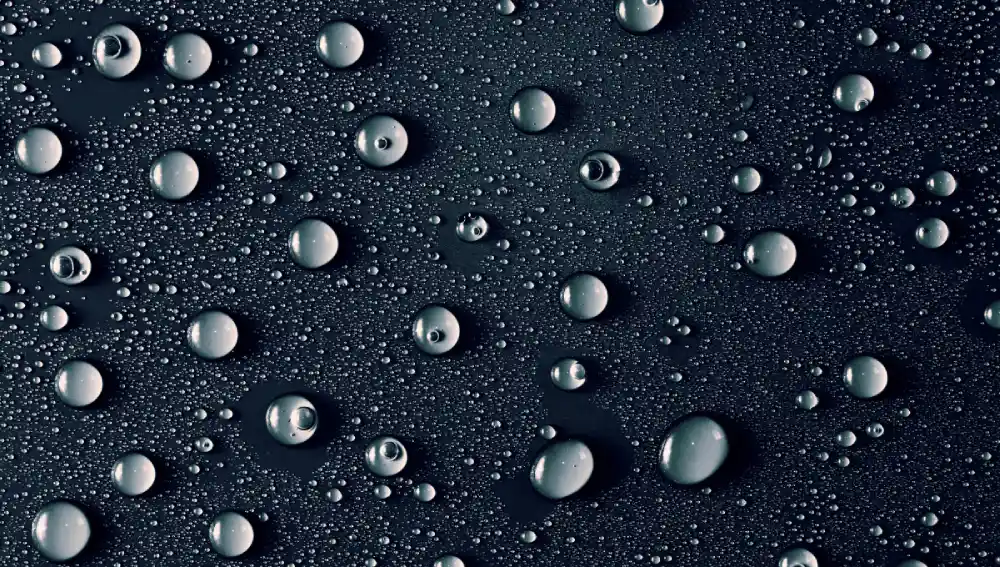
Hydrophobic cement refers to a cement, which has been coated with special reagents which cause the cement to be water repellent. Imagine your concrete wearing a raincoat to prevent damage from rain. Such additives include the sterates which form a coat that surrounds the cement particles. This barrier assists in preventing water from penetrating the concrete and increasing its strength.

How Does It Work?

The fact that hydrophobic cement is water repellent makes it almost ideal for use in construction. When in its dry state the additives coat the cement particles so that water is locked out from doing its destructive work. This also has a function of protecting the concrete against moisture and therefore serves to increase it lifespan. Imagine a material that does not absorb water, allowing the liquid to run off; this is precisely what hydrophobic cement does for concrete.

Key Characteristics

  • Water Resistance: Hydrophobic cement means that water is not able to stick to structures. Thus, it prevents the formation of bad structures, limits water absorption, and reduces damage from moisture exposure.
  • Durability: This  type of cement used prevents water ingress, thereby increasing the lifespan of buildings and structures.
  • Workability: Some of the compounds put in the cement include those that facilitate the cement being  managed more readily, resulting  in a better surface.
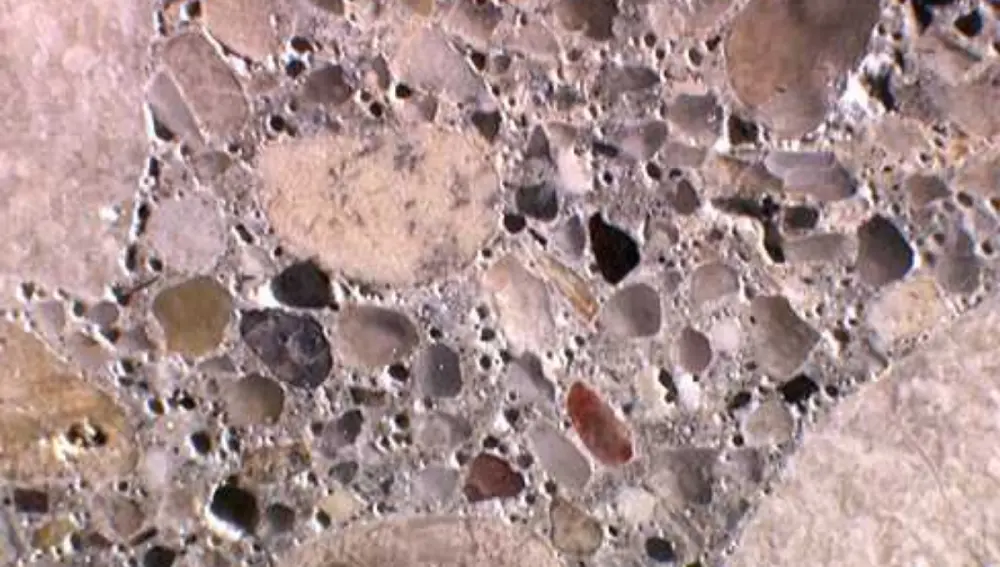
  • Efflorescence Resistance: It also reduces the incidence of efflorescence, which are those nasty white stains usually seen on concrete surfaces.

Hydrophobic cement uses

Hydrophobic Cement

Hydrophobic cement offers many perks, making it a good pick for builders and architects in rainy areas.

1. Top-notch Water Protection

One of the main reasons to use hydrophobic cement is that it effectively keeps water out. This matters a lot for structures that deal with rain, humidity, or groundwater, where regular concrete might struggle.

2. Long-lasting Performance

By preventing moisture from penetrating, hydrophobic cement helps buildings and structures stay intact longer. This reduces  the need for  repair and maintainance, which saves time and money.

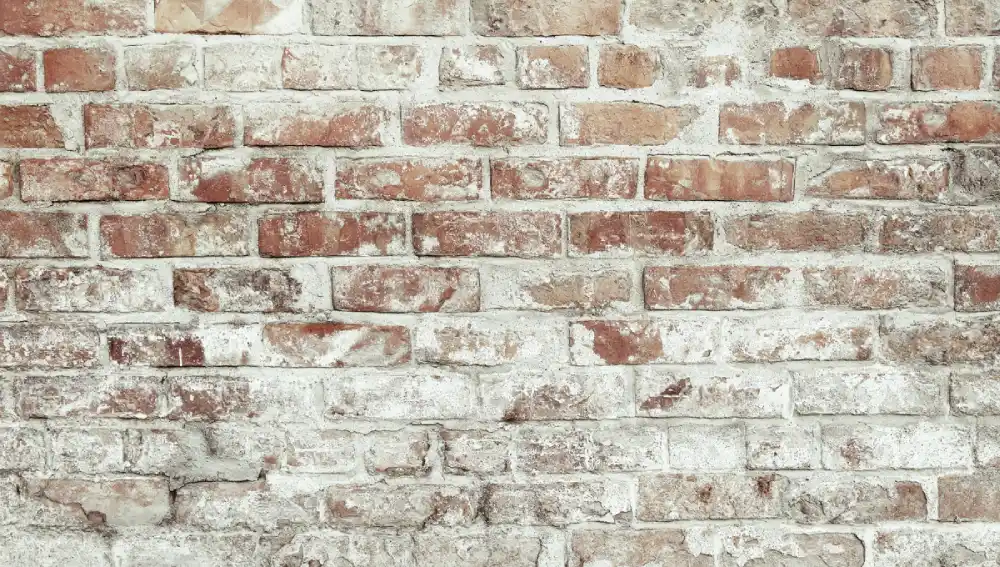
3. Prevention of Surface Staining

Efflorescence often causes problems in regular concrete, but cement with water-repelling properties helps stop this by limiting absorption. This results in fewer stains on the surface and a cleaner look over time.

4. Better Energy Efficiency

Since water-repelling cement can boost thermal  insulation, it can help keep indoor temperatures steady, which might cut down on the costs of heating and cooling.

5. Simple to Work With

Water-repelling cement is easier to mix, pour, and finish, making construction projects more efficient and less labor-intensive.

Hydrophobic cement price

The price of hydrophobic cement typically ranges between ₹350 to ₹600 per bag (50 kg) in India, depending on the brand and location. For exact pricing, local suppliers should be consulted.

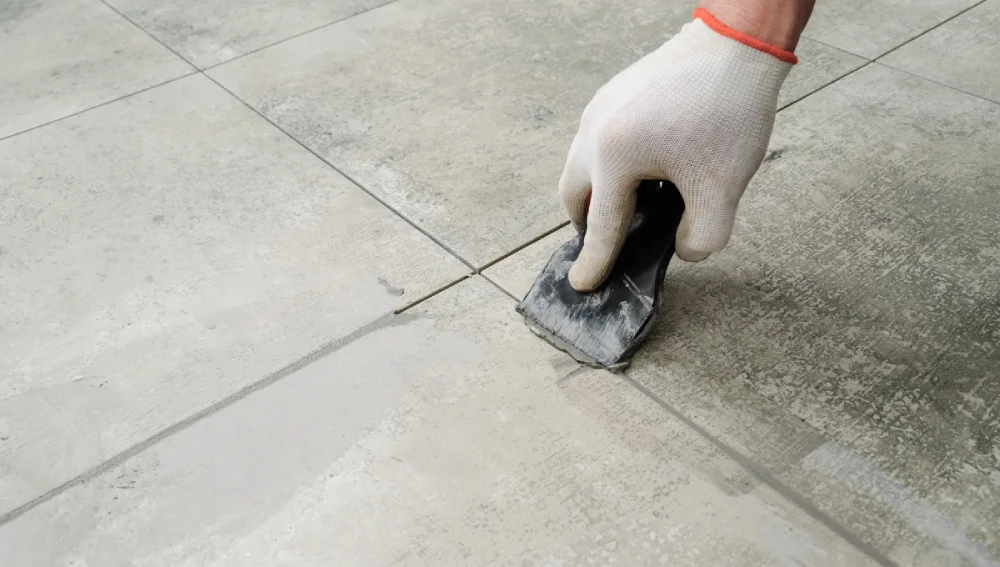
How Can You Apply Water-Repelling Cement?

This adaptable material has applications in many building projects where moisture resistance is crucial.

1. Basements and Foundations

These areas frequently receive water from the ground. Using water-repelling cement helps to protect basements and foundations from water damage, mold growth, and structural weakness.

2. Water Tanks and Reservoirs

For buildings meant to store water, such as tanks and reservoirs, water-repelling cement is a great pick. Its ability to repel water ensures the structure stays free from leaks and is reliable.

3. Bridges and Marine Structures

In tough spots like coastal areas or near bodies of water, bridges and sea structures can benefit from hydrophobic cement’s power to fight rust and decay from salty water and dampness.

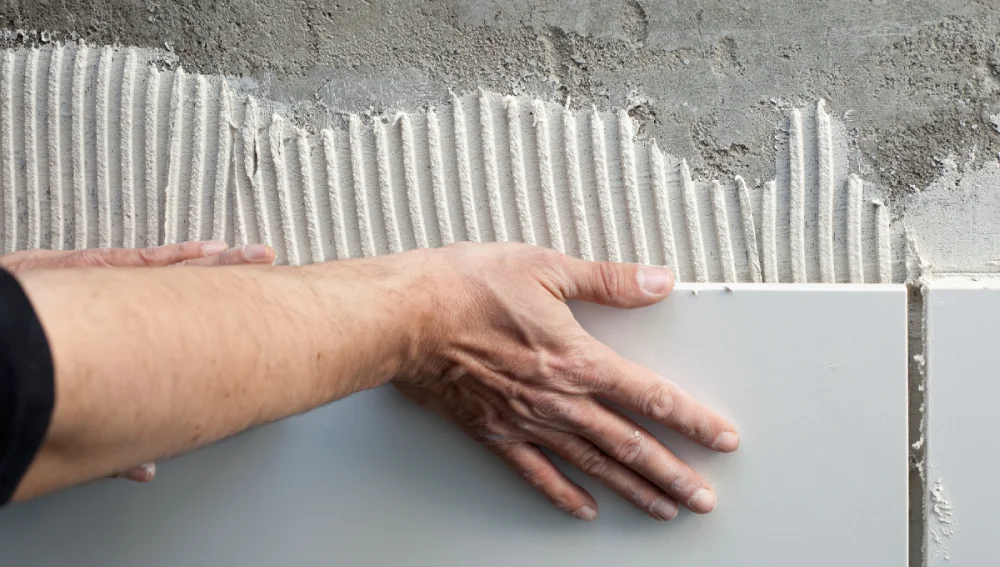
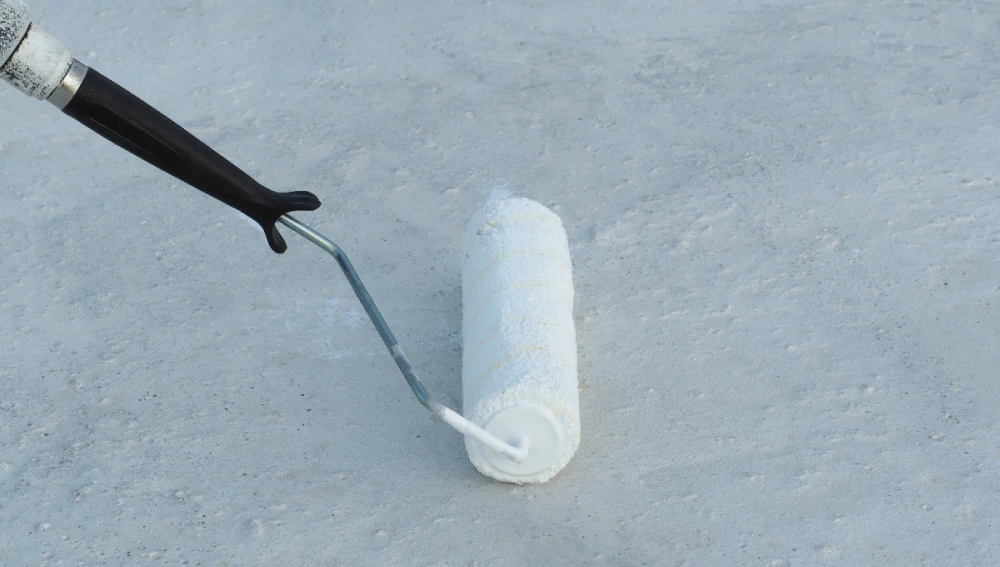
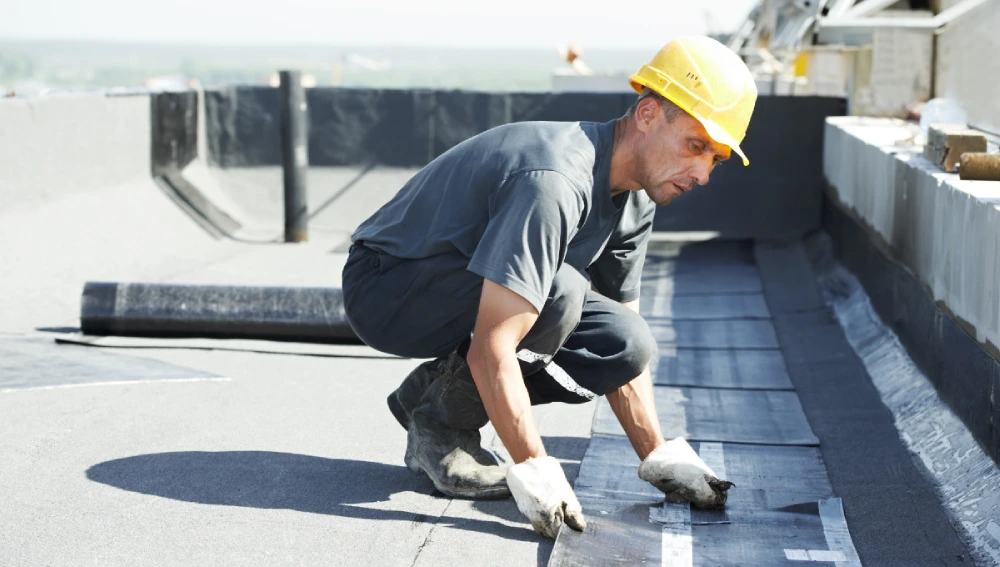
4. Roofs and Cladding

You can apply  water-repelling cement to  roofs and walls to build a tough shield against leaks in places where it rains a lot.

5. Tunnels and Underground Projects

Preventing water ingress is crucial for tunnels and structures below ground to stop leaks. Water-repelling cement gives a strong fix by acting as  a guard against wetness.

6. Retaining Walls

Retaining walls often experience pressure from soil and groundwater. Hydrophobic cement has an influence on its stability and durability by stopping water from getting in.

7. Walkways and Pavements

In rainy areas, pavements built with hydrophobic cement are less prone to cracking or wearing away, keeping their appearance and structural integrity for longer.

How to Use Hydrophobic Cement

To get the best results from hydrophobic cement, it’s crucial to stick to good practices when mixing and applying it.

1. Mix Design

Creating the right mix is vital to getting  the properties you want. You need to strike a balance between the cement’s ability to repel water,  its workability, and strength requirements.
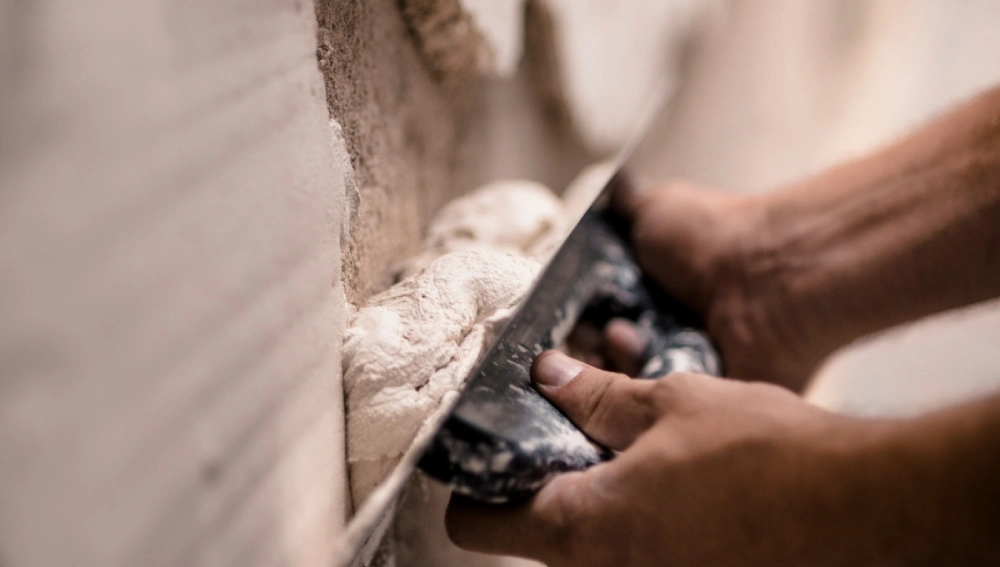
2. Mixing Process

Good mixing has an impact on the uniform  distribution of water-repellent additives in the cement. This keeps the cement consistent and helps it work as expected.

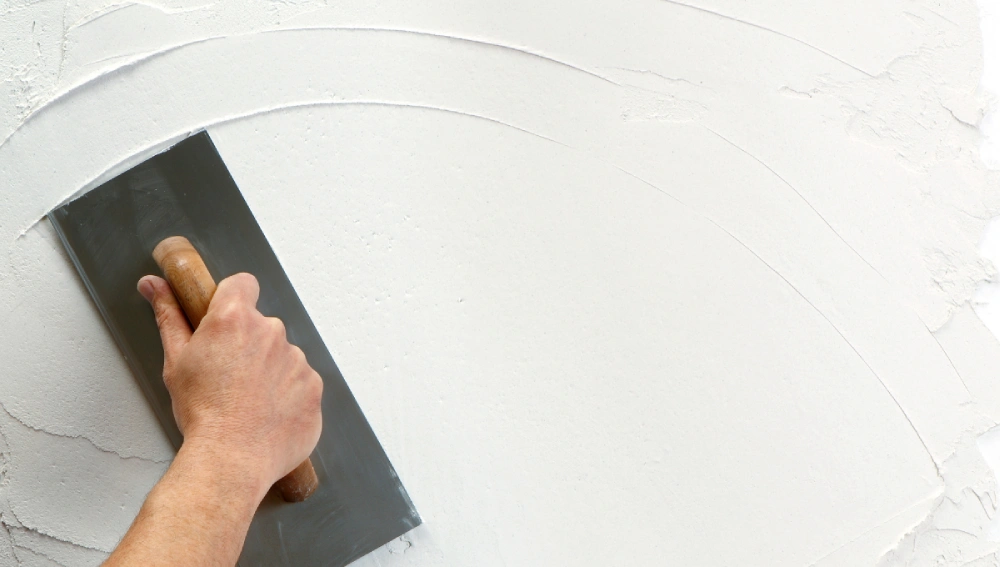
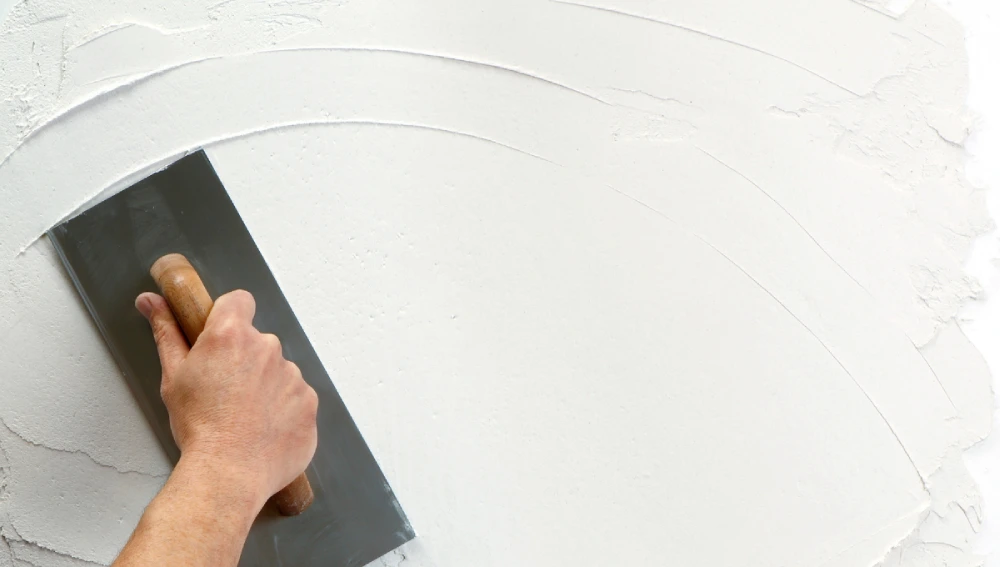
3. Curing and Finishing

Curing is crucial to getting  the most out of water-repellent cement. Giving enough time to cure makes sure the cement gets its full strength and ability to repel water. Finishing should focus on making a smooth surface to improve how the concrete looks and works.

Quality Control and Testing

To ensure water-repellent cement is high-quality and effective, we need to run a series of tests and quality checks.

1. Water Penetration Testing

Checking water resistance helps prove the cement meets  its water-repellent claims. This matters to confirm it fits well in places with lots of moisture.

2. Strength Testing

You need to test the strength regularly  to make sure the cement can handle what it’s used for. These tests track how well the cement holds up as time passes.

3. Durability Testing

Looking at how the cement lasts in different conditions, like freezing and thawing or exposure to sulfates, helps predict how it will do long-term in tough spots.

Considerations and Challenges

While water-resistant cement has many good points, you should think about some issues:

1. Cost Considerations

Hydrophobic additives may increase the initial cost of cement, but the long-term savings on maintenance and repairs often offset the higher upfront investment.

2. Compatibility Issues

It’s key to check that hydrophobic additives are compatible with other materials and mixtures used in construction. Testing can identify any potential issues.

3. Effect on Strength

While hydrophobic cement stays strong, you need to pay close attention to how it’s mixed and cured  to get the best results.

4. Environmental Impact

The manufacture and usage of hydrophobic cement should take nature into account. Green methods can help lower the harm to the environment from building projects that use this material.

Conclusion

Hydrophobic cement proves useful in construction, as it boosts resistance to moisture, lasts longer, and saves energy. This cement helps shield buildings from water damage when used in foundations, water tanks, structures in the sea, or roads. Hydrographic cement and Hydrophobic cement share similar properties and contain portland cement, It makes structures last longer and work better. Builders and engineers who know how to use hydrophobic cement well can create buildings that last even in challenging environments.

In the end, hydrophobic cement is a wise choice for making buildings last and stay strong. It offers immediate benefits and long-term advantages, making it a good pick for many different uses.

Air-Entraining Cement and Its Uses

0
Air-Entraining Cement and Its Uses

Tiny little air bubbles in concrete mixtures, added by air-entraining cement, have completely transformed modern construction. This is because these little pockets of air help to flex and harden the concrete, especially in regions that experience changes from freezing to thawing. In this way, concrete can be able to tolerate temperature changes without shattering or crumbling, like providing spacefor growth on its own.

What is Air-Entraining Cement?

Air-Entraining Cement

Air- entrained cement can be defined as a type of ordinary Portland cement that has been altered in its composition. It is produced with an air-entraining agent in the cement mixture. This agent, when added to water and aggregates forms a number of tiny bubbles in the concrete mixture. These bubbles are in the range of 10 to 300 microns and became dispersed in concrete.

How Air-Entraining Agents Work

Air-entraining agents are specialized chemicals that  generate  air bubbles and maintain the stability of the air bubbles in the hardened  concrete product. These  agents can  include natural resins, synthetic detergents, or fatty acids. When dispersed in water, these agents form  a film over the air bubbles. This film prevents the bubbles from coalescing (coming together as one), and it stabilises the bubbles within the concrete mix.

Types of Air-Entraining Agents

  1. Natural Resins: These agents are derived from wood or plants. They are  biodegradable  and don’t harm the environment.
  2. Synthetic Detergents: People often pick these because they work well and always create stable air bubbles.
  3. Fatty Acids: We don’t see these as much, but they can work well in special cases where we need unique chemical reactions.

Benefits of Air-Entraining Cement

Benefits of Air-Entraining Cement

Adding air bubbles to concrete has many upsides:

1. Better Resistance to Freezing and Thawing

One of the advantages of using air-entraining cement is that it allows fast movement through freeze-thaw cycles. In certain periods or colder regions, water may penetrate the concrete surface, leading to its expansion and crack formation following freezing.

2. Better Workability

Air-entrained concrete is simpler to handle than regular concrete mixes. The small air bubbles reduce  friction between the cement and aggregates, which makes the mixture flow more and simplifies pouring and finishing. This improved ease of use helps with projects that need complex forms or detailed finishes.

3. Greater Durability

Air bubbles can make concrete last longer by reducing permeability. This means harmful substances like chlorides and sulfates won’t get into the concrete and won’t damage it as much over time.

4. Less Chance of Separation and Water Rising

Air-entraining agents that put air in concrete help make a mix cohesion better. This cuts down on the risk that aggregate will separate from the cement paste or that water will come up to the top of the concrete. The result is concrete that’s more even and stable all the way through.

5. Need for Less Water

The air bubbles in air-entrained concrete have an impact on the need for excess water in the mix. This can result in a stronger final product, as a lower water-cement ratio often leads to higher overall strength.

Applications of Air-Entraining Cement

Air -entraining cement is widely applicable in a number of construction projects where workability, durability, and resistance to early weathering duration are important. Here are some common applications:

1. Pavements and Roads

Air entrained concrete is widely seen as being  used by builders to develop pavements and roads, especially in regions that experience many blizzards. The air-entrained concrete has the advantage of withstanding freeze-thaw cycles, so  the surface is not likely to require repair or further maintenance.

2. Bridges and Overpasses

Bridges and overpasses face tough weather conditions . Air-entraining cement helps protect these structures. It reduces the impact of freezing and thawing cycles. This makes them last longer.

3. Airport Runways

Runways need to handle heavy loads and bad weather. Air-entrained concrete gives them the toughness and resistance they need. This ensures safe and reliable surfaces for planes to use.

4. Dams and Hydraulic Structures

Structures like dams and spillways benefit from air-entraining cement. It resists water seeping in and damage from freezing and thawing. This makes these key structures safer and longer-lasting.

5. Sidewalks and Driveways

In residential and business settings, builders often use air-entrained concrete to make sidewalks and driveways. This choice helps stop cracks and surface damage from freeze-thaw cycles and de-icing salts.

6. Marine Structures

Air-entraining cement works great for structures in saltwater, like piers, jetties, and seawalls. The tiny air bubbles cut down on chloride getting in, which helps protect steel reinforcements from rust.

7. Architectural Concrete

When projects need fancy finishes, air-entrained concrete is easier to work with and less likely to have surface flaws. This makes it a top pick for architectural uses.

Mixing and Proportioning of Air-Entrained Concrete

Making a good air-entrained concrete mix requires careful thought about several things:

1. Mix Design

The mix design for air-entrained concrete needs to account for the desired air content, which ranges from 4% to 8% of the total volume. The specific air content depends on the environmental  conditions and required durability.

2. Water-Cement Ratio

Keeping the right water-cement ratio is key to getting the strength and durability you want. Air-entraining agents can lower the need for water, letting you use lower water-cement ratios.

3. Aggregate Selection

The aggregate selection has an impact on the air content and the overall effectiveness of the concrete blend. Well-graded aggregates with the right particle sizes play a key role in creating a stable mix.

4. Mixing Process

Good mixing is key to spreading air bubbles through the concrete. We must fine-tune mixing time and speed to get the air content we want without overmixing, which can make bubbles pop.

Quality Control and Testing

To make sure air-entrained concrete works well, we need quality checks and tests:

1. Air Content Testing

Checking the air content in fresh concrete is key to making sure the mix meets the specificset standards. People often use the pressure and volumetric methods to measure how much air is in the concrete.

2. Slump Test

The slump test checks how easy it is to work with the concrete mix. Concrete with air added has a higher slump than mixes without air. This shows it flows better and is easier to place.

3. Compressive Strength Testing

Compressive strength tests make sure the concrete with air added is strong enough. People test samples at different ages to see how the strength grows over time.

4. Durability Testing

Tests for durability, like freeze-thaw cycles and chloride penetration, help to evaluate how air-entrained concrete performs over time in harsh  environments.

Challenges and Considerations

Air-entraining cement provides many advantages, but users should keep these challenges and considerations in mind:

1. Cost

Adding air-entraining agents can make concrete production more expensive. However, the benefits of durability over time often make up for the higher initial cost.

2. Air Content Control

Getting and keeping the right air content can prove tricky in field conditions. Users need to watch and adjust the mix to ensure consistent results.

3. Compatibility with Admixtures

Air-entraining agents must be compatible with accelerators and water reducers in the concrete mix. Tests, careful monitoring, and talks with suppliers can help make sure they get along.

4. How it Affects Strength

Air-entrained concrete has a bit less compressive  strength than concrete without air bubbles. But people often think this trade-off is okay because it lasts longer and stands up better to freezing and thawing.

To Wrap Up

The field of civil engineering makes considerable use of air-entraining cement. It affects the structure’s durability, strength, and ability to thaw and freeze. Highways, bridges, coast projects, and other unconventional structures are some of the examples. If builders and developers knew the pros and cons of using air-entraining cement, they would make better choices.

White Cement for Roof Cooling

0
White Cement for Roof Cooling

In pursuing energy efficiency and environmental sustainability, identifying solutions for cooling buildings has become important. Among those solutions, using white cement to cool the roof is an innovative approach. White cement was well known for its aesthetic appeal and high reflectance. They have various advantages when used on roofs, mainly in hot climates.

This blog explores the details of using white cement for cooling roofs by emphasizing the mechanism, effectiveness, and practical applications.  

Composition of white cement

Composition of white cement

White cement is normally similar to ordinary Portland cement. However, they differ in raw materials and manufacturing process as they get a pure white color. The main components of white cement are:

  • Limestone with high carbonate and low iron
  • Clay with high alumina and low iron
  • Rubber or Oil
  • Selenite or Gypsum

The chemical composition of white cement is,  

CompositionPercentage (%)
Calcium Oxide62.01
Silica18.33
Alumina4.8
Ferric oxide3.2
Sulfuric anhydride3.15
Magnesium oxide0.83
Potassium oxide0.69
Sodium oxide0.18
Titanium oxide0.01

Properties of white cement

The properties of white cement and their values are as follows:

  • Fineness- 395 m²/kg
  • Setting Time – 100 min
  • Compressive Strength – 1 day (21 MPa),  2 day (38 MPa), 7 day (61 MPa), 28 day (74 MPa).
  • Compact Density – 3150 kg/m³
  • Bulk Density – 1100 kg/m³
  • Brightness- 87%

The Science of Roof Cooling

The Science of Roof Cooling

Thermal Reflectance

White cement’s strong thermal reflectivity is primarily responsible for its ability to effectively cool roofs. The ability of a substance to reflect sunlight and aid in lowering absorption is known as thermal reflectance. 

White cement has a solar reflectance value of 80–95%. This suggests that 80–95% of the solar energy it receives can be reflected by it.

In contrast, traditional dark roofing materials typically have a lower solar reflectance index, normally 5 to 20%.

Emissivity

Another property of white cement is its emissivity. Emissivity is the ability of a material to emit absorbed heat. The normal range of emissivity for white cement is 0.85 to 0.95. The material that has high emissivity can release the absorbed heat faster. This helps in maintaining a cooler roof surface, which leads to lower indoor temperature maintenance.  

Heat Transfer Equations

The process of heat transfer through the roof can be explained with the help of the heat balance equation:

q= εσT4

Here, Q represents the net heat flux (W/m²), 

ε is the emissivity, 

σ is the Stefan-Boltzmann constant (5.67×10⁻⁸ W/m²K⁴), 

T is the temperature (K).

For white cement, which has a high reflectance and emissivity value, the net heat flux is considerably lower when compared to traditional roofing materials. This helps in the reduction of the quality of heat transferred through roofs. This helps in improving the cooling effect and energy efficiency in buildings.  

Benefits of White Cement Roofs

Energy Savings

White cement roofs can save energy by reflecting most of the sunlight and also efficiently emitting the absorbed heat. Buildings that have reflective roofs can get cooling energy savings that range from 20 to 40%. 

There is a study that has been conducted in tropical regions that showed that white cement roofs can reduce indoor temperatures by up to 2 to 4 degrees Celsius. This reduction in temperature is reflected in the 30% reduced usage of air conditioning, which saves energy.

Improved Durability

In addition to improving insulation, white cement roofing extends the life of roofing components. White cement’s high reflectivity reduces thermal cycling, or the expansion and contraction of materials due to temperature variations. Heat cycling is a common cause of material breakdown.

White cement can contribute to a longer-lasting roof and lower maintenance costs by speeding up this process.

Impact on Environment

The energy savings from white cement roofs lead to a reduction in greenhouse gas emissions. Also, white cement production normally involves less carbon dioxide compared to traditional cement production. This is because of the raw materials used and the process of production. This makes white cement more environmentally friendly. 

Practical Application of White Cement Roofs 

General application steps

  1. Preparation of the surface by cleaning and repairing the existing roof.
  2. Primer can be used to improve the adhesion between the roof and white cement.
  3. Coating the white cement in layers to get the desired thickness and coverage.
  4. Curing the cement to get full strength and reflexivity.

Application Techniques

There are various methods for applying white cement to roofs, and each method has its benefits:

Direct Application

White cement can be applied directly as a thin layer over the existing roof materials. This method is easy and cost-effective, providing immediate benefits like increased reflectance and emissivity. 

Precast White Cement Tiles

White cement tiles that are precast can be installed on roofs. These tiles are highly durable, and they also provide a uniform reflective surface. This helps in improving the aesthetic appeal of the roof and also provides cooling benefits. This offers cooling advantages in addition to enhancing the roof’s visual attractiveness. The sun reflecting index (SRI) of white concrete tiles ranges from 71 to 93, while their emissivity falls between 0.85 and 0.90.

Case Studies 

A study has been published in Nature Geoscience. It has been found that replacing traditional dark roofs with white roofs could reduce heat waves by up to 2 degrees Celsius. These cooling effects can be extended beyond urban areas to rural areas. 

New York City has also implemented the white roofs technique by painting over seven million square feet of rooftops. The main aim is to reduce the temperature and fight urban heat islands. This white roof reflects solar radiation and decreases heat absorption, along with lowering the cool energy demands.

Conclusion

Using white cement for roof cooling can provide a robust solution for reducing energy consumption and improving the comfort of the building during the summer. Its reflectivity and emissivity can lower the heat reflux through roofs, resulting in cooler indoor temperatures and energy savings. As there is an increase in urbanization and climatic change, the demand for energy-efficient solutions will naturally increase. White cement roofs can be one solution that helps cool buildings and reduces environmental impacts. 

FAQs

1. How does white cement affect energy consumption? 

White cement reduces energy consumption by lowering cooling needs in buildings.

2. What is the setting time of white cement? 

The initial setting time of white cement is around 100 minutes, while the final setting time is generally less than 10 hours.

3. What is thermal reflectance? 

Thermal reflectance is the ability of a material to reflect sunlight and reduce heat absorption.

4. What is the Solar Reflectance Index of white cement? 

The Solar Reflectance Index of white cement ranges from 80-95%.

Grout vs. White Cement

0
difference between grout and white cement

When you are beginning construction or tiling projects, you have to know the materials that you require. There are two types of grout which can be used namely: the white cement and the standard grout type. Though they seem similar, they come with variations in purpose and have those features that set them apart. In this section, we will elaborate on these two materials to enable users to make proper decisions on the materials to use in their projects.

What is Grout?

Grout

Grout fills gaps between tiles and masonry surfaces this process is known as Grouting. It keeps tiles in place and stops moisture from getting into the surfaces below. You can find grout in different types, each good for specific needs and situations.

Types of Grout

  1. Cement-Based Grout: People use this grout type the most. It combines cement, water, and sand. You’ll find two main kinds:
  • Sanded Grout: This one has sand in it, which makes it stronger and better to fill larger  gaps (wider than 1/8 inch). The sand helps prevent  cracking and helps it last longer.
  • Unsanded Grout: This is a non-sanded grout, thus suitable for joints of up to 1/8 inch in width. It also does not leave an abrasive surface and will not damage  delicate tiles.
  1. Epoxy Grout: A versatile material that results from the mixture of resins and hardeners, epoxy grout, is well-regarded for its ability to withstand stains, chemicals as well as moisture. It is best for areas with high traffic and areas that are exposed to  high conditions, like the kitchen or industries.
  2. Urethane Grout: Individuals appreciate this grout due to its versatility, and they can easily apply it to the surface. Urethane grout does a good job of warding off stains as well. It is readily usable both indoors and outdoors, for the home  or office

Properties of Grout

  • Flexibility: Grout has the ability to bend and stretch. This key feature lets it handle small shifts in tiled areas. As a result, it helps prevent cracks from forming and keeps the tiles in good shape.
  • Color and Texture: You’ll find grout in many shades and textures. You can pick a color that goes well with your tiles or contrasts from them to get the look you want. The texture of the grout can also change how the finished surface looks and feels overall.
  • Durability: The life span of the grout you put in will depend on the type that you use. Different from epoxy or urethane grouts, cement-based ones are superior in their  wearing characteristics. Conversely, epoxy and urethane grouts endure usage and tear; they are stronger for  stains, and blends are better for water contents too.

Common Uses for Grout

  • Tile Installation: Grout’s main function is to fill spaces between tiles. It keeps tiles steady and stops water from getting under them, which could cause damage.
  • Masonry Work: Builders also use grout in masonry to fill gaps between bricks or stones. It gives stability and makes sure the masonry stays secure.

What is White Cement?

White Cement

White cement stands out because of its bright white color. People use it to bind concrete and mortar. Many people like white cement for decorative finishes because it looks clean and nice.

Properties of White Cement

  • Composition: White cement is made from raw materials low in iron, which gives it its white color. It mainly consists of limestone, clay, and other materials, differentiating it from standard grey cement through its minimal iron content.
  • Strength and Durability: White cement shares comparable strength and quality with standard grey cement. It can be used in construction to create structural elements while also enhancing aesthetic appeal.
  • Aesthetic Appeal: The main reason people use white cement is how good it looks. Its bright white color helps create a clean and polished look. You can also mix it with pigments to get a wide range of colors for decorative purposes.

Common Uses for White Cement

  • Concrete Production: White cement has a role in creating concrete with a bright, clean look. Builders use it for architectural and decorative projects where concrete appearance matters, like facades, pavements, and sculptures.
  • Mortar: White cement also has an impact on mortar production to lay bricks and tiles. It creates a strong bond and works well when people want a white or clean finish. white cement also fills up the gaps and cracks
  • Finishing: Besides its use in concrete and mortar, white cement is also used in surface finishing. People use this to get a smooth, polished look, making it a go-to choice for indoor projects where looks matter.

Difference between grout and white cement

Understanding how grout and white cement differ can help you pick the right material for your project. Here’s a rundown of the main differences:

DifferencesGroutWhite Cement

Purpose
This fills gaps between tiles and masonry surfaces. It keeps tiles in place and stops moisture from penetratingThis acts as a binding material in concrete and mortar. People also use it for decorative finishes because of its bright color.

Composition
This contains cement, water, and sand. Some types, like epoxy grout, have resins and other additives.This comes from materials with low iron content, such as limestone and clay, which give it a white color.

Flexibility
Has the flexibility to handle small shifts in tiled surfaces and stop cracks.Stiff and used when flexibility isn’t the main concern.

Color and Finish
It comes in many colors and textures. You can pick a color that goes well with or contrasts  the tiles.Bright white, but you can mix in colors to get different shades. People often use it because it looks good and has a smooth finish.

Durability
How long it lasts depends on what kind you use. Epoxy and urethane grouts hold up better than the usual cement-based ones.It’s as tough as grey cement and works well for building things and making them look good.

Frequently Asked Questions (FAQ)

1. Can I use grout instead of white cement for concrete?

No, you can’t use grout to make concrete. Grout fills gaps between tiles, while white cement has a specific design to make concrete and mortar. Using grout for concrete wouldn’t give you the strength and toughness you need for building structures.

2. What is the process of selecting appropriate grout for my tiles?

The following are important factors to consider when selecting the right grout for your tiles:
Width of the Joint – Sanded grout is recommended for seams wider than 1/8 inch. On the other hand, un-sanded kinds may function better in circumstances where widths are smaller than that dimension.

3. Can I color white cement?

White cement is colorable. You can do this by adding pigments to it. This gives you a range of colors for your creative projects. Just be sure to stick to the mixing guidelines to achieve the correct shade and texture.

4. Can white cement be used for grouting

Yes, white cement can be used for grouting, but it is not ideal for areas exposed to water or heavy wear, as it lacks the durability and water-resistant properties of specialized grout. For better performance, it’s recommended to use epoxy or cement-based grouts specifically designed for grouting purposes.

5. Which is better white cement or grout

White cement is better for structural applications and filling large gaps due to its strength and durability, while grout is ideal for sealing tile joints as it’s designed for flexibility and water resistance. The choice depends on your specific needs.

Concrete Wall vs. Brick Wall: A Guide to Choosing the Right Material for Your Construction Project

0
Concrete Wall Vs Brick Wall (1)

Concrete wall or brick wall—choosing between them is a common debate in every construction project. Generally, builders or homeowners need careful consideration of fundamental building materials to improve their strength and longevity. But the choice between concrete bricks and blocks can be confusing.

Both materials are popular in their own way, with distinctive characteristics and advantages. Understanding their detailed purpose may clear your perspective and help you make informed decisions for your construction projects.

This article delves into the comparison of both concrete and brick walls, including their durability, insulation, weight, strength, and fire resistance. By the end, you’ll have a clearer understanding of which material can fit your needs.

Concrete Wall

concrete wall

A concrete wall is constructed of blocks of uniform size. Its normal size is 8 inches, although dimensions may vary according to the guidelines and requirements of the engineer. A structure made up of concrete blocks can deteriorate if not treated properly.

Concrete blocks are made by pouring a mixture of sand, cement, and coarse aggregates into the framework mold and allowing it to harden. It is best suited for load-bearing structures, transferring loads from floors to the foundation or the wall below.

Benefits of Concrete Walls

  • Insulation: The concrete wall provides reasonable insulation to the buildings, which helps maintain the required indoor temperatures and reduces energy costs. However, their insulation properties can be enhanced using insulated concrete forms (ICFs).
  • Budget-friendly: Concrete blocks are a cost-effective option, especially for large-scale construction projects. The cost of solid concrete blocks starts at Rs 40 to 50 per piece. The cost of a block can vary based on its thickness, finishing, and reinforcement. Based on your construction needs, choose the suitable one.
  • Strength and Durability: Concrete walls are ideal for load-bearing walls and foundations. They are capable of withstanding maximum weight and pressure and are resistant to pests, fire, and weather.
  • Design Flexibility: Concrete blocks can be tailored to the required architectural designs. Architects or designers can add unique shapes and custom features to their homes. They are extremely flexible and can complete the construction process without delaying production.
  • Soundproof: The mass and rigidity of concrete walls effectively reduce the transmission of unwanted noise into the space.
  • Eco-friendly: Using concrete blocks in the construction project reduces waste as the builders can produce an exact amount of concrete. Meanwhile, any waste  can be reused or recycled for other construction work.

Brick Wall

Brick Wall

A brick wall is a vertical structure widely used for both interior and exterior purposes. The most common brick size is 215 mm x 102.5 mm x 65 mm (length x width x height).

Bricks are primarily composed of clay and other recycled materials, shaped into rectangular blocks. They come in different types, such as solid brick walls, veneer walls, and cavity walls, each containing ideal characteristics for various purposes.

Benefits of Brick Walls

  • Aesthetically Appealing: Beyond their strength, brick walls offer a stunning and personalized look. They are identified in numerous styles, colors, and textures, enhancing the entire building’s appearance.
  • Fire Resistance: A brick wall is an ideal option for structures in areas susceptible to fires. The type of mortar used in the brick influences the fire-resistance properties, preventing extreme heat from traveling inside.
  • Strength: Bricks can support significant loads without causing any damage or cracks to the floors or foundations, making them suitable for load-bearing structures.
  • Resale Value: Buildings with brick walls contribute to higher resale value, creating a positive first impression. The primary qualities associated with bricks are solidity, durability, and traditional craftsmanship, which are potentially noted by buyers.
  • Durability: Bricks are a natural material that offers excellent durability to structures and reduces the risk of cracks or damages. They are highly resistant to wear and tear, promoting building longevity with minimal maintenance.

Concrete Wall vs. Brick Wall

This table includes a general comparison of significant parameters. Specific properties may be due to factors such as construction methods, brick type, and wall thickness.

FeaturesConcrete WallBrick Wall
MaterialConcrete blocks are composed of cement, water, and aggregates, manufactured through the molding process.Traditionally made from clay, sometimes they include recycled materials or concrete.
ApplicationDue to their extensive strength, concrete blocks are pretty suitable for retaining walls, load-bearing walls, industrial buildings, and foundations.Bricks are versatile and used in various construction projects, including exterior walls, partition walls, chimneys, and interior bearing walls.
StrengthThe characteristic compressive strength of concrete varies significantly, with grades categorized from M10 (10 N/mm²) to M60 (over 60 N/mm²), demonstrating that concrete generally provides superior strength compared to bricks.
The compressive strength of burnt clay bricks typically ranges from a minimum of 7.5 N/mm² for Class 7.5 to over 35 N/mm² for higher grades.
CostConcrete blocks are cost-effective, especially for large-scale construction projects.It can be expensive, depending on the brick type, production methods, and region.
Ease of ConstructionConcrete walls are easy to construct due to the uniform size of the blocks.Brick walls often require skilled laborers, especially when dealing with intricate designs.
ModificationConcrete walls are difficult to modify, often involving demolition.They are easy to modify, but the cost of labor increases.
DurabilityConcrete blocks are highly durable and resistant to pests and weather.Bricks can withstand any harsh weather conditions without causing any damage.

Conclusion

The priorities and specific needs of individuals are different. Choosing between a concrete wall and a brick wall typically depends on the type of structure and project needs. Similarly, when you compare RCC walls and Brick walls, RCC walls share similar properties with Concrete walls. Consider certain significant factors, like the purpose of the wall, budget constraints, weather conditions, and maintenance requirements, to make a better decision. If you’re unsure about which material to choose, consult your professional builder for accurate guidance.

FAQs

1. Which is cheaper, concrete or brick?

Concrete wall construction is generally cheaper than brick. However, the cost is literally based on the type of brick, the region, and the production method. Concrete walls provide substantial strength and durability, making them a cost-effective option. 

2. Is a brick wall stronger than a concrete wall?

​In general, concrete walls typically have greater sheer strength compared to brick walls.​ Concrete is particularly effective at handling heavy loads and bending moments, making it superior in structural applications where these forces are present. Although high-quality clay bricks can exhibit significant compressive strength, conventional concrete walls generally outperform brick walls in strength and durability in various applications.

3. Which is better: a concrete wall or a brick wall?

The choice of material differs based on the specific project requirements. Both offer unique characteristics; concrete walls can provide excellent structural strength, while brick walls offer an aesthetic look and versatility. By comparing your project’s needs with these functionalities, choose the one that best fits you.

Steel Reinforcement and Its Types: Essential Construction Guide

0
Steel Reinforcement

Steel reinforcement can also be called rebar, an important component in the construction industry. This mainly involves the use of steel bar, mesh, or wire for reinforced concrete, thus providing proper tensile strength that is lacking in concrete. The main role is to support and improve the structural integrity of concrete structures that can withstand loads and stress for a long time. 

This blog will give an overview of the different types of steel reinforcement in the market.

What is Steel Reinforcement?

Steel enforcement is necessary in construction and engineering. It includes steel bars and wires that can strengthen the concrete in the building. Inside the structures of concrete, the wires and steel bars are combined, and this helps in adding the load-bearing capacity of the structure. Attaching the steel reinforcement to concrete helps improve structural integrity, load-bearing capacity, and durability. Typically ribbed or contoured to form a strong bond with concrete, rebar forms a strong bond with concrete, preventing slippage and enhancing stability. 

Rebar are used in structures like roads, bridges, and buildings. They comein various sizes and grades that ensure safety and long life in construction.

Materials Used in Steel Reinforcement

Types of Steel 

Carbon Steel 

Carbon steel is usually used for steel reinforcement. They provide good strength, are cost-effective, and have ductility.

Stainless Steel

Stainless steel can be used for corrosion resistance. They are expensive compared to carbon but offer durability in a corrosive environment.

High Tensile Steel

High-tensile steel is used in applications that need high strength and low weight. They can be used in prestressed concrete structures. 

Properties and Characteristics

Steel reinforcement bonds with concrete, acting as a tensioning device in reinforced concrete structures. It also shows excellent tensile properties and elasticity. This uniformity that simplifies design across various grades and sizes. 

Rebar’s ribbed surface ensures strong bonding with concrete, preventing slippage. It has significant elongation under load, serving as a warning sign before structural failure. 

Rebar maintains strength and ductility under high temperatures, is easy to join via welding or couplers, and meets global concrete design standards. These properties make steel reinforcement essential for durable, resilient concrete structures.

Types of Steel Reinforcement

Hot Rolled Deformed Bars (HRD)

Hot-rolled deformed bars are made by heating the steel at high temperatures and then rolling it to form a bar-like structure. They have a surface that is deformed in the shape of ribs. These ribs help in bonding the steel to concrete, which improves the structural integrity of reinforced concrete structures. 

Advantages:

  • As they have high tensile strength and ductility, they can be used in reinforced concrete structures.
  • A distinct yield point followed by a plastic stage, allowing for better stress distribution.
  • Good bonding with concrete due to surface ribs, preventing slippage.
  • Versatile in application, providing reliability in various construction settings.

Disadvantages:

  • Susceptible to corrosion if not properly protected.
  • Requires careful handling during manufacturing and construction to maintain quality.

Applications:

HRD bars are widely used in construction projects, including:

  • Main stress reinforcement in medium and small reinforced concrete structures.
  • Stirrups for components.
  • Tie rods in steel and wood structures.
  • Can be used as cold-drawn low-carbon steel wires.

Cold Worked Steel Bars (CWS)

Cold-worked steel bars are made by treating hot rolled bars through cold processes like twisting and drawing at room temperature. This process helps in increasing strength, making a smooth surface with tight dimensional tolerance.

Advantages:

  • High strength, making them suitable for structures requiring robust reinforcement.
  • Smooth surface finish and precise dimensions, ideal for applications demanding accuracy.
  • Improved bonding with concrete due to cold working.

Disadvantages:

  • Reduced ductility compared to hot rolled bars, leads to less flexibility.
  • No plastic yield, which can limit their ability to deform under high stress.

Applications:

  • Cold-worked steel bars are commonly used in:
  • Reinforcing concrete structures where high strength is essential.
  • Automotive parts, machinery, and tools can be manufactured.
  • Various construction components require precise dimensions and smooth finishes.
  • These bars are chosen for their strength and precision, enhancing the quality and durability of construction projects.

Mild Steel Plain Bars (MSPB) 

Mild steel plain bars are manufactured by hot-rolling steel into smooth, round bars ranging from 6 to 50 mm diameter. They are produced in long lengths and can be easily cut and bent.

Advantages:

  • Easy to cut and bend without damage, making them ideal for small projects.
  • Cost-effective option for steel structures where high bond strength with concrete is not required.
  • Suitable for tensile stress applications in reinforced concrete structures like slabs and beams.

Disadvantages:

  • The lack of surface ribs reduces bonding strength with concrete, necessitating hooks at the ends for better grip.
  • Not suitable for high-stress applications compared to deformed bars.

Applications: 

Mild steel plain bars are used in:

  • Small-scale RCC projects focusing on the economy.
  • Expansion and contraction joints in columns, dowels, roads, and runways.
  • Reinforced cement concrete structures require low bond strength.

These bars are chosen for their ease of use and cost efficiency in low-stress construction projects.

Prestressed steel bars

Prestressed steel bars involve applying tension to high-tensile strength steel wires, strands, or tendons within concrete structures. This process gives additional strength and reduces deflections, enabling longer spans and thinner sections in construction.

Prestressed Steel Types:

High Tensile Steel Wires:

It has multiple wires spun together, forming 2, 3, or 7 wire strands.

Strands or Tendons: 

Made with various high-tensile steel wires and are cold-formed to get strengths ranging from 1725 MPa to 1860 MPa.

Implementation:

  • They are mainly used in places that need high strength and low deflections, like large buildings, bridges, and others.
  • They stay for a long time and are efficient.
  • It is used in beams, slabs, and girders for the improvement of load-bearing capacity.

Epoxy-Coated Reinforcing Bars

Epoxy-coated reinforcing bars are steel bars that are coated with fusion-bonded epoxy to protect against corrosion. They can be used in bridges, parking garages, and roads.

Coating Process:

  1. Surface Preparation
  2. Heating (450°F)
  3. Powder Application
  4. Curing

Corrosion Resistance and Durability:

Epoxy coating can give protection against chlorides and other elements, which helps in reducing the rate of corrosion in steel bars. This protection will last for a lifetime as it protects the concrete structure from rust and deterioration.

Application:

Bridges: The United States has over 60,000 bridges that use epoxy-coated rebar for durability.

Parking Decks: Protects against deicing salts carried by vehicles, reducing repair costs.

Marine Structures: Prevents corrosion in harsh marine environments.

Pavements: For structural integrity, it is used in concrete pavements and dowel bars for load transfer across joints.

Standards and Codes for Steel Reinforcement: 

Steel reinforcement standards ensure quality and consistency in construction. Key standards include British Standards (BS) and European Norms (EN), which provide guidelines for designing and using steel in concrete structures.

Some of the ASTM or AASHTO specifications generally used for reinforcing bars are,

NameStandard Specifications
A615/A615MDeformed and Plain Carbon-Steel Bars for Concrete Reinforcement
A706/A706MDeformed and Plain Low-Alloy Steel Bars for Concrete Reinforcement
A955/A955MDeformed and Plain Stainless-Steel Bars for Concrete Reinforcement
A996/A996MRail-Steel and Axle-Steel Deformed Bars for Concrete Reinforcement
A1035/A1035MDeformed and Plain, Low-Carbon, Chromium, Steel Bars for Concrete Reinforcement

Conclusion

Steel reinforcement is important in construction for improving the strength and durability of concrete. Even with issues like corrosion and cost, its benefits like increased tensile strength and compatibility with concrete make it attractive. Understanding the types and specifications of rebar in construction helps in proper usage and provides long life for structures. As the construction sector develops constantly, rebar remains vital for resilient and sustainable infrastructure.

FAQs

What are hot-rolled deformed bars?

Hot rolled deformed bars are steel bars with ribbed surfaces that enhance bonding with concrete.

What are cold-worked steel bars?

Cold-worked steel bars are treated to increase strength and improve surface finish.

What are mild steel plain bars used for?

Mild steel plain bars are used in smaller-scale projects where high bond strength is not required.

What is the purpose of the rebar’s ribbed surface?

It ensures strong bonding with concrete and prevents slippage.

What is the significance of steel reinforcement standards?

Standards ensure quality and consistency in the use of steel in concrete structures.

Slab-on-Grade Foundation

0
Slab-on-Grade Foundation

A slab-on-grade foundation is is a type of foundation where the concrete slab is placed directly on the ground. This concrete slab act as a foundation from a mold set in the ground. This is used in various construction projects, such as residential buildings, commercial buildings, factories and distribution centers. This blog will provide the details that can help in understanding the design, manufacturing, and benefits of slab-on-grade foundations.

What is a slab-on-grade Foundation?

A slab-on-grade foundation can also be called a slab foundation. It is a solid piece of concrete poured on the ground directly. This foundation helps in supporting the building without the need for a basement or crawl space. It often includes thickened edges or footings to prevent shifting in cold weather.

When compared to other types of foundations like basements or crawl spaces, slab-on-grade foundations are simpler and inexpensive as they need minimal digging. Crawl spaces will have gaps in between the ground and the building, while the basements are the closed spaces present below the ground level. Slabs on grade foundations are more common in warm climate areas where there are fewer issues regarding cold.

There are mainly three types of slab-on-grade foundations, they are:

Traditional Slab-on-Grade Foundations: 

In this type, thick concrete is poured directly on the ground. These types can be used in warm climates where there is no frost, as they do not have frost protection properties.

Slab Foundations with Shallow Footings: 

These foundations are sometimes also known as T-shaped slab foundations. It mainly consists of concrete slabs that are poured directly into the ground, and they have additional footage at the edges or corners.  They give extra stability as the footings go deep into the soil and prevent heavy frost even if the top layer of the soil is frozen.

Frost-Protected Slab Foundations: 

These slabs use insulating foam sheets for protection from heavy frost. They also have shallow footing to reduce the risk of damage from freezing the soil under the slab.

Cost for Installing Slab-On-Grade Foundation

​The average cost for installing a slab-on-grade foundation ranges from approximately ₹330 to ₹660 per square foot, with a typical cost of around ₹495 per square foot.​ For a home with a 1,000-square-foot area, the complete installation cost would exceed ₹495,000.

Slab foundations are relatively low-cost since they require little or no excavation. In contrast, a basement foundation may cost nearly ₹1,650 per square foot. This significant price difference can amount to approximately ₹1,320,000 in savings for a 1,000-square-foot area.

Construction Process

Preparation of the Site:

The process starts by clearing the area of trees, rocks, and debris. The area is leveled and compacted to make a solid base. Sometimes, gravel can be added to improve stability and drainage.

Layout and Excavation: 

By using the stakes and builders lines the foundation outline can be marked. Excavation can be carried out according to the size of the slab, local codes, and the frost line.

Installing Formwork: 

For holding the concrete in particular, wooden boards are placed around the excavation area. The formwork must be leveled and secured to ensure an even slab.

Placing Reinforcements: 

For strengthening the slab a steel mesh or rebar can be placed that can also prevent cracking.

Concrete Pouring: 

Concrete is then forced into the formwork, and it is spread evenly with the help of a screed tool.

Surface Finishing: 

After pouring the concrete, a trowel is used to smooth it. For making visible slabs, a broom can be used to add non-slip surface texture.

Concrete Curing: 

The concrete needs to be cured for several weeks to get the desired strength. The concrete is covered using a plastic sheet or it is sprayed by a curing component for preventing rapid drying or cracking.

Advantages of Slab-on-Grade Foundations

Some of the advantages of slab-on-grade foundations are:

Cost Efficiency: 

The main advantages of slab-on-grade foundations are cost-effectiveness and affordability. They are less costly to construct compared to other types of foundations. This is because they don’t need any additional material, such as floor joists or a crawl space. This lack of extra components also means reduced heating and cooling costs.

Simple Construction: 

The process of building slabs on graded foundations is simple. Concrete can be poured in one day. And with proper preparation, the construction process ends in 4 days, including curing time, mainly if weather conditions allow it. This quick turnaround is faster compared to more complex foundation types.

Low Maintenance: 

Slab-on-grade foundations have high levels of durability, and they can last until 80 to 200 years if made correctly. They are solid and provide a robust base that requires minimal upkeep. In non-freezing areas, slabs on graded foundations are stable and have fewer issues.

Energy Efficiency: 

Homes that are built using slab-on-grade foundations have lower utility consumption. They have efficient heating and cooling properties in the home. 

Reduced Risk of Mold and Pest Issues: 

Molds and termites can be prevented when using slab-on-grade foundations. As there is no space between ground and structure, the growth rates of molds are reduced and also protected from pests. 

Best for Warmer Climates: 

In areas that have no ground-freezing problems, slab-on-grade foundations can be used. They were designed for handling non-freezing soil conditions. This helps in avoiding the complications related to frost.

Suitable for Clay Soil: 

A slab-on-grade foundation can be used in clay soils, as clay soils have the properties of expansion and shifting. The flat, solid nature of a slab foundation helps to stabilize the structure against these soil movements.

Good for Low-Load Requirements: 

Even if the slab-on-grade foundation is the strongest option, it can be used in lighter load-bearing structures. They can be used in garages or storage sheets where there is a constraint in budget.

Disadvantages of Slab-on-grade foundation

Cracking: 

In freezing temperatures, slab-on-grade foundations are prone to cracking. Even small cracks can let moisture enter the building, and the repair costs will be high. Fixing these cracks usually requires professional help.

Lack of Crawl Space: 

As slabs on grade foundations do not include crawl space, there will be no extra storage in the house. So the heating and cooling systems need to be installed inside walls that can limit their accessibility.

Plumbing Issues: 

As plumbing pipes were attached inside the concrete, it may be difficult to repair the leaks. The repair cost will be high.

Uneven Flooring: 

If there is soil shifting, then the slabs may be unevenly settled, which can lead to uneven flooring in the house.

Earthquake and Flood Problems: 

Slab-on-grade foundations give less protection from earthquakes and floods.

Moisture Problems: 

The concrete is porous and has no moisture barrier. So, moisture can get inside the slab. This may lead to the growth of mold and rotting problems.

Conclusion

Slab-on-grade foundations provide a practical and economical foundation solution for many types of buildings. Their ability to reduce excavation and material costs aligns with environmentally friendly building practices. Despite some potential issues, such as uneven flooring and moisture problems, the overall efficiency and reduced environmental impact make slab-on-grade foundations a compelling choice for modern construction projects.

FAQs

What is concrete curing?

The process of maintaining moisture in the concrete to achieve strength.

What role does formwork play in slab construction?

It holds the concrete in place during pouring and setting.

How can uneven flooring in slab-on-grade foundations be managed?

Address soil shifting and proper construction techniques.

How does a frost-protected slab prevent damage?

By using insulation to protect against ground freezing.

What are T-shaped slab foundations?

Slabs with additional footings at the edges for stability.

False Ceiling Design for Porch

0
False Ceiling Design for Porch

Introduction

Have you ever paid attention to the ceiling in your house? Well, have you considered how a ceiling can uniquely enhance a porch? A porch is an outdoor part attached to your house,  commonly found near the entrance to the house. A  comfortable place where you could sit down,  relax, and enjoy the fresh air. To enhance the beauty of this place, many people opt for a false ceiling. False ceilings include an extra ceiling below the main ceiling. They could be made of different materials and have different designs. This article discusses some cool false ceiling designs for porches.

What is a False Ceiling?

False Ceiling

Before we go on to the designs, let’s understand what a false ceiling is. What is commonly referred to as a false ceiling?  what is either loosely referred to as a dropped or a suspended ceiling? It’s kind of extra roofing added below the actual roof of the porch. It’s not just for looks; it has several other benefits. For example, one could hide wires, pipes, or even bring in a cooling effect. These false ceilings can be made  of materials like plaster of Paris, wood, metal, or even waterproof materials, which are best for open areas like porches.

Why Do We Need a False Ceiling for a Porch?

Now, why would one require a false ceiling for a porch? Since it is an outside area, the porch would certainly be under attack by rain, heat, really strong winds, etc. A good false ceiling design might protect the above space. It would also help in elevating huge style statement points and making the porch look like another cozy living room.

Different Types of False Ceiling Designs for Your Porch

Many Types of false ceiling designs can be used for the porch. Let’s look at some of them:

1. Plaster of Paris (POP) About-plus-minus Design

The POP plus-minus design is popular. The reference to the name is because of it’s raised (plus) and recessed (minus) features, along with the intention to create an impression of 3D on the ceiling.

  • How It Works for Porches: This design will work amazingly for your porches. The reason behind this is that it can be molded into different shapes and patterns. You can easily create a simple round, square, and other complex shapes. The POP is very sturdy as well, withstanding the various weathers.
  • Tip: To make it better suited for a porch, be sure to seal it with waterproof paint or a coating.

2. False Ceiling of Wood

A wooden false ceiling is made  from natural wood panels, making this porch warm and rustic—and absolutely fit  for the outdoors.

  • How It Works for Porches: The porches are other ideal places to apply wood since it is natural, meaning it will blend well with the surroundings. You can make use of wooden beams or panels to come up with a characteristic of seclusion and elegance. Treated wood would best suit the porch floor.
  • Tip: Aim for hard wood, such as teak or cedar, which are less susceptible to water and last longer.

3. PVC Ceiling

PVC ceilings are made from a plastic-like, and waterproof material that is light. They are also available in several colors  and designs; hence, they can be very versatile.

  • For Porches: It is best to use for porches , as PVC is waterproof and can withstand  rain and humidity. It can even be cleaned without much hassle. There  are many options  for many colors and patterns, depending on the style you possibly want for your porch.
  • Tip: Lighter colors like white or beige can  make  the porch look brighter and much more spacious.

4. Metal False Ceiling

Metal ceilings would be made of either aluminum  or steel, with sufficient strength and durability, and whose paint can adhere to any possible color.

  • How It Works for Porches:  The metal ceilings work well for porches because they resist  water, rust, and even termites. They will add a sleek and modern look to the porch area. The design can vary with different patterns of metal panels.
  • Tip: Mount a few lighting accessories on the metal ceiling and give your porch a stylish look at night.

5. Gypsum Board Ceiling

A gypsum board is  composed of soft gypsum mineral , wherein the boards are made lightweight , allowing the makers various cuts, shapes, and designs.

  • How It Works for Porches: Gypsum board ceilings will work marvellously well for a managed porch, given that they are fire-resistant and well-insulated. This means they are going to maintain cooler temperatures during the summer. Still, gypsum is not waterproof, so you must use a waterproof covering with it.
  • Tip: Combine  gypsum board with exposed wooden beams to create a modern and rustic design.

6. Waterproof False Ceiling

Waterproof ceilings are made from fiber cement or PVC materials that are especially fabricated to properly waterproof the ceiling from water.

  • How It Works for Porches: Porches being open spaces, the material next should withstand rains and wetness. Perfect false ceilings are waterproof and are made to stand wet conditions and harsh handling. It is also easy to clean and maintain 
  • Tip: Look for materials that don’t only withstand water but also  UV.

Adding Lights to Your False Ceiling

Adding Lights to Your False Ceiling

Lights will also be the finishing touch  to the beauty on your porch. Having them is even more impressive at  night. You can incorporate various kinds of lights when you install false ceilings. Here are some ideas:

1. Recessed Lighting

These are tiny little lights laid into the ceiling. They consume minimal space and provide a soft, even light on the porch.

2. LED Strip Lights

LED strip lights are flexible and can fit into the edges of the ceiling; they also add a modern touch and are energy efficient. The cost of building a porches may be expensive if we install LED Strips Lights

3. Pendant Lights

Provide a potential center of attraction: Hanging pendant lights on a porch can be a reservation for being atop nearly any porch type. Pendant lights also exist in a variety of patterns, like those  reminiscent of antique lanterns

4. Ceiling Fans with Lights

A ceiling fan with lights is all the good for a porch in a warm area.

Conclusion

Whether the design is POP, the wooden panel, or the highly waterproof false ceiling of a porch, it has its own benefits. Proper design and lighting allow the porch to come out as a really nice spot for relaxation,  allowing you to enjoy nature while spending quality time with family and friends.

FAQ’s

1. What is the best material for a false ceiling in a porch?

The best materials for a porch false ceiling are waterproof options like PVC or fiber cement, as they can withstand outdoor conditions like rain and humidity.

2. Can I install lights in a false ceiling for my porch?

Yes, you can install various types of lights, such as recessed lighting, LED strips, or pendant lights, to enhance the look and functionality of your porch.

3. How do I maintain a wooden false ceiling on a porch?

To maintain a wooden ceiling, use treated wood that resists moisture, and apply a protective coating or varnish regularly to prevent water damage.

Can We Use White Cement for Plastering?

0
Can We Use White Cement for Plastering

Plastering plays a key role in construction and interior design. In earlier days, OPC and lime were used by builders to plaster. It gives a smooth, good-looking finish to walls and ceilings. But in recent years, white cement has become a popular choice. It has special features and looks better. This article will look at how to use white cement for plastering. We’ll talk about its plus points, where to use it, and give you step-by-step tips to use it well.

What is White Cement?

White Cement

White cement is a type of Portland cement that is characterized by it’s  raw materials with low iron and magnesium content, giving it a unique white color. This makes it popular for architectural finishes where looks matter. White cement production follows a process similar to grey cement but needs more careful manufacturing techniques to keep its color and quality. It includes:

  • Using high-purity raw materials.
  • Maintaining specific temperature conditions during clinker formation to prevent color contamination.

Benefits of Using White Cement for Plastering

White cement plastering has several advantages over traditional plastering materials:

1. Looks Good

White cement creates a smooth and bright finish, making the plastered surface look better. It works well for decorative plastering and can serve as a base for different finishes like paint, textures, and other coatings.

2. High Reflectivity

White cement reflects light well, making it a great pick for indoor spaces. It can make rooms look bigger and brighter. This feature  is helpful  in areas  that don’t get much natural light.

3. Durability

White cement plaster long-lasts and stands up to the weather. It sticks well to what’s underneath, so it stays put and doesn’t need much upkeep.

4. Versatility

You can use white cement on many surfaces, like concrete, brick, and blockwork. It also works well with different decorative finishes, so you can use it for lots of things.

5. Smooth Finish

White cement gives a smooth and even finish, decreasing the need to add more finishing layers. This helps save time and reduce labor costs when plastering.

6. Resistance  to Stains and Cracks

White cement plaster is better resistant to stains and cracks than regular plastering materials. Its formulation helps lower the odds of shrinkage cracks and keeps its clean look.

Ways to Use White Cement Plaster

Ways to Use White Cement Plaster

You can use white cement plaster for many things, both inside and outside:

1. Inside Walls and Ceilings

This white cement plaster provides smooth and beautiful surfaces, and interior walls and ceilings can look great. It is 100% suitable for home, work, and social places.

2. Exterior Walls

White cement plaster is used on exterior walls, giving them strength and protection from the weather.  It creates a clean, bright look that can boost a building’s curb appeal.

3. Decorative Plastering

People prefer white cement for decorative plastering because it’s flexible and can create diverse textures and patterns. You can use it to make different finishes, like rough, smooth, or textured surfaces.

4. Repair Works

White cement plaster works well for repairs, helping to fix damaged or cracked surfaces. Its smooth finish can blend in with the existing plaster, giving it a uniform look.

How to Use White Cement for Plastering

White cement plastering will involve The preparation of the surface, multiple coats, and the final coat. Here below are the procedures that are undertaken while applying white cement for plastering:

1. Getting the Surface Ready

For the creation of superior-quality plaster, a proper treatment should be given to the surface. You must check that the surface does not consist of any kind of soil, dust, or mud. It is always necessary to fill the holes and cracks, with the pre-plastering process, before beginning plastering work. Grout and white cement fill up the cracks in walls and tiles more effectively.

2. Mixing the Plaster

To make plaster, mix white cement, fine sand, and water in the right proportions. You’ll usually want 1-part white cement for every 3 parts of sand, but this can vary depending on what your project needs. Make sure you mix everything well to get a smooth, easy-to-use paste.

3. Application of  the Plaster

Spread the plaster evenly across the surface using a trowel or other plastering tool. Make sure that every layer has the same thickness as you work your way up from the bottom. This helps avoid bumpy spots.

4. Finishing Smoothly

After applying the plaster, use a straight edge or trowel to smooth the surface.  This helps make the surface even and gets rid of extra plaster. You can use a spirit level to check the flatness.

5. Letting the Plaster to Cure

Let the plastered area cure properly by keeping it damp for at least one week. It makes sure the plaster gets enough strength and durability. You can do this by spraying water on it or covering it with wet burlap or plastic sheets.

6. Finishing

You can finish it to acquire the desired appearance once the plaster dries. This may include, Adding paint or other ornamental accents, generating textures or patterns, and using sandpaper to smooth out any imperfections.

Tips for  Making  White Cement Plastering Successful

Here are some pointers to help you succeed with white cement plastering:

1. Pick Fresh Supplies

Make sure to use fresh white cement and sand when you mix your plaster. Old or out-of-date materials can hurt the plaster’s quality and strength.

2. Maintain Proper Thickness

The plaster mix needs to be of optimal plaster thickness, to make it easy to apply and stick well. A mix that’s too dry may crack, while one that’s too wet could sag.

3. Minimize Overworking

Working the plaster too much when you’re applying can make it not stick and cause problems on the surface. Apply the plaster with even strokes, and don’t trowel it too much.

4. Ensure Proper Curing 

The secret to strong and durable plaster is to let it cure properly. Keep the surface moist, for the recommended duration.

5. Use Good Sand

The quality of the sand in the plaster mix can influence the result. To get a smooth and even surface, use fine, clean sand without impurities.

Common Issues and Solutions in White Cement Plastering

White cement plastering can run into some typical problems even with careful planning and execution. Here are some issues and how to fix them:

1. Cracking

Cracks can happen because of improper curing, wrong mix ratios, or quick drying. To avoid cracks, make sure to cure, use the right mix ratio, and don’t work in extreme temperatures.

2. Efflorescence

White, powdery deposits on plastered surfaces happen because of salt migration. We call this efflorescence. You can stop it by using cement with low alkali, making sure you waterproof well, and keeping good drainage.

3. Uneven Surface

For a flawless finish, use a straight edge to level the plaster after applying it in even layers. You run the risk of having an uneven surface if you don’t level or apply the plaster uniformly.

4. Poor Adhesion

If the plaster mix is too dry or you have not properly prepared the surface, the plaster may not adhere well. Before applying the plaster, make sure the surface is both clean and slightly damp.  Also, get the mix consistency right.

Conclusion

White cement offers many uses and aesthetically appealing solutions, for plastering. It influences durability, gives a smooth look, and reflects light well, to get good results when plastering with white cement, For better results you need to use the right methods of Plastering. White cement plaster works well for both inside and outside applications, It can make your walls and ceilings look beautiful, apart from keeping them in good shape for a long time. These characteristics make it suitable for use in construction, especially during the repair and renovation of structures.

How to Remove White Cement from Tiles

0
How to Remove White Cement from Tiles

Accidental spills of white cement on tiles can be a major hassle, right? Whether it’s just a mess during a DIY project or a bigger spill from some renovation, don’t worry! You can clean your tiles and make them shine again. With the right tools and approach, this article will guide you step by step through the process.Why White Cement Sticks to Tiles?

White cement is tough and attractive, making it popular in construction. It forms a strong bond, making it tricky to remove it from surfaces like tiles once it dries up. The cement sticks stubbornly, so you’ll need an effective way to clean it off. When white cement meets water, it goes through a chemical reaction, hardening over time. This hardening forms a strong bond with the tiles’  surfaces. Understanding why it sticks helps you figure out the best ways and tools to get rid of it.

What You’ll Need

Before getting started, gather these items:

  • Protective Gear: Safety first! Put on gloves for your hands, goggles for your eyes, and a mask to dodge dust or fumes.
  • Scraper: Use  a plastic or metal scraper to gently lift the cement. Plastic scrapers are usually better, as they have less chance of scratching tiles.
  • Brush: A stiff-bristle brush is great for scrubbing away any leftover bits after lifting the bulk of the cement.
  • Cleaner: You can use a commercial cement remover or mix vinegar and water together. Vinegar’s natural and good for light stains!
  • Water: For rinsing off the tiles and getting rid of cleaning solution.
  • Sponge or Cloth: Use this to wipe down tiles and make sure all residue is removed

Step-by-Step Guide to Removing White Cement

Step-by-Step Guide to Removing White Cement

Here’s how to get that annoying white cement off your tiles:

1. Prioritize Safety

 Safety’s very important when dealing with tools and chemicals. Start by putting on gloves, goggles, and a mask to keep dust and bad stuff away from you.

2. Evaluate the Cement Stain

Check out how big the cement stain is. Is it just a little bit or much larger? Tiny spots might be easy-peasy with basic tools; bigger ones might need extra effort—or even professional help. Prepare the Area

Don’t forget about the surrounding surfaces! Cover them with plastic sheets or newspapers to prevent damage. Especially when working near valuable stuff!

3. Soften the Cement

To make your removal easier, soften that cement first! Apply a commercial remover as per instructions, or mix equal parts vinegar and water and spread that on too. Let it chill for about 30 minutes to an hour—it’ll break down that bond so much better.

4. Scrape Gently

After softening, take your scraper and gently lift that cement off the tile surface! Go slow—avoid scratches! If some areas are being stubborn, apply more pressure or soften them again.

5. Brush and Scrub

Now use your stiff-bristle brush to scrub those tiles after most of the cement’s gone! Dip it in a vinegar solution or cleaner; it’ll help get rid of any remaining residue.

6. Rinse and Wipe

Rinse those tiles off with clean water next! This removes leftover cleaning stuff and any bits of cement. Use a sponge or cloth to dry off nicely—make sure no cleaning agents linger behind!

7. Repeat if Needed

If stubborn stains hang around, don’t fret—just do the process again! Reapply your softening solution if needed and give it another go!

Tips for Preventing Future Cement Stains

Tips for Preventing Future Cement Stains

Want to avoid this mess later? Check out these tips:

  • Cover Surfaces: Always protect those tiles with plastic sheets or newspapers when you’re working with concrete mixtures.
  • Clean Spills Immediately: Move fast! The sooner you tackle spills, the easier they will be to remove before they harden.
  • Use a Barrier: Consider putting on a thin layer of wax or oil on the tiles before starting projects—it helps keep spills easy to clean up!

Common Mistakes to Avoid

Watch out for these common slip-ups:

  • Using Harsh Tools: Stay away from metal scrapers or steel wool—they can really scratch your tiles up! Stick with soft brushes and plastic scrapers for the best outcome.
  • Skipping Safety Measures: Never ditch protective gear—gloves and goggles are key! They’ll keep you safe from dust and chemicals.
  • Rushing the Process: Slow down! Take your time with steps; rushing could mean missing spots and damaging those tiles instead of cleaning them.

When to Call a Professional

In some cases,removing white cement might be too much work for you! If it’s really hard or covering a big area, calling in professionals could be smart—they’ve got special tools and know-how for tricky jobs without harming your tiles. 

Conclusion

Removing white cement from tiles seems challenging, but you can succeed with the right approach and equipment. Follow these instructions, and your tiles will regain their clean, fresh appearance. Taking preventive measures helps you avoid this issue in the future. Remember, effective cleaning requires patience and correct techniques. Good luck with your cleaning task!

FAQs

1. Can I use vinegar on all types of tiles?

A: It’s usually safe for ceramic and porcelain tiles, but it may damage natural stone ones. Always test a small spot first, to ensure safety

2. How long will it take to remove cement from tiles?

The time varies based on the amount of cement and what tools you have handy—tiny spots might be done in an hour; big areas could take several hours and more.

3. Is there an eco-friendly method to remove cement?

Yes! You can create a safe solution by combining vinegar and water. This mixture works on small stains without using harsh chemicals.

4. What should I do if the cement remains hard after my attempts to soften it?

If the cement stays stubborn, reapply more remover and allow it to sit for a longer period. You might need to repeat this process several times for tough spots or seek professional assistance.

5. Will the cleaning process damage my tiles?

If you exercise caution and use appropriate tools, you can remove the cement without causing harm to your tiles.