Home Blog Page 56

Types of Rainwater Harvesting Systems for Homes: Sustainable Water Solutions

0
Rooftop Rainwater Harvesting System

In ancient India, people living in the dry climatic conditions struggled for food, water and shelter. 

The rainwater harvesting system in India originated more than 4000 years ago when the ancient administrative system purposed rainwater for fundamental needs. Today, we live in an era where we are again experiencing water scarcity. In such a scenario, rainwater harvesting emerged as a vital solution to mitigate the challenges posed by water shortages. 

The ancient practice of collecting and storing rainwater gained renewed importance in recent years, with greater focus of using the water for domestic purposes. When you harness the power of the nature’s biggest gift, you choose to adopt a sustainable solution to water management. It further helps you secure water for your future generations.

Importance of Rainwater Harvesting

Knowing the importance of rainwater harvesting and utilization will help reduce the extreme water shortage that millions of people across the world are experiencing.

  1. Water Shortage:

Water is becoming a precious commodity in India. India has 18 percent world’s population against only 4 percent of water resources, making it one of the most water-stressed countries in the world. According to the Indian Government’s NIT Aayog report, today, Indians are experiencing high to extreme water stress. 

  1. Lack of Safe Water and Sanitation:

According to the World Bank, 163 million Indians lack access to safe drinking water; 210 million Indians lack access to improved sanitation; approximately 21% of communicable diseases occur in the nation due to unsafe water and approximately 500 children below 5 years die in India from diarrhoea every day.

The rapid growth in India’s urban areas expanded the government solutions, compromised over privatization. The contamination of drinking water and that used for other domestic purposes by biological and chemical pollutants increased the occurrence of water-borne infections accounting for about 21% of the cases. Furthermore, only 33% of Indian population can avail traditional sanitation.

  1. Rapid Urban Growth

Since the majority of the rural population is moving closer to urban expansions, the market prices for goods are rising. Moreover, people’s lifestyles are changing, which is why there is minimal labour to drill wells, making rural populations difficult to reach the groundwater supplies. As a result, the lack of water in the country serves as a trap for rural residents to obtain food and necessities of life. A recent report from the World Bank states that by 2030, India will experience a 40% increase in water demand than the amount currently supplied. The country’s socioeconomic stability and security are at stake due to water scarcity.

Rainwater Harvesting as a Solution for Scarcity of Water

With escalating decline of groundwater levels and unpredictable climate patterns, rainwater harvesting is a practical solution to counteract water scarcity in India. When you practice rainwater harvesting, you help in recharging the local aquifers, curbing urban flooding, and ensure water access in regions affected by water shortages.

Rainwater harvesting is a straightforward method that involves collecting and stockpiling rainfall for future purposes. Individuals involved in the practice systematically collect and store rainwater through specially designed systems. You must place the system strategically to harness rain from natural or human-made surfaces, including rooftops, rocky terrains, hillsides, and artificially treated impermeable and semi-permeable land surfaces. 

The rainwater collected remains uncontaminated by impurities, which you can easily store and utilize directly for various household purposes. The best part of the practice is that it requires less maintenance cost other than occasional cleaning. One can install home rainwater collection systems in individual houses, societies, schools, hospitals, and even in industries.

Rainwater Harvesting Methods for Residential Buildings

Rooftop Rainwater Harvesting System

Installation of rainwater tanks and storage systems is one of the most common methods that construction planning is focusing on today. This method of harvesting rainwater collects rainwater from the building’s rooftop, storing it for future use.

The method offers various benefits to the homeowners. First, you empty an alternative source of water for various activities, including washing cars, flushing toilets, and other household chores. By using harvested rainwater, you can reduce dependence on traditional water sources, thereby conserving water and lowering the water bills. Furthermore, since rainwater is naturally soft and free from chemicals, you can use it for watering plants and gardens.

Surface Run-Off

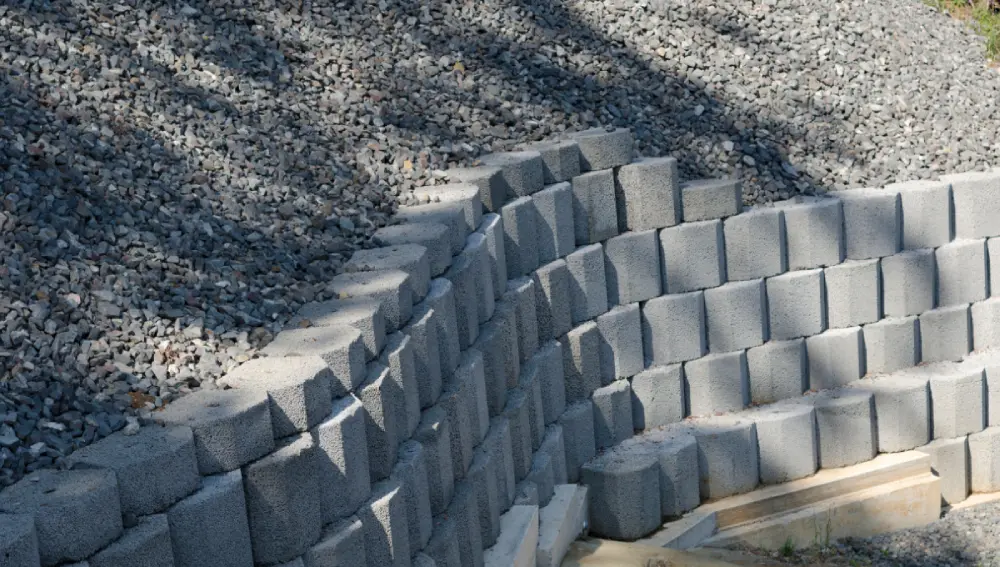
Another method of rainwater harvesting involves the creation of permeable surfaces and percolation pits. During heavy rain, when rainwater falls on permeable surfaces, it allows the rainwater to seep down into the ground. The penetration of rainwater through the surfaces restores the underground water table. You can create the surface from several materials, like gravel, grass, and permeable pavers. You can even use percolation pits, which are excavations filled with porous materials like broken bricks and pebbles. With these materials, you facilitate the absorption and percolation of rainwater into the soil.

The benefits of this rainwater harvesting method are that it helps minimize surface runoff and prevent waterlogging. Since the method allows the rainwater to seep naturally into the ground, the people living in the urban areas experience reduced risk of flooding and recharge of groundwater. Besides combating water scarcity, the method promotes soil health and prevents erosion.

Surface rain water harvesting

Benefits of Adopting Rainwater Harvesting Systems for Homes

Environmental Advantages

Besides being eco-friendly, underground water storage offers various environmental benefits. Rainwater harvesting minimizes flood impacts as it channels excess water into large tanks for recycling, thereby alleviating the strain on drainage systems. With the practice, you no longer need a dedicated land for water storage, prevents population displacement, minimizes direct groundwater exposure to pollution and reduces the risk of drying of rivers.

Economical Water Management

With rainwater harvesting systems, you enjoy cost-effective water solutions, delivering high-quality water for various non-sensitive purposes. The practice reduces reliance on traditional water systems, including wells, as they are easy to maintain and you do not utilize the water for consumption. The expense of this water harvesting system is affordable compared to other water purification and pumping methods. Furthermore, you do not have to break your saving for recharging the subsurface reservoirs as compared to creating surface reservoirs.

Prevents Erosion and Flooding

When you collect the rainwater, you reduce the risk of erosion and flooding, effectively managing storm water flow and avert urban flooding. Today, most urban buildings have rainwater harvesting systems feature that includes built in catchment areas on their roofs that collects large volumes of water during heavy rainfall.

Different Techniques of Rainwater harvesting System for Your Home

You can harvest the rainwater in your home using any of these techniques
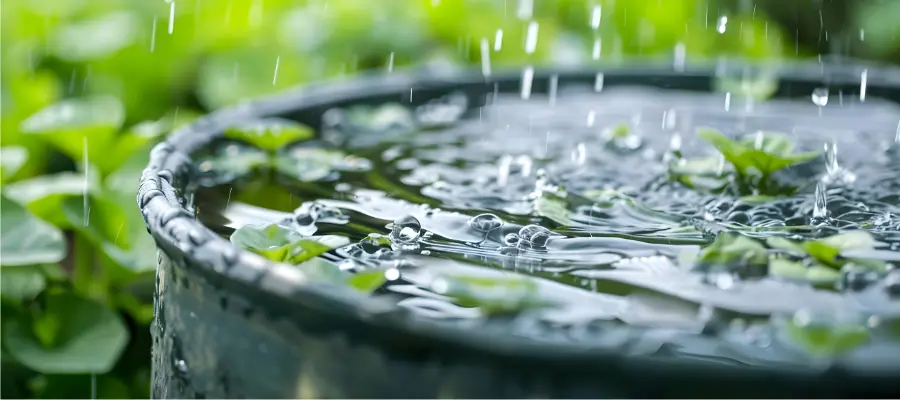
Water Butt

It is the most basic type of rainwater harvesting. During the rainfall, the water collects in the container from drain pipes, which you can utilize for watering your garden. If you have a decent size garden, you might experience a reduction in underground water level. When you pair the water tank with a rainwater filter, you improve the quality of harvested water.

Direct Pumping System

You can use either submersible or suction system. The submersible is the most common and professional harvesting system, especially for domestic properties, which is usually easier to install. The underground tank contains the pump, where you collect the harvested water. The pump directly pumps up the harvested water to other appliances. If you suspect that your tanks might running dry, feed a small amount of mains water to maintain the supply. The suction process differs from the former in that the pump is not present inside the tank. Instead, you will find it within a control unit within the house. Since the unit deals with the backup from mains water supply, you do not require sending main water down the tank.

Gravity-Based Systems

Sometimes you can a system that functions complete through gravity, requiring no pump and hence no use of energy. With this arrangement, you need to collect rainwater from a part of the roof with gutters above the filter and collection tank above the outlets. The arrangement is possible if your storage tank is below the level of the gutters, yet higher than the outlets supplying water. You only need the power of gravity to supply collected and filtered water to various parts of your home for use, making it an energy-efficient option.

How to Choose a Suitable Home Rainwater Harvesting System?

The numerous benefits of rainwater harvesting system make them an idea addition to a site. Enlisted are some of the factors that you must consider while choosing a home water harvesting system. These include:

Tank Size

If you want to save lots of underground water, you must install a large water tank. While this seems to be logical, you must consider the size of the building and its location. You might choose a large tank, as it stores more water; however; you might require spending more as the initial cost is higher. Besides, you might notice that your tank gets partially filled.

Roof Size

If the building or portion of the roof where you harvest rainwater is very small, it becomes unviable. The smaller the roof, and lower the annual rainfall, your tank will collect less volume of water.

Tank Location

The roof of your building stands as an ideal location for placement of rainwater harvesting tanks. It’s usually impossible, as you need to place the gutter below the tank level. You also need to take the weight of the tank into consideration, as the structure of the roof might not be sufficient to handle the weight of the tank when full.

Filter Unit and Tank Levels

While installing filter units and water tanks, do not forget to consider the downstream drainage. The level of rainwater received by the filter unit and the tank will have an impact on the downstream drainage system.

Consider the Potential Demand

When designing your home rainwater harvesting system, consider the potential demand on your rainwater supply needs. When installing the tanks, ensure to assess the amount of water required by the occupants.

Our unfriendly attitude towards nature poisoned the water bodies, turning them unfit for future use. People are stretching the local water resources to support the exponential population growth and economic development. Today, almost everyone is experiencing the scarcity of water, adopting rainwater harvesting techniques for survival.

Brick & Bolt, as a leading construction company in India offers end-to-end services. They combine real-time tracking, transparent communication, regular updates and quality checks on all projects. The firm handles rainwater harvesting system projects using advanced technologies, including artificial intelligence and computer vision. It further allows streamlined management architecture, enabling the predictability of the entire construction process.

How To Identify Teak Wood?

0
Teak Wood

Teak is a tropical wood that has been used since ancient times for the construction and creation of interior elements. The annual supply of teak wood is estimated to be between 2 and 2.5 million cubic meters (CBM). The sources of this teak wood are from the dense natural forests of approximately 1.5–2 million CBM. However, demand is much higher than supply, so imports remain high in many countries. The top three export marketers for teak wood are namely India, China, and Thailand, which have 74%, 16%, and 10% of the total trade volume, respectively. Teak wood’s oil content is high and has an aesthetically pleasing natural grain pattern. It also has relatively high tensile strength. This makes it suitable for tackling different loading conditions. 

What is Teak Wood?

Teak Wood

Teak wood is a tropical hardwood that is scientifically named Tectona grandis. Teak plantations are popularly seen in tropical regions of Asia, Latin America, and Africa. The tree size on average is 100–130 feet (30–40 m) tall, with a trunk diameter of 3-5 feet (1–1.5 m). Teak wood is highly durable and has high decay resistance. Teak wood is regarded as a sensitizers that can cause uncommon allergic reactions. Despite the wide plantations of teakwood worldwide, it is still expensive.   

Identification of Teak Wood Through its Distinguishing Features

Identification of Teak Wood

1. Weight: Teak wood is categorized as a luxury product. It is solid, dense, and moderately heavy. Under dry conditions, teak wood is estimated to weigh around  610–750 kg/m3. The wood contains solid fibers and is dimensionally stable, which makes it easy to work with. It is used in different types of furniture, ships, boats, etc. It is also used for the construction of wooden objects with decorative carvings that are visually appealing. The shrinkage coefficient of teak wood is typically 5.3%. Teak wood is significantly heavier when compared to other woods.

    2. Color: Teak wood can have a color range from golden brown to light yellow-brown. The color of the teak wood entirely depends on the part of the tree, the soil, and the species it is obtained from. Higher-quality teak is usually golden brown, while lower-quality teak can be uneven and have white streaks. The color is used to identify the teak wood from other woods. Teak wood can change color over time when exposed to sunlight. Dirt and impurities can also have an impact on its color.

    3. Grain: The grain texture of the teak is important. Teak wood is identified as having a closed grain. It is coarse and has different levels of silica. Teak has a long, dark-colored, straight grain that appears as streaks or lines running throughout the wood. These are distinctive patterns, or growth rings that might be intertwined. However, the grain can also be slightly wavelike sometimes, which depends on how it is cut and separates it from other woods.

    4. Smell: Teak wood has a natural oil content that gives it a distinct leather-like smell. The sawdust can be checked for oiliness. This smell comes from the natural oils and resins. It is generally found in the wood’s structure, which makes it different from other woods. The oils also make teak resistant to water, bacteria, and pests. 

    5. Water test: High-quality teak is considered water-resistant as it has natural oils that repel water. To pass the water test on the teak wood, the water droplets should sit on the surface instead of soaking inside. This water test is an easy way to identify if the teak is real and  The teak wood can be identified as:

    • Real teak: The water will take a long time to soak in, if at all.
    • Fake teak: The water will be absorbed quickly.

    Properties of Teak Wood

    Teak wood has many desirable properties, making it a popular choice for outdoor furniture and other applications in the construction industry. The teak wood is identified as having the following properties:

    Water and natural resistance: Teak wood is naturally durable and water resistant. This is mainly because of the rubber and natural oils that are present in the teak wood. It makes it water-resistant and protects the material from decay, rot, and moisture. It is generally brittle and prevents cracking, degrading, and bending. Teak wood is significantly used outdoors as it can resist damage from rain. 

    • Rain and humidity: Teak can withstand constant exposure to moisture without deteriorating.
    • Salty coastal regions: Teak wood can be used in high-salt coastal places.
    • High temperatures and consistent sun: Teak can withstand extreme temperature fluctuations, making it fit for hot and cold climates.
    • UV rays: Teak’s natural oils make it resistant to UV rays without requiring additional treatment or oils.

    Non-skid properties: teak wood has a high silica content. It is identified as having skid-preventing properties.

    Hardness: Teak wood has a hardness score between 1000 and 1155 on the Wood Hardness Scale. It  is thus considered harder and a better choice than many other woods.

    Durability: Teak wood is strong and is known for its durability. It can fight against harsh weather. It’s also naturally resistant to rotting and cracking.

    Workability: Teak wood is easy to shape, carve, and mold. It has inherited dimensional stability and.  gives shapes and sizes that are easily retained during the drying process. It is also easy to nail or screw things on teak wood as it has excellent adhesive and holding properties.

    Density: Teak wood has a high density. ThisIt makes it have  excellent insulation properties. High-quality teak furniture will prevent heat.

    Termite and decay resistance: Teak wood is resistant to termites and other wood pests as it contains silica. It has low maintenance, making it highly suitable for projects that are usually vulnerable to termite infections.

    Aesthetic appeal: Teak wood is popularly used in carving and designing materials. It is decoratively appealing and has a beautiful finish. It also gives natural golden-brown hues and can age well

    Conclusion:

    Teak wood is highly valued among wood-based products. It is considered to be luxurious due to its rich characteristics. It is also chosen so that it can be passed down through the ages as a heritage element. Teak wood is also considered a legacy as it is extracted from trees that have been grown for hundreds of years. It is regarded as “The King of the Woods” and prominently used in the furniture industry. Identifying it correctly from other low-quality imitations is important to prevent getting cheated and to ensure longevity of wood products.

    Understanding the Types of Retaining Walls Used in Construction

    0
    Retaining Walls

    A retaining wall is constructed to prevent the pressure of water, sand, or soil being pushed against it in order to support soil or other materials. These walls are available in a variety of styles and serve a variety of functions, including levelling slopes and stopping soil erosion. Both residential and commercial buildings use it because it provides stability and enhances aesthetic appeal. 

    This blog provides information on the many kinds of retaining walls, their attributes, benefits, and drawbacks.

    Types of Retaining Walls Based on Shape and Function:

    Retaining Walls Based on Shape and Function

    1. Gravity Retaining Walls

    Gravity retaining walls rely on their mass to resist lateral earth pressure from the soil behind them, preventing toppling and sliding. They are among the simplest types of retaining walls designed with a wider base and sloped faces to handle higher pressures at greater depths. These walls use their substantial weight to counteract soil pressure.

    Materials Used:

    Common materials include concrete, stone, brick, and masonry blocks. Each material contributes to the wall’s mass and stability, with concrete and stone being particularly durable for larger structures.

    Advantages:

    • Simple construction with minimal reinforcement.
    • Aesthetic flexibility with various materials and designs.
    • Suitable for a wide range of heights and conditions.

    Disadvantages:

    • Requires substantial space due to the thickness needed for stability.
    • Material and construction costs can be high.
    • Not ideal for extremely tall walls without additional reinforcement.

    Applications and Suitable Conditions:

    They can be used for low-height to moderate-height applications in soil retention and landscaping, mainly if there is limited space. For heights exceeding 3 metres, alternative solutions or composite wall systems may be more appropriate.

    2. Cantilever Retaining Walls

    Cantilever retaining walls consist of a vertical stem and a base slab, designed to convert horizontal earth pressures into vertical forces on the ground. They typically feature a thin stem and leverage the weight of the retained soil for stability. These walls are generally constructed from reinforced concrete, making them suitable for higher walls compared to gravity walls.

    The main components are the stem, toe, and heel. The stem is the vertical part, the toe extends in front of the stem, and the heel extends behind it, providing support and stability.

    Materials Used:

    Cantilever walls are constructed from,

    Advantages:

    • Requires less material compared to gravity walls for the same height.
    • Can be constructed for greater heights.
    • More efficient use of space with a thinner wall profile.

    Disadvantages:

    • Requires skilled labour and careful design.
    • Higher initial cost due to the use of reinforced concrete.
    • The complex construction process needs formwork and reinforcement.

    Applications and Suitable Conditions:

    Cantilever retaining walls are ideal for supporting higher loads in areas with firm soil, commonly used in highway construction, basements, and other civil engineering projects.

    3. Counterfort Retaining Walls 

    Counterfort retaining walls have vertical support structures that are attached to them and provide additional lateral earth resistance. They are mainly designed to withstand high loads and to reduce the shear force and bending moments.

    Structural Components

    • Counterforts: Diagonal braces that connect the stem to the heel, reducing the wall’s bending stress.
    • Stem, Toe, Heel: Similar to the components of cantilever walls, with the addition of counterforts.

    Materials Used

    Common materials include reinforced concrete, stone, and brick.

    Advantages:

    • Reduced bending moments in the wall, allowing for taller structures.
    • Efficient use of materials with the additional support from counterforts.
    • Suitable for high walls with significant lateral pressure.

    Disadvantages:

    • Complex design and construction process.
    • Higher initial cost due to additional materials and labour.
    • Requires precise engineering and skilled labour.

    Applications and Suitable Conditions:

    Ideal for supporting high loads in large infrastructure projects, such as highways, bridges and large retaining structures where significant lateral earth pressure is present. Suitable for areas with firm soil and high retaining requirements.

    4. Anchored Retaining Walls

    Anchored retaining walls are reinforced with cables or similar elements to stay anchored into the soil or rock behind them. Anchors are driven deep into the ground and expanded, often using pressurised concrete to form a bulb, providing extra strength. Common anchors include soil nails, tensioned cables and rock anchors.

    Materials Used:

    Typically constructed from steel and concrete.

    Advantages:

    • Suitable for very high walls and areas with significant lateral pressure.
    • Provides additional support in unstable soil conditions.
    • Can be used in combination with other retaining wall types.

    Disadvantages:

    • Complex design and construction process.
    • High initial cost due to the use of specialised materials and labour.
    • Requires regular maintenance and monitoring.

    Applications and Suitable Conditions:

    Ideal for areas with limited space, high load requirements, or loose soil over rock. Commonly used in gardens, building sites, and slope stabilisation projects.

    Types of Retaining Walls Based on Material Used:

    Retaining Walls Based on Material Used

    Sheet Pile Retaining Walls

    Sheet pile retaining walls are used in soft soil and tight spaces. They consist of interlocking sheets driven into the ground, typically one-third above ground and two-thirds below. Taller walls may require tie-back anchors for additional stability.

    Materials Used:

    Common materials include, 

    • Steel, 
    • Vinyl, 
    • Aluminium, 
    • Fibreglass, 
    • Wood.

    Advantages:

    • Can be used in places that have limited space and that are difficult to excavate.
    • Quick and easy installation with minimal site disturbance.
    • Versatile and can be used for temporary or permanent structures.

    Disadvantages:

    • Limited height and load capacity compared to other retaining wall types.
    • They may be damaged in harsh situations and are susceptible to erosion.
    • Stability can be achieved only by proper design and installation.

    Applications and Suitable Conditions:

    Ideal for waterfront structures, riverbank protection, cofferdams, and temporary excavation supports. Suitable for environments requiring quick and effective soil retention.

    Geosynthetic Reinforced Retaining Walls

    Geosynthetic reinforced retaining walls help in improving soil stability and stiffness by using materials like geogrids and geotextiles. They can accommodate greater loads and steeper angles, providing flexibility compared to traditional concrete walls.

    Types of Geosynthetic Materials:

    • Geogrids: gives high tensile strength and durability.
    • Geotextiles: Improve chemical and biological resistance, and help hold aggregates together.

    Advantages:

    • Helps in the construction of tall and stable walls.
    • Reduces the need for heavy and expensive construction materials.
    • Provides flexibility in wall design and construction.

    Disadvantages:

    • Requires specialised materials and construction techniques, which are often expensive.
    • Stability can be achieved only by proper design and installation.
    • They can be damaged by improper installation and environmental conditions.

    Applications and Suitable Conditions:

    They can be applied to narrow spaces, roadways, and steep inclines. They are most appropriate for locations requiring earthquake resistance and moderate to high load bearing capacity. Places such as roadways, airport runways, and bridges can benefit from the use of geosynthetic reinforced retaining walls.

    Earthen Walls with Mechanical Stabilization (MSE)

    MSE walls are composite constructions supported by the soil reinforcement and compacted backfill placed alternately. They are flexible, stable, and capable of supporting heavy loads.

    Materials Used:

    Precast Concrete: For facing units, offering durability and aesthetic options.

    Metallic Strips: Usually galvanised steel for reinforcement, providing high tensile strength and durability.

    Advantages:

    • Allows for the construction of tall and stable walls.
    • Reduces the need for heavy and expensive construction materials.
    • Provides flexibility in wall design and construction.

    Disadvantages:

    • Requires specialised materials and construction techniques.
    • Requires careful engineering and suitable backfill.
    • They are vulnerable to corrosion in reinforcements.

    Applications and Suitable Conditions:

    These walls are suitable for places that need high load-bearing and seismic resistance such as highways, bridge abutments, and seawalls. They can also be used for steep slopes and variable site conditions.

    Concrete Retaining Walls

    Concrete retaining walls are strong structures that are made to hold back the soil or other materials. They can be reinforced with steel for the addition of strength. Concrete walls are mostly made from concrete blocks or poured concrete.

    Types

    There are different types of concrete retaining walls like gravity walls, cantilevered walls, counterfort walls, and also precast walls. All these retaining walls have different functions like providing stability, pressure resistance, tall structure support, fast installation, and so on.

    Applications

    Concrete retaining walls can be used in large projects like commercial buildings and places that need a high load-bearing capacity. Some applications are industrial sites, highways, and landscaping.

    Advantages and Disadvantages

    These walls are strong and durable. They can be molded into different shapes that can be suitable for various designs. But they are costly to install. They may crack over time and skilled professionals are needed for proper construction.

    Maintenance

    They have a long life but need regular inspection and maintenance for proper structural integrity and to address problems like erosion or cracks.

    Masonry Retaining Walls

    Masonry retaining walls are built using materials like stones, bricks, and concrete blocks. They support soil and protect it from landslides or erosion depending upon their mass and structural integrity. 

    Types

    • Dry-stacked
    • Mortared walls

    Applications

    These types of walls are effective for residential landscaping as the visual appeal is important. They are also used in garden terraces and construction that need moderate height and load-bearing capacity.

    Advantages

    One of the main advantages of masonry retaining walls is the aesthetics.  They provide various designs that help the customers to personalise and align according to the landscape. These walls are easy to repair and the individual bricks or stones can be replaced without disturbing the complete structure.

    Disadvantages

    The main disadvantage of these walls is their limitation of height. They are not good for tall structures and areas that have significant soil pressure. Also if it is not properly constructed these walls may shift or settle over time. So there is a need for skilled professionals to build this wall as there is a need for precision for long-term stability.

    Gabion Retaining Walls

    Gabion retaining walls are mainly composed of wire mesh cages that are filled with rocks, stones, or other materials. These cages will be placed to form a wall with the help of their weight under the interlocking nature of the materials that provide stability.  They are flexible and the material choice of the walls will make them suitable for various applications. 

    Applications

    These walls are effective for controlling erosion so it is used in rural as well as industrial environments.  They can be used in riversides, highways, and other areas that are susceptible to erosion.  These walls are also famous for their landscaping design because of their rustic appearance and advantage over the environment. 

    Advantages and Disadvantages

    These walls are cost-efficient and easy to install. They do not need more foundation work and are also permeable, which helps in decreasing the pressure built up. Additionally, eco-friendly and locally available materials can be used for their construction.

    As these walls are made from locally available materials, they may have some aesthetic limitations. Also, the wire mesh can rest or corrode after some time if they are in a moisture-filled environment. This may not be suitable for tall structures and high load-bearing capacity constructions.

    Hybrid retaining walls

    Hybrid retaining walls use both mass and reinforcement for stability. It combines the materials of various retaining wall styles. They offer flexibility and improved performance by optimising both functionality and aesthetics.

    Combination of Different Retaining Wall Types: 

    These walls integrate elements from various systems, such as concrete panels with geosynthetic reinforcements, to enhance strength and stability while reducing material usage and construction time.

    Design and Construction Considerations: 

    Hybrid walls require careful planning to balance different materials and methods. The design must address site-specific conditions, including soil type and load requirements, ensuring proper integration of various components.

    Advantages: 

    Cost-effective, stronger and more stable, eco-friendly, flexible design, reduced build time, lower carbon footprint.

    Disadvantages:

    Complex design and construction, potentially higher costs, durability issues in harsh weather, expensive maintenance, limited expertise, and possible drainage problems.

    Applications and Suitable Conditions: 

    Ideal for sloped terrains, high-load applications, and projects needing aesthetic versatility. Suitable where traditional walls are insufficient, offering tailored solutions for diverse engineering challenges.

    Conclusion

    Retaining walls are essential for soil management and slope stabilisation. Different types offer various benefits, from gravity walls for simplicity to hybrid walls for flexibility. This blog covers various types, from gravity walls to hybrid designs, highlighting their materials, advantages, and limitations. Whether you need a simple gravity wall or a complex hybrid design, understanding these options helps in making an informed decision.

    FAQs

    1. What are counterfort retaining walls?

    Counterfort retaining walls feature vertical supports that connect to the wall to resist lateral earth pressure and reduce bending stress.

    2. When should you use anchored retaining walls?

    Anchored retaining walls are suitable for very high walls or unstable soil conditions, reinforced with cables or stays.

    3. What materials are used in anchored retaining walls?

    Typically constructed from steel and concrete.

    4. What are the benefits of MSE walls?

    They are flexible, stable, and capable of supporting heavy loads with reduced material needs. 

    5. When should you use hybrid retaining walls?

    Hybrid retaining walls are ideal for projects needing high load capacity, aesthetic versatility, and tailored solutions.

    Polishing of Teak wood –  Everything You Need to Know

    0
    Polishing Teak wood

    Building beams and columns, doors, windows, and furniture are just a few of the many uses for teak wood that are common in India. They are accessible for export and are grown profusely in the forest. 

    Teak wood  has a coarse texture and is heavy. It resists decaying quite well. Teak resources cover 20.6 million hectares globally, with 1.5 million hectares in Myanmar and 2.5 million hectares in Thailand; Asia accounts for 99% of these hectares.

     Teak resources are being increased by Indonesia and Myanmar as well, thanks to extensive plantation initiatives. In 2019, the teakwood market was estimated to be worth USD 39.82 billion. From USD 43.26 billion in 2023 to USD 83.76 billion by 2031, it will rise.

    Continue reading to learn more on how this type of wood is polished to create sophisticated and elegant aesthetics.

    What is Teak Wood?

    Teak wood

    Teak wood is obtained from the tree Tectona grandis, which is mostly found in Southeast Asia. Indonesia is the largest teak wood producer, with around 40% of the global supply. Teak wood is a hardwood that is strong, durable, and water-resistant. It is popularly used outdoors as it is weather-resistant.

    How do I Polish Teak Wood?

    A few steps need to be carefully followed while polishing teak wood, in order to get the right finish and add to its aesthetic value. These are:

    Step 1: Clean the surface of the wood.

    Make sure the surface of the teak wood is thoroughly cleaned. This helps in perfecting the surface without leaving any dust or stains. For this, any teak cleaning product can be applied using a brush. Don’t apply pressure to the wood while cleaning as it might cause damage. The process requires smooth handling in such a way that it does not leave any scratches or impressions.

    Step 2: Apply an oil cleanser

    Pour a small amount of teak oil into a clean, dry container and dip a foam brush into it. You can also use cloth or cotton for this step. Apply the oil in the direction of the wood grain until it has a matte appearance. You can apply oil in a circular direction following the grind. Set it aside for 15 minutes for the wood to absorb the oil. The oil must be dried out completely within the given time. 

    Step 3: Sand the surface

    In this step, after drying out the oil, it is necessary to remove any excess from the surface. You can use a brush or cloth for this process. After this, rub the teak wood surface with sandpaper or a similar material to remove any unevenness. Be gentle enough while making sure not to leave any marks on the wood. 

    Step 4: Use suitable wood polish

    Get a high-quality teak wood polish to continue the process. After the wood comes into contact with the chemicals in the polish, it creates a smooth surface that is glossy and sparkling in appearance. It is smooth, with less friction and increased performance, making it look new. You can also use natural polish made at home. This involves olive and lemon juice in the ratio of 2:1, respectively. This is a chemical treatment. After applying the polish, let it set on the teak wood for a particular time. Take safety precautions while carrying out this step. Protect yourself by wearing gloves and eye goggles. 

    Step 5: Dry out the polish applied.

    This step is the time to dry out the applied polish on the teak wood and needs to be carried out slowly. Make sure to start the process the day before. You will need to apply two coats. 

    Step 6: Buff the surface 

    After drying the teak wood, now it’s time for the buffing. It brings a shiny glow to the teak wood. The buffing process is done with the help of a cloth. 

    Polish Teak Wood

    Step 7: Avoid using chemicals

    It is important to avoid the teak wood’s exposure to heavy and hard chemicals that can possibly have an impact on the furniture or material. Harsh chemicals like caustic soda and acid cleaners can damage the teak wood. These chemicals that are used as a brightener or as a cleaner can damage the grain of the teak wood. Especially when using a brush, harsh application can harm the teak and the humans who are exposed to it. Instead, mild detergent or something like vinegar and baking soda can be used, which are some natural cleaning solutions.

    Step 8: Take regular precautions and maintenance.

    While following these steps, make sure you take proper precautions, like wearing gloves and other protective gear. Any chemical exposure can damage the skin and eyes. It can be very dangerous. Also, maintain the teak wood on a regular basis. This can increase the life of the teak wood. Regular maintenance and precautions can increase its longevity and make it look new.

    Step 9: Reapply oil if required.

    At the final stage, if you feel extra oil will be needed, reapply the oil. Also, avoid coming into direct contact with the sun.

    Importance of Teak Wood Polish

    • Teak wood polishing highlights the natural grain, which makes it look rich and, gives it a warm tone. It helps increase the durability. Polishing  teak wood also enhances the wood’s resistance to wear and tear.
    • It prevents the wood from drying out and cracking, .  acts as a barrier and protects it from moisture.
    • It protects the wood from harmful radiation and prevents discoloration. It also reduces the risk of mold and other growth. 
    • Polishing ensures less maintenance and extends  the life span of teak wood products. It provides  a glossy finish, which is attractive and enhances the overall look. 
    • Polishing  creates a smooth, even surface that is pleasant to touch. A well-maintained teak wood adds value to the furniture and its structures.
    • It is easier to work with polished wood. Using polish can likely prevent the wood from cracking over time. It also helps maintain and retain the wood’s shape and form. 
    • Polishing the teak wood creates a protective layer that can resist  chemicals and termite attacks. Exposure of the wood to the air is also avoided by polishing, which extends its existence.
    • It can prevent water damage, wear and tear, and scratches. 
    • The beauty and longevity of the wood are achieved when a teak wood polish is done.

    Conclusion:

    Teak wood can live through generations as a legacy. It depicts cultural heritage, ecological importance, and historical significance. It is also a regular choice for making furniture and other interior elements. It is especially preferred for many industries as it is low-maintenance, highly durable, and weather-resistant. Polishing teak wood is an important step to ensure its longevity and enhance its aesthetics.

    RCC Wall vs Brick Wall: Understanding the Differences

    0
    Rcc wall vs brick wall

    Wall construction is a crucial aspect of building design. The choice between RCC and brick walls significantly influences a building’s structure, insulation, soundproofing, appearance, and budget. RCC walls offer superior strength and durability, which is ideal for load-bearing structures. Brick walls provide better insulation and sound reduction. Aesthetically, both offer versatility, but RCC tends to be more modern. Cost-wise, brick walls are generally more economical for construction. Ultimately, the best choice depends on building purpose, climate, budget, and design preferences. Read on to learn the differences between the two types, so that you can make an informed decision for your home construction.

    What is an RCC Wall?

    Reinforced Cement Concrete wall

    An RCC, a Reinforced Cement Concrete wall, is a strong structural element that combines concrete with steel rebars for tensile strength. This powerful combination makes the wall capable of withstanding heavy loads and external pressures.

    Composition of an RCC Wall

    RCC walls consist of concrete (A mixture of cement, sand, water and aggregates) 

    The materials listed above have steel reinforcement bars which can withstand tensile forces. Together with giving concrete protection against corrosion, steel also makes concrete stronger overall.

    Key Benefits of RCC Walls

    • Exceptional strength and durability
    • Resistance to fire, water, and weathering
    • Versatility in design and application
    • Long lifespan with minimal maintenance

    What is a Brick Wall?

    brick wall

    A brick wall is a vertical structure built using bricks and mortar. Brick is a widely used material for external walls, internal partitions, and other structures. 

    Components of a Brick Wall

    Bricks: 

    The fundamental units are made from clay, which consists of silica, alumina and lime. They provide structure and durability to walls.

    Mortar: 

    Mortar is generally a cement-based or lime-based material that helps bind the bricks together for stability.

    Construction Process

    Bricklayers carefully lay bricks in specific patterns, applying mortar to create strong bonds. The wall can dry and cure, resulting in a robust and long-lasting structure.

    Benefits of Brick Walls

    • Exceptional durability and strength
    • Excellent sound insulation
    • Fire resistance
    • Aesthetic appeal
    • Low maintenance

    Properties and characteristics

    Structural Strength and Durability

    Regarding structural integrity and durability, RCC and brick walls have their advantages.

    RCC Walls: 

    RCC walls are known for their exceptional strength and load-bearing capacity, making them perfect for high-rise buildings and heavy structures. They are also highly resistant to moisture, termites, and even earthquakes. However, initial construction costs tend to be higher.

    Brick Walls: 

    Brick walls offer solid load-bearing capabilities, though generally less than RCC. While they can withstand moisture and are termite-proof, they may require occasional maintenance like repointing. Known for their classic aesthetic, brick walls often come with a lower initial cost than RCC.

    Construction Techniques

    RCC Walls

    Building RCC walls is a multi-step process. Formwork is erected to shape the wall, followed by placing steel reinforcement for strength. Concrete is then poured and cured, gaining durability over time. While this method offers superior strength and design flexibility, it demands more labour than brick walls.

    Brick Walls

    Brick wall construction is relatively straightforward. Bricks are laid in courses, and mortar bonds them together. The mortar cures to solidify the wall. Although less complex, skilled labour is essential for accurate alignment and structural integrity. Brick walls often provide better insulation and soundproofing than RCC walls.

    Thermal and Acoustic Insulation

    Thermal Insulation

    RCC Walls: 

    RCC walls give moderate thermal insulation. While they can store heat, preventing drastic temperature swings, additional insulation is often required for optimal energy efficiency.

    Brick Walls: 

    Generally, brick walls are excellent for thermal insulation. Bricks normally resist heat transfer, thus helping maintain cool indoor temperatures in summer and warm temperatures in winter.

    Acoustic Insulation

    RCC Walls: 

    RCC walls provide reasonable sound insulation. However, additional soundproofing measures might be necessary for environments demanding high acoustic performance, such as auditoriums offices.

    Brick Walls: 

    Brick walls are superior in acoustic insulation. Their dense structure effectively reduces noise transmission between rooms, making them ideal for privacy and quiet spaces, especially when plastered.

    Cost Comparison

    RCC Walls

    Building with RCC often involves higher upfront costs due to expensive materials like cement and steel and skilled labour requirements. However, RCC walls excel in durability and minimal maintenance, potentially offsetting initial expenses over the long term.

    Brick Walls

    Brick walls generally have a lower initial cost compared to RCC, primarily due to less expensive materials. Labour costs can vary depending on the complexity of the project. While maintenance demands, such as repointing mortar, can increase costs, brick walls often offer a more economical choice for the short term.

    Factors Affecting Cost

    Several factors influence the overall cost of both wall types, including:

    • Material prices (fluctuating market conditions)
    • Labour availability and wages
    • Project location and accessibility
    • Wall thickness and height
    • Design complexity
    • Regional climate and weather conditions

    Environmental Impact

    RCC Walls

    Cement production for RCC walls can contribute to carbon emissions. However,  advancements in construction methods are reducing the carbon footprint. RCC walls can also be designed for energy efficiency, reducing overall environmental impact.

    Brick Walls

    Brick walls have been a remarkable structure in construction for centuries. Whether in homes, commercial buildings or even garden walls, brick walls give a classic look that withstands the test of time. 

    Though it releases carbon during the firing process, bricks are long-lasting, recyclable, and can be reused, thus extending their lifespan and reducing their environmental impact. 

    As traditional brick-making methods are environmentally harmful, advancements in the production method can be a solution.

    Aesthetic and Design Flexibility

    RCC Walls

    RCC walls are a blank canvas for architects and designers, as they have smooth and moldable surfaces. Because of its sleek, minimalist exterior and textured finishes, RCC can be adapted to any architectural design. It can give a unique aesthetic by including paints, cladding, or textures. 

    Brick Walls

    Brick walls can give a classic charm and timeless look. Bricks come in various sizes, colours, and patterns, giving you versatile choices. These can be plastered or left exposed to give a rustic aesthetic.

    Maintenance and Repair

    RCC Walls

    Common issues with RCC walls include cracks due to settling or shrinkage. Repair methods involve crack injection or surface treatments to restore structural integrity. There is a need for inspections and maintenance to be made regularly to address any problems and ensure the durability of walls. 

    Brick Walls

    To address any deterioration in brick walls, the repointing of mortar joints is needed. The cracks and any damage to individual bricks can be addressed by replacing the affected brick and applying new mortar. Water seepage is also a common issue faced by brick walls. To protect the appearance and functionality of brick walls, regular inspection and maintenance is necessary.

    Suitability for Different Applications

    RCC Walls

    RCC walls can be used in high-rise buildings, industrial structures, and commercial buildings because of their strength and durability. They can withstand heavy loads and seismic activity. Additionally, RCC walls offer flexibility in design, allowing for various architectural styles and shapes. Their fire resistance and water impermeability make them suitable for environments with demanding conditions.

    Brick Walls

    Brick walls are often preferred in residential buildings and historical buildings. They can give excellent insulation and create a comfortable environment. They are not as strong as RCC walls but provide a warm and inviting ambience. 

    Conclusion

    Choosing between RCC Walls or Concrete Walls is a common debate in every construction project. RCC walls are very strong and mainly used where excess load-bearing capacity is required for walls. This makes them great for tall buildings and big projects. Brick walls look classic and are good at keeping noise and heat out. They are often used in homes and older buildings. When choosing between the two, think about what you need the wall to do, how much it will cost, and the look you want.

    FAQs

    1. Which is stronger, RCC or brick?

    RCC walls are generally stronger than brick walls.

    2. Which is cheaper, RCC or brick?

    Brick walls typically have lower initial costs compared to RCC walls.

    3. Which is more durable, RCC or brick?

    Both RCC and brick walls offer excellent durability, but RCC walls are often considered more resistant to various environmental elements.

    4. Which wall type is more environmentally friendly?

    Generally, RCC walls are considered to be more harmful to the environment due to the unsustainable manufacturing methods of cement.

    5. When should I choose RCC walls?

    RCC walls are ideal for high-rise buildings, commercial structures, and applications requiring very high load-bearing capacity.

    High Alumina Cement and Its Uses

    0
    High Alumina Cement

    High alumina cement is also called calcium aluminate cement and differs substantially from ordinary Portland cement (OPC). It has unique properties like chemical attack resistance, high-temperature resistance, and rapid strength development. This makes it an important component in a large range of applications. 

    The details about uses, advantages, and applications of high alumina cement are given in this blog.

    Composition and Properties of High Alumina Cement

    Chemical Composition

    The composition of high alumina cement is given as follows:

    • Silica – 3% to 8%
    • Alumina – 37% to 41%
    • Lime – 36% to 40%
    • Iron Oxide – 9 to 10%
    • Titanium – 1.5 to 2%
    • Magnesium – 1%
    • Insoluble Resides – 1%

    The high content of alumina provides unique properties that distinguish it from normal cement.

    Mechanical and Physical Properties of High Alumina Cement

    Compressive Strength 

    The compressive strength of high alumina cement is between 40MPa to 80MPa for high alumina cement. While the compressive strength of ordinary cement is between 20 MPa to 40 MPa. 

    Flexural Strength 

    Generally, flexural strength is between 5MPa to 10MPa for high alumina cement. While the flexural strength of normal cement is 3 MPa to 5 MPa. This helps to withstand higher stress and thermal shocks. 

    Rapid Strength Development

    The setting and hardening are rapid in high alumina cement compared to OPC. The initial setting time for high alumina cement can be less than 3.5 hours but for normal cement, the initial setting time is around 2 to 4 hours.

    High Early Strength

    The initial compressive strength can rise to 40 MPa within 24 hours. This is normally higher than OPC, as the initial compressive strength of OPC can be around 20 MPa within 24 hours. 

    High Temperature Resistance

    High alumina cement can remain unaffected up to 1000 degrees Celsius. This makes them suitable for refractory applications.

    Chemical attack resistance

    High alumina cement has high resistance to sulfate, weak acids, and seawater. This makes it suitable for environments that are exposed to aggressive chemicals.

    Low Heat of Hydration

    During hydration, high alumina cement shows an exothermic reaction. This decreases the risk of thermal cracking in large pours. Also, high alumina cement forms aluminate hydrates like CAH10, C2AH8, and C3AH6. These materials can produce a dense matrix and help in the gain of high early strength.

    Durability

    High alumina cement has shown increased durability in aggressive environments. The main working principle is that high alumina cement based concrete has lower permeability. This helps decrease the absorption of harmful chemicals and improve longevity.

    Uses of High Alumina Cement

    High alumina cement can be used in various applications, mostly construction related. Due to its high temperature resistance it is used in refractory linings. It is also used in marine structures, precast compounds and any special civil engineering projects that require fast development of strength and aggressive chemical resistance. 

    Refractory Applications

    High alumina cement is used in refractory applications like furnaces, boilers, kilns, and chimneys as it has the capability to endure extreme temperatures of up to 1000 degrees Celsius, in which it does not have any loss of strength. This capacity makes them suitable for environments where there is intense heat. Some of the environments are kilns, reactors, and furnaces. Their property to quickly obtain strength further improves their application in high temperature applications.

    Chemical Resistant Concrete

    Environments like wastewater treatment plants, chemical plants, and marine structures are exposed to aggressive chemicals. So, high alumina cement is used for its high durability. High alumina cement also offers resistance to sulfate attack or acid corrosion, thus, helping to increase the lifespan of the structures. 

    Rapid Repair Works

    Properties like rapid setting and high early strength make high alumina cement suitable for emergency repair works. Some of them are road repairs, airport runways, and structural repairs in critical infrastructures. The repair based on high alumina cement in concrete can help in the quick restoration of functionality and reduce downtime.

    High Temperature Construction

    High alumina cement can be used in construction facilities that need high resistance to temperature. Some of them are incinerators, in which the wastes are burned at high temperatures, chimneys that must hold the heat gases and corrosive gases from industries and other high temperature industrial facilities. This type of cement has the capacity to maintain structural integrity in extreme heat conditions. 

    Underwater Constructions

    The chemical resistance and ability to set underwater have made high alumina cement suitable to be used in underwater constructions. These constructions include piers, marine piles, and harbor installations. The rapid setting properties help in reducing time for potential washout, which helps in ensuring robust structures. 

    Sewer Infrastructure

    High alumina cement has biogenic sulfide corrosion resistant properties. This makes it suitable for the construction of sewage infrastructure by reducing the corrosive effect of hydrogen sulfide gas. Thus, it helps increase the lifespan of manholes and sewage pipes.

    Flooring and Tiling

    High alumina cement is used in flooring and tiling applications where rapid installation and high early strength are needed. The use of high alumina cement ensures that the tiles and floors are installed quickly.

    Case Study: HAC in Wastewater Treatment Plant

    A wastewater treatment plant in Europe has used high alumina cement-based concrete for its primary containment structures. It has been observed that for over 10 years, the structures have shown only minimum degradation, even though they have been in constant contact with aggressive chemicals and biogenic sulfide. Hence, using high alumina cement has resulted in reduced maintenance costs and a longer life. 

    Conclusion

    High alumina cement is an indispensable material because of its exceptional properties. They gain rapid strength, resistance to high temperatures, chemical resistance, and  durability, making it a preferred choice for various applications. Their applications differ from critical infrastructure repairs to extreme industrial settings. This cement provides reliability and efficient solutions for various applications. 

    FAQs

    What is the heat of hydration of high alumina cement like? 

    The heat of hydration of high alumina cement is lower compared to normal cement. This helps in reducing risks of thermal cracking.

    What is the typical alumina content in high alumina cement? 

    The amount of alumina content used in high alumina cement is between 37% – 41%.

    How is high alumina cement used in underwater constructions? 

    The chemical resistance and ability to set underwater allows it to be used in marine constructions.

    What maintains structural integrity of high alumina cement at high temperatures?

    The structural integrity is maintained by its high strength.

    What are the advantages of using high alumina cement in emergency road repairs? 

    The fast setting and early strength are the advantages of high alumina cement.

    Lime Mortar: Properties, Benefits & Applications

    0
    Lime Mortar

    Traditional building techniques have become increasingly popular in recent years. Likewise, lime mortar is the talk of the town now. Lime mortar is a durable material made from a mixtures of lime, water, and sand. Since ancient times, this has been a tool to bind bricks, stones, and other masonry materials. It is primarily used to achieve the highest quality of bond in the absence of large cracks.

    Though we are familiar with modern materials, this kind of item is perfectly suitable for modern buildings with an increased lifespan. In this article, you will learn the key components, types, significance, and properties of lime mortar.

    What is Lime Mortar?

    Lime mortar is a mixture of lime, aggregates, and other natural additives. This is a primary choice used in everything from the renovation of existing buildings to the recreation of new ones. This is one of the oldest types of mortar, used in ancient Greece and Rome. Based on their formulation, they are categorised into different types.

    Generally, modern cements are less permeable and harder when compared to lime mortars. Its effectiveness and durability have not been well understood, and unfortunately, it’s often used only in historic building restoration.

    In addition to its other features, breathability and flexibility are widely discussed. 

    Key Components of Lime Mortar

    Lime mortar is consists of three fundamental ingredients, including lime, sand, and water. The basic ratio is 1 part lime, 3 parts sand, and water usage as per the desired consistency, but it can vary based on project requirements. However, they are explained in detail below:

    Lime: acts as a binding agent extracted from limestone, which is categorised into three different types. They include: hydrated lime, quicklime, and hydraulic lime. It directly reacts with carbon dioxide (CO2) and water in the air and provides elements with a strong and durable bond.

    Sand: The type and quality of sand greatly influence the mortar’s properties. Choosing the right sand type provides improved strength and workability to the mortar, preventing shrinkage.

    Water: The amount of water decides the consistency. It should be adjusted according to the determined binding requirement. It helps hydrate the lime and allows achieving a workable paste. 

    Properties and Benefits of Lime Mortar

    Lime mortar possesses an ideal set of properties, making it a preferred choice for historic building restoration and modern building construction.

    Flexibility: Lime mortar is extremely flexible, capable of accommodating the natural movement of buildings. Flexibility is a result of good permeability due to its large interconnected pore structure. 

    Breathability: Lime mortar provides sufficient breathability, allowing water content to evaporate freely. It efficiently prevents common issues in buildings such as dampness, salt damage, and mould formation.

    Durability: When the consistency and quality of the ingredients in the mortar are ideal, exceptional durability can be achieved.

    Slow Setting: Unlike cement mortar, lime mortar sets very slowly, providing opportunities for adjustments and corrections during application.

    Feasibility: Due to its excellent workability and plasticity, lime mortar is the best choice to shape the masonry work. 

    Carbonation: Lime mortar easily reacts with carbon dioxide to form calcium carbonate, which is essential to obtain extreme durability and strength. 

    Resistant to Weather: Lime mortar has extreme tolerance against rain, UV rays, and humidity. Hence, it is one of the highly recommended materials to apply outdoors.

    Less Shrinkage and Cracking: In contrast to other types of mortars, lime mortar supports less cracking and shrinkage. Providing an added layer to the buildings typically prevents cracking and lengthens their lifespan.

    Applications of Lime Mortar

    Lime mortar can be found in a variety of construction projects, particularly in historic buildings.

    Ancient Constructions: Lime mortar is a bonding agent ideal for constructing bonding bricks, stones, and other masonry units. It is suitable for both interior and exterior walls, providing durable finishing and protective coatings.

    Modern Applications: Similar to historical constructions, lime mortar is gaining popularity in modern buildings. It creates a healthy indoor environment and is primarily used in sustainable building projects.

    Historic Building Restoration: Due to its compatibility with natural materials, it is indispensable for restoring historic artefacts and buildings.

    Conclusion

    Lime mortar is a good option today due to its extreme strength and durability. Generally, Lime mortar is costly then cement mortar. Whether it is a traditional or modern structure, lime mortar can withstand all kinds of issues like cracking, shrinkage, or any harsh environmental conditions. These better properties allow lime mortar to be an all-rounder in both historic and modern constructions compared to cement mortar.

    FAQs

    What are the sources used to produce lime mortar?

    Lime mortar is composed of three major ingredients: lime, sand, and water. The lime extracted from limestone acts as the binding agent, sand provides structure, and water activates the mixture with its chemical composition through carbonation.

    Can I use lime mortar in new construction?

    Yes, lime mortar can be a preferred choice for creating new buildings. It includes outstanding durability, strength, and eco-friendliness, promoting a healthier indoor environment. 

    Can I buy pre-mixed lime mortar?

    Yes, it is available to purchase. When compared to regular mixing, it is quite expensive. Commercially available pre-mixed lime mortar may contain additives that could affect its properties and cause serious damages.  

    What is the difference between lime and cement mortar? 

    Lime mortar is extremely flexible and breathable compared to cement mortar. It allows moisture to escape and reduces the chances of cracking. Cement mortar sets quickly, but it is still less permeable and contributes to moisture problems in the structures. 

    Is lime mortar suitable for DIY projects? 

    Yes, it can be used, but having a basic understanding about correct mixing, application procedures, and masonry techniques helps. They have been applied to building a cob oven and repairing old stone walls.

    Understanding Deeds of Surrender: A Guide for Landlords and Tenants

    0
    Deed of Surrender

    If you are a tenant wishing to terminate your lease early, a homeowner facing potential issues, or a property manager dealing with lease agreements, understanding deeds of surrender can be particularly advantageous.

    It makes the ending of the tenancy stress-free and minimizes issues since the parties can both agree to end the lease before the agreed date of expiry.

    For any business person or landlord who is in need of a clear explanation of deeds of surrender so that he or she can manage their properties effectively, this article will help to give you all that you require.

    What is a Deed of Surrender?

    Deed of Surrender

    A deed of surrender is a formal contract where the lessee voluntarily terminates the lease agreement and returns the land rights to the lessor. This occurs when both the tenant and the landlord mutually decide not to continue the tenancy, ending  before the lease stipulated time and on favorable terms for both parties.

    Why would this happen? 

    At times, tenants might be facing some financial problems or may want to transform their business model. Sometimes, the two could just decide that it may be necessary to terminate the lease to allow for other strategic decisions and plans to occur.

    In any case, both parties involved, i.e. the landlord and the tenant, should have a clear understanding of this contract so that all the issues are conveyed and managed in the best lawful manner possible.

    Key Features of a Deed of Surrender

    1. Voluntary Agreement: Both parties have to agree to the conditions of surrender. Neither party can forcibly impose these conditions on the other.

    2. Mutual Consent: The tenant and landlord have to mutually agree to surrender the lease.

    3. Legal Documentation: The agreement, to be effective, has to be in writing and signed by both parties.

    4. Clear Conditions and Terms: The deed must specifically mention the terms and conditions of the surrender about any monetary or other obligations.

    Components of a Deed of Surrender

    Components of a Deed of Surrender

    An ideal deed of surrender comprises the following components:

    1. Parties

    Landlord: The proprietor of the premises.

    Tenant: The individual occupying the premises and who is surrendering his interest therein.

    2. Description of Premises

    A detailed description of the premises, describing the location, type of premises, and any distinctive features that may characterize them.

    3. Lease Details

    Information concerning the original tenancy agreement, such as:

    • Start date of the tenancy.
    • The length of the term and date when it ends
    • Rent amount, due date 

    4. Surrender Conditions

    Conditions under which the tenancy is ended, including:

    • Effective date of surrender
    • Matters relating to money, such as arrears of rent or damage fees
    • Conditions for refunding the security deposit
    • Obligations for the tenant, such as vacating the premises and ensuring they are left in good order

    5. Payment

    The consideration typically involves a payment from one party to the other, this could be a payment from the tenant to the landlord, or vice-versa.

    6. Release of Claims

    A clause stating that both parties agree not to bring any legal action against each other concerning the lease once the surrender has been completed.

    7. Signatures and Witnesses

    It must be signed by both parties and may or may not be witnessed or notarized, depending upon local legislation.

    How to Execute a Deed of Surrender

    1. Negotiation

    Both parties must agree on the terms of surrender. They include  the financial issues, the condition of the premises, and the vacation date.

    2. Preparation of Deed

    Having agreed on the terms, someone drafts the deed of surrender. It is in the best interest of the parties to have the document drafted or even reviewed by a lawyer to ensure that the execution complies with all the rules.

    3. Verification and Acceptance

    The document has to be verified by both parties. They should clear up any vague portions or doubts before they sign.

    4. Execution of the Deed

    Both parties sign the deed. Local laws may necessitate witnesses or a notary.

    5. Leaving the Premises

    The tenant should leave the premises on or before the date agreed upon. They should do so in the state and condition that the deed outlines.

    6. Full Settlement

    Finalize any monetary transactions, such as the return of the security deposit or any unpaid rent.

    Impact of a Deed of Surrender

    For Tenants:

    • No Further Lease Obligations: The tenant is no longer liable to honor future lease obligations.
    • Probable Issues with Money: The tenant may have to give some compensation to the owner to get things sorted.
    • Affecting Credit Scores: If the tenant does not act according to the guidelines laid down for moving out, then he will either damage his credit score or make renting in the future difficult.

    For Landlords:

    • Retaking of Premises: The landlord re-possesses the premises and can further rent it to any other person.
    • Money Matters: Although the landlord may get some money back from the tenant, he may have to spend some to look for a new tenant replacement.
    • Property State: The landlord has to ensure that his property is in good condition for renting again.

    Other Ways of Terminating a Lease

    Sometimes, the parties would want to opt for an alternative instead of surrendering a tenancy:

    1. Assignment of Lease

    The tenant assigns the tenancy to a new tenant. This is effective if one finds another tenant willing to continue the tenancy under the same conditions.

    2. Sub-letting

    A tenant rents the property to someone else but remains responsible for carrying out his tenancy obligations. This can save a situation, especially if the tenant intends to return or if the tenancy is close to its end.

    3. Lease Termination Agreement

    A deed of surrender and a lease termination agreement are identical in form, but different situations may call for distinct uses of them. For instance, in situations where there is mutual consent and no money is  exchanged.

    Conclusion

    The landlords and tenants must learn about deeds of surrender as a way of determining how a lease agreement is terminated early. This will ensure that both   parties are protected and that there is no disagreement in circumstances where a tenant may wish to end the contract before the agreed-upon  time. Tenants come to know about the  obligations they have to perform and might specifically demand to be let off the lease, whereas the landlord only  comes to know what  the property looks like and who owns it.

    Frequently Asked Questions

    1. How is a deed of surrender different from a lease termination agreement?

    A deed of surrender is a formal document used to terminate a lease when both the tenant and landlord mutually agree to end it. This document often involves a financial exchange and sets clear guidelines for vacating the property. On the other hand, a lease termination agreement is less formal. It doesn’t require a deed and simply outlines the mutual decision to end the lease, without necessarily including detailed terms or financial arrangements.

    2. Can a deed of surrender be revoked once signed?

    No, a deed of surrender is binding when signed by both parties. You cannot withdraw unless both parties enter into another agreement that runs contrary to the deed of surrender. All parties must understand and agree to what is stated before signing.

    3. What happens if the renter fails to depart the premises on the date specified in the surrender deed?

    If the tenant does not move out of the house as agreed then, the act may be interpreted as of breach of agreement. It means that the landlord is within his/her rights to seek their eviction through the courts and also seek compensation for any loss that had been incurred due to a breach of the promise made. Therefore, the tenants have to observe time clauses in the deeds in a bid to avoid being dragged to the court of law.

    Understanding the Compressive Strength of Concrete: Testing Methods and Factors

    0
    Strength of Concrete

    Before starting any type of concrete construction, you must ensure the capacity of the concrete to withstand different types of loads. Compressive strength is one of the important factors influencing the structural strength and load-bearing capacity of concrete in construction. 

    In today’s blog on Brick & Bolt, you will understand the different methods used and factors influencing the compressive strength of concrete.

    What is the Compressive Strength of Concrete?

    The compressive strength of concrete indicates the maximum load a concrete sample can endure without failing. It is generally measured in megapascals (MPa). Before designing any concrete structure, you must consider the compressive strength of the concrete. It depends upon the concrete’s mix proportions, curing practices, and the properties of its ingredient materials. Higher compressive strength indicates greater durability and resistance to different types of stresses. Commonly, the compressive strength of concrete after 28 days is considered standard. This time is essential for the concrete to achieve its essential strength.

    While high strength is crucial, it’s important to understand the difference between high-strength concrete and high-performance concrete to choose the right type for your project.

    Concrete strength testing methods

    Every country has its own set of regulations that must be adhered to, and concrete testing techniques vary from place to place. You can test the compressive strength of concrete samples with destructive or non-destructive methods.

    The following are the destructive compressive strength testing methods:

    1. Cube Test
    2. Cylinder Test
    3. Concrete core testing

    1. Cube Test

    Concrete cube testing is one of the most common concrete strength test methodologies for measuring compressive strength. Concrete samples are prepared by pouring the concrete mix into cubes, normally with dimensions of 150 mm x 150 mm x 150 mm.

    The concrete will gain complete strength after 28 days of pouring. The test will be conducted for 7, 14, and 28 days. After 7 days, it should have gained 65% of its strength and 90% after 14 days. After the standard curing period of 28 days, these cubes are subjected to axial loading in a compression testing machine until failure takes place. The force at which the cube fails, divided by its cross-sectional area, gives the compressive strength. While compressive strength is crucial, it’s not the only measure of concrete’s performance. Another important property is flexural strength of concrete, which measures its ability to resist bending under load. Understanding both compressive and flexural strength is essential for comprehensive concrete design and quality control.

    2. Cylinder Test

    Similar to the cube test, the cylinder test also involves the casting process of concrete into cylindrical molds, usually 150 mm in diameter and 300 mm in height. Cylinders should have a length-to-diameter ratio of 2:1 and a diameter three times the coarse aggregate’s maximum nominal size. After curing, the cylinders are tested for compressive strength. This concrete strength test is commonly preferred for its statistical reliability and also for selected methods for longer and more slender structures, offering an accurate representation of the concrete’s properties when placed in situ.

    3. Concrete Core Testing

    Core testing involves drilling sites in existing concrete structures, taking multiple cylindrical samples of the concrete that are then examined and tested in a laboratory. Testing the concrete for strength in this way is mandatory to verify the integrity of the concrete, particularly if earlier laboratory tests indicated doubts about its compressive strength or overall quality. Even if core testing provides reliable and accurate data, it is also invasive and will need careful handling to prevent related damages.

    Non-Destructive Testing Methods

    Non-destructive testing (NDT) methods allow engineers to test the strength of concrete without damaging structures, effectively identifying potential quality issues.

    Penetration Method

    The penetration method employs a device like the Windsor probe, which drives a hardened steel probe into the concrete using a powder-actuated charge. The depth of penetration correlates inversely with the concrete’s compressive strength; thus, deeper penetrations indicate lower strength. This method is comparatively quick and requires minimal setup.

    Rebound Hammer Test

    The rebound hammer is also known as the Schmidt hammer. It measures the surface hardness of concrete by using a spring-driven mass to strike the concrete and then record the rebound energy. The rebound value shows a good correlation with compressive strength, which makes this method very beneficial for large-scale evaluations of concrete surfaces. Although the rebound hammer test is simple, it requires careful correlation with cylinder test results for accurate strength estimations.

    Pull Out Test Method

    The pull-out test involves inserting a metal disk into the surface of the concrete and applying a tensile load until the disk is extracted. The force needed to extract the disk gives an estimate of the concrete’s compressive strength. This technique is helpful for evaluating early-age concrete strength and can be performed in situ without large-scale sampling.

    Ultrasonic Pulse Velocity Method

    Ultrasonic pulse velocity (UPV) testing is a versatile test. It uses ultrasonic waves to distinguish internal defects and assess the quality of concrete. Engineers use this method to measure how long the sound waves take to travel through a patch of concrete as an indicator, not just of its density but also – indirectly — of its compressive strength. The detection of defects such as voids and different types of cracks in UPV is more useful for maintaining quality.

    Radioactive Methods

    It is one of the major non-destructive tests. Tests with radioactivity encourage the identification of an in-situ density test to determine a successful compressive strength. This test is useful for detecting the position of reinforcement, measuring density, and detecting honeycombing in concrete components. It uses very simple equipment, and, except for the cost of purchase, it can be relatively cheap to run. You can easily test the concrete samples of up to 18 inches. This method is best for high-risk, difficult-to-reach locations, but regulatory and safety restrictions might limit the usage.

    Compressive strength of concrete at Various Ages

    AgeStrength percent
    1 day16%
    3 days40%
    7 days65%
    14 days90%
    28 days99%

    Factors Affecting Compressive Strength of Concrete

    Several factors significantly impact the compressive strength of concrete, emphasising the importance of careful material selection and curing practices.

    Water-Cement Ratio

    Compressive strength is most sensitive to changes in the water-cement ratio. Concrete will become hard when the water is less, and if it is more, porosity will increase, reducing compactness and hence reducing density, ultimately decreasing strength. Typically, the target ratio for optimal concrete strength is between 0.4 and 0.6.

    Aggregate Quality and Size

    Aggregates should be of good quality and size to help in creating a proper mix of concrete that will lead to higher compressive strength. Good high-quality aggregates, appropriate grading, and perfect cohesion give higher capability for load distribution, resulting in improved strength. Proper compaction of concrete is also crucial to ensure optimal aggregate distribution and minimisation of voids. On the other hand, low grades of aggregates or inadequate compaction will result in considerable deficiencies in the concrete matrix.

    Curing Conditions

    Good concrete curing is important to make concrete gain its maximum strength. Curing conditions such as proper moisture and temperature ensure proper hydration, which in turn results in the strength of concrete. Insufficient curing allows the surface of cured material to be dry and cracked, which affects its long-term service performance.

    Age of Concrete

    Concrete strength matures with age, and test samples may produce extremely misleading results if not tested at the appropriate time. Although concrete typically gains most of its strength within 28 days, it continues to get stronger for months or years under the proper conditions.

    Admixtures and Supplementary Cementitious Materials

    Using admixtures in concrete, such as superplasticisers or fly ash, allows for the improvement of concrete properties, such as compressive strength. They can improve workability, permeability reduction, and proper hydration, consequently producing better structural performance.

    Generally, understanding and evaluating the compressive strength of concrete includes thoughtful consideration of different testing methods and factors. The careful selection of appropriate tests—whether traditional or non-destructive—for a thorough understanding of critical variables such as water-cement ratio, aggregate properties, and curing conditions ensures the durability and safety of concrete structures. By prioritising the factors that affect compressive strength, engineers and construction professionals can effectively mitigate risks and enhance the longevity of their projects. For construction services in Hyderabad, consider Brick & Bolt, a reputable firm with a track record of delivering high-quality concrete structures.

    Ground Beam vs Plinth Beam

    0
    Ground Beam vs. Plinth Beam

    In construction, beams are key to keeping structures stable and strong. The ground beams and plinth beams are particularly important elements of a building’s substructure and first floors. Although they may appear similar at first sight and sometimes are even used interchangeably, a ground beam and a plinth beam are distinct and are employed in distinct manners. This guide will therefore focus on what they are, their role, construction, and the increasing importance of beams in current construction practices.

    Getting to Know Ground Beams

    Ground Beam

    Ground beams are horizontal building parts that builders place at or just below the ground. They have an essential role: to hold up a building’s weight and move it to the foundation or the soil underneath. Ground beams play a crucial role when the soil can’t support much weight or when the ground isn’t level, which could lead to instability.

    Main Jobs of Ground Beams

    1. Load Distribution: Ground beams distribute the weight of walls and columns across the soil or foundation. This helps stop uneven settling.
    2. Structural Support: They give extra support to buildings on soft or uneven ground, acting as a stabilising part.
    3. Leveling: People use ground beams to level a building’s foundation on sloping land. This makes sure the structure sits on a stable and flat base.
    4. Bridging Weak Soil: By spanning areas of weak soil, ground beams can make a stable base that improves the overall strength of the structure.

    Construction of Ground Beams

    Building ground beams involves several main steps, including:

    • Design: To design ground beams, engineers consider the building’s load needs and the soil’s geotechnical features. They figure out the right size and reinforcement details to keep things safe and stable.
    • Material: Builders make ground beams from reinforced concrete, which offers the needed strength and durability. They put steel bars (rebar) inside the concrete to make it stronger when pulled.
    • Formwork: Before pouring the concrete, workers set up forms to shape the beam. They remove these forms once the concrete hardens.
    • Reinforcement: Reinforcement: Reinforcement bars are the steel materials that are fitted in the formwork as per the design and tied together to form a grid-like like structure to improve the strength of concrete.
    • Pouring Concrete: Members add water to the cement and place the mixture over the reinforcement in the formwork. They then shake it around to allow it to flow into  all the voids and eliminate air pockets.
    • Curing: As in the case of ground beams, curing is critical to concrete strength and performance. 

    Ground Beams vs Plinth Beams

    Ground beams and plinth beams might sound alike, but they serve different purposes and have unique uses. Let’s take a closer look at how these two differ:

    FeatureGround BeamPlinth Beam
    LocationAt or just below ground levelAt the plinth level, just above ground level
    Primary PurposeTransfer loads to the soil or foundationIt provides lateral support and, prevents cracking
    FunctionLoad distribution  and levelingLoad transfer and seismic resistance
    Construction MaterialReinforced concreteReinforced concrete
    Use in ConstructionUsed where soil bearing capacity is weakUsed in all types of buildings for stability
    Load BearingDirectly supports walls and columnsPrimarily supports walls and prevents tilting

    Importance of Ground Beams and Plinth Beams in Construction

    Ground beams and plinth beams are essential in building construction. Here’s why we can’t do without them:

    Benefits of Ground Beams

    • Better Stability: Ground beams make buildings more stable on uneven or soft ground. This reduces the chance of the building settling or getting damaged.
    • More Design Options: They let builders be more creative with their designs. This means we can build on tricky sites where normal foundations might not work.
    • Handling Weight: Ground beams spread out the weight of the building. This helps to manage stress and stop weak spots from forming in the structure.

    Benefits of Plinth Beams

    • Structural Integrity: Plinth beams keep walls in line and intact, reducing the chance of harm from foundation shifts or outside forces.
    • Protection: Plinth beams lift the structure up. This guards against damp and water getting in, which can cause long-term decay.
    • Seismic Resistance: In places that often have earthquakes, plinth beams play a key role. They boost the building’s ability to stand up to sideways forces.

    Challenges in Building Ground Beams and Plinth Beams

    Ground beams and plinth beams offer many good points. But building them has its own set of problems:

    1. Complex Design Requirements: Accurate  design plays a key role in making sure these beams do their job well. This calls for exact calculations and a solid grasp of how soil behaves.
    2. Material Quality: The grade of concrete and reinforcement used has a big impact on how well both ground and plinth beams work. Low-grade materials can cause the beams to fail or not last as long.
    3. Environmental Considerations: Buildings need to consider things like temperature, moisture, and soil conditions. These factors can change how the beams are set and perform over time.
    4. Cost Implications: Adding these beams can increase the overall cost of building a structure. This is true if the project needs special materials or building methods.

    Tips for Successful Construction of Ground Beams and Plinth Beams

    Here are some hands-on tips to make sure you build ground beams and plinth beams correctly :

    • Check Out the Site: You need to understand the soil and how much weight it’ll carry (load-bearing capacity) to design beams that work well.
    • Material Selection: Buy top-notch concrete and steel to make your beams strong and long-lasting.
    • Stick to the Plan: Follow what the structural engineers tell you to do as per specifications.
    • Let It Set: Give the beams enough curing time to dry out so they prevent cracks and get as strong as they should. 
    • Regular Monitoring:  Look things over often to spot and fix any problems while you’re building.

    Conclusion

    Ground beams and plinth beams play a key role in building safe, stable, and long-lasting structures. Though they have different functions, both beam types are essential to manage  loads, prevent  structural problems, and boost a building’s overall strength. When builders and engineers understand their functions, building methods, and hurdles, they can use these beams well to create lasting structures. Whether dealing with challenging  soil or trying to improve earthquake resistance, smart use of ground beams and plinth beams is vital for successful building projects.