Home Blog Page 54

Brick Mortar Ratio: Essential Guide for Durable Construction

0
BRICK MORTAR

If you are constructing a building, either for personal or business use, you may have questions about the correct ratio for brick-and-mortar. Mortar is basically a mixture of cement, sand, lime, and water that, when combined in appropriate ratios, acquires the desired strength, durability, and workability needed for various applications. 

In this blog, you will find the ideal ratio, formula, ingredients used, how to mix the brick-mortar, things to be considered, and their importance.

What is the Ratio of Mortar Mix to Brick?

Ratio of Mortar Mix to Brick

The common ratio for an average brick-mortar mix is 1:3 (1 part cement and 3 parts sand) or 1:4 (1 part cement and 4 parts sand). Here is a general mortar mix ratio for different types of brick walls:

  • Normal bricks: 1:4 ratio (1 part cement and 4 parts sand)
  • Soft bricks: 1:5 ratio (1 part cement and 5 parts sand)
  • Very soft bricks: 1:6 ratio (1 part cement, 6 parts sand, and optionally, 1 part lime). This mixture increases the mortar’s ability to withstand moisture and temperature fluctuations, ensuring a longer-lasting bond.

Water is added to the dry mixture according to the mortar mix used for the bricks.

Formula for Brick-Mortar Ratio

There is no direct formula for calculating the brick-mortar ratio. However, the common specifications of the mortar includes 1:3 and 1:2:9. Either the first or the first two digits refer to a binder, which is cement and lime. The last digit refers to the filler, which denotes sand. It is used in the correct proposition to make a perfect mortar mix for bricks.

For example, in a 1:3 mortar mix, the ratio signifies 1 part binder (cement) and 3 parts filler (sand). Similarly, in a 1:2:9 mix, 1 part cement, 2 parts lime, and 9 parts sand are used. 

The choice of ratio depends on the specific requirements of the construction project, including the type of bricks being used, the load the wall needs to bear, and the environmental conditions.

Factors Influencing Mortar Ratios

Various factors influence the mortar ratio for bricks. This includes:

  • Type of bricks
  • Brick size and
  • Thickness of bricks

Type of Bricks

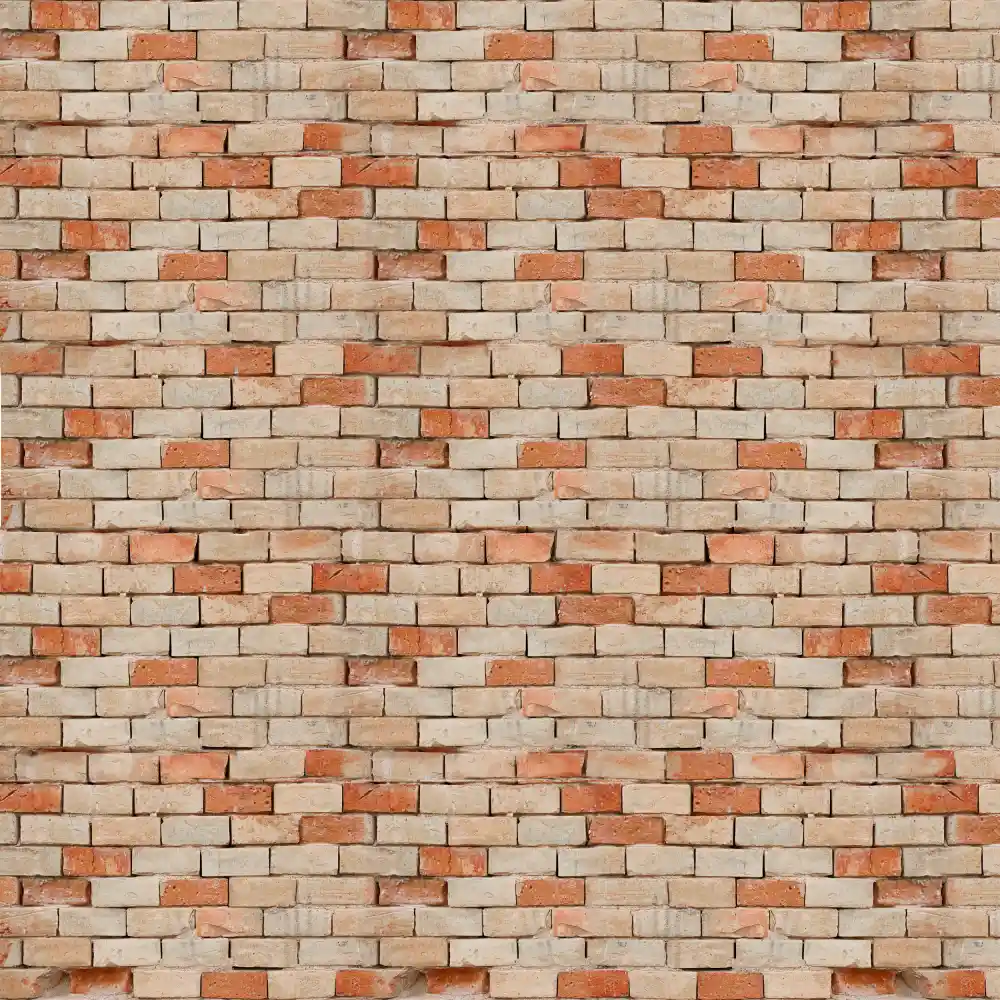
1) Clay Bricks: Traditional clay bricks are known for their porous nature and require a specific type of mortar mix that allows for good adhesion while accommodating slight expansion and contraction. A common mortar ratio for clay bricks is 1:4 (cement to sand) to ensure a strong bond.

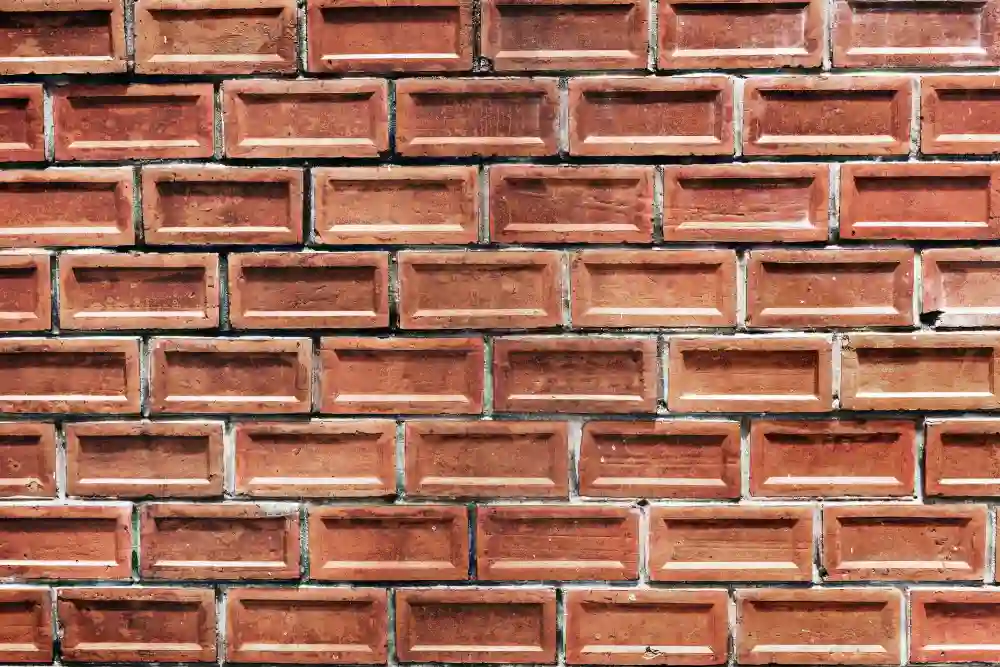
2) Concrete Bricks: Concrete bricks are generally denser and less porous than clay bricks. This means they often require a stronger mortar mix, such as 1:3, to ensure proper bonding, especially in load-bearing structures.

3) Fly Ash Bricks: Fly ash bricks, which are lighter and more uniform in shape, might use a slightly different mortar ratio, such as 1:5, to achieve the desired bond strength while accommodating their unique characteristics.

Brick Size

1) Standard Size Bricks: For standard-sized bricks (typically 190mm x 90mm x 90mm), a mortar ratio of 1:4 is commonly used. 

2) Larger Bricks: These types  of bricks are preferred for industrial or commercial construction, which might require a different mortar mix ratio, like 1:3, to handle the increased surface area and weight, ensuring the bricks are securely bonded.

3) Smaller Bricks: This type of brick often requires a different mix, with a ratio of 1:5, which can be used for lighter loads where flexibility is more important than strength in this case.

Brick Thickness

1) Single Brick Thickness Walls: In walls where the bricks are laid in a single thickness, typically 4.5 inches, the mortar ratio might be lighter, such as 1:5, since the wall is not designed to carry heavy loads.

2) Double Brick Thickness Walls: In double brick thickness walls, such as 9-inch load-bearing walls, the mortar ratio generally needs to be stronger, such as 1:3 or 1:4, to ensure the wall can handle the additional load and pressure.

3) Thicker Walls: For thicker walls or multi-brick walls, particularly in high-rise or industrial buildings, the mortar needs to be even stronger. 

In such cases, ratios like 1:3 or even 1:2:9 (cement, lime, sand) might be used to provide extra strength and durability.

Ingredients used for brick-mortar 

Ingredients used for brick-mortar 

The ingredients in brick mortar can be categorized into: 

  • Binder content – The elements such as cement and lime are used for brick mortar, which is used to bind the bricks.
  • Filler content – Sand is the primary element used for brick-and-mortar, provides durability and improves strength. 

Water is the main component used to mix and activate the chemicals present in brick mortar.

Importance of Water-Cement Ratios

In general, Water-Cement ratio is important in both design and performance of concrete and mortar as it affects strength and durability. It is expressed in W/C ratio where W represents weight of water and C represents weight of cement in a concrete mix.

Lower water-cement ratio generally results in higher strength concrete. This is because less water means fewer pores in the hardened concrete, which improves its overall strength. 

Ratios as low as 0.40 are often used for high-strength concrete applications.

On the other hand, a higher water-cement ratio increases the amount of water in the mix, leading to more pores in the hardened concrete. This reduces the strength of the concrete, and more susceptible to cracking under load.

How to Mix Brick-Mortar

Here are the steps that are included for mixing brick mortar. 

The steps are:

  • Use a clean, dry bucket to measure the elements that are required for the mortar mix.
  • Understand the requirements and measure them in an appropriate ratio.
  • Use plastic tubs or a mixing board to mix the mortar. Before mixing them, pre-wet the container or the surface so the ingredients do not get stuck to it.
  • Add the required ingredients, such as cement, sand, and water (lime, if needed). It differs according to the need for the buildings.

The exact proportions of these ingredients depend on the specific requirements of the building project. 

For example, a standard mortar mix for most residential construction might be in the ratio of 1:4 (cement to sand), while heavier structures may require a stronger mix like 1:3. 

Lime is often added in a ratio of 1:2:9 (cement, lime, sand) for projects which adapts for restoration work. 

  • Add water gradually as per the need for the mixture. Fold the mortar up and down when the mixture is prepared in your hands.
  • Stop mixing the mortar once it reaches the right consistency and becomes wet enough; then, it is ready to be applied between bricks.

What is the good mortar ratio?

Types of Brick WallRatio of Mortar Mix
Load bearing walls1:3 to 1:4
Non-Load bearing walls1:4 to 1:6
Exterior walls1:3 to 1:4 ( by adding lime )
Interior walls1:4 to 1:6

Things to consider before mortar mix

The three important things to consider before mixing the mortar are

  • Temperature – If you are planning to apply mortar for bricks then you must note the weather conditions. It should not be 5 degrees or less than 5 degrees. This is because the mixer will freeze, and it becomes weak.
  • Mixing technique – The mortar can be mixed either by hand or cement mixture. You can plan according to the requirements of your buildings.
  • Have a trial – Before applying the mixture to the bricks try once if the ratio of the mortar is good enough to apply. If there is any correction sort it out and find the best mortar mix to apply.

Why it is Important?

The correct mortar ratio is important because

  • Protects the wall from damage and prevents cracks on the wall.
  • Maintains the proper structure for the buildings and ensuresthe perfect shape for the corners.
  • If there is a perfect ratio, then the appearance and thickness of the wall looks good.
  • It gives the proper consistency to apply between the bricks.
  • If any of the ratios becomes high or low, then it damages the total buildings.

Conclusion

Measuring and mixing the required elements in the correct ratio gives the perfect output. Following these measurements improves the durability, provides the perfect finish, prevents damage to the wall, and makes the building more elegant.  

FAQs

1. How much mortar mix is used in brick?

The answer is that 120 kg of cement is used for 1000 standard-sized bricks. However, it varies according to the surroundings of your wall and the thickness used to join between the walls.

2. What cement is used for brick mortar?

Masonry cement is the most common cement used in mortar as it is more consistent. In the old technique, portland cement was  used for brick mortar.

Stunning Brick Wall Pattern Designs to Enhance your Space

0
brick wall design

From making a strong foundation to the right color selection of a building, we need to pay careful attention to these details. When selecting the perfect sofa, lamp, or furniture, it showcases your creativity in decorating the space.

While you start realizsing this in depth, you can understand that choosing the best brick wall is a fundamental architectural job where the real strength and beauty begin. It leads to creating a rustic and earthy charm in an elegant space. The right choice of brick wall patterns is not only aesthetically appealing but also contributes to structural integrity.

Over the years, brick wall patterns have become the most versatile option for homeowners and interior designers to add interest and warmth to any wall. Their usage in modern construction is a statement piece used to create a timeless appearance. Read this article to learn more.

What is a Brick Wall Pattern?

Brick wall patterns, often referred to as bonds, dictate how bricks are arranged in wall construction, enhancing both aesthetics and functionality  It can be arranged as a column, sidewalk, or wall. The range of patterns fits from traditional to contemporary styles, significantly enhancing the overall functionality of any space.

Brick Wall Pattern Designs

Brick Wall Pattern Designs

The variety of brick wall patterns is impressive  With more than its strength and durability also how much brick is required for a wall depends on the wall’s design, homeowners can achieve a visually engaging appearance at the same cost. So deciding on an appropriate style is essential.

Header Bond

Header bond is a popular brick wall pattern where all the bricks are laid perpendicular to the wall face. This method consumes so many bricks, particularly those reserved for high-quality buildings. Even a less skilled labor can handle this brick; its specific design elements are primarily used for decorative purposes. Due to its limited strength, this is not highly recommended for buildings subjected to heavy loads.

Stretcher Bond

It is a bricklaying pattern where all the courses are laid as stretchers. This method involves laying bricks horizontally with their longest side exposed. It creates an overlapping pattern, providing a clean and modern look to your building. Stretcher bond is easy to use to construct thicker walls, especially for walls of half-brick thickness (approximately – 100 mm). Opt for this bond for garden walls and partition walls, but not for load-bearing structures due to its limited structural strength.

Stretcher Bond

Flemish Bond

The Flemish bond is ideal for creating an aesthetically pleasing appearance. This wall bond has alternative stretchers and headers on every course. It means that the headers in one course are falling between the gaps over the stretchers in the course below. These wall faces are identified with a diagonal pattern, suitable for non-load-bearing walls that require decorative applications. It can be stronger when properly constructed for decorative applications; but itbut might not be the best choice for buildings subjected to withstand significant loads.

English Bond

It is a traditional wall brick pattern determined by alternating courses of headers and stretchers. The header bond is centered over the stretchers underneath, which is quite stronger than the Flemish bond. It is the oldest pattern and is commonly used in civil engineering projects like embankments, bridges, and viaducts. This alternate pattern provides excellent strength and structural integrity to the load-bearing walls and foundations.

Stack Bond

In a stack bond, the bricks are positioned directly on top of each other, with no overlap. This vertical alignment is inherently weak, yet it delivers a striking visual effect. It offers a minimalist and contemporary look and is often used for non-load-bearing walls. To compensate for the lack of bonding, reinforcement is required to leverage stability.

English Garden Wall Bond

The primary purposes of English garden wall bonds are to offer aesthetic appearance and structural integrity. It involves three courses of stretchers laid for every one course of the header, often in various colours. Typically, it has been used for garden walls and low-rise buildings. When compared to English bonds, they are less strong and cost-effective.

Designs Around Exposed Brick Walls 

Designs Around Exposed Brick Walls 

Here are the best ways to design your exposed brick walls. Based on the type of infrastructure, you can make a wise choice. 

Combine Brick with Modern Elements

Adding a contemporary style to your brick pattern can significantly elevate its appeal. Consider pairing modern finishes, such as glossy Scandinavian-style furnishings, white walls, and black countertops, to create a chic and sophisticated atmosphere.

Incorporate Floating Shelves

Elevate the elegance of rustic brick walls just by installing floating shelves. It allows for storage and improves the traditional view of exposed brick walls. But ensure the shelves don’t hide the wall.

Exposed Brick Headboard

An exposed brick wall can serve as a striking headboard. If your bedroom features a single brick wall, placing the bed against it will create a focal point that draws immediate attention, adding a touch of warmth and style to the room.

Pair Brick with Wood

Pairing a brick wall with wood elements brings a rustic yet refined look to your space. The wood elements are elegant and draw out both the colour and texture of your brick. They are a kind of highlighter, offering a new appearance to your room and adding interest.

Painted Brick Ideas

Painting brick walls provides a natural colour, worth holding to improve the space and make it more aesthetic. Applying a thin, minimalist layer of paint elevates the character of the brick so that perfection can be achieved.

Go with Old-World Style

Historic elements can add value to your designs. A  detailed look can be achieved by choosing decorative elements and furnishings with vintage appeal and character. It really seems admirable and looks eye-catching.

Factors Influencing the Brick Wall Pattern Selection

The brick wall pattern influences the overall strength and look of the structure. Determining the right style appropriate to your dream and budget tends to provide a visually arresting appearance. With consideration of the significant factors mentioned below, you can choose the best pattern:

  • Building Requirements: Prioritize the function of a building, like required strength, durability, or maintenance, to make a perfect choice. Residential buildings often focus on insulation and appearance, while commercial structures require enhanced durability and maintenance. Identifying these fundamental requirements helps find a suitable bond.
  • Climate and Weather Conditions: Weather conditions have a direct impact on the longevity and appearance of a brick wall. Discuss the temperature range in the area of construction and choose a pattern accordingly. Harsh climates typically require a brick that can sustain extreme temperatures and heavy rainfall. Such as: Fly Ash Bricks, Fire Bricks (Refractory Bricks), etc 
  • Decorative Goal: Choose the wall pattern based on your personal taste and the building design. As mentioned, there are some specific patterns that contain decorative features that add an elegant touch to your space. Whether it is a traditional or modern style, making the right decision will offer the desired output.
  • Material Availability and Cost: Brick size is a primary factor that influences the choice of pattern and cost. For instance, a large brick will not be suitable for Flemish bonding. Likewise, the brick pattern and quality determine the overall budget. The cost can vary for simple and complex patterns.

Final Thoughts

In summary, brick wall patterns are available in numerous designs, colors, and patterns. According to your construction requirements, including durability, strength, and visual appearance, you can make the best choice. From traditional to modern styles, they can suit your taste and budget. Regardless of the type chosen, the wall pattern should fit your building and style to avail of the long-term benefits.

FAQs

1. Which brick wall pattern is the strongest?

The English bond is extremely strong and durable compared to other wall patterns due to its interlocking brick arrangement. It is characterized by alternating stretchers and headers, commonly used for foundations and load-bearing walls.

2. How do I maintain a brick wall pattern?

To maintain its aesthetic appearance, regular cleaning with a mild detergent and thorough rinsing are essential.  It can remove dirt, dust, and debris. In cases of severe damage, consult a professional bricklayer for a quick recovery.

3. What is the difference between brick wall pattern and brick wall type?

A brick wall pattern denotes the position of bricks within a wall, whereas a brick wall type refers to the overall construction of a wall.

Exploring Different Types of Pipes Used in Building Construction

0
Pipes Used in Building Construction

Plumbing is an essential aspect of ensuring the smooth flow of water and waste in a structure. Apart from functionality, plumbing influences the overall structural integrity of a building. Beyond connecting the utilities, the pipes you use in your construction projects play a crucial role in preventing blockages and even structural damage arising from improper installation and material choices. 

Today’s construction industry uses different types of pipes, and each of them has specific uses.  Some pipes are ideal for plumbing, while others are ideal for structural applications. When it comes to using them for installation, you must consider their purposes because the main piping material influences your other pipes. Furthermore, the advantages provided by each type of pipe include cost-efficiency, versatility, and environmental friendliness.  

The blog discusses in detail the different types of pipes used in building construction, examining their benefits and common uses. It helps industry experts make informed decisions when choosing the right pipe for a particular project. Once you understand these options, it helps ensure the long-term efficiency and safety of any building. 

Importance of Plumbing in the Construction Industry 

A plumbing system refers to the arrangement of pipes, drains, fittings, and furnishings that allow the distribution of smooth water and the elimination of wastewater. Whether you are constructing a multi-storey apartment, a bungalow, a villa, a small house, or a commercial building, plumbing stands as its lifeline, ensuring residents have access to clean and safe water for consumption.  

Without an adequate plumbing system, no one would be able to live in a structure. In the absence of proper plumbing, inhabitants cannot perform daily routines such as taking showers, flushing toilets, washing clothes, or accessing food and clean drinking water. Efficient plumbing enables these daily activities to function effectively, underscoring their significance.

Does your structure have an efficient plumbing system? Whether your building serves residential or commercial purposes, with an efficient plumbing system, the occupants can enjoy the following: 

Clean Water Supply: A plumbing system must provide continuous and easy water supply to all the inhabitants. In the absence of soft water for drinking, cooking, and cleaning, the people living in the house or an apartment might be exposed to various health risks. 

Efficient Wastewater Disposal: Plumbing systems are responsible for removing wastewater from homes. If your structure has an appropriate plumbing system, it ensures proper drainage and sewage systems, safeguarding public health. 

Enhance Comfort and Convenience: Today’s modern plumbing systems offer the level of comfort and luxury that earlier generations could only imagine.  From hot water showers to dishwashers and washing machines, these plumbing systems enhance our quality of life and existence. 

Types of Pipes Used in Building Construction 

Every building structure requires a sufficient amount of water, which must be available at the service locations according to the requirements of the occupants. You must calculate the supply demands and the amount of water transmitted through the pipes in the building. Moreover, you must also calculate the requirements for drainage and waste management. Different types of pipes have different uses. For instance, the pipes used for supply are different from those used for drainage. 

Supply Pipes or Service Pipes 

The pipes connecting the main water supply and the plumbing system of the house are the service pipes. These pipes comprises of the following materials: 

  • Copper pipes 
  • Galvanised iron pipes  
  • PVC pipes 
  • CPVC pipes 
  • PEX pipes 

Copper Pipes 

In some areas, you might find the underground water to be highly corrosive to metals. In these areas, installing copper pipes is the best choice. Copper has high corrosive resistance when compared to other metal pipes. Besides, these pipes have considerable strength and reasonable ductility, making them available in long lengths on the market. Since these pipes can bear high pressure, they are ideal for industrial purposes with heavy flow. Whether you require a heavy gauge or a light gauge variety, you can easily avail of these on the market. Heavy-gauge pipes are ideal for use in areas where pressure is very high, such as the leading pipe from the main distribution. The light gauge pipes, on the other hand, are ideal for usage in areas where the pressure is minimal, such as internal domestic pipes. 

Galvanized Iron Pipes 

If you cannot afford copper pipes and are looking for an economical option, the galvanised iron or steel pipes are the best choice. However, they corrode easily when they encounter soft and acidic waters. In other cases, these pipes are stronger than copper pipes, making them an ideal choice for usage in areas where corrosion is less or in hard water areas. Do not forget to hammer the pipes to remove the hard scales formed when exposed to hard water. 

PVC Pipes

PVC pipes are ideal for cold water service networks. They are lightweight, corrosion-resistant, and easy to install, leading to increased demand in modern plumbing systems. Unlike other types, PVC pipes do not require threading applications and are cost-effective compared to galvanised iron pipes. However, they should not be used for hot water applications, as they can only withstand temperatures up to approximately 140 degrees Fahrenheit (60 degrees Celsius).

CPVC Pipes 

Although CPVC pipes and PVC pipes look similar from the outside, they have different chemical or molecular structures. During the manufacturing of CPVC pipes, the manufacturers add chlorine to them. Like PVC, CPVC pipes are strong, rigid, and available in similar sizes. However, CPVC can handle higher operating temperatures of around 200 degrees Fahrenheit (93.33 degrees Celsius), making it suitable for hot water lines such as those used in solar systems or geysers.

PEX Pipes 

PEX, or cross-linked polyethylene pipes, are designed to handle both hot and cold liquids, making them ideal for various commercial establishments. Their flexibility makes them perfect for hard-to-reach areas within and under buildings. PEX pipes are easy to install and replace, even in spaces with numerous obstacles. Known for low maintenance and durability, they are among the most sought-after options for plumbing in commercial settings.

Drain Pipes or Disposal Management Pipes 

Residential accommodations produce wastewater from various sources, like kitchens, bathrooms, and toilets. The disposal of wastewater requires an interconnected network of pipes. You need to use different types of disposal pipes for varied functions like soil waste management, wastewater, rainwater, and ventilation. Waste disposal pipes come in different materials and differ in properties. Pipes used in the drainage system include the following: 

  • Cast iron pipes 
  • Concrete pipes  
  • Asbestos pipes  
  • Stoneware pipes  
  • HDPE pipes 

Cast Iron Pipes 

Cast iron pipes are commonly used in sewer lines by domestic and commercial occupants. Since it is stronger than most other pipes, it can withhold the weight of dirt and slugs without breaking. These pipes are prone to rust and corrosion in real-time. Since they wear out due to corrosion, one can observe a certain decrease in diameter. They are primarily suitable for indoor plumbing networks. 

Concrete Pipes 

When constructing a building, it is essential to connect the structure’s major water supply with the main water supply line. Concrete pipes are available in both large and small diameters; larger pipes are ideal for heavy drainage, while smaller ones are suitable for lighter flows. Completely made of concrete, these pipes do not require reinforcement.

Asbestos Pipes  

It’s one of the cheapest plumbing pipes. The asbestos pipes are better than the PVC pipes, especially if you are looking for good quality at an affordable price. These pipes are ideal for the drainage of water, sewage, and rainwater from roofs. You can also use these pipes for ventilation. The best thing about these pipes is that they can withstand high pressure, and the installation does not require skilled labour. 

Stoneware Pipes 

Manufacturers manufacture stoneware pipes in the ceramic industry by burning soft soil at high temperatures. They are ideal for underground drainage systems in low-cost construction buildings. Although affordable, the installation and supervision processes require skilled workers. 

HDPE Pipes 

The high-density polyethylene pipes are in high demand. They can be procured in various thicknesses and can be bent up to 90 degrees. Since they are resistant to biological sustenance, they are ideal for pressurised wastewater lines and sewage disposal networks. 

Things You Must Consider While Choosing a Plumbing Pipe 

Whether you are a homeowner, a newbie plumber, or a construction engineer, you must consider the following when choosing the plumbing pipes in your building construction: 

Purpose of Usage 

Do not forget to determine the purpose of the pipes you are using in your construction project. While some pipes supply water, others are ideal for disposal of sewage or waste. Since the pipes are made of different materials, sizes, and thicknesses, they serve different purposes. 

Water Pressure Resistance 

If you are constructing a commercial building, you need pipes that can withstand high water pressure. Opt for pipes with durable, wide mouths and smooth interiors for optimal water flow and longevity. Plastic, copper and brass pipes are some of the best pipes when it comes to water resistance, as these pipes possess all the features and are rust-resistant. 

Water Type and Corrosion Level 

Although it is one of the most important things to consider, most people hardly focus on it when it comes to choosing a plumbing pipe. The kind of water you use in plumbing determines the longevity of the pipe. If water is corrosive, it will dissolve almost all materials, degrading your pipe within a short span of installation. 

The Degree of Exposure to Sunlight 

The ultraviolet rays are harmful to your pipes as well. Therefore, you must select pipes with insulation properties, as they can withstand high temperatures for longer. If you know that your pipes have a chance of getting exposed to sunlight, avoid using plastic and PVC pipes since they cannot withstand hot temperatures. When installing pipes, ensure that they are done in a way that they won’t be vulnerable to direct sunlight, which might damage their surface quality and weaken them in the future. 

The various types of pipes used in building construction have varied usage and hence comprise different materials, including plastic, PVC, asbestos, concrete, copper, galvanised iron, and others. Most of the applications depend on a particular pipe’s capability to transmit fluids without any changes to the pipe. Therefore, some pipes are more suitable for particular purposes, such as the distribution of water from the main water supply system, while others have a broader and more general structural use. 

Brick & Bolt emerged as a leading construction company, providing their customers with complete design-to-build service with advanced facilities like real-time tracking, effective communication, quality checks, and updates on projects from the undertaking of the project to the final delivery. The organisation focuses on bringing transparency and trust to the industry. You receive regular updates about the quality and progress of your projects, which they map using advanced technologies. Whether you are building your dream home or upgrading the plumbing system of your home, Brick & Bolt’s expertise will take care of all your minute demands within your budget. 

How Much Does Building a Front Porch Cost?

0
Front Porch

A front porch can transform your home by adding value and providing a beautiful outdoor environment. But before making plans for porch construction, you need to know about the cost. While local contractors can provide estimates, understanding the factors that influence porch pricing is essential. This guide will help you determine a realistic budget for your dream porch and start planning your outdoor oasis.

What is a Porch?

Porch

An exterior structure that is attached to the main building and is usually located at the entrance is called a porch. This structure can be open or may be slightly closed to give a sheltered area for relaxation, outdoor seating or act as the entry to a home. 

Cost to Build a Porch

The costs for a front porch can be different based on location and plan. A basic 100-square-foot porch in Indian cities may cost between ₹20,000 – ₹1,50,000. However, this is a broad estimate where the final cost depends on several factors.

Design and materials are key. A simple, uncovered porch will cost less than an enclosed porch with detailed designs. The material choice for flooring and roofing can affect the overall cost. Labour costs also rise with the complexity of the design.

Additional features like steps, railings, and decorative elements add to the expense. A porch that has a stone foundation and ornamental columns will be costlier than basic structures made of wood. Even budget-conscious people can have a porch. They can consider simple designs, less expensive materials, or even some prefabricated materials for cost reduction. With proper planning and shopping, you can build a porch at a low cost.

Foundation and Flooring Costs

A sturdy porch begins with a solid foundation. The type of foundation needed depends on the porch design and local soil conditions. Contractors often recommend pier or slab foundations. Pier foundations, typically costing ₹375 – ₹600 per square foot, use posts to support the structure. Slab foundations, which form a concrete base, are usually more affordable at ₹225 – ₹375 per square foot.

Once the foundation is set, the porch floor, or decking, becomes a significant cost factor. Popular choices include wood and composite decking, with price ranges varying widely. Wood decking starts around ₹100 per square foot, while composite options can range from ₹150 – ₹975 per square foot. For a more traditional look, brick or stone decking can be an option, but expect to pay between ₹150 – ₹625 per square foot. Regular flooring tiles can also be utilised, the price of which can start at ₹40 per square foot. These are just starting points, as the final cost will depend on factors like porch size, material quality, labour costs, and regional pricing.

Porch Roof Styles and Cost

The design of your porch roof significantly impacts its overall cost. There are primarily three types: gable, hip, and shed. A gable roof, the most common, features a triangular end wall. It is versatile and suits many home styles. The shed roof, with a single slope, is simpler and often more affordable. However, for a more complex and visually appealing option, a hip roof is the choice. This roof has no vertical sides and is sloping down on all sides. These can be aesthetically beautiful but their design construction costs more. Flat roofs with concrete slabs or roofing sheets can also be created, which may be more economical. Front porches can also be left open-to-sky (no roofs) in case of ambient climatic conditions, this can significantly reduce the total cost of construction. 

Walls, Railings, or Screens

The front porch characteristics can be changed by the addition of walls, screenings, or railings. These materials can improve comfort and privacy and also impact the price and function of your porch. 

The completely closed porch that has walls can be protected from weather and insects. This gives more space for various activities, but costs more. Railings can add visual balance and also ensure safety without completely closing the porch. They also improve the aesthetics of the porch. However, a completely closed porch can give protection from sunlight, rain and insects, allowing its usage in all seasons.

Other Amenities

After the determination of the size, style, and structure of the porch, consider the finishing materials. They can be products like fans, lights, and paint that can improve the ambiance and comfort of the porch. For example, a ceiling fan can cost between ₹1,500 – ₹37,500, and also the installation costs must be considered. When making a porch, remember to calculate the cost of furnishings like swings, rocking chairs, and tables. The cost of this furniture must be added while making a budget for porch construction. Such elements are not completely necessary, but add to the comfort level and aesthetic value of porches.

Cost Considerations

Cost Considerations for porches

The price for building a 200-square-foot porch can differ based on factors like materials, designs, and labour costs. The average costs may range between ₹30,000 to ₹90,000 or a lot more. The following factors must be considered for the estimation of porch construction,

  • Materials used
  • Labour
  • Amenities
  • Furniture.
Porch ElementMaterials CostWith Installation
Decking/ Flooring₹10,000 to ₹5,88,000₹20,000 to ₹7,56,000
Roof₹20,000 to ₹3,08,000₹10,000 to ₹4,20,000
Posts₹7,350 to ₹1,61,000₹12,250 to ₹2,24,000
Railings₹7,000 to ₹49,000₹10,000 to ₹84,000
Steps₹4,900 to ₹1,05,000₹7,000 to ₹1,33,000
Permits₹2,000 to ₹35,000₹7,000 to ₹35,000
Total₹50,000 to ₹7,10,000₹65,000 to ₹11,17,000

The figures mentioned above are only indicative numbers to estimate the cost of constructing a 200 sq ft porch. However, actual figures may vary widely depending on various factors such as design complexity, location, project requirements, site conditions, material choices and selection of contractors.

Cost of Building Different Porch Types

The building costs for a porch differ based on its type, size, materials, and complexity. Some common porch styles and their associated costs (for a 100 sq ft porch) are as follows. 

Covered Porch

A simple covered porch can be made within ₹40,000. However, large and more elaborate designs can increase the price to around ₹1,00,000 and even go up to ₹10,00,000. 

Screened In Porch

The conversion of an open porch into a screened-in porch normally ranges between  ₹10,000 and ₹50,000. The cost of building a screened-in porch from scratch will be more expensive ranging between ₹20,000 to ₹2,00,000. The overall cost may be impacted by the choice of screening materials like aluminium, copper, and PVC.

Sunroom or Florida Room

The sunroom, also known as the Florida room, is made of windows. This can cost around ₹50,000 to build. Such porches have indoor as well as outdoor living spaces where the plants can grow.

Concrete Porch

A concrete slab porch is budget-friendly and it costs around ₹400 to ₹960 per square foot. This can be basic but it can give a solid foundation for roofs, coverings, and railings

Sleeping Porch

A covered or closed porch that is made for sleeping in a warm climate is called a sleeping porch. For building a new sleeping porch, it costs around ₹15,000 to ₹3,00,000, mainly depending on factors like insulation, size, and screening.

Prefabricated Porch

Prefabricated porches can cost around ₹50,000 to ₹10,00,000. Their final price mainly depends on design complexity and size. This Prefabricated Porch suits more in False Ceiling porch designs

Note: these prices are general estimates, actual costs may change based on labour, location, materials, and local regulations.

Conclusion

A front porch can improve the appeal of the home and provide the experience of outdoor living within a secured space. However, its costs may differ based on various factors like materials used, size, labour costs, and design complexity. By planning and budgeting carefully, the front porch can be made according to your financial requirements and visual desires. 

FAQs

1. How do I maintain a composite porch? 

Composite porches require minimal maintenance, typically involving occasional cleaning.

2. Can I add lighting to my porch? 

Yes, porch lighting enhances safety and ambience.

3. How can I save money on porch construction? 

Consider DIY options (with expertise), budget-friendly materials, and simplified designs to reduce costs.

Exploring Types of Kitchen Tiles for Modern Homes: A Comprehensive Guide

0
Modern Kitchen Tiles

Irrespective of the city or the type of home you live in, your home is incomplete without a kitchen. Decades ago, kitchens were smaller and typically included separate areas for cooking and dining, designed to conceal the cooking space and odours. Today’s kitchens are larger and serve multiple purposes. Most homeowners have comfortable sitting areas along with storage cabinets and nook spaces for work units, making it an ideal area for family gatherings. With modern amenities, you can use your kitchen in various ways that work best for you. 

Whether it’s your new home or you change the kitchen décor, you must choose the right kitchen tiles. In addition to enhancing your kitchen’s overall aesthetics, they play a crucial role in ensuring durability and functionality. Your kitchen tiles get exposed to moisture, heat, and constant use. Therefore, you must select the right kitchen tiles that will enhance the beauty and practicality of your kitchen.  

Whether you are looking for sleek and minimalist designs or bold and vibrant patterns, a variety of tile options are available to meet your needs. This Brick & Bolt blog explores the various types of kitchen tiles suitable for modern kitchens, guiding you to make an informed decision that aligns with your design preferences and lifestyle requirements. 

Popular Kitchen Tiles for Modern Homes 

Marble Tiles  

Marble is a metamorphic stone used since time immemorial for creating sculptures, buildings, and flooring. Manufacturers create marble tiles by cutting the stone into thin pieces and polishing them with diamond dust, giving them a shiny finish. Therefore, when light falls on these tiles, they reflect the light, giving it a shimmering effect. You can avail yourself of these tiles in various shades of pink, green, and blue, depending on your preferences and existing décor. If you want to create an elegant and classic kitchen look, marble tiles are the best choice. 

Marble Tiles

Ceramic Tiles 

Since homeowners can find ceramic tiles in various designs, colours, and sizes, they stand as one of the most common kitchen tiles. You can use them on your kitchen countertops, floors, walls, and anywhere that requires durability. Be sure to apply a sealant to the tiles before grouting, as this helps prevent porous materials from absorbing dirt and moisture. Although easy to clean, ceramic tiles chip and crack easily, which is why you must use them in low-traffic areas. If you are using ceramic as your kitchen wall tiles, ensure that they do not receive heat, thereby cracking the tiles. 

Porcelain Tiles 

Porcelain tiles are heavier than ceramic tiles. They come with a smooth, glazed surface that does not absorb any dirt or stain, making them easy to clean and maintain. Since manufacturers fire these tiles at incredibly high temperatures, they are extremely durable. However, these tiles can be slippery when wet, making them a less suitable option for kitchen floors without the addition of non-slip treatments.

Porcelain Tiles

Mosaic Tiles 

Often referred to as decorative edging tiles or insert tiles, mosaic tiles are popular for their aesthetic appeal. Mosaic tiles are among the most budget-friendly of the interlocking flooring options available on the market. You can use these tiles on your kitchen floor to create visually appealing border designs surrounding larger patterns. You can choose between smooth and textured surfaces. These tiles are versatile options for any flooring project, with the ability to create a statement design that would transform a room or outdoor space into a visual masterpiece. 

Travertine Tiles  

Manufacturers make travertine tiles from dense stones that are difficult to cut, increasing the durability and longevity of the tiles. If you plan to install these tiles in your kitchen, remember that no two pieces will look exactly alike. 

Granite Tiles 

Today, many homes prefer using granite tiles because of their durability. Additionally, these tiles are easy to clean and install, providing an aesthetic and luxurious appearance in your kitchen. You can avail the tiles in various colours and patterns that will match all your decorating needs and design styles. 

Glass Tiles 

Glass tiles are another popular option for modern kitchens, as they typically do not require sealing. Instead, you need to glue them to existing floors. After installation, these tiles give a contemporary look similar to other tiles. Since glass is fragile, it is better to use it in areas where it receives less wear and tear. These come in varied colours and beautiful designs. You can also use the tiles to create unique patterns on floors and walls. Glass tiles emerged as a popular flooring type, especially when paired with marble tile accents.  

Cement Tiles 

Homeowners have been using cement tiles for a long time, and they have now become popular in modern home kitchens. Besides being versatile, these tiles can be used in several beautiful colours and patterns. If your cement tiles become damaged or discoloured, you can sand them down or reseal them. However, they are tough to lay and ideal for those areas with less traffic. 

Tips for Choosing the Right Kitchen Tiles 

Tiles and modern home kitchens are synonymous, as they are durable and water-resistant. They are easy to maintain and a hard material that would not absorb your kitchen odours and bacteria. Besides, they can put up with lots of wear and tear and maintain their shine after a good wipe. When choosing your modern kitchen tile design, consider the following factors: 

Usage and Durability 

Whether you live in a big family or have small children and pets who can enter the kitchen, your kitchen needs a tile that can bear extreme wear and tear. Ceramic and porcelain are good choices if you have a kitchen that experiences heavy cooking. Since these tiles are hard to crack, they can last for about two decades with quality installation. However, if you have a small family with grown-up children, you can opt for natural stone and marble tiles. These gorgeous tiles will offer a unique look to the kitchen. 

Shape and Size of Your Kitchen  

You will get kitchen tiles in a wide variety of shapes and sizes. Do you have a small kitchen design? You can opt for large tiles in a neutral colour, as they create the illusion of a large kitchen. However, if you have a larger kitchen, opt for smaller, square tiles in a softer shade with rectangular edging. Opt for larger tiles for your kitchen floor and smaller ones for the walls in the same or complementary colours. Most homeowners use large tiles, as they require less grout, which helps create a continuous and sleek finish for their home interiors. 

Style and Layout of Your Kitchen 

Whether you are building your new dream home or replacing the tiles in your kitchen, ensure to consider the overall style and layout of your kitchen. If you want to create a contemporary or modern look, you can choose the perfect one from the various options available on the market. Ensure to analyse the size of your kitchen as well. Opt for kitchen floor and wall tiles in the same colour to create the illusion of a spacious kitchen. 

Maintenance and Cleaning 

Since tiles are easy to clean and maintain, they find the topmost place in modern kitchen design. Kitchen accidents like falling food, stains of food, and burning food are common. When something falls on your kitchen tiles, the stains, dirt, and liquids rest on top. Your tiles do not absorb the food and you can easily clean them with a mop, vacuum, or simply wipe off the stains.  

Are you afraid to clean the tiles, as they might experience damage? Constant cleaning never damages your tile. Even if your tile witnesses minute damage, like chipping or experiencing a break, it is easy to replace. Besides, since the tiles do not absorb food particles, there is little chance of bacteria or germs, making your kitchen a hygienic place. 

Budget and Cost 

You can find kitchen tiles for walls and floors in varied designs, textures, and patterns. Although most tiles are expensive, some, like marble tiles might be out of your budget. Though expensive tiles last longer, you must check the kitchen tile’s price before purchasing. 

When it comes to interior design, every room holds equal importance; however, your kitchen holds a special place. As the heart and soul of your entire space, you must concentrate on the beautiful visual appeal of its interiors. With the countless modern kitchen tile designs, choosing the best tile sometimes becomes daunting. 

As a leading construction firm, Brick & Bolt strives to meet all your expectations about your dream home. The organisation works with partnered contractors, saving homeowners from the hassle of coordinating with multiple vendors. Their expert designers guide their clients through the expansive exploration of design concepts. From finding the right theme to finalising the right tiles for your kitchen floor and walls, Brick & Bolt designs a home that is unique to every family. 

What is DPC in Construction (Damp Proof Course)?

0
Damp Proof Course

In construction, moisture control is crucial for building integrity. A Damp Proof Course (DPC) is a key protective measure that prevents moisture from rising through walls and foundations. It protects structures from damage, mold, and decay. With many materials and methods available, builders, architects, and homeowners must understand DPC.

This article covers DPC, discussing its importance, benefits, and types of materials. It also reviews installation methods and key considerations. The goal is to ensure durability and safety in construction.

What is DPC in Construction?

DPC Construction

DPC, or Damp Proof Course, is vital in building construction. It prevents moisture from rising through the walls and foundations. This moisture can cause problems. These include structural damage, mold, and rotting materials. The DPC is usually installed at the foundation level. It acts as a barrier against dampness that could harm the building.

The course can be made from various materials. It depends on the project’s requirements and the environment. DPC is a key moisture control method that is both simple and effective. So, builders and architects must consider it in their designs.

Why is DPC Construction Important?

One cannot overstate the significance of DPC construction, as it serves several crucial functions in the building process:

Moisture Prevention:

DPC’s main role is to stop moisture from rising in building materials. It does this by blocking capillary action. Without an effective DPC, moisture can cause damp walls, peeling paint, and mold.

Structural Integrity:

Moisture can damage a building by causing the wood to rot, the steel to rust, and the walls to fall. Adding a damp-proof course (DPC) makes a building stronger and longer-lasting.

Health and Safety:

Excess moisture can create an unhealthy home. It can promote mold and mildew growth. These conditions can cause respiratory issues and other health problems. DPC minimises  these risks, contributing to a healthier indoor atmosphere.

Cost Efficiency:

A dampproof course (DPC) can cut future repair costs. Water damage is expensive   and difficult to fix. So, installing a DPC is a cost-effective way to avoid it.

Benefits of Using DPC in New Construction

Benefits of Using DPC in New Construction

Incorporating DPC into new construction projects offers many advantages:

1. Improved Durability:

DPC prevents moisture from entering the building. This greatly extends the life of construction materials, especially timber and plaster.

2. Increased Property Value:

Buildings that are safeguarded against water typically have higher market values. Homebuyers prefer properties with fewer moisture issues. So, DPC is a strong selling point.

3. Safeguarding Beauty:

DPC prevents water damage, helping maintain a building’s appearance by preventing stains and warping, thus preserving its visual appeal and structural integrity.

4. Compliance with Regulations:

Building codes make DPC installation mandatory, aligning construction with safety norms. Beyond legal compliance, Damp Proofing mandate creates healthier homes. DPC-integrating builders protect residents and avoid lawsuits. They meet both ethical and regulatory duties.

5. Energy Efficiency:

Controlling dampness contributes to energy efficiency. Ventilated, moisture-free buildings reduce the load on heating and cooling systems. This leads to lower energy bills.

What are the types of materials used in DPC construction?

DPC can be made from various materials, each with its own set of advantages. Some of the most common materials include:

  • Bitumen:

Bitumen sheets are widely used due to their durability and water-resistant properties. They can be easily applied and form a strong barrier against moisture.

  • Polyethylene Sheets:

Flexible and lightweight, polyethylene provides excellent moisture resistance. It is often used in combination with other materials for added strength.

  • Concrete:

In some constructions, a layer of water-resistant concrete is used as a DPC. It is robust and provides added structural integrity.

  • Slate and Stone:

Older construction often uses these natural materials. They are water-resistant. However, installation can be challenging and expensive.

  • Chemical DPCs:

These include liquid membranes that can be applied to existing structures. They penetrate the materials and create a barrier against rising dampness.

What are the methods of construction of DPC?

Thus, the installation can differ. This still depends on the kind of building that is being constructed and the type of materials that are being used. Common methods include:

Horizontal DPC:

This method entails the use of a continuous DPC layer right from the foundation wall level. They should be able to cover the entire floor area of the building where the proposed system will be executed. This works as a horizontal barrier and helps to stop the moisture from rising anymore.

Vertical DPC:

Some constructions require the installation of a vertical DPC around the junction of walls. It also plays a role as the sealant on the joint to ensure that even though water penetrates a given surface, it cannot penetrate deeper into a structure.

Cavity Wall Construction:

This technique is especially used during the construction of cavity walls. This technique employs two walls with a small cavity in between, often filled with foam. A layer of DPC is positioned within the inner wall, offering protection against contaminants that could infiltrate the inner part of the building, while also allowing water to drain through the cavity.

Injection Method:

For existing buildings that lack a DPC, the injection method involves applying chemical solutions into drilled holes in the walls. This process creates a barrier against moisture by forming a damp-proof course through the chemical reaction within the wall materials.

Membrane DPC:

Membranes can be placed either in the horizontal or vertical position, with care taken to seal joints at each connection point. This continuous application is particularly effective for maintaining moisture barriers in areas like windows.

What are the conditions to take into account when constructing DPC?

When managing the installation process of DPC, especially during the planning process, several factors call for attention.

Site Conditions:

It is important to consider the climate, the type of soil, and the level of the groundwater while constructing a DPC. This can help you select the right DPC materials that can protect your building from moisture-related issues.

Building Design:

The architectural design and nature of the structure inform the choice of the appropriate DPC and its positioning. It may be seen that complicated systems for clients may require tailored solutions for better performance.

Material Compatibility:

Construction materials come with different characteristics; therefore, they are likely to have different results when in contact with DPC materials. Compatibility is key. It eliminates issues, such as exothermic processes that ingress and corrode the DPC.

Installation Quality:

The effectiveness of DPC wholly depends on its installation quality. All joints and seams that are present in the design must be properly sealed. This should be done to position the DPC at the correct height to avoid water infiltration.

Maintenance:

Maintenance services can detect and solve any DPC complications when they are still mild. Years later, DPC installed in older structures may get damaged. Hence, regular checks are very important.

FAQs

1. How long does DPC construction take?

The time required to install a DPC can vary based on the building size and selected methods. Installation spans a brief period, ranging from days to a week. This includes time for prep, application, and curing of the materials.

2. What is the purpose of DPC in construction?

Moisture-blocking DPC fortifies buildings from the ground up. It prevents dampness from seeping through walls and foundations. This enhances structural integrity, improves indoor air quality, and extends material life.

Trending Wall Colour Combinations for Homes: Elevate Your Interior Design

0
Wall Colour Combinations for Homes

Interior design is a captivating realm where one can find both creativity and functionality. The colours stand as a key element that professional designers wield with finesse when designing extraordinary spaces. Colours play an essential role in interior design, helping you transform the ambience of your rooms. You can never deny the importance of colours for your interiors, as they play a pivotal role in influencing our emotions, moods, and physical well-being. Whether you are revamping your bedroom or moving to an entirely new environment, you must select the right colours to achieve a harmonious and appealing design. 

With the evolution of design preferences, colour trends also evolve. Over the years, homeowners have shifted their colour preferences from bold and dark tones to neutral and pastel shades. Today, most homeowners are opting for colour combinations that are stylish and timeless. The blog guides you through the latest trending wall colour combinations that elevate the décor of every room in the house. Whether you are renovating or redecorating, these trendy combinations will help you stay ahead of the curve in your home décor choices. 

Understanding Colour Psychology in Interior Design 

Colour psychology refers to a theory that states how each colour affects your mood, cognitive functions, creativity, and productivity. Most people feel relaxed when surrounded by calming colours like blue and green. On the other hand, when loud, vibrant tones like red, orange, and maroon surround you, you feel energetic and passionate. Similarly, neutral colours like white and grey make you feel serene. Colour psychology determines how each colour of the spectrum influences your brain.  

Colour schemes form an important factor in your interior design. The colour of your home walls, furniture, decorative pieces, lights, and fixtures plays an important role, as you spend hours in the combinations you choose. Therefore, you must paint your home in colours that match your personality. 

Although the effects of colours might seem similar, studies show each individual responds differently to each colour. For instance, some people associate black colour with depression and demotivation, while for others, black represents order and functionality. Some might find red to be a colour of threatening, while others find the colour inspiring. 

Trending Colour Combinations for Living Room 

Taupe and Reddish-Brown Accent  

The duo combination creates an interesting contrast and visual-spatial effect in your living room. The neutral grey colour beautifully complements the reddish-brown colour similar to terracotta. When you paint terracotta in a defined shape over the primary grey, it creates a focal point with a touch of earthiness. Whether you go for modern rustic, boho chic or transitional styles for your living room, you can opt for the colour combination. 

Aqua and White 

An aqua shade has a deep impact, as it instantly makes you feel relaxed and add positivity. However, the colour is not at all soothing to your eyes. You get the perfect vibe when you combine it with light home paint colours. Since your home is your relaxing space, opting for an aqua and white combination is ideal. The combination, besides giving a soothing effect to your interiors, impresses your guests as it offers a classy and refreshed look to your living area. 

Turquoise and Grey 

Today, most homeowners love experimenting with colours in their living rooms. If you are looking for a trending combination for your living room, turquoise and grey are the best combinations. The combination creates a classy and unique look. 

Add a Pop of Orange 

Adding a pop of orange creates an appealing visual interest, making a bold design statement perfect for relaxing and socializing. You can paint the colour with several neutral colours: blues, yellows, and greens. Try incorporating other statement design elements like furniture, rugs and accessories in your living room. 

Purple Accent in the Living Room 

Do you want to create a vibrant and luxurious atmosphere in your living room? The best way is to add a purple accent to your living room. The colour draws a perfect amount of attention, creating an excellent focal point in the area. Create a mysterious charm for the place by adding a darker-coloured sofa, a centre table, and a rug. 

Trending Colour Combinations for Kitchen

Olive Green and White 

Bring the beauty of the Mediterranean’s lush green gardens into your kitchen with this unique colour combination. The olive green cabinets, along with crisp white countertops, create a refreshing and timeless look. Complement the colour scheme with wooden accents and brass hardware for a sophisticated touch. 

Teal and White 

If you do not like the idea of keeping your kitchen all white yet want a bright and clean feel, opt for a stark and moody paint for your cabinets. The teal blue colour, in combination with white, will create an elevated and classic look for your kitchen without overpowering it in one monochromatic tone. 

Cappuccino Brown and Cerulean Blue 

It is a classic colour combination for your kitchen. While the shade of brown gives your kitchen a feeling of using wood in the islands and cabinets, the blue creates a calming atmosphere in the kitchen. It breaks the monotony of colours from the brown family. The combination of the two colours creates a lasting visual appeal, which is attractive to your eyes and works positively on your appetite. Whether you have a classic or modern home design, this combination works the best. 

Black and White 

A timeless classic combination. If you want a sleek and modern kitchen, the monochromatic combination is a perfect choice. While black adds depth and drama, white keeps the look bright and fresh. For a cohesive look, pair the combo with stainless steel appliances and silver fixtures. 

Deep Green and Pale Blue 

If you want a fresh yet unique palette for your kitchen, try deep green with pale blue. This combination creates a calming and invigorating atmosphere. Complement the look with white or cream cabinets and a marble backsplash for a balanced aesthetic. 

Trending Colour Combinations for Bedroom 

Lavender and Off-White 

If you are a millennial, this combination of interior house colours is the best option. In this colour combination, the lovely lavender walls, complemented by off-white exude a dreamy space. As the colour of healing, the shade creates a tranquil ambience. When the two colours combine, it creates a bedroom that is restorative and joyful. 

White and Orange 

Orange is a happy and uplifting colour and goes well with white. From burnt orange to tangerine, you can go for any shade of orange. White being soft and subtle, helps to calm bright and bold orange colours. If you feel orange is a bit on the bolder side, opt for a lighter, softer shade with a beige undertone to bring the colour without overwhelming the space. If you want to keep your bedroom all white, add a splash of orange on the corner walls for a fresh and bold impact. 

Brown and Cream 

Do you want your bedroom to look rich and elegant? Opt for a combination of chocolate brown and cream colour combination for your bedroom for a dramatic yet sensual look. Combining the two colours give your bedroom a classy yet comfortable look. 

Peach and White 

Peach is one of the most preferred room colour combination for bedroom, as it has a comforting effect and is easy to combine with other colours. The combination of delicate peach-hued and milky white walls is an extravagant colour combination. 

Baby Pink with Lime Green 

If you want an unconventional colour for your bedroom, baby pink and lime green are excellent colour combinations. The green colour exudes calmness, creating a relaxing vibe to your space. The home colour combination provides a touch of softness. Hints of green on the walls create a sense of balance in the pink scheme. 

Tips for Selecting Your Interior House Colours 

Whether you are moving to a new house or repainting your house, you need to select the right colour combination for your interiors. While selecting the colours, you must consider several factors. These include the following. 

The Interiors 

Home paint colour combinations complementing your interiors give your home a classy look. Therefore, before choosing the home wall colour, ensure that it goes well with your interiors. If your interior has metallic decorations, avoid grey colour combinations. Pastel shades are the best choice in such a situation. 

The Floor 

Your house’s floor is another important consideration when choosing interior colours. If you have wooden flooring at home, opt for dark blue, grey, beige, and mauve. Dark wall colour combinations go well with dark tiles. 

Your Personality 

Your home reflects your taste, and the colour combination reflects your personality. If you are bubbly and cheerful, opt for bright and vibrant shades, such as yellow and orange. If you are a calm person and not fond of very bright hues, opt for lighter shades. 

The Space 

If you have a compact space, opt for pastel or bright colours that will make your room bigger. Dark-coloured walls will make your room look smaller. 

The Light in the Room 

When choosing your home colours inside the house, check the lighting in that particular space. Check the amount of natural light the particular corner receives, as light reflects less on dark colours. If you want more light in a specific corner, such as a study room or your living room, opt for lighter combinations, such as white, pale yellow, and light blue. Besides, the colour of the spot where you spend most of your time in your house must have a soothing effect on your eyes. 

Conclusion  

Your home’s interior colour combination plays a vital role in giving a homely feeling to your house. Besides making your home warm and cosy, it reflects your personality. Therefore, ensure to choose appropriate home colours that calm your mind. 

In this journey of creating your dream home, it is essential to have a reliable partner by your side. Brick & Bolt, as a leading construction company, understands the overwhelming effort that every homeowner puts into building their ideal spaces. We recognize the challenges homeowners face when dealing with multiple contractors, which can often make the process tiresome. ​Therefore, as a tech-enabled firm, we aim to simplify the construction experience, ensuring that it is smooth, memorable, and efficient.​ If you require assistance in your home building process, please do not hesitate to contact us.

Plain Cement Concrete: Importance, Applications, and Mixing Ratios

0
Plain Cement Concrete

Concrete plays a vital role in constructing various  type of building, serving as a fundamental building material for centuries . Basically, concrete is made of aggregate particles like sand and gravel which are combined  with cement and water. Concrete’s stability  is determined by the quality of the cement, sand, and water-to-cement  ratio. Plain Cement Concrete (PCC), in simple terms means, is a perfect mix of cement with fine aggregate and coarse aggregate.

 In this blog, we will  discuss PCC and its crucial role in construction. Keep reading for more details!

What is PCC in Building Construction?

PCC in Building Construction

Concrete is an essential material in construction. One notable type is PCC (Plain Cement Concrete).  PCC has been used in several construction projects, both small-scale and large-scale. Its major role is to level the surface and avoid laying on sand directly.

What is PCC in Construction?

PCC is a construction material. It is  a mix of cement, sand, gravel or crushed stone, and water. It is a basic type of concrete. It is used for many construction purposes, mainly as a structure foundation. PCC is used to make a strong, rigid foundation. It reduces the risk of moisture damage to the structure.

Why is PCC Important in Construction?

PCC plays a crucial role in construction for several reasons:

Foundation Stability: 

PCC provides a solid base for structures. It helps spread loads evenly and reduces settlement.

Moisture Barrier:

It blocks moisture. This stops water from reaching the structure and causing damage.

Cost Effectiveness: 

PCC is less expensive than reinforced concrete and many advanced materials, making it a cost-effective option for builders.

Durability: 

PCC offers long-term durability. It resists weathering and is suitable for different environmental conditions.

Materials Used in Plain Cement Concrete

1. Coarse Aggregate

Coarse aggregates are large particles in concrete, measuring 4.75 mm to 150 mm. Examples include gravel, crushed stone, and crushed slag. They 

should be clean, hard, and durable. Proper grading is essential for ensuring  good workability and strength.

2. Fine Aggregate

Fine aggregates are smaller particles, usually sand, with a particle size of up to 4.75 mm. Natural sand or manufactured sand. 

They should be free from impurities like silt and clay. Which could cause issues with bonding and strength.

3. Cement

Cement is a binding material. It reacts with water to form a hard, solid mass. 

Portland cement is commonly used in construction projects. It should meet standard specifications, such as IS 269 in India or ASTM C150 in the US.

4. Water

Water is essential for the hydration process that occurs when mixing concrete. It should be clean and free from impurities that could affect the setting time and overall strength of the concrete.

Mixing Ratios

The common mixing ratio for Plain Cement Concrete (PCC) is typically expressed as 1:2:4, which denotes:

  • 1 part Cement
  • 2 parts Fine Aggregate (Sand)
  • 4 parts Coarse Aggregate (Gravel or Crushed Stone)

This ratio is generally used for various structural components such as foundations, pavements, and other non-load bearing elements. Adjustments to the ratio may be made depending on the specific project requirements, such as load-bearing capacity or environmental conditions, to enhance strength and durability56.

In addition to the standard 1:2:4 mix, other ratios can be utilized for specialized applications:

1:1.5:3 for beams, providing enhanced strength for structural elements.

1:3:6 for sidewalks and floors, ensuring sufficient strength while maintaining workability during placement.

1:0.5:1 for water-retaining structures, focusing on impermeability.

These ratios offer flexibility to meet the various needs of construction projects while ensuring that the concrete remains workable and strong.

Mixing of Plain Cement Concrete

Mixing of Plain Cement Concrete

The mixing of PCC involves the following steps:

1. Batching: 

Measure the amounts of cement, aggregates, and water accurately. Do it according to the desired mix ratio.

2. Dry Mixing: 

Mix the dry ingredients (cement, fine sand, and coarse stones) in a concrete mixer. Space them out to create a balanced layout.

3. Wet mixing: 

Wet mix is the Mix in the water slowly. Stir until the blend is the thickness you want.

4. Consistency check: 

Check the mix’s flow using the slump test. Optimal consistency ensures success.

Advantages of Using PCC in Construction

  1. PCC is generally more affordable than RCC (Reinforced Cement Concrete) So, it’s good for basic structures.
  2. PCC is easy to apply. Its simple mixing and placement do not require specialized skills.
  3. Low maintenance requires minimal maintenance compared to other types of concrete.
  4. It provides decent thermal insulation properties, contributing to energy efficiency in buildings.

Disadvantages of Using PCC in Construction

  1. PCC crumbles under tension, failing as a standalone material for load-bearing structures. Its weakness demands reinforcement to withstand stress. Without added support, PCC proves inadequate for critical structural applications.
  2. Cracks may develop in poorly designed mixes. Certain conditions increase vulnerability, making careful formulation crucial to preventing fracturing.
  3. Load Capacity Constraints: Compared to reinforced concrete, this material falters under heavy burdens. Its structural limitations prevent its use in high-stress scenarios.
  4. Lacking reinforcement, PCC crumbles under shear and bending forces, necessitating additional support in structural applications.

How PCC Works: Dos and Don’ts

Dos:

  1. Ensure you use the correct mix ratio to achieve the desired strength and durability.
  2. Maintain proper curing to achieve optimal strength and prevent cracks.
  3. Regularly test materials and mixes to ensure consistency and compliance with construction standards.
  4. Handle and transport the concrete with care to prevent segregation and contamination.

Don’ts:

  1. Avoid over-watering the mix., as this can weaken the integrity and cause segregation.
  2. Don’t use contaminated materials. Impurities in aggregates or water can affect the quality of the concrete.
  3. Avoid rapid setting. Ensure there is adequate time for setting and curing to prevent issues such as cracking.
  4. Don’t neglect cleanliness. Equipment and tools should be clean. This avoids contamination and ensures proper mixing.

PCC vs. RCC

FeaturePCC (Plain Cement Concrete)RCC (Reinforced Cement Concrete)
DefinitionConcrete without reinforcementConcrete with embedded steel rods
StrengthLower tensile and flexural strengthHigher tensile and flexural strength
ApplicationFoundations, pavements, non-structural elementsLoad-bearing structures, beams, and columns
CostLess expensiveMore expensive due to reinforcement
DurabilityLess durable under tensile stressMore durable and resistant to stress

Conclusion

Plain Cement Concrete (PCC) is fundamental in construction. It is known for its simplicity and low cost. It provides a strong base for many structural elements. It also keeps out moisture. But, it is not good for high-stress applications because it lacks tensile strength. Knowing the materials used in PCC and the right mixing procedures is crucial for achieving optimal performance. Also, knowing the key differences between PCC and RCC can help in making informed decisions for construction projects. Proper handling, quality control, and best practices are vital. They ensure PCC’s performance and longevity in construction.

All You Need to Know About Calculating Construction Cost Per Square Foot in Delhi

0
home construction cost in Delhi

Delhi, as India’s capital city, is an ever-growing metropolis with planned as well as  unplanned development. The demand for housing in the city is constantly on the rise due to rural to urban migration and booming population growth. With skyrocketing land prices and rapidly evolving construction costs, building a house in the city can be an intimidating task. This blog serves as a comprehensive guide on construction costs in Delhi, to enable property owners to make informed choices and decisions with enhanced financial planning.

Factors That Affect Construction Cost in Delhi

Numerous physical, environmental and political factors affect the home construction cost across various regions. A few of the specific factors influencing construction cost in Delhi are explained below. 

Climate Control

Delhi has a composite climate, meaning that it experiences extremes in both warm and cold temperatures. This demands additional architectural features such as passive shading elements (such as overhangs and chajjas), insulating materials and electrical devices such as coolers, air conditioners and heaters. All of these features result in a significant increase in the house construction costs, as well as running or maintenance costs. 

Site Location

Delhi is a very large city, thus the location of the site inside the city is a major factor that affects the building construction cost. Material transportation costs for sites in the centre of the city may be high (as materials are generally manufactured on the city outskirts). However, labour costs will be higher for isolated sites or sites far away from the city centre. Accessibility to the site with adequate road sizes and quality are also important. For example, sites with small abutting roads will require manual labour for excavation since they cannot be accessed by large vehicle excavators, this consequently increases the total construction cost. 

  • Local Regulations and Conditions

The building plan approval process in Delhi requires various documents to be submitted to local authorities, such as DDA (Delhi Development Authority) and NDMC (New Delhi Municipal Corporation). Electrical and water supply connections must be obtained through the Delhi Vidyut Board and Delhi Jal Board. Apart from this, stamp duty and registration also need to be completed. All of these processes entail specific costs, which may be subject to variation based on the site location and current political conditions. 

Type of Construction and Material Choices

Delhi is a city composed of a diverse population with very large income differences between the poor and rich. This means that home construction choices can range from very basic to ultra-luxurious. The type of materials for building the main structure and for finishing can likewise range from affordable to extremely expensive. These choices predominantly affect the home construction cost in Delhi.

Estimating the Average House Construction Cost in Delhi

Construction cost per square feet in Delhi varies widely depending on the factors explained above. For estimation, it is first necessary to calculate the total built-up area of a house, which can then be multiplied with the square foot rate to obtain total cost of construction.

Prices in Delhi generally start at ₹1900/sq ft for basic construction, while high-end home construction costs can even go beyond ₹10,000/sq ft. 

In general, the above mentioned square foot construction cost is made up of the following components:

ComponentPercentage of total cost required
Architectural design charges3-15%
Structural design charges0.5-5%
Contractor’s charge20%
Labour cost40-50%
Material cost50-60%
Services cost (plumbing and electrical work including labour and materials)18%

These figures are just general indicators that can be used to derive rough estimates for construction before all the building details are designed and confirmed. 

Cost of Building a 1000 sq ft House in Delhi

Considering the general values explained above, the total cost of constructing a 1000 sq ft house in Delhi can be calculated as:

Low range cost (at ₹1900/sq ft)Mid range cost (at ₹2500/sq ft)High range cost (starting at ₹4000/ sq ft)
Architectural services (₹40 to ₹200/sq ft)40,00080,0001,20,000
Structural design services (₹10 to ₹50/sq ft)10,00020,00040,000
Material cost (~60%)8,82,00011,40,00018,24,000
Labour cost (~40%)5,88,0007,60,00012,16,000
Contractor’s profit (~10%)1,90,0002,50,0004,00,000
Overheads and miscellaneous (~10%)1,90,0002,50,0004,00,000
Total cost 19,00,00025,00,00040,00,000

Similarly, the construction costs for different sizes of houses can be calculated:

Size of House (Built-up area)Low-range cost (at ₹1900/sq ft)Mid-range cost (at ₹2500/sq ft)High-range cost (starting at ₹4000/sq ft)
500 sq ft₹9,50,000₹12,50,000₹20,00,000
1200 sq ft₹22,80,000₹25,00,000₹40,00,000
2000 sq ft₹38,00,000₹50,00,000₹80,00,000
5000 sq ft₹95,00,000₹1,25,00,000₹2,00,00,000

The figures mentioned above are only indicative and variable depending on the numerous site conditions and specific project requirements, such as location, number of floors, and design complexity. 

Home Construction Cost Calculator

The steps explained above can be followed to obtain rough estimates for building construction costs in Delhi. However, Brick & Bolt’s Construction Cost Calculator can be used to procure more accurate estimates of costs for building a house in Delhi. This calculator will produce estimates based on customisable options for structural materials, finishing materials, types of services required, site location, and various other aspects.

Brick & Bolt is a tech-enabled company with 4500+ completed residential projects that conducts 470+ quality checks at every construction stage to ensure the best quality for your house. With 3200+ customisable designs to tailor your home to accommodate your desires and the provision of end-to-end construction services, Brick & Bolt is a construction company in Delhi and numerous other Indian cities. Contact Brick & Bolt today to construct your dream home at the lowest market price in Delhi!

Is Power of Attorney Valid After Death?

0
Is Power of Attorney Valid After Death

If you’re handling legal matters for a loved one or preparing for future situations, understanding how a Power of Attorney (POA) works is crucial. One common question people have is whether a Power of Attorney remains valid after the death of the principal. The simple answer is no. 

After death, the executor of the estate, as designated in the will, takes over the responsibility of managing the deceased person’s affairs. If there is no will, the court will appoint an administrator to handle the estate.

For  detailed information, let’s dive into this blog without further delay.

What is Power of Attorney?

Power of Attorney

Power of Attorney (PoA) is a legal instrument whereby the principal grants the agent or attorney the authority to exercise powers on the principal’s behalf. It could be useful in handling any financial, health, or legal matters when the principal is incapacitated by illness or travel.  The Power of Attorney ceases immediately upon the principal’s death.

Note: The principal is the individual who delegated  his or her authority to another individual (the agent or attorney-in-fact) with the help of a Power of Attorney.

Validity of Power of Attorney After Death

Ceases at Death: 

Thus, the key point to be noted is that a Power of Attorney loses its force and no longer has any legal effect after the death of the principal. This means that no legal defense for the deceased can be made by the agent anymore.

Why Does the Power of Attorney End?

Purpose Fulfilled: 

The main purpose of a Power of Attorney is to allow someone to act on your behalf while you are alive. Once you pass away, there is no longer a need for someone to manage your affairs.

Legal Authority: 

Besides, the PoA does not grant the PoA agent the right to manage  the deceased’s affairs after death; this role goes to the executor of the will or the administrator of the estate appointed by the court.

What Happens to the Estate After Death?

 Estate After Death - PoA

Executor or Administrator Takes Over:

  • If the deceased had a will, the executor named in the will takes over the responsibility of managing the estate.
  • If there is no will, the court appoints an administrator to handle the estate.

Role of Executor or Administrator

  • They are responsible for paying all outstanding debts, dividing and distributing the remaining property and assets among the heirs, and fulfilling any other legal responsibilities concerning the estate .
  • Their authority is derived legally through probate,  a legal process when the will is proven and the executor gets permission to act.

Steps to Take After the Principal’s Death

Obtain the Death Certificate:

  • Why: The death certificate is one of the essential documents that prove the death of the principal.
  • How: You can get the death certificate from the local municipal office or the hospital where the death occurred. It is important to get multiple copies, as you will need them for various legal and administrative processes.

Inform Relevant Institutions:

  • Banks and Financial Institutions: Notify all banks, investment firms, and financial institutions where the principal holds  accounts. Provide them with a copy of the death certificate to freeze the accounts and prevent unauthorized transactions.
  • Insurance Companies: Inform life and health insurance companies to start the claim process.
  • Government Departments: Notify relevant government departments like the pension office or the income tax department.

Locate the Will:

  • Why: The will contains detailed instructions on how the principal’s assets should be distributed.
  • How: Check the principal’s personal documents or consult their lawyer to find the will. If the will is registered, you can also obtain a copy from the local sub-registrar’s office.

Initiate the Probate Process

  • If There is a Will: The executor named in the will needs to file for probate in the local court. Probate is the legal process that validates the will and gives the executor the authority to manage the estate.
  • If There is No Will: Apply to the court for the appointment of an administrator. The court will issue a Letter of Administration, granting someone the authority to manage the estate.

Appointing an Executor or Administrator

  • Executor: The person designated in the will to manage the estate. They will collect the assets, pay off debts, and distribute the remaining assets as per the will.
  • Administrator: If there is no will, the court will appoint an administrator, usually a close family member, to manage the estate.

Gather Legal Documents

  • List of Assets: Create a detailed list of all assets owned by the principal, including property, bank accounts, investments, and personal belongings.
  • Liabilities: List all outstanding debts and liabilities, including loans, credit card balances, and bills.
  • Important Documents For PoA: Collect property deeds, bank statements, insurance policies, and any other relevant documents.

Manage the Estate

  • Pay Outstanding Debts: Use the principal’s assets to settle any outstanding debts and liabilities.
  • Distribute Assets: Follow the instructions in the will to distribute the remaining assets to the beneficiaries. If there is no will, distribute the assets according to the legal inheritance laws.
  • Close Accounts: Close the principal’s bank accounts, credit cards, and other financial accounts once all debts are paid and assets distributed.

Handle Property and Investments

  • Property: Transfer ownership of the property to the beneficiaries. This may involve registering the property in their names at the local sub-registrar’s office.
  • Investments: Transfer stocks, bonds, and other investments to the beneficiaries. This usually requires filling out transfer forms and providing a copy of the death certificate.

File Final Tax Returns

  • Income Tax: File the final income tax return for the deceased, which includes reporting all income earned until the date of death. Be aware of deadlines for filing, as estates may be required to file returns for both income and potential estate taxes, depending on the value.
  • Estate Tax: If applicable, file an estate tax return for the assets owned by the principal at the time of death.

Conclusion

Handling the affairs of a deceased principal involves several crucial steps. Starting with obtaining the death certificate, informing relevant institutions, locating the will, and initiating the probate process are essential. The appointed executor or administrator must gather all legal documents, manage the estate, pay off debts, distribute assets, and handle property transfers. Completing these steps ensures that the principal’s estate is settled legally and fairly, following their wishes or the applicable inheritance laws.