Home Blog Page 50

Bricks vs Hollow Concrete Blocks: Which are Better for Construction?

0
Bricks vs Hollow Concrete Blocks

Materials are very important when constructing a house or any other structure. Bricks and hollow concrete blocks are the most commonly used materials in the construction of walls, especially for residences. A common question among property owners is-  which is the better material: bricks or hollow blocks? Let’s evaluate the differences between them, like costs, strength, insulation, and usability, so that you can make an informed choice for your construction project.

What are Bricks and Hollow Concrete Blocks?

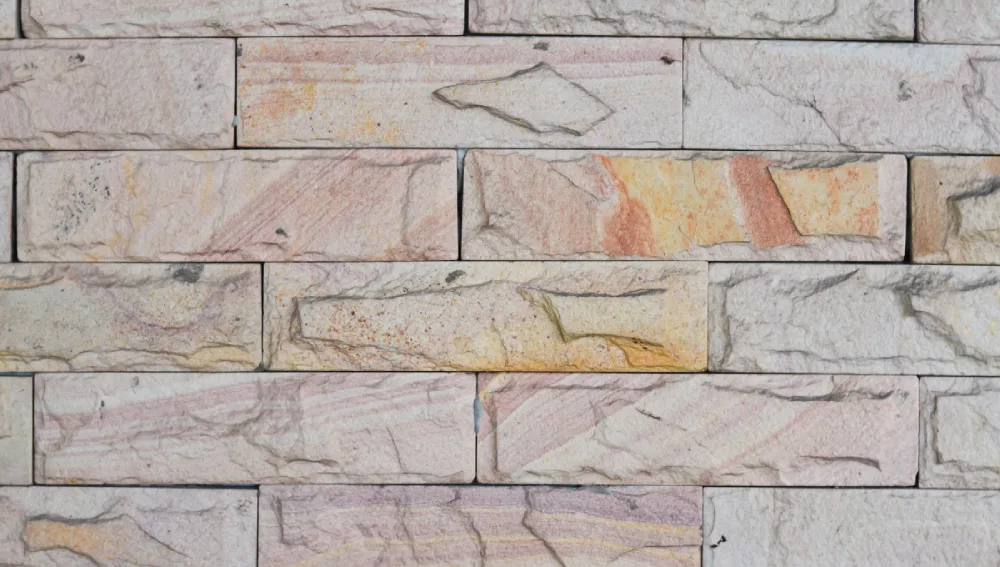
Generally, bricks used are made from clay. The clay is moulded into cuboidal shapes, and these shapes are further heated at very high temperatures using a kiln. This tightens the clay and makes it strong. Bricks are said to be solid, which means they have no empty voids in them.

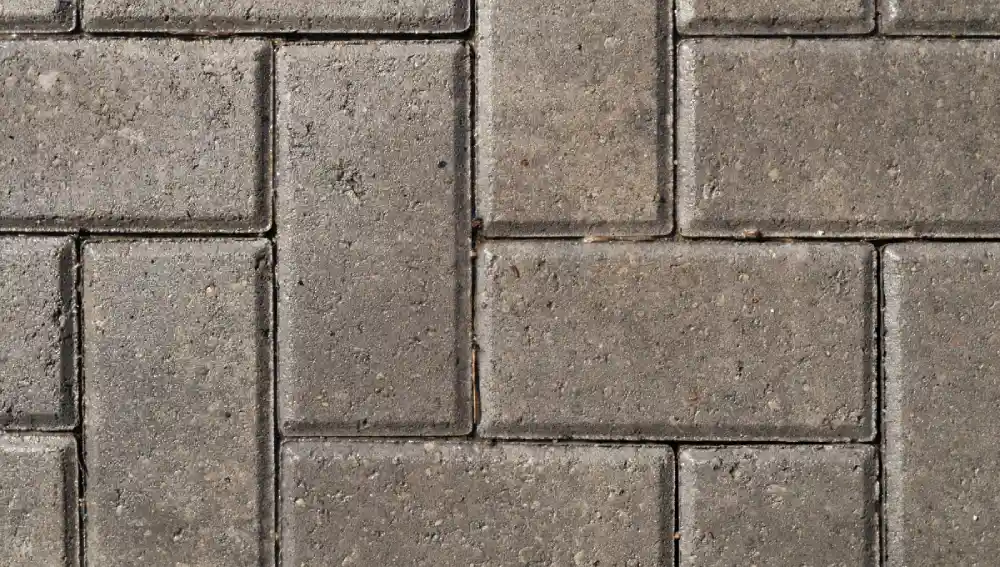
Hollow Concrete Blocks: These blocks are made of cement, sand, and small stones. Unlike bricks, these blocks have voids in them, thus making them lighter. The size of the hollow blocks is bigger than bricks, but they are rather easy to handle due to their lower weight.

Strength and Durability

Bricks: Bricks are highly durable and can last for a large number of years.. For this reason, bricks have been used in making homes from time immemorial. They are really tough and can bear loads in bulk without breaking. 

Hollow Concrete Blocks: These are hard and strong, but not as much as bricks. They can be made stronger by putting steel bars inside or filling up the void space with concrete. 

Thermal Insulation

Bricks: Due to their high density, a building made of bricks can retain warmth in winter and maintain coolness in the house in the summer. Day warmth is absorbed and then slowly released back by bricks during the night, helping keep days cool and nights warmer.

Hollow Concrete Blocks: Hollow concrete blocks have better thermal insulation than bricks. The hollow parts in the blocks trap the air in them, which keeps the building cool in the hot season. They can also prevent the escape of hot air by trapping it in their voids, thus keeping indoor spaces warm in winters.

Cost

Normally, bricks tend to be more costly than hollow blocks. This is attributed to them being usually more cumbersome and costly to produce. They are also small in size, meaning you  need a larger number of bricks  and more labour time for the construction of a wall. 

Hollow concrete block walls are cheaper than brick walls by 15-20%. This is due to the mere fact that they are big, hence many hollow blocks would only entail less of the material in putting up the same size wall and also reduced time. 

Workability

Bricks are smaller and heavier, so lots of them are required, making it time-consuming to lay a brick wall.

Hollow Concrete Block walls are quickly constructed because the blocks are  large and light. They are also easier to handle and work with in general. However, cutting them into smaller pieces for laying is extremely difficult. 

Environmental Impact

Bricks: Brick manufacture can negatively impact the environment.. The baking of bricks inside the kilns is energy-intensive and results in pollution. In making bricks, clay has to be dug up, which means that land is at risk. 

Hollow Concrete Blocks: These types are more eco-friendly compared to the others, as they use less material. Some of these hollow blocks are made using recycled material. However, concrete, in general, is not considered to be sustainable due to the harmful manufacturing process of cement. .

Visual Appearance

Bricks: They are available in earthen colours and can be used to enhance the natural and traditional aesthetics of built forms when left exposed.. 

Hollow Blocks: In general, hollow blocks are grey and do not have the great appearance that bricks have. Usually, they are plastered over or painted, which means that once the finished product is obtained, you do not see them.

Water Resistance 

Brick walls, especially when left exposed, can be porous and develop mould. A Few other problems that can be associated with these are seepage and also a white salt stain seen over them. This can be easily avoided using the various waterproof materials that are applied on bricks. 

Hollow Concrete Blocks: They absorb very little water, and therefore, they are less sensitive to moisture, which makes them suitable for wet areas. They are less susceptible to seepage.

Conclusion 

Both bricks and hollow concrete blocks are good building units for construction. Bricks are strong and long-lasting, having an aesthetic appearance, but they are more expensive and relatively more time-consuming to build with. Hollow blocks are cheap, easily used, and more environment-friendly, but they have reduced strength and flexibility in design. Thus, both materials have different properties, advantages and disadvantages, which must be carefully studied and evaluated before selection for individual project requirements.

FAQs:

1. Which is stronger, bricks or hollow blocks?

Bricks are generally stronger than hollow blocks, but hollow blocks can be made stronger with reinforcement.

2. Are hollow blocks cheaper than bricks?

Yes, hollow blocks are usually cheaper because they use less material and are quicker to build with.

3. Which is better for keeping a building warm?

Hollow concrete blocks are better as they have higher thermal insulation.

Dowel Bars in Construction: Types, Placement, and Benefits

0
Dowel Bars in Construction

Dowel bars are common materials used in the construction industry as reinforcement for concrete structures. They are crucial as they are durable, provide stability, and transfer load evenly throughout the structure. Dowel bars are widely used in concrete pavements. This blog explains the role and specifications of dowel bars. 

Dowel Bars

A dowel bar is a short steel bar used in the installation of concrete slabs. The main application of the dowel bar is to provide mechanical support to the slabs without restricting the horizontal joint movements. They also maintain load transfer and balance the weight. 

Size of Dowel Bars

Dowel bars are generally 32 to 38 mm (1.25 to 1.5 inches) in diameter, 18 inches (or 460 mm) long, and are spaced at intervals of 305 mm (or 12 inches). However, the figures may differ depending on regional standards and specific project requirements. 

Purpose of Dowel Bars in Construction

Dowel bars are used in construction for several purposes, mainly to improve joint performance and load distribution. Some of the purposes of dowel bars are explained below:

  • Dowel bars enhance the structural stability of the construction as they distribute weight across concrete joints.
  • Dowel bars help minimize deflection and stress at the joints, leading to lesser joint deflection. 
  • Dowel bars are flexible. This is a crucial factor as the concrete expands and contracts due to changes in moisture and weather.
  • Dowel bars decrease joint cracking and faulting.
  • The Dowel bar elevates the load transfer efficiency between adjacent slabs.

Overall, dowel bars are primarily used in construction to provide strength to the building. 

Types of Dowel Bars

There are different types of dowel bars depending on their application. Some of the types are explained below:

Round Dowel Bars

This is the general type of dowel bar. They are made from a high-strength steel bar that has a diameter between 12 mm to 32 mm. 

Square Dowel Bars

The square dowel bars resemble the round dwell bars. However, they have a square cross-sectional area instead of the round one. A square dowel bar is particularly used in areas where high load capacity is needed. 

Fiberglass dowel bars

These bars are new types of dowel bars that are made using composite materials. These materials are lightweight and have low thermal expansion compared to steel bars.

Placement of Dowel Bars

The placement of dowel bars should be done by following the steps mentioned below:

  • The bars should be in a standard 90-degree angle with the centerline. 
  • On each side of the dowel, there should be at least one and a half inch gap, and a new channel should be carved.
  • The dowel bars are placed across the concrete pavement’s transverse joint. This is because the movement of the concrete happens at this place.
  • To restrict the bonding to PCC(Portland Cement Concrete), the middle slab should be covered with a bond-forming substance.
  • As the dowel bears load, the adjacent slabs should have enough room to expand and contract. 

Method 1 of Placing a Dowel Bar: The first method includes placing the dowel bar and pouring concrete on top of it. This is a successful procedure that increases bonding, is cost-effective and doesn’t require additional chemicals.

Method 2 of Placing a Dowel Bar: It is a costly and long process. In this method, a hole is drilled and Hilti chemical is used for strong bonding. This is used when placing an extension bar is forgotten before concreting. 

Advantages of Dowel Bar

The advantages of dowel bars are listed below:

Transfer of Load: Dowel bars facilitate load transfer between adjacent concrete slabs, thus reducing the stress on the pavement and preventing the formation of cracks.

Joint Stability: The stability of the joints is increased between the concrete slabs, ensuring the surface level is maintained without faulting.

Longevity: The lifespan of the concrete can be increased, and hence the pavements remain durable without cracks or other damages. 

Disadvantages of Dowel Bars

The disadvantages of dowel bars are explained below:

Cost: Dowel bars are costly, specifically the high-strength steel dowel bar. 

Complex Installation: Dowel bar installation needs experts and equipment; hence, they are complicated and time-consuming. 

Corrosion: Dowel bars in harsh environmental conditions are susceptible to corrosion. 

Maintenance of Dowel Bars

Dowel bars should be maintained for the longevity and integrity of the structure. The important aspects of the maintenance of dowel bars are explained below:

Inspection: Dowel bars need to be inspected frequently to identify any damage. Check signs for cracks, corrosion, or any dislocation in the area.

Cleaning: Dowel bars should be regularly cleaned to prevent any debris settlement that leads to damage. High-pressure water can be used to clean the area. 

Lubrication: Lubrication decreases corrosion. Hence, the dowel bars should be installed after thorough lubrication to ensure smooth movement between the slabs.

Replacement: Damaged or bent dowel bars should be replaced promptly; prolonged use of damaged dowels can lead to more significant issues and higher repair costs. 

Conclusion

Dowel bars play an important role in maintaining the durability and functionality of concrete pavements and other constructions. Dowel bars have incredible applications in improving joint stability, load transfer between concrete slabs, and increasing the lifespan of the concrete structure. Dowel bars do have some disadvantages; however, they are brilliant materials for concrete pavements and other applications. 

FAQs

1. How do dowel bars contribute to preventing cracking in concrete?

Dowel bars help evenly distribute loads across concrete slabs, reducing differential movement and stress that can lead to cracking.

2. What grade is a dowel bar?

The diameter of dowel bars is generally 16 mm to 50 mm. They can be supplied in strength grades such as 250, 500, and 600, as mentioned in BS 6744:2016.

3. How do you measure a dowel size?

The size of a dowel pin can be measured using a caliper. This determines the diameter and end-to-end length of the dowel pin along with the crowns.

Simple Rangoli Designs for Home

0
Simple Rangoli Designs for Home

Rangoli is a traditional form of art that includes the creation of patterns and designs on the ground with the help of various materials, mainly colour powders. This traditional practice is a part of Indian culture that has been used for over centuries. This has been used in various festivals, celebrations, and religious occasions. Rangoli is a variety of colours that can form a vibrant and beautiful design. 

This blog will provide you with information regarding the rangoli, the need for simple designs, and the types of simple design rangoli that can be used for home. 

What is Rangoli?

Rangoli is an art form that originated from the Indian subcontinent, and these forms are created by using materials like limestone, dry rice flour, quartz powder, flower petals, coloured rocks, and red ochre. This is a tradition that is practiced every day in many Hindu houses; however, mostly they are reserved for festivals and important celebrations as it is time-consuming. 

Rangoli designs can be simple geometric shapes, structures of deities, flowers, or flower petals that are created for given celebrations. These designs can also be drawn on a daily basis for home decoration.

Why is it Needed for Simple Designs?

Rangoli designs can be elaborated during major festivals and special occasions, but simple designs have their own charm and practicality. Simple rangoli designs are easy to create and also provide more accessibility to beginners and people who have busy lifestyles. They need a smaller amount of materials and a small amount of time, and they are also perfect for the visuals of the home. 

By selecting a simple design, you can enjoy the process of rangoli creation without any pressure to get a perfect result. It will be easier to experiment with different patterns and styles that can help you develop your artistic skills over a period of time. Along with that, simple rangoli designs are versatile and can be used for different occasions, which makes them convenient and beautiful along with your home decorations.

Getting Started with Rangoli

Materials Required

Before starting the rangoli, it is important to gather all the necessary items. Some of them include,

  • Colour powders
  • Rice flour
  • Stencils
  • Flowers and petals
  • Chakar white pencil
  • Oil lamps 

Selection of the right spot

Selecting the correct place to draw your rangoli is very important. This can help in improving the overall appearance of the design. Commonly, rangoli is created at the home entrance, courtyards, or near any sacred places like altars or pooja rooms. Normally the popular choice for rangoli is the entrance of the home, as it symbolises the welcoming of guests and deities with positive energy and good fortune.

In modern homes, when choosing a spot for rangoli, it is good to consider the areas that are visible and well-lit. The good choices will be the living room, balcony, or a space that is near the main door. Before starting the rangoli, make sure that the surface is clean, flat, and dry. If the rangoli is drawn indoors, then go for the spot that has minimum foot traffic to avoid any accidental smudging. 

Basic Rangoli Patterns

Dot rangoli

Dot rangoli is mainly involved in creating designs by using small dots. Dots will be placed in a specific pattern to form shapes, flowers, or any animals. It is one of the simplest and most traditional forms of Rangoli. The term involves the creation of a group of dots and then connecting them with the lines or curves to form different patterns.

Basic Rangoli Patterns

Some of the steps involved are,

  1. Draw a grid of dots.
  2. Connect the dots.
  3. Fill it with the colours.

Beginners can start with some basic patterns, like simple flowers and stars. After a certain amount of experience, you can start trying more complex designs.

Geometric Rangoli

Geometric rangoli mainly uses shapes like squares, circles, triangles, and diamonds as their base. They are easy to draw and can be combined with different ways of creating innovative patterns. They mainly represent the cosmic order and harmony. The shapes can be combined to produce intrinsic patterns that have symmetry, making them perfect for simple rangoli design.

Geometric Rangoli

Some of the easy patterns are,

  • Concentric squares can be drawn, and alternating colours can be filled in each square.
  • A series of circles can be drawn, and they can be decorated with different colours and patterns.
  • Starlike patterns or other symmetrical designs can be made by using triangles.

Freehand Rangoli

Free-hand rangoli is created without any guidelines or measurements. These types of designs are drawn with the imagination of the artist directly on the floor. This style will improve the creativity and spontaneous thinking of the artist, making it easier for the rangoli designers who are beginners.

Freehand Rangoli
Freehand Rangoli

Some of the basics of freehand drawings are that you can start with a central design like flowers and expand it outwards. Here you can use your creativity for drawings or any swirls and other decorating elements. The simple design for free-hand rangoli may range from simple floral patterns to more elaborate designs. The important part is to maintain the symmetry and balance in the design.

Creative Ideas for Simple Rangoli

Floral Rangoli

Floral Rangoli mainly uses natural elements like flower petals and leaves to create a beautiful and eco-friendly design. This type of design will be frequently used during festivals like Onam and Diwali, where fresh flowers are mostly available.

Flower petals and leaves can be collected from various types of flowers like roses, chrysanthemums, and marigolds. These flowers will be arranged in a pattern on the floor, starting from the center and working outwards.  Leaves can be added to provide a green colour contrast.

The flower petals can be mixed with traditional rangoli powders that can provide a variety to your design.

Floral Rangoli
Floral Rangoli

Stencil Rangoli

Stencil Rangoli can be used to create more intrinsic designs easily and quickly.  These are precut templates that can be used on the floor, and Rangoli powder can be used to fill the gaps. They are available in different designs, from simple shapes to complex patterns.

The steps involved in using stencil Rangoli are,

  1. Selection of stencil design
  2. The stem cell needs to be placed on the floor where the rangoli needs to be made.
  3. Gently fill the stencil with their rangoli powder, making sure that all the areas are covered evenly.
  4. Carefully lift the stencil.
Stencil Rangoli
Stencil Rangoli

Conclusion

Rangoli can be considered more than a decorative work as it is used in the celebration of culture, improving creativity and providing happiness by making something creative and beautiful with your own hands. Rangolis can be used daily or occasionally. Yet simple designs can help provide a beautiful look and also include the traditions of life in this fast-paced era.

FAQs

1. Can I create Rangoli designs every day?

Yes, Rangoli can be created daily, especially simple designs that don’t require much time or materials. Many people make small, easy patterns at their doorsteps each morning to start the day on a positive note.

2. What materials do I need to start making Rangoli?

Basic materials include coloured powders, rice flour, and stencils. You can also use flower petals, leaves, and even small diyas for added creativity.

3. How can I create a Rangoli design without stencils?

Freehand drawing allows you to create unique designs using your creativity. Start with basic shapes or a central motif, and build your design outward, focusing on symmetry and balance.

4. Can I involve my children in making Rangoli?

Definitely! Simple designs are a great way to introduce children to Rangoli. They can help with filling in colors, arranging flower petals, or using stencils to create patterns.

5. What are some modern twists on traditional Rangoli?

You can incorporate contemporary patterns, use unusual colour schemes, or even try creating Rangoli on water using floating diyas and flowers. Mixing traditional with modern elements can create unique designs.

Understanding The Differences Between Legal Heir Certificate And Succession Certificate

0

The distribution of the property of a deceased person, whether it is movable or immovable, is governed by the Indian Succession Act of 1925. This act lays down two different kinds of certifications: succession certificates and legal heir certificates. The certificates are vital for claiming the assets of the deceased person and also confirming the rightful heirs to the property. This blog will explore the differences between the two certificates and also highlight their role in identification of legal heirs and granting authority to the successor. By understanding their purpose, legal power, required documents for application, and specific uses of each certificate, one can explore the complex process of inheriting property according to Indian law.

What is a Succession Certificate?

The definition of succession certificates according to Indian Succession Act 1925 is a certificate issued by the court to the family members of the deceased person for establishing their authenticity as legal heirs and also to give legal heirs the authority to inherit debts, security, and other properties of the deceased. This succession certificate is given to the heirs of the deceased who have passed away without leaving any will.

In normal cases, the succession certificate is not needed for movable properties unless a case has been filed in the court of law for establishing ownership over the property. But for immovable properties, it is essential to get a succession certificate from the court; this certificate is needed if the legal heirs wish to sell or administer the property by themselves even in the absence of any other claim on it. 

For getting the succession certificate, the legal heir must file a petition with the district judge or the high court, claiming their rights over the property of the deceased. This must be signed and verified by the applicant. This application must include,

  • Death certificate copy that must include the time of death
  • The ordinary residential address of the deceased, and if there is no such residence, then the particulars of the properties that are under the jurisdiction of the court where the application has been filed.
  • The address, name, and other details of the legal heirs and other family members. 
  • The non-objection certificate by other eligible or possible heirs, other than the applicant, which states that they do not have any objection to the applicant’s possession of the property.
  • Copies of passport and ration card, and the rights of the petition
  • The details about the assets and security for which the applicant has made the request need to be mentioned.

After the application has been filed in the district court, the judge will inspect the same and publish a notice regarding the same in the local newspaper, calling for any objections. A time period of 45 days will be provided for protest, after which the date is fixed for hearing. If any person protests, then he needs to do the same with the proper documents and proof. At the date of hearing, the judge will decide whether the applicant has the right to apply for the succession certificate, and if the judge is satisfied, then the succession certificate may be granted. This certificate will have the details regarding the debts and liabilities that were stated in the applications and also mention the power that is granted to the applicant.

What is a Legal Heir Certificate?

After the death of a person, legal heir certificates must be obtained by the family members of the deceased for transferring the properties of the deceased to family members. It is an important document that will establish a relationship between the deceased and the legal heir and aid in claiming the pensions, provident fund, house tax, transfer of electrical connection, transfer of bank account, filing of IT returns, and so on when the deceased left without choosing a nominee. 

According to Indian laws, the following people are considered legal heirs and can claim the legal heir certificate. They are,

  • Spouse 
  • Siblings 
  • Children, maybe a son or daughter 
  • Parents

The legal heir certificates can be obtained from the respective municipality or corporation, by approaching the taluk tahsildar, or from the district civil court. This certificate is provided after proper inquiry and listing down all the legal heirs of the deceased person. For claiming the legal heir certificates, the legitimate heir must make the application to the concerned authority along with the application form that contains the following:

  • Proof of identity of all the applicants
  • Address proof of all the applicants
  • Death certificate of the deceased
  • Date of birth proof of all the applicants
  • Address proof of the deceased
  • Self-undertaking affidavit on stamp paper

After submitting the application, the administrative officer and the inspector will carry out an inspection and complete the inquiry. After this, the authorized persons will provide the applicants with the legal heir certificate. This whole process will be completed within the time period of 30 days.

Differences between succession certificates and legal higher certificates

CriteriaSuccession CertificateLegal Heir Certificate
DefinitionA legal document issued by a civil court, granting heirs the right to inherit a deceased person’s movable assets.A certificate issued to identify the legal heirs of a deceased individual.
PurposeTo transfer the deceased’s financial assets, such as debts, securities, and bank balances, to the rightful heirs.To establish the relationship between the deceased and the heirs for purposes like pension claims, insurance, etc.
Issuing AuthorityIssued by a civil court after following a legal process, including public notifications for objections.Issued by local government bodies like the Revenue Department, Municipality, or Tehsildar’s office.
Applicable LawGoverned by the Indian Succession Act, 1925.Governed by state-specific and religion-specific laws and regulations; not covered under a central law like the Indian Succession Act.
Scope of UsePrimarily used for financial transactions, including transferring debts, securities, and other movable assets.Used for purposes, such as claiming pension, provident fund, insurance benefits, and property mutation.
Required DocumentationRequires a legal petition to the court, death certificate, heir details, and an advertisement for objections.Requires proof of relationship, death certificate, and an application to the local authority.
Time Frame for IssuanceMay take several months due to the court process and a mandatory notice period for objections.Typically issued within 15-30 days, depending on the local authority’s process.
Conclusive EvidenceServes as conclusive evidence of the legal right to inherit movable assets under the Indian Succession Act.Serves as proof of relationship but not as conclusive evidence for legal heirship in financial matters.
Subsidiary DocumentA primary document required for transferring or inheriting movable property or assets.Often used as a supporting document in property-related matters and non-financial claims.

Conclusion

After a person’s death, the legal heirs and successors can be established with the help of a succession certificate and legal heir certificates. The legal heir certificate has a narrow purpose and is normally easier to get, while the succession certificate is a more detailed document that has extensive jurisdiction over the property of the deceased. Considering the specific needs and nature of the properties and liabilities, you can make a choice of getting a succession certificate or a legal certificate.

FAQs

1. Which certificate is easier to obtain?

The legal heir certificate is generally easier and quicker to obtain, as it involves a simpler verification process through local authorities. The succession certificate requires a more complex legal process, including court hearings and public notifications. The time and effort required depend on the specific circumstances of each case.

2. Is the process for obtaining a legal heir certificate complicated?

No, the process is relatively simple and involves basic documentation and verification by local authorities. It is less complex than obtaining a succession certificate.

3. Can a legal heir certificate be conclusive evidence for inheritance?

No, a legal heir certificate is not conclusive evidence for inheritance in financial matters. It mainly serves to establish the relationship between the deceased and their heirs.

4. What happens if there are disputes among heirs for a Succession Certificate?

If disputes arise, the court will review all claims and evidence before issuing a Succession Certificate. The process may take longer as the court must ensure the rightful heirs are recognized.

Rebar In Construction: All You Need To Know

0
Rebar In Construction: All You Need To Know

Rebar or reinforcing bar acts as a strong backbone of modern construction projects. It typically adds strength and durability to concrete structures in the long run. They are made of steel and come in various types, sizes, and grades to support a variety of structures. Though fiberglass is a popular choice, rebar is non-magnetic and will not rust easily.

Still, many people are unaware of this technique and are facing troubles in concrete applications. In this blog, we’ll discuss in detail: what rebar is, its types, applications, and the significance of applying it in construction. Let’s delve into reading to learn more.

What is Rebar in Construction?

We all commonly know that concrete is brittle in nature and has less tensile strength, making it susceptible to cracks when force is applied. However, embedding rebar within the concrete enhances the tensile strength and significantly prevents cracks. It also ensures the strength and overall stability of the structure.

They come in many shapes and sizes, including square, round, and deformed bars. It can be used according to the project needs and specific applications.

Role of Rebar in Construction

Rebar, known as steel reinforcing bars made from carbon steel. During construction, these steel bars are placed within the freshly poured concrete. Together, they provide impressive support and strength to the building when it is subjected to stretching or pulling forces. When embedded, a composite material is created to withstand heavy loads.

Control Cracks & Structural Failures

The natural hardening or drying process in various weather conditions causes concrete to shrink and crack. This situation can be efficiently handled by improving structural integrity with rebar. It adds extra protection to the building and enhances the robustness and overall structural integrity against cracks. It is particularly suitable for constructions that needs to withstand heavy loads.

Distribute the Loads Efficiently

Buildings are subjected to various loads, which is why concrete construction is encouraged. All such loads and conditions are evenly distributed using rebar, so you can ensure the safety and stability of a building. The selection of rebar type should be based on construction needs and the project budget.

Sustainability of Constructions

Prioritising the sustainability of construction is significant. Concrete reinforced with rebar reduces the frequent maintenance and reconstruction work. It involves improving the longevity of the structures against all environmental impacts that tend to chemical exposure and cracks.

Cost-Effective Solutions

All the properties of steel bars positively influence the construction. Rebar is a practical solution to prevent structures from various repairs or problems caused by temperature fluctuations. This method prevents unwanted expenses and the overall possibility of costly occurrences.

Applications of Rebar in Construction

Rebar is used in numerous construction applications and is listed as follows:

Foundations: Rebar is an unavoidable choice for foundations as it provides integral stability and resistance to the building. It prevents settlement and can be used in piles, footings, and foundation slabs.

Beams and Slabs: Concrete slabs and beams highly require rebar to resist heavy loads and efforts, such as structure weight and variable loads (people, furniture, home accessories, etc.). It ensures durability and resists cracking.

Columns and Pillars: The rebar provides the biggest support to these vertical load-bearing elements and prevents the structure from buckling or deformation.

Walls: Incorporating rebar into the walls helps improve its resistance and stability. This is significant to seismic areas or a region with a risk of ground movements.

Rebar Grades

Understanding the purpose of tensile strength and yield strength in construction helps you select the appropriate grade of rebar you need for your construction. Each grade has unique properties, and based on the project needs, we need to choose the wise option.

In general, the yield strength in a building represents the minimum stress a material takes before deforming completely. Conversely, tensile strength denotes the maximum stress that a material can cause before being damaged or broken completely.

Commonly used rebar grades are 40, 60, 75, 80, and 100, the minimum grade rebar is primarily used to balance, with each grade having unique properties. The selection of rebar grade is based on the application-specific properties.

For instance: the minimum grade rebar is primarily used for balancing the strength and ductility. The maximum grade is ideal for earning the highest strength, especially for high-rise buildings, bridges, and dams.

In a Word

Rebar is a significant material for reinforced concrete that typically improves its strength and durability. Choosing the proper size, shape, and grade is crucial for project success. Before stepping forward, it is crucial to understand each grade’s properties, benefits, and cost differences to help find a reliable option. Having this in mind, you can consult with experts to avoid all possible challenges in the long run.

FAQs

1. Why rebar in construction

Rebar, also known as reinforcing bar, ultimately provides sufficient strength to a structure and prevents cracking and shrinking. It helps ensure the durability and structural integrity of bridges, buildings, and high-rise buildings.

2. How to install rebar in construction?

The rebar is typically placed within the concrete once it is poured. For proper positioning, it is embedded using wire ties or other methods.  When both are set together, it provides essential strength and durability to the buildings.

3. How does rebar in construction enhance durability?

Incorporating a rebar in concrete helps construction to withstand heavy loads. Additionally, they provide wear and tear resistance and prevent cracking.

4. How to repair or replace the damaged rebar

A damaged section of rebar can be removed and replaced with new material, though this typically requires the assistance of experts with specialized equipment.

5. What are the factors that influence the selection of the rebar grades

Rebar grade is crucial to consider when choosing for your construction project. Ensuring certain significant factors like ductility, strength, and corrosion resistance helps find the appropriate grade.

Concrete and Rebar: How it Works in Construction

0
Concrete and Rebar: How it Works in Construction

Undoubtedly, concrete is the most important material in construction. This is because of its impressive flexibility, strength, and durability. People all over the world prefer concrete as a primary choice in various construction projects. But even if the concrete has a potential flaw, it may tend to break under certain types of forces. This situation can be managed by various materials, with rebar being one of the most efficient options.. Both the concrete and rebar form an inseparable partnership, leading to enhanced durability and structural integrity. Together, they can handle immense loads and terrible environmental conditions.

This article clearly explains the purpose of rebar in concrete and its different types.

Types of Rebar

Rebar is a special material suitable for any type of concrete structure to enhance its abilities. Based on the type of situation, rebar types used may vary. Here are the lists of main types of rebar:

Black Bar

The black bar is also known as carbon steel or tempered steel rebar and is particularly used for residential and commercial concrete construction. It is cheap but easily corrodes when directly exposed to high-humidity locations.

Galvanised Rebar

Carbon steel is coated with a protective layer of zinc metal, known as galvanised rebar. This coating acts as a barrier to corrosive elements in the concrete structure. Galvanised rebar is more expensive than regular rebar due to its reduced maintenance and long lifespan.

Epoxy-Coated Rebar

Similar to galvanised rebars, black bars coated with epoxy are another rebar type. It offers the same strength as regular rebar but with more corrosion resistance. This rebar type needs extra care during transportation and use as the coating may get easily damaged.

Glass Fiber Reinforced Polymer Rebar (GFRP)

GFRP is highly expensive but not easily corroded. It is specifically suitable for construction projects in large humidity regions. This rebar is inflexible yet offers lightness and durability.

European Rebar

European rebar is made with manganese, which is a relatively weak material. Probably, this is not the right material to use in applications exposed to extreme weather conditions, such as earthquakes or hurricanes.

Stainless Steel Rebar

Stainless steel rebars are expensive and offer high fatigue resistance, ductility, strength, and toughness, along with corrosion-resistant properties. It is suitable for large-scale construction projects, like bridges and other structures in areas of high seismicity.

Why Concrete Requires Rebar

Though concrete is known for its impressive strength and durability, it also has some downsides. Rebars overcome these by providing the following benefits:

Added Strength

Concrete with rebar provides added strength to the construction. Concrete has excellent compressive strength but lesser tensile strength; however, this togetherness can balance it. Rebar particularly doubles the tensile strength to resist being pulled or stretched.

Less Concrete Thickness

For extra strength, a thicker pour of concrete mix is required. However, in some construction areas, you don’t have enough space for it. Adding rebar to the concrete mix increases the ability to sustain heavy loads even at minimal thickness. This concrete reduction is best in terms of flexibility and saves costs.

Minimize Cracks

Combining rebar with concrete improves the breaking point and reduces the number of cracks in a structure or building. Generally, cracks occur due to heavy pressure, which the concrete struggles to sustain. Rebar optimises its ability, improving durability and bearing capacity.

Versatility

Rebar is available in many types, sizes, forms, and shapes. They can be customized according to the project’s needs, which typically adds length and stability to the construction.

Ensures Safe Structure

Concrete reinforced with rebar reduces the chances of structural failure. These damages usually occur due to natural disasters like earthquakes, floods, and hurricanes. Concrete reinforced by steel bars minimises the chance of building collapse and the risk of injuries.

Factors for Choosing the Best Rebar

With so many rebar types available, these are the factors that decide which is best to use in concrete:

Humidity: Rebar is generally composed of steel. When in contact with water, it easily corrodes. As mentioned earlier, some special types of rebar contain extreme corrosion-resistant properties. Deciding the rebar type based on the level of humidity in that region helps.

Budget: Cost is a major concern in all construction projects. There is no use in choosing the expensive and highest quality rebar is constructed if it is unnecessary. You can balance the cost of rebar based on the project budget and the needs of the structure.

Anticipated Loads: The amount of concrete tells how much load it can withstand, and the choice of rebar depends on the anticipated loads.. As discussed, rebar is a primary material that provides extensive tensile strength to concrete. Projects with higher tensile stress and anticipated loads need a stronger rebar type.

Location: The structural location is also an important factor to be noted when choosing a rebar. Some regions are highly prone to natural disasters like hurricanes, earthquakes, floods, and tornadoes. It increases the stress on a structure and causes shrinkage and cracks. Consider high-quality rebar tolerating temperatures higher than normal.

A Guide to Install Rebar with Concrete

The significance of rebar can be obtained only if it is installed properly. It is crucial to follow the engineer’s instructions from head to toe. They must also be specially trained to guide the workers in following all local building codes.

Even a wrong selection of rebar type severely impacts the structural strength. So far, being aware of a specified type, grade, and size of rebar helps go with the wise selection.

To ensure a solid bonding with concrete, the rebar should be clean and debris-free before installation.

The rebar should be fully indulged inside the concrete. If it still exists out of the concrete, you need to pour more to cover it.

Final Wordings

Using rebar with concrete reduces the concrete requirement and improves the tensile strength, safety, and versatility of the structure. Hopefully, you have an idea of which type of rebar is right for your construction project. A discussion with your site engineer regarding this will help you more efficiently.

FAQs

1. How is rebar different from concrete?

Concrete is a composite material prepared with water, cement, aggregates, and some chemical admixtures. A rebar, or reinforcing bar is a steel embedded with concrete to add tensile strength and structural integrity to a structure. In general, concrete is weak in tensile strength but good at compressive strength and it can be efficiently balanced using this togetherness in any construction project.

2. Is concrete with rebar suitable for all construction projects?

No, it will not! The method will work out only in specific situations if certain factors are favourable. They include project requirements, budget, cost, location, and site condition.

Steam Curing of Concrete: Boost Strength & Durability with Efficient Hydration

0
Concrete curing

Concrete is a ubiquitous material used in all types of modern construction. It is composed of admixtures, including cement, aggregates, and water, in varying proportions to obtain specific properties. 

Concrete’s enhanced durability, versatility, and strength make it a preferable choice for various applications. However, without a proper curing process, the properties of concrete cannot be fully optimised.

One such widely used method is steam curing. This technique accelerates the hydration of cement, consequently improving concrete’s strength development  and mechanical properties. In this blog, we’ll explain to you the process and advantages involved in the steam curing of concrete.

What is Steam Curing of Concrete?

Steam Curing of Concrete

Steam curing is a controlled process that involves curing freshly placed concrete in water vapour. This process is performed either under high-pressure steam or atmospheric pressure. When the concrete is exposed to a specific temperature and pressure, a humid environment is created. This provokes the chemical reactions essential for concrete hardening.

curing is preferred to speed up the hydration process and strength gain. It is particularly helpful in regions where the temperature is extremely low.

How Does the Steam Curing Process Work?

The steam curing process promotes the chemical reaction between cement and water, which is vital for concrete hardening. During this process, the production of calcium hydroxide and calcium silicate hydrate (C-S-H) compounds contributes to achieving the desired strength and durability.

Under normal conditions, this process will be slower and consume more time for curing. However, with steam curing, the increased temperature enhances the rate of hydration and obtains the required properties quickly.

This process includes several stages, which are mentioned in the following:

  • The initial delay before the streaming process: Exposing the freshly placed concrete under high temperature for 180 minutes. It creates a good environment, promoting the hydration of concrete. It may occur for a few hours after casting. This treatment prevents thermal shock and cracking.
  • Increasing temperature process: In this phase, the temperature is gradually increased to 60 degrees Celsius and maintained for an approximate period of 120 minutes. Rapid heating is strictly avoided to prevent potential cracking and thermal gradients.
  • Maximum temperature phase: During this stage, the curing temperature reaches the maximum temperature of more than 70 degrees Celsius , and is maintained for  around 120 minutes.
  • Decreasing the temperature range: The concrete elements are set to cool down for a time period of 120 minutes until they reach the ambient conditions. This controlled cooling process prepares concrete to withstand thermal stress and minimises the risk of cracking.

Methods of Steam Curing Concrete

There are two significant methods involved in the steam curing process:

  • Steam curing at atmospheric pressure
  • High-pressure steam curing / Autoclaving

Steam Curing at Atmospheric Pressure

This steam curing method is performed within the temperature range of 70 to 90F per hour. However, it depends upon the size and shape of the concrete element. This is a standard and effective method, employed for the production of precast concrete components.

It is simple and budget-friendly, suitable for various applications in the construction industry. In order to achieve the determined strength, the start-to-end process should be curated with utmost control.

High-Pressure Steam Curing / Autoclaving

The autoclaving method is best for small manufactured units. It involves curing concrete at high pressure and temperature. The process is performed at a temperature range of 160 to 180 degrees Celsius and a pressure range of 80 to 170 psi.

High-pressure steam speeds up the hydration process, resulting in high early strength. This method is specifically used for autoclaved aerated concrete blocks containing excellent thermal insulation properties.

What are the Advantages of Steam Curing of Concrete

Advantages of Steam Curing of Concrete

Steam curing concrete offers numerous advantages over traditional curing methods, which are uncovered below:

Early Age Strength

Steam curing is known for its enhanced early-age strength. It is crucial for construction projects with strict deadlines. This strength enhancement significantly accelerates the production, installation, and transportation of concrete elements.

Improved Durability

Steam curing of concrete promotes the hydration process, resulting in long-term durability. The quickened curing process develops a dense microstructure It helps concrete to resist chemical and weather attacks.

Rapid Strength Gain

One of the significant benefits of the steam curing method is a quicker strength gain. This is crucial for quicker removal of formworks and enhances the overall productivity of precast components.

Utmost Control Over Curing Conditions

With better control over steam environments, the crucial factors like humidity and temperature of the process are carefully curated. It ensures uniform curing and prevents the impacts caused by uneven curing.

Applications of Steam Curing Concrete

The high early strength and accelerated curing process of steam curing make it suitable for various applications, such as:

  • Prestressed Concrete: Prestressed concrete elements, which endure high tensile stress, significantly benefit from steam curing by gaining early strength. It is vital to apply prestress and handle the products efficiently.
  • Bridge Construction: Bridge construction is more critical than other projects, which requires early strength and durability. Rather than a rapid hydration process, steam curing helps produce and install the segments quickly.
  • Autoclaved Aerated Concrete (AAC): As mentioned earlier, the autoclaving method helps produce AAC blocks and panels. They are lightweight and widely used in modern construction projects. AAC blocks offer excellent thermal insulation that can withstand cracks.
  • Precast Concrete Production: The steam curing method efficiently supports the production process of precast concrete elements, like beams, pipes, slabs, and columns. Its rapid strength gain property allows for quick mold turnover.

In a Word

Steam curing is a reliable and cost-effective technique that enhances the overall curing process. This method not only helps achieve rapid strength but also promotes durability and versatility. By carefully controlling the temperature and humidity range, the technique provides uniform curing throughout the process. Based on the application, the inherent properties are adjusted with enhanced energy efficiency and quality.

1. What is the primary reason for using the steam curing method?

Steam curing of concrete is a commonly used technique in modern construction projects. They help improve durability, energy efficiency, rapid strength gain, and reduce shrinkage on the walls.

2. What are the different phases involved in steam curing?

The steam curing process is performed under four different phases, such as
* Pre-streaming
* Heating
* Constant temperature, and
* Cooling

3. Is steam curing suitable for all climatic conditions?

Steam curing is particularly beneficial for construction in cold regions, where  the air curing is very slow. It fastens the hydration process of concrete and accelerates the strength gain.

Top 10 Vastu Plants for Prosperity and Positivity 

0
vastu plants

‘Plant seeds of happiness, hope, success, and love; it will all come back to you in abundance. This is the law of nature.’

Creating serenity in our living space is an art. This art is classic wisdom that has been, passed down through generations. Vastu Shastra, an ancient Indian science that  literally means ‘science of architecture,’ deals with the principles of design, layout, measurements, ground preparation, space arrangement, and plants. It emphasises the importance of integrating architecture with nature in our living space for positive vibrations. Vastu plants have an aesthetic appeal that can influence harmonious and peaceful living. It is capable of attracting positivity and promoting  our well-being.

In this article, let’s explore various vastu plants and their benefits. Keep reading!

Vastu Shastra Plants

Vastu Shastra Plants

In this trending world, people fail to pay attention to vastu, without realiszing that it can be a game changer. Vastu plants, a key element in Vastu, connect our living space with nature by enhancing their aesthetic quality and adding charm to our good fortune. There are many vastu plants available in the market. The top 10 vastu plants for home are given below, which gives prosperity and positivity.

1. Money Plant (Epipremnam Aureum)

The money plant, scientifically known as ‘Epipremnam Aureum’ is a popular indoor plant, believed to carry fortunes because of its purported capability to entice wealth and prosperity. According to Vastu, it should be placed in either the north or northeast direction of your home. The money plant’s vibrant greenery leaves symbolise financial growth and abundantly enhance economic prospects. It is considered a good luck plant because it can amplify wealth and success. With low maintenance, it can thrive under low light and infrequent watering. It is easily available in almost every place or can be bought from online retailers.  Thus, money plants add aesthetic looks to your indoors and bring good fortune.

 2. Bamboo Plant (Dracaena sanderiana)

As per Vvastu, the bamboo plant is regarded as auspicious and brings joy, health, good fortune, fame, peace, and positive energy. It is believed that if this plant is placed in the east or south- east direction, either in the bedroom or living room, it can promote health and happiness. It can enhance the touch of natural beauty indoors. This plant can be gifted to your well-wishers, friends, and relatives.

3. Rubber Plant (Ficus Elastica)

The rubber plant is favourable and promising, if it is planted inside the home. According to Vastu, this plant must be placed in the southeast direction for better financial prosperity and commercial success. This plant is capable of removing negative energy and purifying the air. It can create a harmonious environment and prosperity by protecting against any losses, both financially and economically. Remember, if this plant is placed in the wrong direction, then it can bring bad luck too.

4. Snake Plant (Sansevieria Trifasciata)

Snake plants are considered to be a great source of positive energy and a familiar choice for indoor ambience. According to Vastu, it holds a significant property and ability to purify the air when placed near a window. It can be placed in the south, east, or southeast direction for good spiritual and mental growth. The snake plant is an ideal option for people who have less gardening interest, because it needs less care to flourish This plant is known for its  air-purifying properties, which can easily absorb formaldehyde and benzene from the air, and improve air quality.

5. Jade Plant (Crassula ovata)

The jade plant, also termed as ‘money tree,’ brings luck, growth, and symbolises prosperity. As per Vastu, it should be placed in the east direction of your indoor. It is believed that the Jade plant can enhance friendship. It can attract wealth and influence abundance.

6. Tulsi Plant (Ocimum tenuiflorum)

The Tulsi plant holds significant spiritual and medicinal value in both vastu and Ayurveda.  According to Vastu, it should be placed in the north or northeast direction. It can remove negative energy and offers an enormous amount of oxygen. They are rich in antimicrobial properties and widely used in traditional medicine, especially in home remedies. It can enhance your well-being and aids in providing oxygen supply.  

7. Aloe Vera Plant (Aloe vera)

Aloe vera plant is regarded as the best vastu plant since it contains medicinal and air-purifying properties. It should be placed in the north or northeast direction, for it can promote health, prosperity, and harmony. It is also used in Ayurveda and provides multiple benefits in skincare, digestion, and air purification. It is good for environmental sustainability as it can absorb large quantities of carbon dioxide and release an equal amount of oxygen.

8. Lotus (Nelumbo nucifera)

As we all know, lotus is affiliated with the Goddess of wealth, Lakshmi, and Buddha. As per Vastu, Lotus must be placed in front of the home to get all the benefits. It can be placed inside the home too. This plant is one of the most auspicious vastu plants that brings wealth, prosperity, and positivity. It indicates strength, morality, and purity.

9. Jasmine

Jasmine has a sweet fragrance that can ease any mental stress. Jasmine plants, also known as chameli flowers, attract positivity and promote harmony. According to Vvastu, inside the premises of the home, this plant must be placed in a south-facing direction, whereas outside the home, it should be placed in the north or northeast direction. Its cool fragrance can uplift love and romance.

10. Chrysanthemum

The stunning yellow Chrysanthemum promotes happiness, brightness, optimism, brilliance, and confidence. This plant attracts harmony and good luck. It should be placed only in the living room, not in the bedroom. This plant was widely used for decoration since it can enhance spiritual calmness. It can be gifted to others.

Plants to be Avoided, According to Vastu

Vastu Shastra Plants

According to Vastu, dead or dying plants should be removed immediately, as even dried flowers are considered unlucky. Avoid planting Myrtle trees since they are  considered to be evil’s favourite. Cotton plants, Silky cotton plants, Palmyra, Babool and any thorny plants around the home can bring disharmony and unluck. According to Vastu, creepers can be grown only inside the compound of the house, so letting them outside is not recommended. Planting creepers in front or center of the home should be avoided. Milk-bearing plants like Peepal, Banya, Mahua, and Milky sap plants must be avoided.


Conclusion

‘May your life be like a wildflower, growing freely in the beauty and joy of each day.’ 

Thus, in terms of good luck, prosperity, and positivity, vastu plants play a vital role in our home. It makes you relax from and stress. Connect yourself with nature. Happy Planting!

FAQ

1. What is Vastu, and how is it related to plants?

Vastu Shastra, an ancient Indian science, literally means ‘science of architecture’ and deals with the principles of design, layout, measurements, ground preparation, space arrangement, and plants. It emphasises the importance of integrating architecture with nature in our living space for positive vibrations. Vastu plants have an aesthetic appeal that can influence harmonious and peaceful living. It is capable of attracting positivity and promotes our well-being. Each plant has some specific qualities that align with vastu principles.

2. Why are specific directions preferred for placing Vastu plants?

Each direction  such as North, South, East, Northeast, and Southeast, is considered auspicious since they are associated with certain principles like positivity, prosperity, harmony, good luck, and health.

Disadvantages of Interlocking Bricks

0
Disadvantages of Interlocking Bricks

We can see that many innovative and advanced techniques have been introduced and used in the construction industry through the ages to ease construction work and make it more effective. Traditional bricks have been used in construction work for a long time. They are made from mixing clay, water, and lime. An alternative to these is interlocking bricks, which have  their own set of benefits and disadvantages. 

Interlocking Bricks

Interlocking Bricks

Interlocking bricks got their name because these bricks work according to the lock and groove method. They are manufactured with a specialised design that has the ability to lock into each other without mortar (mortar refers to the mixture of sand, cement, and water used to fill gaps in the traditional bricks) or cement.There are many types of bricks being used for various construction activities, such as building construction, pavement installation, and other decorative needs. Although these bricks are considered for easy installation, low maintenance, and durability, they also have disadvantages that should be taken into account.

Disadvantages of Interlocking Bricks:

  1. High initial cost: Interlocking bricks are more expensive than traditional bricks due to their larger size, and they are also manufactured using high- quality materials, which results in a high cost.
  2. Risk of pest infestation: As there is no plastering needed, there will be minor gaps or fissures between bricks. This becomes a breeding ground for pests like ants, wasps, and beetles. They started to dwell and breed in the fissures, which led to the structural disintegration of bricks.
  3. Not suitable for high-level buildings: The absence of plastering and concrete makes interlocking bricks less durable. So, they can’t resist heavy loads.
  4. Modification issues: Interlocking bricks require proper base preparation, and they are locked into each other. So, it is difficult to make any changes or alterations in a particular area, which can collapse the entire construction.
  5. Prone to weather damage:During heavy rain, interlocking bricks are more prone to waterlogging as water can’t escape through the surface. In extreme heat conditions, they are also exposed to fading.
  6. Risk of weed growth: Weeds can grow easily after heavy rain if the soil has moisture and nutrients. Soil and dirt accumulated in the small gap between interlocking bricks, along with water accumulation, can nurture the growth of weeds.
  7. Limited load-carrying capacity: These bricks can’t withstand heavy loads as there is no concrete mixture for stability. They have gaps, which can compromise the overall strength of the construction.
  8. Hard to clean: As they have fissures and gaps on a rough surface, soil and dirt can easily penetrate between them. They are susceptible to other dirt like grease, oil, and food waste, which can make the cleaning process more challenging.
  9. Limited availability of colours and designs: Manufacturing  of interlocking bricks is a tedious process, and it needs quality materials and more time. So, achieving colours and various designs is challenging in the production.
  10. Not suitable for all drainage systems: These bricks lack water drainage due to their size and can’t withstand heavy waterflow. Therefore, they are not advised to use in wet areas like bathrooms and other garden spaces.
  11. Noisy installation: Installation of interlocking bricks can create a noisy environment due to cutting, trimming, and hammering of bricks.

Mitigating the Disadvantages: Effective Solutions

Interlocking Bricks - disadvantage
  • Use high-quality and high-strength interlocking bricks to attain durability and structural integrity.
  • Pest  infestation can be prevented by sealing bricks and by using pest-resistant paints or coatings. Gaps can be sealed by using sealant materials such as silicone or polyurethane.
  • As interlocking bricks can’t withstand heavy loads, use them in less-traffic areas where there are fewer heavy vehicles. It is suitable for narrow streets and pedestrian areas with limited vehicular access.
  • Drainage issues can be resolved with slope bricks, which ensure water runoff without logging.
  • It is advisable to use weather-resistant or cooling coatings. To prevent these bricks from fading, they can be used in sheltered areas like school and college halls, auditoriums, bus stands, railway stations, and so on.
  • Regular maintenance and cleaning can help prevent weed growth.
  • To minimise the noise level of installation, it is recommended to install bricks during less busy times. Using noise-reduced equipment and sound barriers can also help reduce noise.
  • Regular sweeping, pressure washing, and using weed and sand removal tools can help to maintain a clean surface.
  • Interlocking bricks are not suitable for high-level buildings, but they are greatly suitable for pathways, garden passages, courtyards, and outdoor spaces. Because they are non-slip and can resist heavy foot traffic.
  • These bricks are available only in limited colours, but they can be painted or coated with specialised materials to get an aesthetic appeal.

Conclusion

Interlocking bricks have several benefits and also some drawbacks. The possible disadvantages and the ways to mitigate them using different techniques have also been discussed here. By understanding the applications and challenges of interlocking bricks as well as other key factors, it is possible to attain a solution for construction projects.

FAQs

1. Are interlocking bricks prone to cracking?

Yes, interlocking bricks can crack due to extreme weather conditions, heavy loads, and poor base structure.

2. Are interlocking bricks suitable for high-rise buildings?

No, they are not suitable for high-rise buildings; they can’t withstand heavy loads.

A Comprehensive Guide to Superstructures in Construction

0
Superstructures

In the context of construction, the structure of the building is important for achieving stability and strength. There are two major structural portions in building construction: superstructure and substructure. Let’s explore further the details of the superstructure in this article. Keep Reading!

What is a Superstructure?

Superstructures

In construction, superstructure refers to the elements of the building visible above the ground, including floors, walls, roofs, columns, beams, arches, terraces, and other elements. They form the main usable spaces of a building. The superstructure is placed on the substructure, which gives the stable structure for the building.

Components of Superstructure in Building Construction:

  • Floor: A floor refers to a horizontal, flat structure typically made of concrete, which separates different sections of a superstructure into different floors or levels. These surfaces are usually finished with materials such as wood, tiles, marbles, or carpet.
  • Walls: Walls refer to enclosed vertical structures built with materials like brick, concrete, block, wood, or steel. They provide privacy by closing open spaces and separate different rooms in a building. They are usually finished with paint, plaster, or panelling. Walls also carry loads of slabs and roofs.
  • Roofs: A roof refers to the horizontal plane surface constructed with materials like concrete, slates, wood, metal, and so on, which provides protection from environmental factors. Roofs are parallel to ground floors, and they can act as floors for the level above. 
  • Beams and columns: These are horizontal and vertical elements connected to each other. They carry the loads from the other building elements, including walls, floors, and roofs, and transfer these loads to the foundation. They work together to provide safety and stability.
  • Parapet: A dwarf wall raised upward from the edge of a roof, terrace, or balcony to prevent accidental falls, block and redirect pouring rain water or wind, and provide extra support for the building.
  • Lintel: A horizontal beam that covers over two vertical supports, such as doors, window frames, or other openings, to bridge the space and carry the load between them.
  • Doors and windows: They are openings created intentionally in the wall or steel structure to allow entry, exit, ventilation, natural light, and to see the external world.
  • Sunshade: A building element that is raised above windows, doors, or outdoor spaces, which helps protect occupants from direct sunlight.
  • Staircase: A series of steps and landings that provide access to other floors by connecting them.

Functions of Superstructure in Construction

Functions of Superstructure in Construction
  1. Supporting weights: They carry the weight of buildings and residents and bear other external pressures like wind and snow.
  2. Providing space: Confined spaces provide privacy to occupants and also protect them from environmental factors.
  3. Defining spaces: Superstructural elements provide space for various activities by dividing a space into different rooms for allocated purposes. 
  4. Supporting services: They create  the space to provide plumbing services, electricity connections, and other utilities
  5. Aesthetics: The occupier’s aesthetic needs are fulfilled with some decorative elements on the ceiling, roof, threshold, windows, etc.
  6. Safety and security: Proper structural elements, including enclosure features like grills, door locks and railings, provide safety and security.
  7. Resisting forces: Walls, roofs, and doors act as resisting forces against natural forces like wind, sunlight, and rain. They also protect occupants from external agents such as animals and insects.

Types of superstructures

There are two main types of superstructures. They are:

  1. Load-bearing superstructure: Walls, floors, and roofs take the complete load and support their own weight. There are no separate frames used for carrying loads. This construction method is simple and affordable, but it is only ideal for low-level buildings. It has low load-carrying capacity, is more prone to cracking, and is less resistant against natural disasters like earthquakes and landslides.
  2. Framed superstructure: In this construction method, a framework with columns, beams and floor and roof slabs is constructed. They carry both vertical and horizontal loads. It is more expensive than a load-bearing structure but has strong resistance to natural forces. Life span is dependent on the quality of construction.

Materials Commonly Used in Superstructures:

  • Masonry units (bricks, blocks, stones)
  • Steel (beams, columns, frames, windows)
  • Concrete (floors, roofs, columns, beams)
  • Timber (walls, doors, windows, roofs, furniture)
  • Aluminium (doors, windows, roofs)
  • Glass (doors, windows, partitions)

Cost Factors For a Superstructure

The cost of a superstructure depends on various factors, such as: 

Materials used: The quality and quantity of materials used. Materials such as steel, aluminium, and glass are high in cost compared to concrete, brick, plywood, vinyl, or PVC products.

  • Design: Increased complexity in decorations and intricate geometrical curves require skilled labour and high-quality products, which can raise the cost.
  • Local regulations and permits: The location of a site, whether it is a municipality, corporation, or village, can determine the expenses because taxes, transportation charges, and permission fees vary from place to place.
  • Size and scale: Larger and taller structures require more materials and manpower.
  • Construction choices: According to the preferences for construction methods, whether cast-in-place or precast concrete, modular or prefabricated construction can affect cost. 
  • Quality and finish: High-quality finishes using specialised and rare materials can increase the cost

Conclusion

In construction, the superstructure is a crucial component of any building because it provides function, form, and enhanced appeal. The choice of materials, skill of labourers, construction methods, financial resources, and location of the site altogether contribute to athe well-defined superstructure. The superstructure, which is carefully designed and skilfully constructed, provides durability, safety, and stability for any building in the long term.