Home Blog Page 48

Wall Cracks: Causes, Types, and Effects on Your Building

0
Wall Cracks

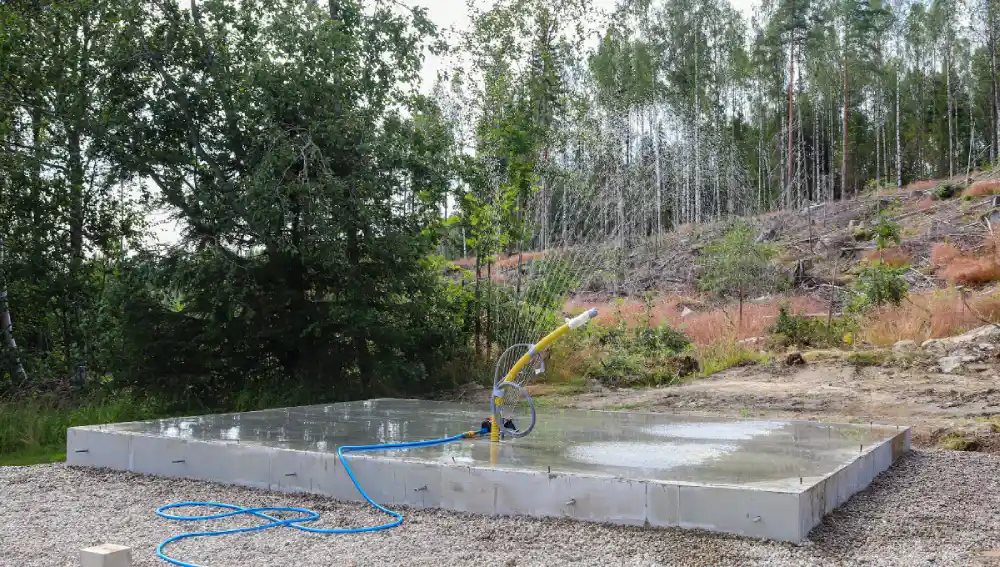
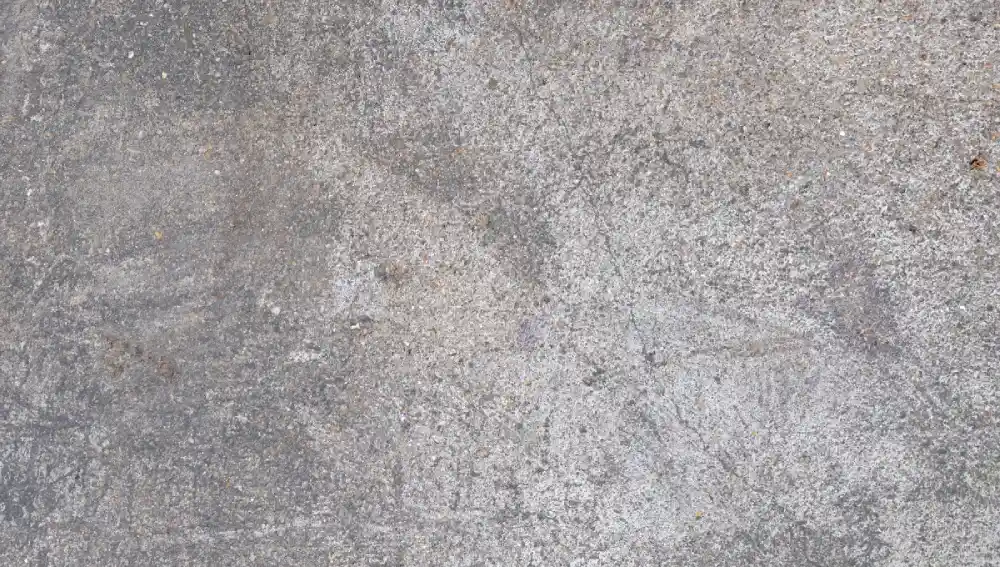
What causes cracks in the walls? There are several reasons for cracks in walls. For example, structural issues are caused by the contraction and extraction of the materials used in construction. Or simply a minor problem, which includes hairline cracks. These can be fixed by using fillers and paints. These cracks are a result of temperature change and moisture content. Various types of cracks can occur.

Types of Cracks 

Types of Cracks 

Vertical Cracks 

Vertical cracks are typically straight hairline cracks, though they can become slightly wider. Concrete must be prepared using the proper techniques and materials to avoid this. 

Causes of vertical crack: 

  • When plaster expands during drying, it can lead to shrinkage. This is due to humid conditions. This can be fixed using paint and filling. 
  • Vertical cracks are also caused by foundation settling. This is due to the soil movement, which can affect the support of the building. This needs serious attention. 
  • The seasonal changes can cause the soil to expand and contract. It can result in flooding and lead to cracks in the walls. 

Horizontal Cracks

The horizontal cracks are an indication of a wall failure. This needs proper immediate attention.

Causes of horizontal cracks:

Poor soil 

Wet or dry clay-rich soil has the feature of expanding and contracting. This causes pressure on the foundation walls, which can lead to cracking.

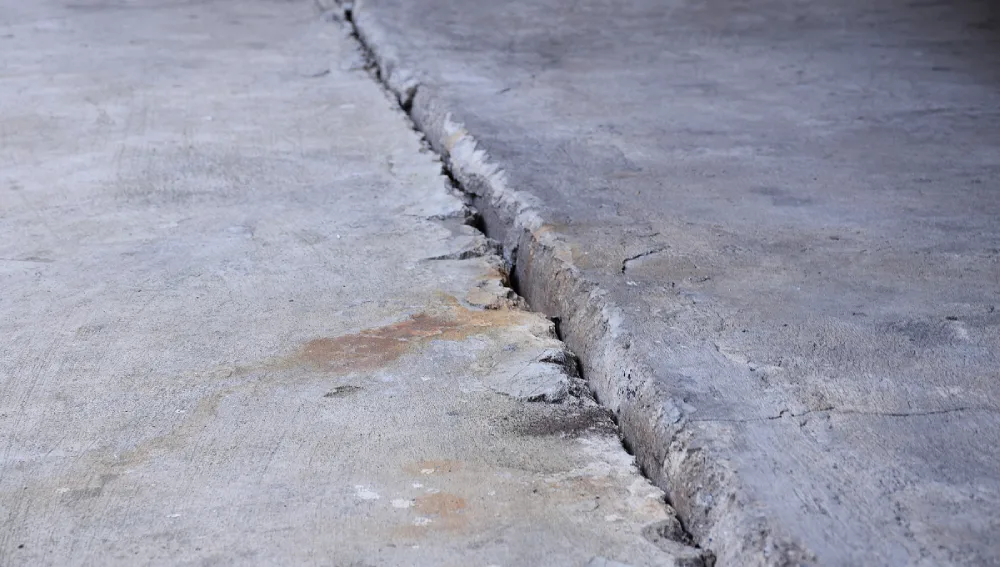
Hydrostatic pressure 

The excess water occurs due to poor drainage. This affects the foundation of the building and builds pressure. This pressure causes cracks in the foundation wall. 

Chemical reaction 

A chemical reaction includes the corrosion of metal. It can alter the structure of the walls, causing cracks over time. 
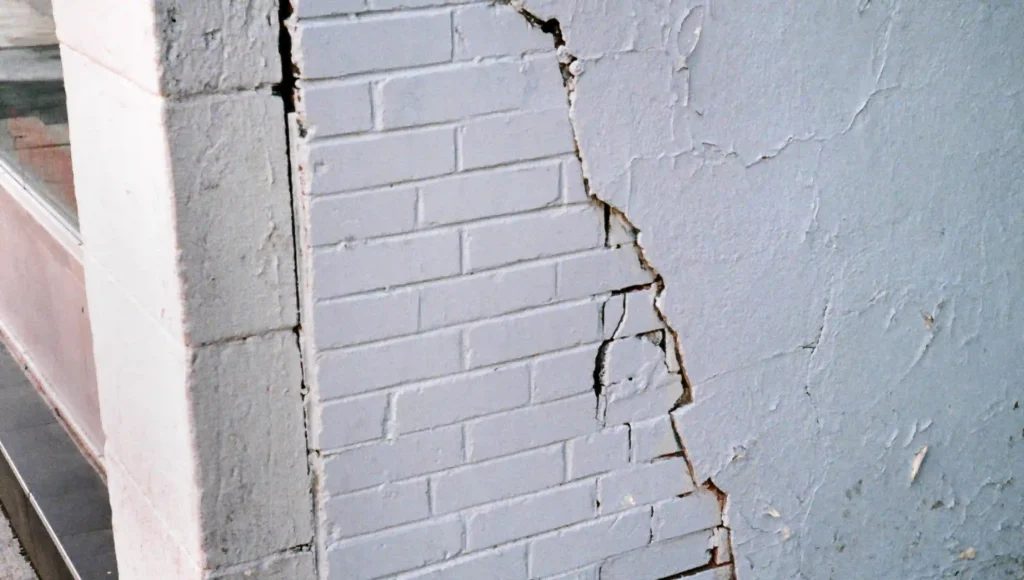
Diagonal Cracks 

Diagonal cracks are often referred to as shrinkage cracks due to the concrete’s contraction during the curing process.

Causes of diagonal cracks 

Structural deterioration 

The diagonal cracks often occur in concrete due to concrete shrinkage. This is also called a shrinkage crack. Poor soil conditions during construction can lead to such issues over time. 

Brick walls 

When stress distribution is uneven in brick walls, diagonal cracks form. These are load-bearing tracks and can commonly occur near windows or doorways.

Reasons for Cracks in Walls:

Reasons for Cracks in Walls

Foundation Settlement

If the soil underneath a structure fails to support the building’s weight, cracks less than 1.5 mm thick may appear. Stabilizing the structure using appropriate methods can prevent these cracks. This is seen as vertical or diagonal cracks in the windows or doors.

Thermal Expansion and Contraction 

Temperature variations cause thermal expansion in concrete. When there is a change in the moisture content of the air, it leads to temperature variation. Expansion or contraction occurs in these materials. Expansion is due to heat, and contraction is due to the cooling effect. This can lead to stress on the walls. Usually, hairline cracks appear in a horizontal or stair-like pattern.

Moisture Infiltration 

Flow of water or moisture fluctuation can result in cracks in the building. Water flow into the building material can cause it to expand. Water intrusion can weaken material strength, and when moisture evaporates, gaps can form, leading to issues such as bulging, peeling paint, and mold growth.

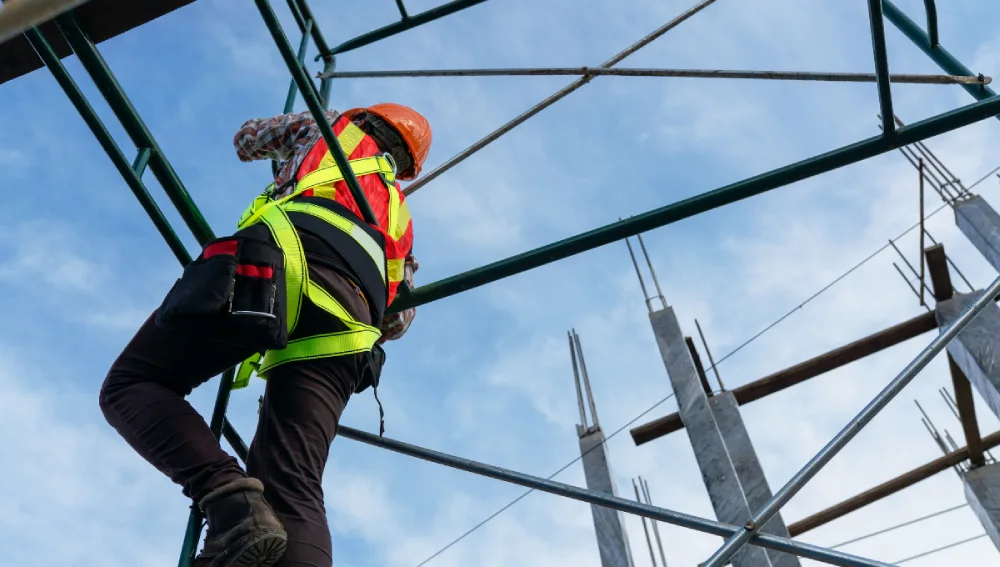
Poor Construction Practices

When the materials used in the construction, like sand and cement aggregate, are poorly mixed, it causes cracks. Proper load support design, including adequate steel reinforcement, is critical; inadequate support can lead to cracks. Other factors include improper curing, low-quality materials, and poor workmanship.

Soil Shrinkage 

The movement of soil can cause high stress on the foundation of the construction. Its expansion and contraction with changes in weather conditions can cause cracks in the walls. 

Vibration and External Forces 

Vibration caused by heavy machinery, nearby construction, and traffic can cause external forces. These forces lead to creating stress and tension on the building walls. It results in developing cracks over time.

Load Bearing Issues 

The load-bearing walls, such as pillars, need adequate support. When there is an excessive strain or inadequate support, it can lead to poor load bearing. This causes cracks in where walls meet ceilings as a sign of load-bearing issues. 

Seismic Activity 

The regions that are prone to earthquakes affect the building. It has increased stress, which results in cracks in the walls. Buildings in such places must be designed to withstand these seismic forces. 

Improper Curing of Concrete

Curing is a process that occurs in the preparation of concrete. If the concrete does not dry and harden properly, it has a high risk of developing cracks. It fails to provide the necessary strength and durability that the concrete requires. 

Plumbing Leaks 

Water leakage from pipes and drainage systems can cause structural damage. If water leaks between the concrete particles, it can weaken its material strength. This results in cracking of the walls. 

Lack of Maintenance 

Negligence and improper maintenance of construction can lead to crack occurrences. Filling the cracks and gaps with paint and adequate material is essential. Addressing the moisture issues will help prevent cracks. 

Structural Overloading 

A building must be designed according to its capacity. Overloading the construction can result in cracks in the walls. For example, shifting from residential buildings to commercial use can be inadequate. 

Overloading of Floors 

The excessive weight more than the building can hold leads to increased stress on the lower walls, which results in cracks. Upper floors, which are excessively weighted, cause increased pressure on the building. 

Wind Loads

High winds can cause pressure on the building. Any construction near windmills or seashore can experience high tide winds. This causes increased tension on the surface of the walls. It results in introducing cracks.

Differential Thermal Movement 

The expansion and contraction that occur in different buildings at different rates also experience a variation in the temperatures. The joints of the building can cause movement between the different materials used for construction. 

Chemical Reaction 

Chemical reactions have a severe impact on the walls of the building. The highly reactive chemicals can cause expansion and cracking of the walls. This can highly risk the building structure and its quality.

Poor Installation of Doors and Windows 

Proper workmanship when installing doors and windows during construction is important. The corners of windows and doors are more prone to crack occurrence. These are places where stress is more concentrated and requires proper attention. 

Inadequate Waterproofing 

Always notice that the walls have adequate waterproofing. The walls are more prone to water-related damage due to moisture infiltration, which can lead to the cracking of the walls.

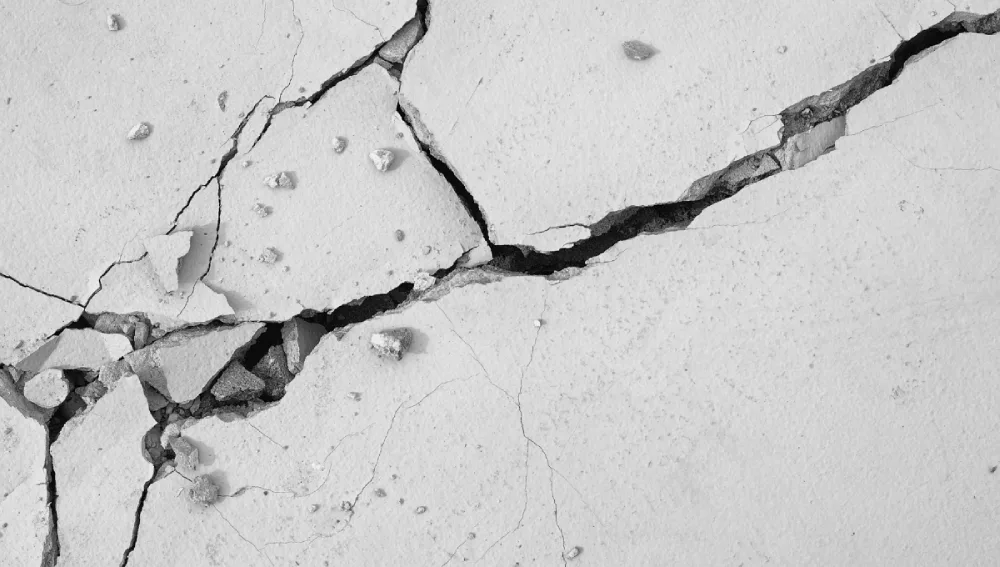
Effect of Cracks in the Walls 

  • The cracks indicate that there is structural damage, which is an underlying problem. For example, foundation problems can affect the strength of the construction. 
  • Visible cracks can make the building look less attractive, reducing its aesthetic value.
  • Cracks in the building can also reduce the property’s market value. The reasons are an indication of poor construction. Pests in the building can also lead to cracks.

Conclusion

Understanding cracks in the wall is essential in taking safety measures and preventing the building. Identifying the cause of damage in the building. Cracks are seen in both old and new buildings. They are not different, but we must take necessary and immediate actions. This helps prevent the spread of the cracks further. Cracks may pose a serious problem. While some cracks may pose a serious risk to the structural integrity of the entire building, others may be superficial and easily remedied. Determining the crack helps in choosing the appropriate method to fix the damage.

What Is Spalling and How to Fix It?

0

Spalling means that the concrete is breaking apart, which can make surfaces look bad and become weaker. By knowing how to spot and fix spalling and taking steps to prevent it, you can maintain the safety and appearance of your concrete structures and surfaces. In today’s Brick & Bolt blog, you are going to understand the basics of spalling, including what it is, what causes concrete spalling, how to recognize the signs, the effects it can have on structures, and much more.

What Is Spalling?

Spalling is the term used when the concrete breaks into little pieces or flakes off the surface. Can you imagine having a smooth, solid surface and chipping away parts of it, leaving unsmooth patches and holes? That is exactly how spalling happens. This problem occurs in many concrete forms on buildings, bridges, sidewalks, and even driveways. If spalling occurs, the surface will not only look bad but also weaken over some time.

Concrete Spalling: What is it?

Concrete spalling is characterized by the flaking or chipping off of surface layers of concrete. This can make concrete appear uneven and jagged. In its more advanced stages, you will notice actual spots with missing concrete, possibly exposing stone or aggregate. Such surface damage poses safety risks and compromises the durability of the concrete.

Causes of Concrete Spalling

Several reasons may lead to concrete spalling: Here’s a closer look at some common reasons:

CauseExplanation
Corrosion of ReinforcementConcrete reinforcement mainly contains steel bars to provide additional support. As the steel bars corrode, they increase in volume, hence bursting the concrete in which they are contained and resulting in the detachment from the concrete.
Freeze-Thaw CyclesWater can penetrate concrete, and upon freezing, it expands. The expansion of ice forms cracks in concrete. Once ice thaws, the cracks increase in size, which leads to spalling.
Fire ExposureHeat from a fire will convert the water contained within the concrete into steam. Steam generates pressure, and this pressure can lead to the cracking and spalling of concrete.
Poor Concrete MixA poorly proportioned concrete mix, whether excessive or insufficient in ingredients, can reduce strength and make it more susceptible to spalling.
Chemical ExposureChemicals such as salt or acid can have a chemical reaction with the concrete; it break down the cement matrix of the concrete, making it brittle and crack.
CarbonationThe carbon dioxide in the atmosphere reacts with the concrete, which becomes weak. This is an untreated phenomenon famously referred to as carbonation, which can eventually cause spalling.

Signs of Concrete Spalling

It’s important to notice the signs of spalling early to fix it before it gets worse. Here are some signs to watch out for:

SignDescription
Flaking or ChippingSmall concrete pieces will start to come out of the surface, opening up gappy areas and some uneven patches.
CrackingThere will be visible lines or cracks on the surface. Those cracks may extend and develop more spalling if not repaired.
Exposed AggregateThe inner stones or gravel of the concrete are exposed as the outermost layer of the concrete flakes away.
DiscolourationIn the concrete, there is a change of colour whereby it appears with whitish hues in some parts as if the colouration has become pale or washed off, which may be indicative of further damage inside.
Pitting or PockmarksSmall holes or indentations around the surface can make the concrete appear damaged and rough.

Effects of Concrete Spalling

Spalling can have several negative effects on concrete surfaces:

EffectDescription
Weakened StructureSpalling could weaken the strength of the concrete to the extent that it would lose the capacity to support weight and resist stress applied to it.
Increases Moisture ProblemsFurther saturation of the affected areas can increase degradation and can lead to water damage.
Reduces StrengthAs the concrete deteriorates, its ability to hold up against forces and pressure decreases, making it less reliable.
Exposes ReinforcementWhen the outer layer of concrete is gone, the steel bars inside can become exposed and rust, further weakening the structure.
Aesthetic IssuesThe surface can become uneven and unattractive, affecting the appearance of the structure or pavement.

How can I Repair Concrete Spalling?

Repairing concrete spalling depends on how serious the damage is. Here are some ways to fix it:

Repair MethodDescription
Surface PatchingMinor damages require the area to be cleaned and subsequently filled with a special patching material that is made up of concrete. This method is good for minor, small cracks and surface flaking.
Full-Depth RepairFor more serious damage, the failure concrete should be removed and replaced by new concrete. It involves removing the defective concrete and then replacing it with a new one.

Steps for Surface Patching

Clean the Area: Remove any of the affected concrete and dirt by wiping with a wire brush or by using a pressure washer.

Prepare the Surface: Before coating with the patching material, the area should be wet so that it is better to stick onto the surface. You may have to use a grinder or perhaps a chisel.

Apply Patching Material: Again, for the spalled area, you can use a concrete patch repair mix, which can be bought from the local hardware store. Follow the instructions well if you want the best results from your work.

Smooth the Surface: Finish off the repair by levelling the patch with the surrounding concrete using a trowel or even a putty knife to minimise its visibility.

Cure the Repair: Let the patch dry and set it according to the instructions. Keeping the patch moist while it dries can help it set properly.

Steps for Full-Depth Repair

Remove Damaged Concrete: If possible, take off the deteriorated concrete and move it up to sound concrete and ensure that all the loose concrete is pulled out during the process.

Prepare the Surface: Roughen the surface on portions where new concrete is to be poured. These have the capability of making newly formed concrete have a very good bond with previously formed concrete.

Add Reinforcement: If needed, place new steel bars or mesh inside the prepared area to add strength.

Fill with New Concrete: Pour new concrete into the prepared space, and level it using a trowel so that it is at the same level as the existing surface of the structure.

Finish and Cure: Let the newly placed concrete harden and cure well. This may involve the process of covering the concrete with moist fabric and keeping it applied for several days.

How can I Prevent Spalling?

Preventing spalling is easier than fixing it later. Here are some steps to help keep your concrete in good shape:

Prevention MethodDescription
Use Proper Concrete MixMake sure the mix of concrete has the proper proportions of cement, sand, and water. This provides you with an assurance that the resulting concrete is strong and less likely to spill.
Cure the Concrete WellMaintain wet conditions during the setting and hardening phase. This may be done by covering it with wet burlap or polyethylene sheeting.
Avoid Excess WaterWatering too much water in the mix will weaken the concrete obtained and could even cause it to spill. Only the minimum quantity of water required must be applied.
Protect from ChemicalsUse special coatings or sealers to protect concrete from harmful chemicals that can cause damage.
Regular MaintenanceRoutine inspection of the surface of concrete and minor defects should be done on time before they develop into hitches. Otherwise, various defects in concrete, including spalling, can be prevented by periodic maintenance.

Conclusion

Although concrete spalling can be a major issue, understanding what it is and how to solve it can help you maintain your concrete surfaces. When you know its causes, observe the symptoms, and undertake repair and preventive measures, your concrete will always look good and serve you best.

What Does Grade 33 Cement Indicate?

0
Grade 33 Cement

Cement is the fundamental material that is used in construction. It can hold other materials, like gravel or sand, to form concrete and motor together by acting as a binding material. It is considered essential material for the construction of buildings, roads, bridges, and other infrastructure projects. However, not all types of cement are manufactured using the same method and material. So, knowing about the different grades of cement is important for making sure that the construction is safe and successful.

The different grades of the cement refer to the strength of the cement and are determined by compressive strength that is obtained in 28 days of curing. The common grades of cement are 33, 43, and 53, and each number mentioned in their names indicates the strength of the cement. Among these grades, grade 33 cement can be considered a stable cement used in construction, and they have their own roles and characteristics. This blog will provide you with information regarding what Grade 33 cement is, its properties and applications, and its advantages and disadvantages. 

What is Grade 33 Cement?

Grade 33 cement is ordinary Portland cement. After 28 days of curing, the grade 33 cement has a minimum compressive strength of 33 MPa. They are used in plastering and ordinary masonry projects because of their excellent workability, and they are suitable in places where the highest strength is not much needed. They can be used in civil construction activities like plastering, flooring, and masonry up to M20-grade concrete. Other works like the installation of tiles and non-structural tasks like bricklaying and blocklaying can be completed using this type of cement. 

These cements are normally used in small residential and commercial construction because of their low compressive strength. Some major features of this cement are the low compressive strength and low heat of hydration that help in reducing crack-related problems. The handling and working of the cement in the masonry projects become simpler as they have reduced strength. They also help in the necessary workability for the plastering of exterior and interior walls, floors, and ceilings. They can be used flexibly because of their slower rate of strength increase. They are mostly avoided in the construction of reinforced cement concrete(RCC) because of their low compressive strength. They can be used in grouting and site restoration projects as they become stronger as time increases.

The initial setting time is 30 minutes, while the final setting time may be over 10 hours. The fineness of grade 33 cement is 225 m2/kg, which refers to particle size. The various specifications of the grade 33 cement can be seen in Indian Standard (IS) 269:2015.

Properties of Grade 33 Cement

Some of the key properties of grade 33 cement are,

Compressive Strength:

Compressive strength refers to the ability of a material to withstand axial loads without failure. It is the measure of how much load or stress a material can bear before it fails in compression. The compressive strength of this cement is minimal. It can be observed from their name that the compressive strength level is 33 MPa after curing for 28 days. They can be used in applications where there is no need for extreme strength.

Fineness:

The fineness of grade 33 cement will influence how quickly it hydrates and obtains strength. Grade 33 cement has a fineness of around 300 m2/kg, ensuring that it has good workability and can help get a smooth finish in concrete application. 

Setting Time:

The setting time means the time taken for a cement to initially set and harden. Grade 33 cement has a moderate setting time, with an initial setting time of approximately 30 minutes and a final setting time of around 600 minutes.

Heat of Hydration:

Grade 33 cement has a low heat of hydration. This helps in reducing the risk of thermal cracking in large concrete structures. This property is vital during the curing process, especially in massive applications where temperature variations can significantly affect structural integrity.

Chemical composition:

The chemical composition of grade 33 cement comprises a balanced volumetric proportion of silica, lime, alumina, and iron oxide. These chemical constituents contribute to the cement’s overall strength and durability, making it suitable for a wide range of general construction tasks.

Workability:

Grade 33 cement has fine particle size and good fineness. This property of the cement makes them have excellent workability as they can be mixed and applied easily. 

Durability:

In terms of durability, Grade 33 cement will perform well in environments where extreme strength is not needed. They can provide good durability in normal environmental conditions, and they can be used for general construction purposes where extreme strength is not a primary requirement.

Applications of Grade 33 Cement

Some of the common applications of grade 33 cement are,

  • Plastering
  • Masonry Work
  • Flooring
  • Non-Structural Concrete
  • Pavements and Sidewalks
  • Mortar for Tile Installation
  • Precast Concrete Products
  • General Repairs

Advantages of Using Grade 33 Cement

  • Workability
  • Cost efficiency
  • Low heat of hydration
  • Flexibility
  • Environmental impact and sustainability

Limitations of Grade 33 Cement

  • Lower compressive strength
  • Reduced durability
  • Longer setting time
  • Not suitable for heavy load-bearing constructions
  • Limited use in high-strength concrete
  • Low lifespan and performance in harsh environments

Conclusion

Grade 33 cement can be used in various constructions where extreme strength is not needed. The application can be considered suitable for residential and small-scale commercial buildings or projects such as plastering, flooring, and masonry. This type of cement is cost-efficient, has good workability, and has low heat of hydration. As they can be a great option for non-structural works and normal repairs. However, because of their low compressive strength and reduced durability, they cannot be used in high-load bearing and critical structure applications. By understanding these properties and characteristics, you can select the proper cement for construction that can help with both efficiency and safety. 

FAQs

1. Can Grade 33 cement be used in extreme weather conditions?

Grade 33 cement can be used in moderate weather conditions, but its performance in extreme conditions may be limited. For harsh environments, higher-grade cements or special formulations might be necessary. Proper curing and protective measures can help enhance its performance.

2. What is the role of soundness in Grade 33 cement?

Soundness ensures that the cement does not undergo significant volume changes after setting, which helps prevent cracks. This property is crucial for maintaining the integrity of the applied cement. Grade 33 cement has good soundness, making it suitable for non-structural uses.

3. Can Grade 33 cement be used for tile installation?


Yes, Grade 33 cement is suitable for mortar used in tile installation. Its workability and moderate strength make it effective for non-structural tasks like tiling. Additional considerations may be needed for heavy-duty tile applications.

4. What should be considered when choosing Grade 33 cement for a project?

Consider the required compressive strength, application type, and environmental conditions. Grade 33 cement is suitable for non-structural work and general repairs. Higher grades should be used for high-load-bearing structures.

5. How does Grade 33 cement affect construction efficiency?

Grade 33 cement offers good workability, making construction tasks like plastering and masonry more efficient. Its moderate setting time provides flexibility during application. For projects with specific strength requirements, efficiency may be improved with higher-grade cements.

Pointing In Construction: What is it & Process

0
What Is Pointing In Construction

No matter how big or small your construction is, if the stability of the bricks or building blocks is not good enough, the building won’t be stable and will be prone to damage. Pointing is a procedure that is done to prevent this issue and enhance the strength and integrity of your building.

In this article, we will look into what pointing is and how it can help strengthen your building.

What is Pointing In Construction

Pointing refers to filling the gaps between brick or stone masonry with mortar or other similar materials. This is an important step in construction that ensures the building’s functionality and also increases its aesthetic appeal.

The materials you use for your mortar depend on your climate, type of brick, stone, or building block; and your desired finish. Some mortars include cement mortars, lime mortars, or hybrid mortars.

Like any other aspect of construction, pointing also has various techniques and types you can choose from. Some of these types of pointing include:

  • Flush pointing,
  • Recessed pointing,
  • Beaded pointing,
  • Struck pointing,
  • Rubbed, keyed, or grooved pointing,
  • Tuckpointing,
  • V pointing, and
  • Weathered pointing.

Pointing Process

The pointing process is considerably easy and can be completed within a short time. Below is a step-by-step explanation of how pointing is done.

Removal of existing mortar

The existing mortar on the joints is examined for any cracks or damages. Excess mortar is then raked out with a chisel, hammer, or other tools for a depth of 1 to 2 cm.

The masonry is cleaned and dampened

The debris from the raked-out mortar is removed from the exposed masonry. This includes any dust or broken mortar pieces. After a thorough cleaning, the masonry is dampened to prevent the new mortar from drying too quickly.

Mortar mix is prepared

Your preferred mortar mix is prepared. Ensure the mix is not too dry or too wet and has an even consistency.

The joints are filled by pointing

The joints can now be filled with the prepared mortar using a pointing trowel. Make sure the joints are filled with mortar and no void is left open. You can design the pointing to your desired shape or design.

Curing

The newly applied mortar is protected from heat, rain, and other external sources for a few hours. The number of hours required depends on the type of mortar used and the prevailing weather conditions. After this, the pointing requires consistent watering for a few days to cure properly.

Why Is Pointing Important?

Pointing plays an important role in protecting the structural integrity of the wall. It also protects the brick or other masonry joints from potential damage. Below are some reasons why pointing is important for your walls.

Structural integrity

If masonry is improperly executed, cracks can develop and lead to loss in the strength of walls. Pointing helps prevent this issue.

Prevents moisture and damage

Pointing prevents any gaps or cracks from appearing on the masonry joints. These cracks can cause water to get clogged in the joints, which can cause damage. Pointing prevents moisture-related damage like frost damage and structural weakening.

Insulation

Pointing reduces heat loss during winter and heat gain during summer. This can maintain the temperature of your masonry joints, reducing the impact of changing weather and creating more comfortable indoor environments.

Aesthetics

Pointing enhances the overall look of the building, especially in cases of exposed masonry. You can create designs or textures with it to add to its charm.

Preservation

Pointing protects the mortar joints from rain and damage, thus preserving the integrity of the building for a long time.

Pointing for Repair of Old and Historic Buildings

Repointing is very important for the repair of old and historic buildings. It can help remove old or damaged mortar from the joints of a wall and replace them with new mortar. This can help maintain the integrity and stability of the building.

Here are some methods of repairing old buildings with pointing.

Raking Out Old Mortar

Old mortar from the joints is raked out using a screwdriver or handsaw. The mortar is raked at least twice as deep as the width of the joint. This can give adequate space for the new mortar to be applied.

Mortar Mix

Lime mortar is usually the preferred material for repointing old buildings, due to its ability to blend well with historic aesthetics. The general mortar mix ratio used is 1:3, that is, 1 part lime and 3 parts sand. However, the ratio can change based on the requirements. The mortar must be more porous and weaker than the masonry to allow movement and moisture.

Lime should be bought in the form of putty. It should be mixed with sand and aggregate at least 48 hours before use. You can use sand from quarries and seas or crushed bricks and tiles.

You can store the mortar mix in a sealed container for more than a month. Don’t add water to the mix before the putty has to be used.

Application

Before pointing, ensure all the debris and dust are brushed off from the surface. This can help mortar stick to the joint better and dry quickly.

What Happens If You Do Not Do Pointing?

Pointing is an important step in construction that you should not miss. Even though bricks are strong and can withstand pressure, they will surely decline in the long run.

Structural damage

Not doing pointing can lead to cracks and holes in the mortar joint. This can allow water to leak and get clogged in the gaps, causing dampness and weakening the structure.

Loss in Aesthetic Value

Damaged and eroded mortar can make the building look less appealing. This can greatly affect the property’s value.

Health issues

If left untreated, mould can grow in the dampened mortar. This can cause health issues.

Conclusion

Whether you are constructing a new building or are trying to renovate an old building, ensure that you add pointing to your construction process, especially for exposed masonry surfaces. This step is essential for the longevity of your masonry structures.

Consult an expert in the field if you have any concerns regarding pointing. They will analyze your building and tell you what to do further.

FAQs

What mortars can be used for pointing?


The materials you use for your mortar depend on your climate, type of masonry, and your desired finish. Some mortars include cement mortars, lime mortars, and hybrid mortars.

How is cement mortar made?


Cement mortar is made by mixing cement, water, and sand. There is a particular ratio you must follow for each ingredient to get the best outcome.

How is lime mortar made?


Lime mortar is made by mixing lime, sand, and water at specific ratios. The common ratio for lime and sand is 1:3 (1 part lime to 3 parts sand). Water is added gradually to the mix to make the mortar.

M30-Grade Concrete Cement Sand And Aggregate Mix Ratio

0

Concrete is a base material that is primarily used in construction works. The cement feasibility depends on versatility, strength, and durability. Among different types of concrete, M30 is commonly used because of its stability and workability.
M30-grade concrete is characterized by its comprehensive strength, which must achieve 30 MPa after twenty-eight days of curing. The strength is usually measured in megapascal. This blog provides details about the importance of aggregate and M30-grade concrete.

Detailed Composition of M30 Grade Concrete

The general ratio of mixing for M30-grade concrete is 1:0.75:1.5, Which is 0.75 parts of sand, one part of cement, and 1.5 parts of aggregate. The detailed mixture of the cement is explained below:

Cement

Cement is an adhesive that holds the sand and aggregates together. For M30 concrete, the minimum cement content is 340 kg/m3. The content can differ depending on the type of work and its requirements.

Sand (fine aggregates)

Sand is a type of aggregate. Sand aggregates fill up the space between coarse and cement. The general role of sand is to improve the workability of the concrete mix and increase its strength.

  • Sand Type: The type of sand that is used in M30 is river sand. The characteristics of the M30 sand should be that it is free from impurities, clean, and has a good gradation, ensuring strength and workability.
  • Sand Content: The proportion of sand usually comprises 30 to 40 percent of the overall aggregate volume, varying according to workability and mix design.

Aggregates (Coarse Aggregate)

Coarse aggregate is the major component of the concrete. This gives stability and strength to the aggregates. The shape, size, and type of aggregate influence the properties of concrete.

  • Aggregate Type: In the M30 grade concrete, gravel or crushed stone is primarily used. The aggregate must be clean, angular, and free from dust and organic material.
  • Aggregate Size: The primary size of coarse aggregate is around 20 mm. However, the size of the aggregates can vary between 10 mm and 12.5 mm for M30-grade concrete, depending on the application and workability.
  • Content of the Aggregate: Coarse aggregates typically make up 60 to 70 percent of the total volume of M30-grade concrete. The proportions can vary based on the specific mix design needed to achieve the desired workability.

Water

Water is the basic element in the concrete mix. When water is added, the cement reacts with it and binds the aggregates. The quality of water impacts the final strength of the concrete.

  • Cement-Water Ratio: The strength and durability of concrete depend on the ratio of water used. The cement-water ratio usually ranges between 0.40 and 0.45. Reduced workability can be observed if the ratio is low, and if the ratio peaks up, then the strength will be decreased.
  • Water Quality: The water used for mixing should be of drinkable quality. It should be free from contamination.

Mix Design of M30 Grade Concrete

The mix design includes careful calculation of the proportion of aggregate, sand, and water. The mix design described below is according to the Indian Standard Code IS 10262:2019.

Steps in Mixing

The steps followed in the mixing of the components are explained below:

Mean Target Strength: The mean target strength is the anticipated total strength that a concrete achieves on the twenty-eighth day. The formula for calculating this is:

Target mean strength = characteristic strength + 1.65 * standard deviation
For M30-grade concrete, assuming a standard deviation of 5 MPa, the target mean strength is calculated as follows:
Mean target strength=30 MPa+1.65×5 MPa=38.25 MPa

Water-Cement Ratio Selection: The water-cement ratio is determined depending on the target mean strength and required workability. The cement-water ratio is typically between 0.40 and 0.45.
Cement Content Calculation: The general content of the cement is based on the required water content and the water-to-cement ratio. However, the minimum cement content is 340 kg/m3.
Aggregate Calculation: The total aggregate content is calculated via specific gravity and desired workability. Hence, the quantity of coarse aggregate differs depending on the required strength.
Trial Mix: A trial mix should be conducted frequently to make sure the desired composition has been achieved before applying them directly to the construction.

Applications of M30 Grade Concrete

There are several applications of M30-grade concrete, and some of the applications are listed below:

Reinforced Concrete Structures

M30 is primarily used in columns, slabs, foundations, and beams. It has high durability and strength, making it suitable for load-bearing applications and long-term performances.

Flyovers and Bridges

The high durability and strength of M30-grade concrete make it a suitable material for flyovers and bridges. These structures need concrete that can withstand varying environmental conditions.

Industrial Floors

M30-grade concrete is favored for industrial flooring due to its durability and ability to withstand wear and heavy loads, commonly found in warehouses and industrial settings.

Roads and Pavements

Due to its durability and strength, M30-grade concrete is used in the construction of roads and highways.

Conclusion

M30 is an excellent material that is used in construction. Its quality is determined by the primary components used to make it, including aggregates, water, and cement. Aggregates make up the largest portion of the concrete, while water acts as the binder that holds everything together. The composition of M30 concrete can vary based on its intended use, making it important to adjust the mix accordingly for different applications.

FAQs

What is the mix ratio of M30-grade concrete?

M30-grade concrete has a general mix ratio of 1:0.75:1.5.

What strength can M30-grade concrete attain on the 28th day?

M30-grade concrete can achieve a strength of approximately 30 MPa (30 N/mm²) on the 28th day of curing.

How many bags of concrete for M30?

Generally, around 8.25 bags of cement are needed for 1 cubic meter of M30-grade concrete.

Understanding the Key Properties of Steel in Civil Engineering

0
Properties of Steel in Civil Engineering

Steel is an extremely versatile material. It is strong, durable, and ductile enough to be employed in a variety of applications, but construction is the most closely associated with it. Properties of steel have an impact on the design and construction of steel structures, hence understanding steel material properties is critical. This blog explores physical, chemical, and thermal properties of steel in the civil engineering field, which will help you to understand why steel plays such a key role in today’s construction industry. 

What is Steel?

Steel is an alloy of iron and carbon, containing less than 2% carbon, about 1% manganese, and small amounts of silicon, phosphorus, sulphur, copper and oxygen. Despite steel’s low carbon content, carbon has a big influence on physical properties of steel, making it harder and more durable than pure iron.
Adding other elements like chromium, nickel, manganese, and vanadium can boost properties of steel even more. Common steel is created by the purification of iron and combining it with other metals and minerals. Steel is a vital material for the construction industry.

Properties of Steel:

Let’s understand in depth the physical properties, chemical properties and thermal properties of steel.

Physical Properties of Steel:

Steel has the capacity to support heavy weights without being heavy itself, and it shows resilience in tough environments without failing. Engineers and builders who understand these properties of steel can apply it more appropriately to address the requirements of modern structures and technological advancements.

Density:

One of the most essential physical properties of steel is its density. Density is the measurement of the ratio of matter in an object to its volume. Steel becomes stronger as its density increases. The density of steel varies from 7,850 to 8,050 kilograms per cubic metre.

Young’s Modulus:

Young’s modulus is an important physical property of steel. It shows how well steel goes back to its original shape after being pulled. Steel with a higher Young’s modulus can handle more force without bending. The Young’s modulus for steel is between 190 and 210 gigapascals.

Tensile Strength:

Tensile strength denotes how much force steel can take before it breaks apart. The higher the tensile strength, the tougher the material. Steel’s tensile strength varies in the range from 400 to 2,000 megapascals.

Shear Strength:

A material’s shear strength is defined as its capacity to withstand forces that cause the internal structure to slide against itself. The shear strength of steel is specified at the point of failure under shear stress, and it is approximately 0.57 times structural steel’s yield stress.

Ductility:

Ductility is one of the most important physical properties of steel that allows it to be hammered thin or stretched into wires without breaking. Steel can bend significantly before failure, which is critical for absorbing energy during collisions and seismic activity.

Yield Strength:

Yield strength is the highest stress that a material can withstand before permanently changing shape and failing to bounce back. This tests the material’s ‘ductile’ character. If the stress level does not exceed the yield strength point, the material will regain its original shape after the stress is relieved. High yield strength indicates that the material has high strength. The yield strength of steel can range between 250 and 1,500 megapascals.

Chemical Properties of Steel:

The chemical properties of steel are largely concerned with its composition and how its constituent elements affect its behaviour and performance. Steel has the following key chemical properties:

The Carbon Content:

The concentration of carbon in steel can range from less than 0.1% to more than 2%. It has a considerable impact on ductility, hardness, and strength of steel. Lower carbon steels are more ductile, but higher carbon steels are harder and more durable.

Alloying Elements

The following elements are present in steel composition:

  • Manganese (Mn): Manganese, which is typically found in percentages ranging from 0.3 to 2%, enhances hardness, tensile strength, and wear and abrasion resistance. It also aids in the deoxidation of steel by eliminating sulphur and oxygen contaminants. 
  • Chromium (Cr): Chromium, which is in percentage ranging from 10% to 30%, is used in stainless steel to improve corrosion resistance, hardness, and wear resistance.
  • Nickel (Ni): Nickel is added in steel in levels ranging from 2-20%. It improves hardness and corrosion resistance.
  • Molybdenum (Mo): Found in trace levels (0.1-0.5%), molybdenum improves hardness, strength at high temperatures, and corrosion resistance.
  • Vanadium (V): Added in trace levels (0.1-0.5%), vanadium increases strength, toughness, and wear resistance.
  • Silicon (Si): Silicon improves strength and flexibility and is often found in concentrations ranging from 0.2 to 2%.
  • Copper (Cu): Copper, when added to steel in moderate quantities (up to 0.4%), helps in improving the corrosion resistance of steel.

Thermal Properties of Steel:

Steel has several essential thermal properties that make it useful in a variety of applications, particularly construction and manufacturing. Here’s an overview:

Thermal conductivity:

Thermal conductivity refers to a material’s capacity to conduct and transfer heat. Materials with lower thermal conductivity provide better heat insulation. Carbon steel has a thermal conductivity of 45-60 W/m·K. Thermal conductivity, which is one of the important stainless steel properties, is about 15 W/m·K, which means it doesn’t conduct heat well.

Melting Point:

As there are different types of steel available in the market, there is no standard melting point for steel. The melting point of steel lies in the range of 1370-1510°C. Steel’s high melting point allows it to be employed in high-temperature applications like power plants and furnaces. 

Thermal Expansion:

Thermal expansion describes the tendency of steel to expand when heated. The coefficient of thermal expansion of carbon steel has a range of 11x 10⁻⁶/°C to 13 x 10⁻⁶/°C. Stainless steel often has a somewhat higher coefficient.

Specific Heat:

The specific heat of an object is the amount of heat required to raise the temperature of a unit mass of the object by one degree. A high specific heat value means that the object has more heat insulation. The measurement units are Joules per Kilogram Kelvin. The specific heat of carbon steel ranges from 450 to 2081 J/kg-K, while that of structural alloy steel ranges from 452 to 1499 J/kg-K.

The above physical, chemical, and thermal properties of steel make it an excellent choice for a wide range of applications in the construction industry. It can hold heavy loads without weighing too much, and it stands up well to harsh conditions without breaking down. When engineers and builders know these properties of steel in civil engineering, they can use it better to meet the needs of today’s structures and aid with new technological advances.

Why Curing is Required for Concrete

0
Concrete curing

Concrete curing is a practice performed to maintain moisture content in a construction within a certain temperature range. This process allows concrete to obtain the appropriate characteristics for its intended use. Curing is essential for all types of constructions to hydrate and gain strength. The primary objective is to keep concrete saturated and avoid thermal shrinkage and cracks.

It takes place immediately after the concrete is made to allow cement particles to react with water. During this period, adequate moisture and temperature are maintained. This hydration process helps obtain a strong, crystalline structure.

In this blog, we’ll discuss why curing is essential for concrete construction and how it helps you.

Benefits of Concrete Curing

Benefits of Concrete Curing

Proper concrete curing benefits the construction in many ways, and are explained below:

Improves Strength

The hydration process is triggered by sufficient moisture content that provokes chemical reactions between cement and water. This process builds strong bonds between the ingredients of concrete, leading to attaining maximum strength. A well-cured concrete has maximum compressive strength that can withstand heavy loads. 

Enhance Durability

Concrete curing promotes durability, helping prevent water penetration and other potential risks, such as spalling, cracking, and freeze-thaw damage. This is because well-cured concrete becomes denser and provides a uniform structure. A properly cured surface is less susceptible to wear and tear, leading to enhanced durability. 

Appealing Appearance

In addition to strength gain and versatility, curing provides a glossy and perfect finish to the concrete surface. It helps avoid uneven textures, stains, and discolouration. Maintaining a smooth texture and uniform colour throughout the surface is an added advantage to the structure. Proper curing positively influences the overall aesthetics of a building and improves long-term appearance. 

Reduce Shrinkage

Curing helps prevent shrinkage, minimising the risk of cracking in concrete. Choosing a proper curing technique is essential for large structures, particularly in areas with significant temperature fluctuations. Ensure that it creates a denser and impermeable concrete surface, which is less likely to water absorption and staining. 

Saves Money

Proper curing practices extend the life of concrete structures, reducing the need for regular or frequent maintenance. It results in increased service life and long-term cost savings. Whether it is a small or large-scale structure, well-planned ideas are needed for proper curing. 

Specific Factors Influencing the Concrete Curing

Specific Factors Influencing the Concrete Curing

When it comes to concrete curing, not all situations and constructions are the same. One of the major factors is the optimal temperature range, which should exist between 50 to 75 degrees Fahrenheit. If it extends this range, it may hinder crystal growth and make concrete weaker.

Other significant factors that you must be aware of, such as:

  • Weather Condition: Similar to temperature, the humidity level also plays a vital role in the curing process, especially if you are using a misting technique. Higher humidity levels prevent the rapid evaporation of water and increase the curing time, leading to the occurrence of the hydration process.
  • Size and Shape of the Concrete: To achieve consistent durability throughout the structures, the water should be evenly distributed. When planning for curing procedures, consider the thickness, size, and shape of the concrete. Choosing appropriate methods according to the dimension ensures even curing.
  • Don’t be Fast in Further Steps: One of the common mistakes is to start painting the structures before the concrete is completely ready. Providing a sufficient time gap allows the concrete to set and harden properly.

Points to Be Noted During the Concrete Curing Process

  • Freshly prepared concrete structures shouldn’t be exposed to harsh sunlight, dry winds, or rain.
  • Cover the concrete with a tarpaulin, especially if the weather is too hot and dry.
  • For curing, water should be poured at least 24 hours after the concrete has been made.
  • Curing practices need a minimum of 15 days from the day of concreting.
  • The water used for curing technique should be clean and chemical-free, including alkalis, oil, vegetable matter, acids, etc.
  • Saltwater should be strictly avoided for any construction purpose at all. It causes rapid reinforcement corrosion and salt crystallisation, which gives a poor lifeline.
  • Ensure the pH range of the water is between 6 and 8.5, which is almost neutral.

The Connection Between Proper Concrete Curing and the Longevity of Concrete Resurfacing

A well-cured concrete is directly related to the longevity of concrete resurfacing. It provides a strong and durable surface to the structure without causing any damage in the long run. 

When the original concrete is cured well, it is less likely to encounter cracks or shrinkages. Therefore, planning your investment for a proper curing technique significantly benefits your structure with enhanced effectiveness and lifespan. 

Final Thoughts

Curing practice is a deciding factor in concrete’s quality, strength, and durability. Site engineers or supervisors must pay careful attention throughout the process. Once it is done as per the determined procedure, the concrete gains superior characteristics. Prioritising choosing the right curing method ensures the availability of required properties.

FAQs

1. What are the problems occurring due to inadequate curing?

Inadequate curing causes several impacts, such as:

* Reduce structural integrity and strength
* Increase the risk of concrete spalling and cracking
* Creates durability issues
* Causes uneven texture, stains, and discolouration on concrete surfaces
* Increase maintenance cost

2. How long does a concrete curing process need?

The curing period generally depends upon the weather conditions and project requirements. To obtain desired properties, it is advisable to cure concrete for at least 15 days from the day of concreting

 What is the Difference Between Bracing and Beam?

0
difference between bracing and beam

In construction, both bracing and beams are vital. They ensure a structure’s stability and strength. It’s vital to understand the differences between bracing and beams. This knowledge is key to learning how buildings are made and how they resist external forces. In this article, we will examine bracing and beams. We’ll compare their roles, functions, and importance in construction. 

What is a Beam? 

Beam

A beam is a structural element designed to support applied vertical loads. By nature, beams are horizontal. They carry the load of the floor, roof, or any structure above them, whether imposed or self-weight. They transmit this load to the columns or walls supporting them and, therefore, are an important part of the building framework. Its ability to resist bending is helpful in maintaining stability within constructed spaces.

Key Features of Beams: 

  • Support Vertical Loads: The beams carry the floor’s load. This includes furniture, people, and other items. They then transfer this load to the columns or walls, which pass it down to the foundation. 
  • Horizontal Alignment: Beams are generally laid horizontally, spanning from one supporting point to another. For example, from one wall to another or from one column to another. In such cases, it is easy for effective load distribution. 
  • Materials: Beams can be of different types of materials. The materials could be of steel, concrete, or wood, amongst others; all rely on the design nature and the structure of the building. The choice of material would depend on the type of building, the loads the beams will carry, and the general design of the structure.

Types of Beams

  1. Simply Supported Beam: In buildings, this is the most common type of beam. It is supported from both ends and transmits the load from the center to the supports at either end. This type of beam is simple to design and construct; hence, it finds a place in many types of buildings. 
  2. Cantilever Beam: A cantilever beam is fixed at one end and free at the other. It’s often used in balconies and overhanging structures. The beam extends beyond its support. Loads on the free end require careful design to ensure stability. 
  3. Continuous Beams: For longer structures, continuous beams span multiple supports. Sometimes, more than two supports are needed. This setup evenly distributes the load, improving stability and reducing bending moments. 
  4. Fixed Beam: A fixed beam has support at both ends with restraint against rotation at the supports. This kind of beam is usually experienced when the application requires additional stability. This means that this type of beam cannot rotate with the insertion of a load because of the fixed supports. 
  5. Overhanging Beam: In this case, an overhanging beam extends beyond its bearing at one or both ends. This, however, could be thought of as some form of a cantilever which is partially supported somewhere along its length. These kinds of beams are often used in bridges and other structures in which the beam needs to be overhung beyond its supports. 

What is Bracing? 

Bracing

Bracing is a structural component of a building. It makes the structure stable by resisting forces like wind and earthquakes. This prevents the building from swaying or collapsing. Depending on the requirements, bracing can be diagonal steel, concrete cores, or other designs. 

Key Features of Bracing: 

  • Lateral Forces: Bracing is essential to help a building withstand lateral forces, such as wind or earthquakes, which can cause it to tilt or shift. Without proper bracing, a building can become unstable and at risk of collapse when exposed to these forces. 
  • Diagonal or Vertical Alignment: Bracing can be placed either diagonally or vertically, or in other configurations based on the building’s requirements. Bracing alignment depends upon the direction of the lateral forces that need to be resisted. 
  • Materials Used: Bracings are readily made of steel or reinforced concrete structures. These materials are known for their bending strength properties that allow them to face and bear lateral forces. These materials are designed to absorb and distribute lateral forces throughout the structure, preventing localised damage and enhancing the building’s overall stability.

Types of Bracing: 

  1. Diagonal Bracing: It can be observed that the diagonal bracing is placed between the columns and the beams at an angle to add strength against the lateral loads. It is common in the steel structure since the diagonal members widen the frame and can resist horizontal forces. 
  2. Cross Bracing: An X-shape arrangement of two number of diagonal braces is considered cross bracing. Such an arrangement is generally found for steel structures where it imparts greater strength and rigidity. Cross bracing is good for countering lateral loads acting on the structure from opposite sides. 
  3. K-Bracing: This kind of bracing is one in which the braces are linked in a manner that assumes the shape of the letter “K.” Bracing of this type is very much used in cases where both vertical and horizontal stability are required, as in high-rise buildings among other infrastructural applications that require these two characteristics. 
  4. V-Bracing and Inverted V-Bracing: V-bracing involves two diagonal members meeting at a point to form a ‘V’ shape. An inverted V-bracing is a variation of this system in which the braces meet at the center of the top horizontal element. These two methods are very commonly used in seismic areas, as they have proved to be easily resilient methods of energy dissipation that is generated by the occurrence of  seismic events. 

Distinction Between Beams and Bracing in Construction

FeatureBeamsBracing
DefinitionStructural elements that support vertical loads.Structural members that stabilise against lateral forces.
Primary FunctionCarry loads from floors, roofs, or other structures to columns or walls.Resist lateral forces such as wind and seismic activity.
OrientationGenerally horizontal, spanning between supports.Can be placed diagonally or vertically, depending on the design.
MaterialsOften made of steel, concrete, or wood.Typically made of steel or reinforced concrete.
Load TypeSupports vertical loads (imposed or self-weight).Resists lateral loads to prevent swaying or collapse.
Design ConsiderationsFocused on load distribution and bending resistance.Emphasises stiffness and stability against displacement.

How do Beams and Bracing go Hand in Hand?

Beams are used in a well-designed building for the purpose of carrying both vertical and lateral loads. They help in carrying weight from the various components that make up the building. On the other hand, bracing ensures that the building is stable.

Why are Both Important? 

Bracings and beams are important to the building because they offer strength and durability Beams are used to carrying and transfer the weight of everything above it to the other part of the structure, while bracing prevents the building from swaying or failing because of lateral forces. 

This becomes more crucial in seismic regions or areas with a high wind velocity, since bracing can be  used to prevent structural damage from such forces. Meanwhile, beams provide the required support for floors and roofs to ensure that they are in place, loading and moving the loads the way they are designed for. 

How Bracing and Beams are Used in the Real World of Construction 

In practice, beams and bracing function cohesively . For example, in a high-rise building, beams can be used to support each floor, and bracing is used in some parts of the structure to resist the lateral forces due to wind or seismic. Close reasoning must be considered in the design of such systems to ensure that both elements work together effectively.

Conclusion 

An important aspect of building construction is to differentiate  beams from bracing. Beams are used for horizontal support, and they carry vertical loads. On the other hand, bracing gives stability by resisting lateral forces. They both create a strong framework for securing buildings to be safe and stable from both vertical and horizontal loading. 

This interaction and cooperation between the beams and bracing enable the building to stand majestically strong to withhold influences from tough environmental conditions.

Vastu Tips for Kitchen Sink

0
Kitchen Sink

The kitchen sink also plays an important role in maintaining the Vastu Shastra of a house. This is the place where we clean up our dishes, vegetables, and other items and is vital for maintaining the hygiene of a kitchen. According to Vastu Shastra, the placement of the kitchen sink should be done carefully to maintain harmony in the kitchen and throughout the entire house.

Best Direction of Kitchen Sink as per Vastu

Kitchen Sink as per Vastu
  • Northeast Direction: The best direction to place the kitchen sink is northeast, as it happens to be one of the water element areas. The sink would, therefore, naturally come under this position. Balancing fire generated at the stove with water helps regulate the elements in the kitchen.
  • East Direction: If placing the sink in the Northeast direction is not possible, East direction is considered the next best option. 
  • North Direction: The north direction is considered quite auspicious for the placement of the kitchen sink. This direction relates to positive energy, and keeping the sink here guarantees good energy flow, keeping the kitchen in rhythm.

Directions to Avoid

  • Southeast Direction: This is a fire corner and falls in the southeastern part of the kitchen. Placing the sink here can trigger the fire-water clash that can lead to stress and conflict at home.
  • South-West Direction: Associated with the earth element, it signifies stability and strength. It can be grossly tampered with, mounting a sink here can bring in instability.
  • North-West Direction: Though not as disastrous as from the south-east or south-west directions, the north-west is also not a very good position to place the sink. This may bring instability in relationships and lead to unnecessary disagreements.

Dos and Don’ts for the Placement of Kitchen Sink according to Vastu

Do’s:

Keep the Sink and Stove Apart: The sink and stove should not be very close to each other. The sink is represented by water, so if the stove represents fire, then it needs to be distanced from the sink. This will help in keeping away a clash between these two opposite elements.

Cleanliness: Never allow dirt to build up in the sink. A dirty sink may invite negative energy into your home and affect the atmosphere in your kitchen. Form a habit of cleaning it regularly, and avoid piling dishes up for later.

Drainage Pipe: The drainage pipe of the sink should point towards the northeast or east, as this is the proper way for water to drain smoothly without obstructing the free flow of positive energy in the kitchen area.

Lighter colours can be used: The colours around the kitchen sink area need to be light and soothing. White, very light blue, or green brings an enhanced water element into the space, reflecting quietness and peace.

Install Proper Lighting: Let the sink area be well-lit. Not only does good lighting help in cleaning the area, but it also maintains positive energy. A dimly lit sink area can invite negative energy.

Don’ts:

Avoid placing the sink in the Southeast corner: As mentioned above, the southeast comes under the fire element, therefore, keeping the sink here will cause a problem. It invites clashes and discord in the house.

Avoid Using Dark Colors Near the Sink: Dark colours reduce positive energy within the kitchen. One should not use shades such as black, dark blue, or deep red in the surroundings of a sink to avoid an imbalance.

Don’t Let the Sink Face the Stove: When a sink is facing the stove directly, it creates a situation of a head-on fight. Water and fire energies are fighting head-on. It will create tension and stress in the household. For small areas, try placing a sink at an angle rather than setting it atthe opposite side of the stove.

Avoid Clutter around the Sink: Try not to place too many things near the sink. Clutter can block the flow of positive energies. Keep the area around the sink as free and open as possible.

Correcting Vastu Defects for Proper Placement of Kitchen Sink:

Correcting Vastu Defects for Proper Placement

Sometimes, there is no possibility of placing the sink in an ideal Vastu direction due to space constraints or due to the pre-existing structure of the kitchen. Given below are some tips to correct Vastu faults relating to the placement of the kitchen sink.

Crystal Bowl Placement: If one has a sink placed in the southeast direction and cannot move it, a crystal bowl filled with water can be placed near the sink. Crystals are active converters of negative energies to positive ones.

Vastu Elements: Some Vastu remedies, such as keeping a Vastu pyramid, can help balance the energies if the sink is not put up in an ideal direction. These remedies are rather easy and can be used to correct  Vastu flaws.

Lighting : If the direction of the sink is not appropriate according to Vastu, keep the area around the sink well-lit. This will help minimise negativity and maintain a healthy atmosphere in the area.

Avoid Dirtiness: Keeping the sink clean will also help in reducing the negative impact caused by improper placement. Cleaning the sink and area around it regularly may retain the positive energy in the kitchen.

The Importance of Kitchen Sink Placemente

Accommodation of the kitchen sink seems to be a normal thing in a kitchen, but it is vital to retain the harmony of the home. Vastu ensures that your kitchen is indeed a source of positive energy, which afterward will make every one of you healthy, rich, and delighted.

If appropriately placed, a sink contributes to the general harmony of the kitchen by maintaining the balance between fire and water elements. The balance here does not lie only on the physical placement but also about the energy flow in this kitchen.

A well-placed sink thus contributes to serenity in the home and makes daily activities such as cooking and cleaning more pleasant. 

Conclusion 

In the Vastu Shastra of your house, the kitchen sink holds a very vital place. Its placement may turn out to be the most overlooked area that objectively can create a severe imbalance in the energy of the kitchen space and therefore the entire house. 

Moreover, keeping the kitchen sink facing northwards, preferably towards the northeast or north side, avoiding the southeast and southwest corners, is in tune with Vastu’s guidelines for the kitchen sink and guarantees that your kitchen remains positive and is a harmonious entity. 

Keep the area around the sink clean and clutter-free, ensure proper lighting, and use light colours to enhance the positive energy. It is always a great idea to keep a crystal bowl or use a Vastu pyramid to remedy faults if ideal Vastu placement isn’t possible. 

FAQs 

Q1: Can I place my kitchen sink in the south-east direction? 

No, the south-east is a fire element governed direction and places the fire and water elements in conflict, which will bring discord in the home.

Q2: What should I do if my kitchen is small and I can’t follow all Vastu guidelines?

 If the kitchen is small, then follow as far as possible the relevant guidelines of Vastu. Apply remedies suggested by Vastu such as crystal bowls or Vastu pyramids to balance the energy. 

Q3: Why is cleanliness important to the kitchen sink area? 

A dirty sink invites bad energy, keeping the sink area clean keeps the positive energy moving in the kitchen.

Cement Concrete Flooring: A Comprehensive Guide

0
Cement Concrete Flooring

Introduction

Cement concrete flooring is one of the most popular types of flooring used in both residences and commercial complexes. Concrete flooring is long-wearing, long-lasting, and looks great. But before we move forward it is essential  to understand exactly what ‘cement concrete flooring’ is and how it is produced. 

Let’s explore a step-by-step process, along with certain technical details to understand this essential process of construction.

What is Cement Flooring Concrete?

Cement Concrete Flooring

Cement concrete flooring is created  in the form of a mix of cement, sand, water, and aggregate gravel laid on a prepared base for flooring. This gives a solid framework that is a hard, stable, and smooth surface that can able to bear very heavy loads,. It has proven to deliver excellent service for many years. It can also be used in basements, garages, outdoor patios, and other areas such as warehouses.

Materials of Cement Concrete Flooring

The major materials usually used in cement concrete flooring include:

  1. Cement: OPC—Ordinary Portland Cement acts as the cementing material while the following are the components that make up the mix.
  2. Sand or fine aggregate: This helps to fill the space between the cement and the gravel and gives the face of the concrete smooth surface.
  3. Gravel – This component contributes to compounding concrete strength.
  4. Water: Water activates the cement and helps it form a bond with the sand and gravel.
  5. Admixtures: Chemical ingredients that are optional and added in to positively influence the properties of the concrete, such as setting time and strength.

Process in Cement Concrete Flooring

The cement concrete flooring process consists of several operations that create a durable and leveled finish, which is completed in steps.

1. Sub-Base Preparation

Before laying the concrete, the ground must be prepared. 

This involves:

  • Leveling: The ground must be compacted to achieve a smooth, level surface using a roller or tamper.
  • Compacting: The nature of the soil is compacted to minimise the chances of the floor sinking abnormally in the future.
  • Damp-Proof Course: A protective layer is installed to prevent moisture from rising into the concrete, which can be detrimental.

2. Placing the Base Concrete

The base concrete is the first concrete laid down. Let’s take a look aton how it’s done:

  • Mixing the Concrete: The cement, sand, gravel, and water are also blended in a specific proportion.
  • Concrete Laying: The mixed concrete is then placed on the prepared sub-base.
  • Leveling: The poured concrete is leveled in a manner where it is as flat as possible using a straight edge, also known as a screed.
  • Compacting: Compaction is normally done using a mechanical vibrator, which helps to drive out the air bubbles in the concrete, thus compacting it.

3. Laying the Finishing Layer

The finishing layer of concrete gives the floor a smooth, polished look. This layer is usually thinner than the base layer and follows these steps:

  • Mixing the Finishing Concrete: A finer mix of concrete is prepared. 
  • Pouring and Spreading: The concrete finishing is poured on the base and spread properly with a trowel.
  • Floating: After placing, the concrete is floated with a wood or a magnesium float to level it and to bring a layer of cement paste to the surface.
  • Troweling: The surface is troweled further with a steel trowel to bring about shine to the finish.

4. Concrete Curing

Curing is a very important process that is required to maintain a moist condition in concrete for several successive days, allowing adequate hardening. This can be done by:

  • Wet Burlap Cover: Wet burlap or cloth is placed on the concrete, with the burlap being kept wet.
  • Water Sprinkling: Water is sprinkled on the concrete surface several times a day.
  • By applying Curing Compounds: A chemical curing compound can be sprayed on the surface to keep it moist.
  • Curing commonly varies by roughly 7-10 days.

5. Final Finishing

Any final finishing touches to the surface can be done once the concrete has completely cured:

  • Polishing: The surface can be polished to attain a glossy finish.
  • Application of Sealants: Sealers may be used on concrete to prevent stains and wear.

Pros and Cons of Cement Concrete Flooring

Pros and Cons of Cement Concrete Flooring

Cement concrete flooring, like any construction material, has its advantages and disadvantages.

Advantages:

  1. Durability: Concrete floors are indeed very strong and, if properly maintained, can work well over many years.
  2. Versatility: They can be customizsed with any colour, texture, or finish.
  3. Ease in Maintenance: Concrete flooring requires minimal effort for cleaning.

Disadvantages:

  1. Hardness: While this gives concrete durability, it can also make it uncomfortable to stand on  for a longer period.
  2. Cold Surface: Concrete flooring can be cold, especially in winter, unless radiant heating is used.
  3. Susceptibility to Crack: Concrete floors, when laid or treated improperly, are most likely to develop cracks over time.

Common applications of cement concrete flooring

Cement concrete flooring can be done in a variety of settings, such as:

  1. Residential Houses: Basements, patios, and garages. 
  2. Commercial Spaces: Warehouses, factories, and retail stores. 
  3. Outdoor Areas: Sidewalks, driveways, and parking lots. 

Conclusion:

Cement concrete is a highly competitive, versatile product fit for both residential and commercial buildings as flooring. Knowing the materials, process, and stages, one appreciates the skill and precision for a quality finish of a concrete floor that should last for a long time, maybe even a lifetime. Each stage is extremely important for successful  flooring: preparation of a good base, careful mixing and pouring of concrete, or applying the final touches.

FAQs 

1. What is the major element in cement concrete flooring? 

The main component of concrete flooring is cement, which acts as the binding agent that also holds together sand and gravel.

2. How much time does it take to cure a concrete floor? 

A concrete floor typically takes 24-48 hours to set enough for walking and around 28 days to fully cure and reach maximum strength. Proper curing during this time is essential for durability.

3. What makes concrete flooring so popular in warehouses? 

Because of its durability, it can support heavy weights and requires less maintenance, so concrete floors are often used in warehouses.