Home Blog Page 47

What is Erection in Construction: Types and Process

0
what is erection in construction

Erection in construction refers to the process of assembling, aligning, or installing building elements, making any alterations, or repairing building components in the site using pre-manufactured parts such as steel frames, concrete elements, and mechanical parts. The term is generally used to denote the execution of steel structures.

Difference Between Construction and Erection

Both the terms construction and erection are generally used interchangeably and are related to each other. But both are different processes. Construction is a complete process that starts with site evaluation, excavation, planning and designing, and finishing the project. On the other hand, erection refers to the installation and mounting of pre-manufactured parts after site preparation and completion of foundation work.

Advantages of Erection in Construction

  • Faster Project Completion: Erection can speed up construction projects since it involves assembling pre-manufactured parts on-site.
  • Improved Quality: Erection involves the assembling of components manufactured in a controlled environment with high quality and industrial standards.
  • Enhanced Safety: Erection prevents injuries or accidents on-site as components are assembled on the ground or in a factory.
  • Reduced Waste: Erection minimises material wastage, unlike traditional construction, as components are manufactured to exact specifications and requirements.
  • Cost Savings: Erection speeds up construction projects, reducing labour costs and other waste generation.

Types of Erection in Construction

Steel Structure Erection:

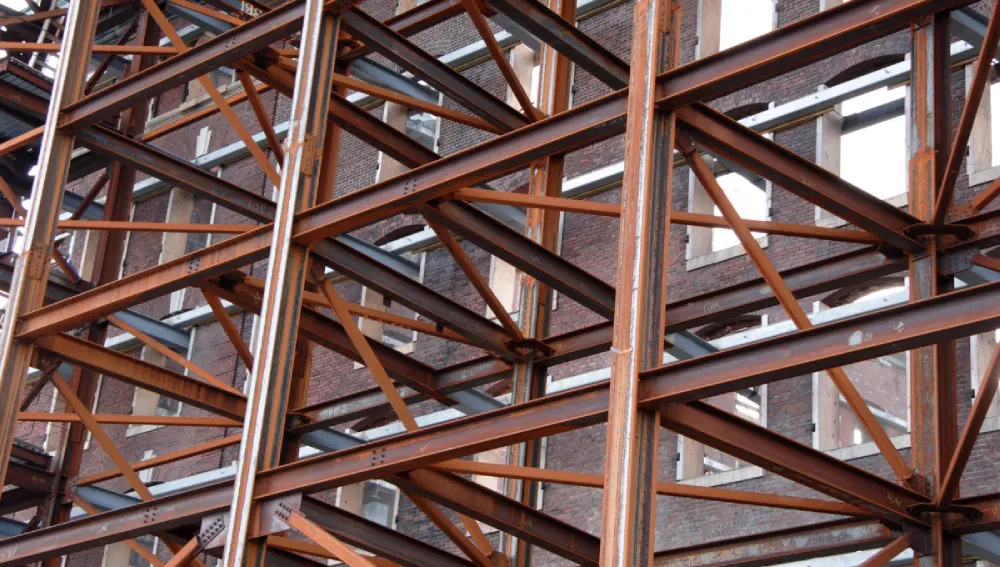
Steel structures have the capacity for bearing large loads in buildings and bridges. The construction of buildings, bridges, aircraft hangars, auditoriums, warehouses, towers, and power plants using steel structures with the help of welding and bolting tools is known as steel erection. Steel erection is usually done with the help of cranes, rigging equipment such as pulleys, slings, and shackles to move steel structures, and welders to connect the steel components. This process involves making steel roofing and siding, constructing steel columns and beams, and installing handles and staircases in steel frames. 

Mechanical Erection:

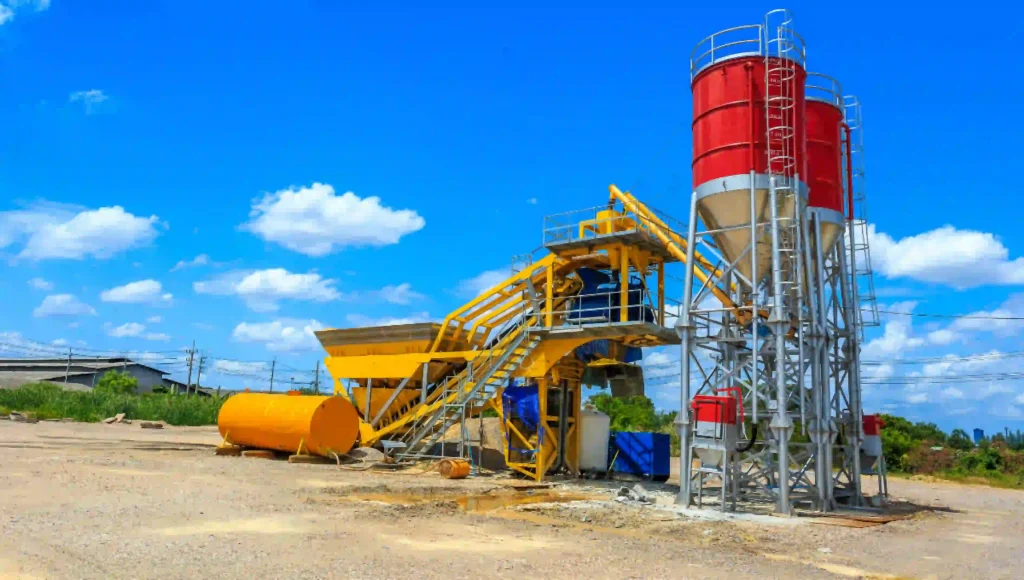
Mechanical erection means setting up and aligning mechanical equipment like engines, motors, compressors, pipelines, turbines, and food processing machines such as mixers and blenders. It also includes installing equipment that helps transfer power, along with other industrial machines. This process usually takes place in large industrial areas like power plants, oil refineries, mining sites, chemical plants, and aerospace facilities. A good example of mechanical erection is installing HVAC systems (Heating, Ventilation, and Air Conditioning) like furnaces, boilers, fans, and cooling towers in factories, commercial buildings, and power plants.

Hybrid Materials Erection:

This is the process of installing ready-made components such as door frames, wall panels, windows, pre-made concrete elements, staircases, electrical parts, kitchen cabinets and countertops, and other interior features to achieve a high-quality finish. This process should be carried out carefully according to the design and specifications.

Precast Concrete Erection:

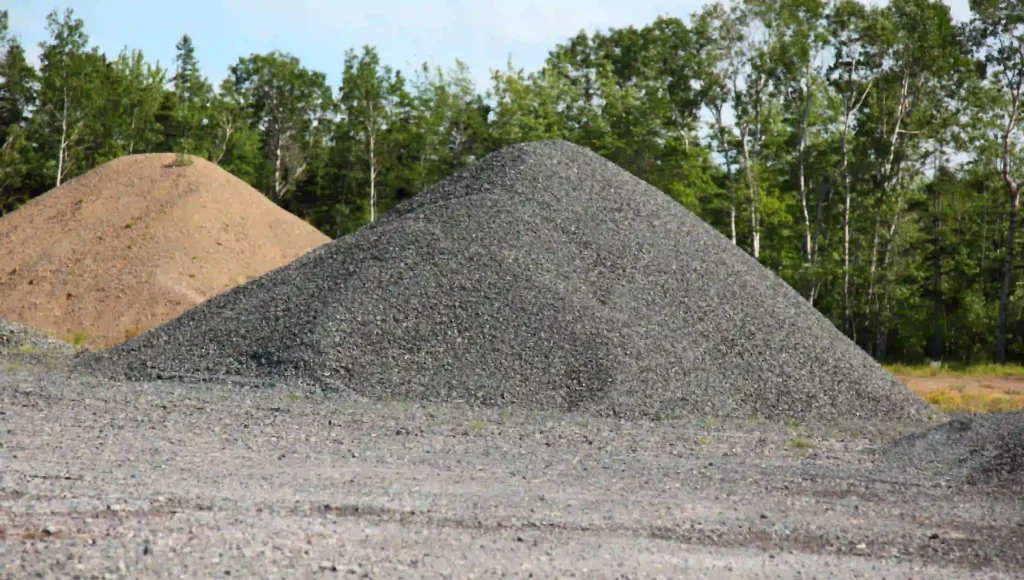
This technique involves manufacturing concrete components such as walls, floors, and roofs in a factory and transporting them to the site. These precast components are assembled on-site to form a structure. They provide accuracy, durability, quality, and faster construction.

Wood Structure Erection:

Wood erection refers to the process of fabricating and mounting wood components, such as frames, columns, and beams, to form the structural support system for a building.It can add a warm, natural, and rustic appearance to a building. Additionally, it has a high strength-to-weight ratio and can withstand heavy loads. But wood requires extra protection from moisture to prevent decay and damage from pests.

Erection Process

Planning and preparation:

Before starting a work, it is important to review the designs and requirements. It is necessary to create a proper timeline for the erection process and visit the site for inspections.

Safety measures:

The system of erection involves installing huge building components. Therefore, it is important to take safety and precautionary measures to protect workers, engineers, and people near the site area.

Materials delivery and storage:

Safe transportation of building elements to the site area and evaluating site conditions for handling this  is vital. Store the materials in an organised way in the provided storage areas.

Assembly and installation:

This is the critical phase of the erection process, as it involves setting up building frames and structures using cranes, pulleys, slings, hooks, and other equipment to lift heavy loads.

Quality control and inspection:

This is the process of checking the assembled structures to see if they meet the required standards, parameters, and safety protocols by examining the dimensions, placements, and overall quality

Erection Techniques and Methods

Stick built process:

This is a conventional way of installing a building structure piece by piece on the construction site. It is a flexible way of construction, which allows for individual element modification during the process.

Modular construction:

Modular construction method, building frames and structures are assembled in a factory and transported to site for erection or installation. It results in less waste, improved and controlled quality, and time savings.

Safety Measures

  • Ensure the safety of workers by providing them with personal protective equipment such as harnesses, gloves, hard hats, safety glasses, and safety shoes.
  • Prevent accidents and falls from heights by implementing protection measures like installing safety nets and using scaffolding and barriers.
  • Use rigging and lifting equipment that is in good condition and make sure operators are trained and certified.
  • Careful handling of materials is a must to prevent damages or falling objects.
  • Engineers should monitor weather conditions and need to stop the work during heavy winds, thunderstorms, or rain.
  • Establish communication guidelines among workers, engineers, and contractors to avoid misunderstandings and confusion.
  • Make sure proper electrical wiring, grounding, and insulation is done to prevent electrical shocks.

Conclusion:

An efficient and successful erection process is based on careful planning, execution, and management. By considering various methods, techniques, selection of materials, safety measures, and cost factors, it is possible to achieve a high-quality, effective, and safe erection process in construction projects.

FAQs

1. What are the benefits of erection in construction?

It includes improved quality, enhanced safety, increased productivity, and reduced project timelines.

2. Can erection be done in phases?

Yes, erection can be done in phases to cater to project requirements, financial needs, and timelines.

How to Measure Anchor Bolt

0
How to Measure Anchor Bolt

Anchor bolts play a crucial role in all construction and engineering projects. They enable a strong and secure connection between structures and their foundations. Among the list of solutions, the anchor bolt stands ahead as a versatile one. They provide exceptional support and stability to a building.

However, the performance of the anchor bolt joints is often underestimated. In reality, the precise measurement of bolts helps efficiently hold machine frames to foundations.

In this guide, you’ll learn the step-by-step process of measuring anchor bolts and the tools needed for doing so.

Anchor Bolt Measurement Methods

To accurately measure the anchor bolts, here are the methods to follow:

Calculate Using Measuring Tape

The length and diameter of the bolt are the primary requirements you need to begin with.

  • Length: To estimate the accurate length, place the measuring tape from the end of the bolt to the beginning of the thread.
  • Diameter: The width of the bolt can be measured using a measuring tape or a caliper.

Embedment Depth

Embedment refers to the depth at which the anchor bolt is drilled into the concrete. In general, when installing mechanical expansion anchors, anchors are placed at the bottom of the drilled hole. It may range between 4da to 5da.

For a perfect estimation, make use of this formula:

Embedment depth = base material thickness + required clearance

  • Material thickness – This term refers to the thickness of the concrete or masonry, as the application depth is crucial for determining how deep the bolt needs to be placed.
  • Required Clearance – When installing an anchor bolt inside the concrete, a certain space is needed to ensure it is secure. It typically depends on the type of bolt and the amount of weight required to hold.

Determining Anchor Bolt Length

In order to estimate the anchor bolt length, follow the below instructions as well:

Formula:

Minimum bolt length = tfix + l. s,min

Maximum bolt length = tfix  + l. s,max

tfix – the thickness of the fixture

l. s,min and l. s,max – the minimum and maximum length of the bolt

There are two different factors influencing the bolt length:

  • If a bolt is too short that might not fit perfectly to the thread sleeve. This situation causes the thread of the sleeve or the thread of the bolt to wear out or break.
  • If the bolt is too long, it might come to the point of contact before it’s fully screwed in. In such a case, the bolt is hard to move further and may break the anchor’s sleeve.

Verify the Hole Size

When drilling the holes to screw in the anchor bolts, ensure using a drill bit gauge to verify that its size is appropriate to the anchor bolt diameter. This will prevent the drill size from being either too small or too large.

Key Factors to Keep in Mind When Installing the Anchor Bolt

Anchor Bolt

A proper installation is key to achieving the enhanced effectiveness and overall stability of the structure. Follow these considerations without fail to avail various benefits:

  • Use Longer Bolts: Longer bolts allow for maximum stretch, which is essential to achieve the desired tension. Additionally, it prevents the surface of the block from tensile stresses and terminations. When enlarging the cone of compression, they can effectively spread out and cover more area. With this technique, the anchor is expanded to a large part of the material and makes the area stronger.
  • Wrap the Bolt: To make the anchor bolt stronger and more durable, it is recommended to wrap or cover it along its length. This practice prevents the bolt from cracking between the concrete and the bolt. It also provides possible free stretch length to the anchor bolt, holding intended loads and force effectively.
  • Add a Space: Providing a small space around the top of the bolt makes it more stable. This adjustment allows the bolt to bend a little if needed, which helps connect it to a frame easily.

In a Word

Accurate measurement of anchor bolts offers enhanced safety and durability to the structures. With the aforementioned methods and formulas, you can measure the bolts and select the appropriate components that fit your application. This process includes a lot more crucial factors such as load-bearing capacity, exposed length and base material. It may vary for every construction project, but it is recommended to consult the manufacturer’s guidelines before installing.

FAQs

1. Why is the accurate measurement of anchor bolts necessary?

Determining the accurate measurement of anchor bolts ensures the safety and structural integrity of a building. Inappropriate measurements will typically cause potential failure, safety hazards, and weakened connections between the bolt and the concrete.

2. What are the major mistakes to occur during measurement?

Here are the costly mistakes you need to be aware of when measuring anchor bolts:
Inaccurate embedment depths
Wrong measurement of length or diameter of anchor bolt
Failed to analyze load-bearing requirements
Neglecting to consider base material properties

3. How are minimum and maximum bolt lengths differentiated?

* Minimum Bolt Length: The minimum anchor bolt length provides efficient embedment and load-bearing capacity.
* Maximum Bolt Length: The maximum acceptable length helps avoid interference with structural elements or other components.

4. How often should the anchor bolt be replaced or inspected?

Regular inspections are recommended for structures that particularly exist in harsh environmental conditions or after applying significant loads. If you notice any signs of damage or excessive water leakage, then replace it immediately.

Concrete Efflorescence: Causes, Prevention, and Removal Techniques

0
Concrete Efflorescence: Causes, Prevention, and Removal Techniques

The porous building materials like concrete, pavers, and other masons are all prone to efflorescence. It is a chalky mineral deposit that appears on the surface. Although concrete efflorescences will not cause damage to the concrete, it cause unsightly blemishes. In most cases, these can be easily removed using appropriate cleaning methods and tools.

This blog will help you understand the efflorescence in concrete, its causes and effects, and how to remove them in detail.

What is Efflorescence?

Efflorescence in concrete is the formation of white powdery deposits on the surface because of salt leaching. These salts are normally present in the concrete mix and can be made in contact with water. This is mainly because of the evaporation of water from the concrete. It is caused by the water-soluble salts that are present in the concrete material coming to the surface when the water evaporates from the concrete. The charge will travel through the salt bridges and appear on the surface of the concrete. Efflorescences are normally washed away on unsealed concrete surfaces; if that is stubborn, then a mild acid wash or even a light sandblasting can be used for removal. Efflorescence that is trapped under the sealer will become unsightly, and it is even more conspicuous if the floor colour is dark.

In some worst-cases, gases that cannot pass through the top coat, like urethane or epoxy, can create water blisters because of the hydrostatic pressure that indicates the delamination of the top coat from the concrete. In the case of acrylics, you can rarely see the blisters, as acrylic sealers will allow the vapour to pass through them, but the salt deposits may remain behind, which can create an unsightly appearance.

Causes of Efflorescence

The presence of soluble salt in one concrete material can cause efflorescence. Commonly, salts can be identified in the fine aggregate or sand taken from the river banks.

  • If the concrete is not cured properly, then it will lead to an incomplete hydration process that may result in unhydrated products near the surface that can form efflorescence.
  • If the rate of water evaporation is slow, then it will allow the charge to permeate to the surface. This is the reason efflorescence tends to be more of a problem during the winter months than compared to that of the summer months. This is because in summer, due to high temperatures, evaporation takes place, and salt deposits occur within the concrete and not on the surface of the concrete. 
  • The concrete will be porous if the water content in the concrete mix is higher. This will make a path for water and salt to come to the surface and cause efflorescence.
  • In conditions like rainy seasons, there will be a large amount of water that can act as a medium for the salt to be transported to the surface of the concrete and form a crystalline white powder.
  • Any variability in the concrete, like compaction or curing issues, can result in localised problems where the water can permeate more easily through the concrete.
  • Water infiltration into the concrete, mainly in areas with poor drainage systems, can dissolve the salt and transport it to the surface.
  • If the humidity level is high, then it can lead to continuous dissolution and migration of salt within the concrete.

Salt Types in Efflorescence

  • Calcium sulfate: Brick
  • Sodium sulfate: Cement brick
  • Potassium Sulfate: Cement brick
  • Calcium carbonate: Mortar or concrete backing
  • Sodium carbonate: Mortar
  • Potassium carbonate: Commonly found in mortar
  • Vanadyl sulfate: Bricks
  • Manganese oxide: Brick

Signs of Efflorescence

Signs of Efflorescence
  • A visible white or greyish powder deposit is found on the surface of the concrete.
  • Crystalline structure formation on the surface of the concrete commonly resembles the salt-like pattern.
  • Presence of any stain or discolouration on the concrete that is caused by the deposition of salt.
  • Sometimes efflorescence may lead to a rough or gritty texture on the surface of concrete.
  • In the case of severeness, the surface may start to flake or peel due to the growth of crystallines.

Prevention of Efflorescence

  • To lock in the significant amount of calcium hydroxide in the concrete, you can include class F fly ash or metakaolin.
  • A vapour barrier must be installed to prevent moisture movement from the subgrade to the surface of the slab.
  • To prevent the surface water from penetrating the slab, the application of sealings or coatings can be made.
  • Waterproofing agents can be used to reduce the permeability of the concrete.
  • The permeability of the concrete can be greatly reduced when dense concrete is made and used.
  • Placing a plastic membrane under the slabs can prevent the hardening of concrete from exposure to moisture, and the surface can be maintained by using surface sealants or site drainage.
  • By preventing the concrete from premature drying.
  • By using concrete materials like aggregate, cement, and sand that have a very low amount of salt.
  • Maintaining a proper water-to-cement ratio in the concrete mix can prevent excessive water that can dissolve and transport salt.
  • By using clean, noncontaminated water for mixing and curing the concrete, you can prevent the introduction of additional salts.
  • Water can be prevented from ponding on the surface of the concrete, mainly during the curing period.
  • By following the best construction practices that include proper drainage design and protection of the concrete at the time of construction to prevent water infiltration.

By addressing these factors during the construction process, you can significantly reduce the chances of efflorescence structures of concrete.

Removal of Efflorescence in Concrete

The sources of the efflorescence must be identified before removing it from the concrete. The removal can be done in three methods, namely,

Pressurized water

Efflorescence The concrete can be removed by using pressurised water jets. The efflorescence can be dissolved faster by applying the pressurised water. However, they must care about the water after completely removing the efflorescence. If it is not properly used, the same water may become the cause of efflorescence. 

Brushing

Some types of efflorescence can be easily removed when a stiff bristle broom or brush is used. If the result is not up to the mark, then scrub it with clean water and slightly rinse the surface.

Dilute acid solutions

Commonly concentrated acids are not recommended to be applied on the surface of the concrete; hence, the diluted version of the acid with a proportion of 1:20 can be used. The surface on which the acid is applied must be moist, but it should not have any free water. The applied solution will be able to react on the surface of the concrete for about 10 to 15 minutes. Then the surface must be completely washed and scrubbed with water. Washing it repeatedly for at least twice or until all the traces of acid solution are removed is essential. 

Using the acid to wash may lead to variations in colours and change the surface texture. For surfaces that have coloured finishes, more diluted solutions of two percent or one part of acid to 50 parts of water may be needed. First, a small trial area must be checked for results.

Proper safety must be followed during the procedure. Make sure to have good ventilation and avoid contact between the acid and the reinforcement.

Acids that can be used for the removal of efflorescence in concrete surfaces,

  • Phosphoric acid
  • Hydrochloric acid
  • Prepacked efflorescence removers

How to Repair Efflorescence in Concrete?

Clear water repellents, along with acrylic coatings and silicone coatings, can assist in preventing the recurrence of efflorescence. Additionally, the combination of white wine vinegar and warm water has been shown to have an effect on the removal of efflorescence. Application steps involved in coating for prevention of efflorescence in concrete are,

  1. Clean the surface area.
  2. Use chemical cleaning methods when necessary.
  3. Rinse the surface thoroughly to neutralize the acid and remove the remaining acids.
  4. Dry the surface before applying any sealers or coatings.
  5. Apply a breathable sealer to the surface of the concrete.
  6. Identify and address the main cause of water infiltration.
  7. Repair the cracks in the concrete to prevent water penetration.
  8. If possible, consider using efflorescence-resistance concrete mixes.

Conclusion

If there is any occurrence of efflorescence, then be careful and make your systematic approach of cleaning, sealing, and addressing the underlying issues that can help in the restoration of the concrete appearance and also prevent further problems. Regular checking and maintenance are important for making sure that concrete can be durable for a long time and the visual appearance can be maintained. By combining the strategies, the impact of efflorescence can be reduced, and this allows the structures not only to stand the test of time but also to maintain their aesthetic quality. 

FAQs

1. Is efflorescence a permanent problem?

No, it can usually be cleaned off and prevented with proper maintenance.

2. Will efflorescence return after cleaning?

 It can return if the underlying moisture problem isn’t addressed.

3. Can efflorescence occur on indoor concrete?

 Yes, if there’s moisture inside the building, it can still occur.

4. Is efflorescence more common in new concrete?

Yes, it’s more common in new concrete because the salts are still near the surface.

Coarse Sand Vs. Fine Sand

0
coarse sand vs fine sand

Sand is an important material used in construction. It plays a vital part in creating perfect and strong concrete mixes for your homes and other structures. It also has other uses depending on specific requirements.

There are many types of sand, which can be classified based on their particle sizes and shapes, ranging from coarse sand with larger particles to fine sand with smaller particles.

In this article, we will learn about coarse and fine sand, their definitions, differences, and roles in construction. 

Coarse Sand

Coarse sand is a type of sand that has larger grains and a rough texture. It is used to make drainage and concrete mixes. It is also called rough sand, grit sand, or concreting sand.

The larger particles in coarse sand allow for good water drainage. It helps water to quickly drain from the surface. This also means that coarse sand has less water retention properties. 

Coarse sand is also used to produce strong concrete mixes. The larger grains in coarse sand allow the cement to be tightly bound to the sand. This improves its strength and durability.

Coarse sand can also be used on surfaces to reduce slipping. It has a rough texture that can be used on slippery surfaces like walkways, driveways, bathrooms, etc. 

Fine Sand

Unlike coarse sand, fine sand has a smooth and fine texture. It has smaller grains than coarse sand and is an excellent choice for certain construction purposes. It is also called soft sand or silver sand.

Its smaller grains allow the sand to be tightly bound to one another. This creates a smooth and even surface that can be used to create a base layer for concrete, pavers, etc. 

It can also retain moisture. It quickly absorbs water and distributes it evenly throughout the surface, which can be beneficial for soil moisture. 

It can also be used in children’s play areas. The fine sand particles provide a soft texture that children can play on without hurting themselves. The moisture retention properties also allow for creative and fun activities like digging and shaping. 

Coarse Sand Vs. Fine Sand

The main difference between coarse and fine sand lies in the size of their respective particles. It influences their properties, performance, and applications. The table below depicts some major differences between coarse and fine sand. 

Coarse SandFine Sand
It has larger grains, around 0.5mm to 2mm.It has smaller grains, around 0.075mm to 0.425mm.
Particles are irregular in shape and sizeThe particles are more even and rounded.
It has a rough texture.It has a smooth texture. 
It has excellent drainage properties due to its larger grain size, allowing water to flow freely.It has poor drainage facilities due to smaller grains, which can lead to accumulating water.
It has low water retention properties.It has high water retention properties.
Coarse sand is less expensive than fine sand. Usually more expensive than coarse sand.
It is used in concrete, drainage, and various other purposes.It is used in mortar, sandboxes, and other specific purposes. 

Which Sand is Better for Construction?

Sand For construction

Coarse sand and fine sand have their own properties and distinctive qualities. They are useful for different types of construction and landscaping purposes. Below are some major applications of coarse sand and fine sand. 

Coarse Sand

  • Used as an important component in concrete mixes.
  • Used as a stabilizing material in road construction for better drainage and support. 
  • Used in landscaping for better drainage.
  • Used as a stable foundation for pavers.
  • Used in water and waste treatment plants for better drainage of waste particles. 

Fine Sand

  • Used in mortar to bind bricks and blocks. 
  • Used in plastering to create smooth walls and ceilings.
  • Used to create sandboxes for children’s play area.
  • Used in beach replenishment projects.
  • Used as a raw material in glassmaking.

Technical Guidelines for Selecting Sand

1. Particle Size Distribution:

    The particle size of sand helps achieve better compaction and strength and reduces voids in the mix. For this, ensure the sand has a well-graded mix of particle sizes.

    2. Shape and Texture of Sand Grains

      Always prefer angular or sub-angular grains, which provide better interlocking and bonding strength in construction than smooth and rounded grains.

      3. Cleanliness and Impurity Levels

        It is advisable to ensure the sand is free from organic materials, silt, clay, and other impurities that can weaken the concrete or mortar. 

        4. Moisture Content

          Moisture content in sand plays a huge role in construction stability. Excess moisture content in sand can affect the concrete mix, while insufficient moisture may lead to poor workability.

          5. Durability Requirements

            Sand durability is crucial when it comes to withstand environmental conditions the structure will face. It should be able to resist weathering and not degrade over time.

            6. Local Availability and Cost

              Going with locally available sand is a smart option to avoid transportation costs. On the other hand, the sand must meet the quality standards before being used for construction.

              7. Supplier Quality Assurance

                Work with suppliers who can provide high-quality sand with proper documentation and testing reports. 

                Conclusion

                Coarse sand and fine sand have their own uses in construction and landscaping. Before choosing one, understand your requirements well. Choose the one that best suits your needs. You can consult a professional if you want to get a clear idea of which one to buy. 

                FAQs

                1. What is the size of coarse and fine sand?

                Coarse sand has larger grains, around 0.5mm to 2mm. Fine sand has smaller grains, around 0.075mm to 0.425mm.

                2. What about the drainage properties of coarse and fine sand?

                Coarse sand promotes good drainage due to larger grains, allowing water to flow freely. Fine sand has poor drainage facilities due to smaller grains and can accumulate water. This makes coarse sand the best choice for surfaces that require higher drainage facilities.

                3. Which is expensive, coarse sand or fine sand?

                Fine sand is more expensive than coarse sand. The cost depends on factors like availability, demand, and processing time. 

                Can You Cancel a Mortgage Deed Early?

                0
                Can mortgage deed be Cancelled?

                One of the common questions that the owners ask is, Can I cancel my mortgage deed? The answer is not a simple yes or no, but it depends on various factors that involve legal and financial terms.

                For cancelling a mortgage deed, you can sell the property and use the amount to repay the loan, or you can turn over the ownership to the lenders, you can also opt for a short sale, rent the home, ask for loan modification, seeking foreclosure or the discharge of the mortgage deed once it is paid completely. There are various options available for cancelling the mortgage, and this will depend on the individual’s situation and financial objectives.

                What is a Mortgage Cancellation Deed?

                The mortgage cancellation deed is a document that is used to release a mortgage lein from the property title after the debt has been completely repaid. This document states the end of the agreement between the borrower and the lender as it provides clarity and assurance of ownership. 

                Legal Steps and Grounds for Mortgage Cancellation

                For cancelling a mortgage the borrower, their lawyer or notary can discharge the mortgage once it is completely paid. It is important to make sure that there is no outstanding amount that is related to the products like the home equity line of credit.  Homeowners also have the right to a rescission that will allow them to back out of certain refinance, home equity loan and HELOC contracts within 3 business days of signing the mortgage contract. For terminating your mortgage agreement, may involve reviewing, contracting lenders, negotiating, payments regarding the application fees, and also obtaining the release.

                Steps Involved in Cancelling a Mortgage Deed

                The prepayment penalties are an important detail that must be known before the cancellation of the mortgage. These penalties are the charges that are imposed by the lenders to the borrower when they try to repay the loan before the agreed period of time. The prepayment penalties may vary depending upon the agreement on the loan. 

                1. Review the mortgage agreement completely and look for any clauses that are related to pre-payment penalties.
                2. Contact your lender to discuss the prepayment options and any related fees.
                3. Negotiate with the lender to potentially reduce or eliminate the prepayment penalty.
                4. Calculate the remaining balance and determine the amount that you can pay to prepay the mortgage.
                5. Submit the request to your lender to initiate the prepayment process.
                6. Make the prepayment according to the agreed terms, and this is the confirmation from your lender.

                Conditions When a Mortgage Deed Cannot Be Cancelled

                There are some limitations and restrictions that must be known before the borrower cancels the mortgage. There are some situations that may prevent the cancellation of a mortgage where it will be extremely difficult or more costly.

                • If it is a fixed-term contract, then breaking the agreement can result in a high penalty.
                • Some more days agreements will include the prepayment penalties which are fees that must be paid if the borrower can pay off the mortgage earlier than the agreed time.
                • If there are any refinancing or loan modifications, then the approval from the lender is important to cancel the mortgage deed.

                Possible Exceptions and Consequences

                • If the lenders and borrowers can mutually agree to the cancellation of the mortgage then the mortgage can be cancelled. This happens mainly if there are any other alternative arrangements like a deed in lieu of foreclosure. 
                • If the borrower files for bankruptcy then the court may involved and change the terms of the mortgage.  In most cases, it will lead to the mortgage being canceled.
                • In some rare cases, the government may interfere or change the last that can impact the enforceability of the mortgage deed.

                Consequences of Attempting to Cancel Without Meeting Conditions

                If the mortgage was attempted to be cancelled without meeting the conditions, then there will be some consequences. They are,

                • The lenders can take legal actions to enforce the terms of the mortgage which can include foreclosure proceedings.
                • If you are attempting to cancel the mortgage without fully meeting any necessary conditions, it can result in financial penalties. These financial penalties include prepayment fees or fines.
                • The unsuccessful attempts at mortgage cancellation can negatively affect the credit score of the borrower. This will make it hard for borrowers to get the loan in future.
                • If the mortgage is not properly cancelled, then the borrower will be held liable. It will be continued after the debt has been repaid, which can lead to legal complications and financial obligations.
                • Without a proper cancellation, the title of the property may remain restricted by mortgage. This will create confusion about the ownership rights and future transactions that involve the property.

                Conclusion

                The cancellation of a mortgage deal involves various legal steps and financial considerations. It is possible to discharge the mortgage if it has been completely paid. But there may be a prepayment penalty and other restrictions if you want to cancel early. After carefully studying your agreement and consulting with your lender, you can avoid penalties and complications if possible. Always make sure that the proper cancellation process has been carried out properly to secure the clear ownership of your property. So that you can avoid any future legal or financial problems.

                FAQ

                1. Can a mortgage be modified instead of cancelled? 

                Yes, loan modifications can adjust payment terms without cancelling.

                2. What if my mortgage has a fixed term? 

                Cancelling it early may result in high penalties.

                3. Can a mortgage be modified instead of cancelled? 

                Yes, loan modifications can adjust payment terms without cancelling.

                4. Can the government cancel a mortgage deed? 

                In rare cases, government intervention may affect mortgage deeds.

                5. Does cancelling a mortgage affect my credit score? 

                Cancelling properly won’t affect it, but improper cancellation can lower it.

                6. What happens if I don’t meet mortgage cancellation conditions? 

                You may face legal action, penalties, or continued liability.

                Anchor Bolts: Types, Applications, and Key Considerations

                0
                Anchor Bolts

                An anchor bolt is a staple fastener designed to clamp structural elements to concrete. It plays a crucial role in all types of construction industry to embed one end of a material with the opposite end. They are known for providing stable and secure structural support. They are available in various types , each suited to fit a wide range of applications.

                If you are confused about choosing the right one, you’ll get an idea here. In this blog, we’ve discussed the anchor bolt types and their application in detail. Continue reading to learn more. 

                What is Anchor Bolt

                An anchor bolt is a specialized fastener used to attach and secure structural or non-structural objects to concrete surfaces. One end of the anchor bolt is drilled into the concrete and the other end is fixed above the concrete. The exposed end is clamped with attaching equipment that causes the anchor to expand and fit the hole.

                How Anchor Bolt Works

                Concrete is a strong and fundamental material that seems more difficult to work with than other materials. Unlike wood or metal, the fastening to concrete demands specialized anchors and techniques. In contrast to traditional methods, these are the steps involved in using anchor bolts:

                • Drill a hole in the concrete
                • Insert an anchor that fits the hole well
                • Fasten a screw into the anchor

                Anchor Bolt Types

                As mentioned earlier, anchor bolts are classified into four different types to fit the various application requirements. Each has its own purpose and merits based on the intended use. Exploring its applications can help you choose the better one for your project.

                L-Shaped Anchor Bolts

                L-shaped anchor bolts are available in various sizes, shapes, and materials – often used in masonry and structural applications. This type is well-suited for highway sign structures, light poles, tooling, and heavy equipment. They all consist of a threaded end, making them ideal for carrying maximum load-bearing capacity.

                Other significant uses are as follows:

                • Provides strong support to structural elements in buildings, such as plates, ledges and beams.
                • Can be easily embedded in walls and beams in both load-bearing and non-load-bearing walls.

                Double End Rods with Plate

                Double-end rods with plate, in other terms called ‘threaded studs’ or ‘anchor rods.’ It contains a plate washer on one end that is attached to a tack-welded or anchor bolt with a nut drilled inside the concrete. They are primarily used in constructing highway signs, columns for buildings, and other applications.

                The most common applications include:

                • Stabilizing large constructions
                • Anchoring traffic signal poles
                • Building columns for various structures

                Headed Anchor Bolts

                Headed anchor bolts are typically different from other anchor bolts, which contain a non-threaded end with a forged, square head or heavy hex. One of the primary reasons to go for this anchor rod is that it can be installed permanently. Beneficially, there is no need for frequent maintenance once the installation is done. The headed end of this anchor bolt is embedded into the foundations, ensuring the structure is safe in place.

                Headed anchor bolt uses include the following:

                • Affix light poles
                • Helps secure structural steel columns
                • Attaching bridge rails

                Swedge Anchor Bolts

                It is the strongest anchor bolt variant and provides a safe and reliable connection between structural components and masonry or concrete. They seems like a round bar steel, which is threaded on one end and swedged on the other.

                The term “Swedge” represents the multiple indentations on the non-threaded end that help concrete sell well within the grooves and offer a great pull-out resistance. Swedge bolts are 100% domestic, and available in several different materials to meet the demand of construction needs.

                Swedge anchor bolts are typically used in applications like:

                • Connect girders and piers
                • Augment department of transport projects
                • Support highway work

                Critical Factors to Consider When Choosing Anchor Bolt

                Choosing the right anchor bolt ensures the structural support of your construction project. In that, the size of the hole and the length of the bolt are the two most important considerations. With the following, you’ll get to understand the other critical factors in detail:

                Hole Size: The size of the hole required for the anchor bolt must align with the specifications of the fixture being attached. It is essential to keep size down to ensure the bolt can fit the fixture’s hole.

                Structural Integrity: The selection of an appropriately sized anchor bolt is critical to maintain the structural integrity of a project.  Attaching as much as widest, and strongest anchor bolt can safely support the heavier loads.

                Placing of Anchor Bolt: Based on anchor bolt positioning their functionalities may differ. It is all about where you place the fixture. For instance: The anchor bolt is best suitable for wall fastening but will not be the right option for overhead fixtures.

                Concrete Thickness: Thinner, smaller diameter anchor bolt requires less drilling depth into your concrete. Estimating your minimum embedment can assist you in finding the appropriate anchor bolt that fits your application.

                Professional Assistance: If you are not aware of the right anchor bolt size, then get a consultation from a tools and equipment supplier. Explain to them about your structural needs and scope of application that may help them to suggest a reliable one.

                In a Word

                An anchor bolt plays a pivotal role in all construction projects to elevate the structural ability. However, choosing right tools to measure anchor bolts and equipment determines the outcome of your project. It needs a wider perspective to provide all the essentials that are the right fit for the application. Hopefully, this blog gives you a complete understanding of anchor bolts, their working principles and their types.

                FAQ

                1. Where is the anchor bolt widely used?

                Anchor bolts can apply to all common industries and applications include:

                Power and steel industry
                Airplane industry and rail lines
                Nuclear industry
                Construction industry
                Support structural parts of petrochemical, oil and gas industries
                Pharmaceutical and food processing plants

                2. How does an anchor bolt work?

                An anchor bolt is drilled into a concrete or masonry substrate to create a secure connection between the structural components. Based on the type of application, the anchor bolt types will differ. This technique uses a mechanical expansion within the hole when tightened.

                Bracing in Wall Framing: Types, Installation & Importance for Structural Safety

                0
                Bracing in Wall Framing

                Bracing is a technique used to reinforce walls, making them more resistant to forces such as wind and earthquakes. By adding this extra support, bracing helps keep walls upright and stable, ensuring that the building remains safe and durable. This article explains the different types of bracing and the installation process.

                What is Bracing?

                Bracing

                The bracing is a critical technique in wall framing, making the walls stronger and more stable. When building a house or any other construction, the walls should be strong enough to bear heavy forces from wind or even earthquakes. Bracing enables the wall to resist such forces for the safety and soundness of the structure.

                How does Bracing Work?

                The bracing adds extra support to the walls. For example, if you stack books vertically and push on them, they will fall. However, if you place a piece of cardboard on either side, they remain stable.  This principle applies to wall framing, where bracing typically consists of materials like wood, metal, or other sturdy materials attached to the wall framing to resist lateral loads.

                Bracing Types

                There is not one type of bracing in wall framing but more. Each has its purpose and can be used according to the design of the building and the forces the walls need to withstand.

                 Let-in Bracing:

                This type of bracing involves cutting a diagonal slot in wall studs and inserting a long, thin piece of wood or metal in it. This helps by giving more strength to the walls against lateral forces.

                Diagonal Bracing:

                Diagonal bracing is one of the simpler forms of bracing. This involves placing diagonal boards or metal straps across the framing of a wall. These cross braces are created because the forces acting on the wall are distributed more evenly, ultimately creating a stronger wall.

                Shear Panels:

                These are large panels, usually made of wood or other materials. It covers the entire wall frame and offers very good resistance to the lateral forces. These are in extensive use in areas that are pretty windy or prone to earthquakes.

                Steel Straps:

                One can attach metal straps over the wall frame diagonally, which are thin, flexible strips of metal that will provide additional support and help the wall resist lateral forces.

                Why is Wall Bracing Important?

                Wall bracing is critical as it can be used to determine whether the building is stable and safe. Without proper bracing, walls may easily bend or twist at times if the pressure turns high and may collapse. It is very important in areas prone to natural disasters such as earthquakes or hurricanes.

                Example: During an earthquake, the ground shifts. This creates a lateral force that acts on the walls by shoving and pulling them. The walls, if not well-braced, will weaken and fail, putting the whole structure in danger. Strong winds from hurricanes cause similar effects. They exert high pressure on the walls. Bracing helps the walls resist such forces. This may prevent them from swaying or falling.

                Building Codes and Bracing

                The building code is somewhat like a specification of rules and regulations that ought to be used during a construction phase for safety. Dealing with wall bracing, there are special building codes relative to the manner of conducting bracing. These vary with each different location and the type of building.

                For instance, in areas subjected to high wind speeds, the code might require stronger and more severe bracing to bear forces like those of a hurricane. Similarly, for earthquake-prone areas, it could be necessary to apply certain shear panels or other forms of bracing that afford additional strength.

                Builders are expected to adhere to these codes when constructing a building so that it meets the criteria of safety and resists any force that might come into play during its lifetime.

                Steps to Install Bracing in Wall Framing

                Steps to Install Bracing in Wall Framing

                Planning:

                Before the builder can begin, he has to design where the bracing will go. This means studying the building codes to determine what type of bracing and how much will be required.

                Cutting and Fitting:

                The builder cuts the materials to size based on the bracing type. For let-in bracing, a slot is cut into the studs, and for diagonal bracing, boards or metal strips are cut and attached diagonally across the frame.

                Bracing Securing:

                After the bracing is in place, it must be nailed to the wall frame. The nails, screws, or other types of screws are to keep the bracing from shifting or settling.

                Inspection:

                After the bracing pops into place, what is important now is to check the work to ensure it meets the building codes and is properly secured. One needs to fix any loose or improperly installed bracing before continuing with the construction process.

                Final Checks:

                A final check is made before the wall is covered with drywall or other finishes to ensure bracing is present and functioning as intended. This ensures the wall is safe and gives stability.

                Conclusion

                Bracing plays a vital role in wall framing to develop strength and stability in the structure. It helps the walls resist both wind and earthquake loads while making sure that the building provides safety to its occupants. With a proper understanding of different types of bracing and following the proper steps of installation, builders can assure themselves that the walls are strong and code-compliant. Whether it is a small house or a big one, whether you are constructing a small or large commercial structure, good wall bracing at the foundation means safety and durability of the building.

                FAQs

                1. What is the fundamental purpose of wall bracing?

                The primary function of wall bracing is to stiffen the walls for stability, resisting lateral forces such as wind or earthquakes.

                2. Can wall bracing be added to existing structures?

                Yes, wall bracing can be added to existing ones. However, professional assistance is advisable for accurate installation.

                3. Name the most common materials known to be used for wall bracing.

                Common materials for wall bracing include wood, metal, and shear panels.

                4. Do building codes require wall bracing?

                Yes, most building codes require wall bracing to make the structure both safe and stable.

                5. Does improper wall bracing lead to structural failure?

                Yes, poor wall bracing may lead to structural failure, particularly in locations where strong lateral forces have been experienced.

                What is Aggregate in Concrete?

                0
                Aggregate in Concrete

                Introduction

                Aggregates were found on Earth even before humans existed. They are formed from volcanoes, glaciers, water, and, with time. They provide strength, durability, and workability to the mix. Therefore, the selection of the aggregate plays an important role. In today’s blog from Brick & Bolt, you will understand the aggregates and their impact on the construction industry. Let’s delve deeper for comprehensive knowledge about its functions and the importance of its role.

                What is Aggregate in Concrete?

                Aggregates are granular geological materials. It is an essential ingredient for construction. It increases the mechanical strength of the concrete by making it compact. Aggregates are composed of crushed stones, rock sand, and gravel. These are mixed with cement and water to obtain the final product. It has various applications in projects like railway runways, parking lots, walkways, etc. They are classified into two categories based on size: Fine aggregates and Coarse aggregates. 

                What are Fine Aggregates?

                Fine aggregates are smaller particles. They have a diameter of less than 4.75 millimeters(the size range is typically 0.075 mm to 4.75 mm). For example: sand. They are typically made of crushed stone, natural sand, or manufactured sand. It is utilized to fill the voids in between coarse aggregate. Fine aggregates enhance the workability of the concrete and promote its overall strength.

                What is Coarse Aggregate?

                Coarse aggregates are generally larger particles. These have diameters greater than 4.75 millimeters. For example: gravel and crushed stones. They are obtained from natural sources like quarries, riverbeds, gravel pits, etc. The coarse aggregates are used for concrete production for roads and buildings. It provides stability to railway tracks.

                Functions of Aggregate in Concrete 

                Functions of Aggregate in Concrete 

                The aggregates have multiple functions related to concrete. 

                • The aggregate materials in concrete improve the mechanical strength as it is more compact. 
                • It also helps to reduce the amount of cement required, making it more economical. The concrete contains aggregates, which provide the necessary volume and bulk. 
                • Aggregate enhances strength with improved durability. It helps to distribute the load and reduces stress. The aggregate, with its rich durability, enables it to withstand environmental conditions. 
                • Aggregate helps restrain crack development. It enhances properties such as thermal resistance and elasticity in concrete.
                • They also bring stability, volume, and dimension. The aggregate has control over the shrinkage. It also prevents the cracking of the concrete. 
                • The texture of the aggregates can be smooth or rough. It also comes in a variety of shapes, both flat and rounded. The shape and texture have a significant influence on the concrete’s workability. It also affects the overall performance during the mixing and curing of the concrete.

                Important Characteristics of Aggregate in Concrete 

                • A well-graded aggregate should typically be within the size range of 1/8 to 2 inches; however, most guidelines suggest sizing coarse aggregates between 3/8 inch and 1.5 inches (9.5 mm to 37.5 mm) based on project requirements. Aggregates larger than 3 inches are not suitable for most concrete applications.
                • The process of distribution of aggregates based on sizes is called grading. The aggregates are significant because they influence the arrangement of particles. This determines the number of voids in the concrete and its other properties. 
                • The surface texture of the aggregate plays a major role in determining the comprehensive strength. The fine aggregate can have a surface texture as both rough and smooth. 
                • The specific gravity is the ratio of the aggregate mass to the volume of water. This is primarily used for proportioning concrete mixtures and performing calculations.
                • The percentage of aggregates in concrete can vary depending on the specific mix design, usually between 60% to 75% by volume. For certain structural concrete, these values may vary 
                • Aggregates with low permeability influence the flow of water. Concrete with less permeability restrains water flow. 
                • The thermal properties of concrete are thermal conductivity, thermal expansion, and heat capacity. These properties are highly controlled by the aggregates used in the concrete. 
                • High modulus of elasticity in aggregates results in stiffer, more brittle concrete, which affects how it handles loads and temperature changes.
                • Aggregates must be free from harmful contaminants. Harmful substances can react with cement and affect the hydration process. Organic matters like clay silt can affect the concrete.

                Types and Classification of the Aggregates 

                Aggregates can be classified based on origin and density, among other criteria.

                Based on the Origin 

                • Natural Aggregates: These are obtained naturally from rocks including metamorphic, igneous, and sedimentary types. They are extracted from large rocks by an open excavation process. This includes materials such as gravel, sand, and crushed stone. 
                • Processed Materials: These include recycled concrete, synthetic aggregates, and slag(blast furnace slag is used in various forms, including granulated and air-cooled), which are manufactured into artificial aggregates.

                Based on Density 

                • Lightweight Aggregates: The bulk density of these aggregates is less than 1120 kg/m3. They have applications in lightweight concrete mixes. For example: slate, pumice, and clay. 
                • Normal weight aggregate: These have a bulk density between 1520 and 1690 kg/m3. It is used for construction purposes that require a standard mix of concrete. 
                • Heavyweight aggregate: They have a bulk density greater than 2080 kg/m3. They include materials like magnetite and barite.

                Based on the Geological Classification 

                • Igneous rock: It is highly durable and hard. The aggregates are extracted from granite and basalt.
                • Sedimentary rock: The durability and hardness depend on the source, commonly extracted from sandstone and limestone. These aggregates are commonly extracted from sandstone and limestone.
                • Metamorphic rock: These aggregates are strong and durable. These are extracted from marble and schist.

                Uses and Applications of Aggregates in Concrete 

                • Aggregates form the foundational support for building construction, facilitating the weight-bearing capacity of structures. They are essential in formulating concrete mixes for floors and walls, influencing durability and resistance. 
                • The floors and walls require aggregates in the concrete mix to determine their durability by providing the necessary resistance.
                • Aggregates are essential for road and highway construction. They form the base layers, providing stability and load-bearing capacity. 
                • Aggregate can influence the concrete load-bearing capacity. Therefore, it also helps in building bridges and dams. 
                • Aggregates are also used to create decorative concrete surfaces. They give excellent finish and aesthetic; they can be used in driveways, walkways, etc. 
                • Marine and coastal structures are designed using aggregates found in concrete. It can be used to construct sea walls, which prevent erosion and water damage. 
                • Aggregates can be used in concrete for industrial flooring. It provides the greatest support and prevents erosion and water damage.
                • Aggregates used in concrete help design the drainage system. As it manages the water flow, it can control erosion. 
                • Recycling aggregates used in concrete can improve sustainability by reducing waste. 

                Conclusion 

                Aggregate is essential for concrete preparation as it highly influences its performance. From ancient civilizations to the present day, aggregates are evolving. Architects have played a crucial role in the construction industry. It has various application ranges, from foundation implementation to big infrastructure projects. It helps bring sustainable practices along with a decorative finish. 
                Aggregates provide a vital contribution. They decide the cement’s durability, strength performance, workability, and other properties. Its selection is important in bringing effective outcomes. The type of shape, structure, and extraction is determined by the aggregate used in the concrete. With advanced technology, aggregates can be recycled and used to develop high-performance concrete.

                Asbestos in Drywall: What You Need to Know

                0
                Asbestos in wall

                Asbestos is a perfect material for construction because of its heat and fire resistance. However, if a tiny piece of asbestos gets into the air and is breathed in, they are very harmful to our body.

                In this article, you will learn what asbestos is, whether your drywall has asbestos or not, and precautions to keep it safe.

                What is Asbestos?

                Asbestos

                Asbestos is a term used to describe naturally occurring minerals that have long been used in construction due to specific properties. They comprise long, thin, fibrous minerals that are extremely strong and heat-resistant.

                Key Asbestos Minerals:

                MineralDescriptionCommon Uses
                ChrysotileAlso known as “white asbestos”; the most common type.Insulation, drywall, ceiling tiles.
                AmositeAlso called “brown asbestos”; less common.Pipe insulation, roofing materials.
                CrocidoliteKnown as “blue asbestos”; the most dangerous type.Spray-on coatings, cement products.
                TremoliteRare in commercial use but can be found as a contaminant.Some insulation and talc products.

                What is Drywall?

                Generally, drywalls are also referred to as gypsum boards or plasterboards in making walls and ceilings. Essentially, drywall material contains gypsum, a soft mineral wrapped in two layers of paper. Therefore, it is popular among builders due to ease during installation and ability to be painted over.

                Drywall Components:

                ComponentDescriptionPurpose
                GypsumA soft mineral found in sedimentary rocks.Provides the core material for the board.
                Paper SheetsTypically made from recycled paper.Cover and protect the gypsum core.

                Asbestos in Drywall

                Asbestos was incorporated in the drywalls due to its heat resistance and insulating nature. Here’s how asbestos made its way into drywall:

                • Asbestos-Containing Joint Compound: It is the major material used for insulation of spaces between two adjacent sheets of drywall. It was added to some joint compounds to make them stronger and heat-resistant.
                • Asbestos-Enhanced Drywall Panels: Sometimes, asbestos was added to the gypsum wallboard in order to improve the stability and fire resistance of the material.

                Asbestos-Containing Products in Drywall

                ProductDescriptionPurpose
                Joint CompoundThe filler is used to seal joints between drywall panels.Added fire resistance and strength.
                Drywall PanelsBoards are used to construct walls and ceilings.Occasionally enhanced with asbestos.

                Why is Asbestos Dangerous?

                Inhaling asbestos fibers can cause a major health risk if they become airborne. These particles are tiny enough to enter the lungs deeply by inhalation, eventually leading to several diseases.

                Methods to Identify Asbestos:

                MethodDescriptionPros and Cons
                Building AgeCheck if the building is old.Quick but not definitive.
                Labels and DocumentsLook for historical labels or documents about the materials.Helpful if available.
                Professional TestingHire a certified professional to test samples.Most accurate but involves cost.
                • Check the Age of the Building: Houses built before the 1980s are most likely to have asbestos in their drywall.
                • Look for Labels: If available, someone may check old labels or documents, and they can tell whether asbestos was used or not.
                • Professional Testing: This can safely be said to be the most reliable, as it involves hiring the services of a certified individual to collect samples of the drywall and have them laboratory analysed.

                What to Do if You Find Asbestos

                Find Asbestos

                If you discover that your drywall contains asbestos, it’s crucial to handle the situation correctly:

                Steps to Take When Asbestos is Found

                StepDescriptionWhy It Matters
                Do Not DisturbAvoid disturbing the material.Prevents the release of harmful fibers.
                Hire ProfessionalsUse trained experts for removal or repair.Ensures safety and proper handling.
                Follow RegulationsAdhere to local laws and guidelines.Avoids legal issues and ensures safety.
                • Do Not Disturb: They also have asbestos-containing material. Where it is left undisturbed, it will not present any danger at all if it is in good condition.
                • Hire Professionals: When doing any work that involves the removal or repair of any material containing asbestos, always engage personnel who have adequate knowledge of the handling of asbestos. They have the tools and resources that are necessary to handle the material with no compromise to the safety of the people around them.
                • Follow Regulations: Check and ensure that every regulation and guideline relating to the removal and disposal of asbestos are met.

                Alternatives to Asbestos

                Today, we use safer materials instead of asbestos. Some common alternatives include:

                MaterialDescriptionCommon Uses
                FiberglassInsulation is made from fine glass fibers.Insulation in walls and ceilings.
                Mineral WoolInsulation is made from rock or slag.Fire-resistant insulation.
                CelluloseInsulation is made from recycled paper.Insulation in attics and walls.
                1. Fiberglass: A type of covering material manufactured from glass filaments. It is safe when the installations are done perfectly.
                2. Mineral Wool: This is also called rock wool, and it serves the purpose of insulation and fire protection.
                3. Cellulose: It is a paper product made from recycled paper that is used for insulation purposes and does not contain any asbestos.

                Conclusion

                Most importantly, one needs to know about asbestos in drywall to avoid possible harm to you and your house. Asbestos is a substance that was used earlier because of its characteristic fire resistance and strength, even though we are aware that it is really harmful to our health. If one learns how to identify and control this substance, he or she will be better placed in protecting his or her family and hence providing safe shelter to them.

                Just remember that if you have any idea that there is asbestos in your home, then consult with experts. Asbestos poses a great threat when handled without proper knowledge and precautions; therefore, the need to take necessary measures so as to avoid its dangers among the people.

                Batching and Mixing: Understanding the Differences

                0
                What is the difference between batching and mixing_

                Essentially, concrete production consists of two very important processes: batching and mixing. These methods ensure that the concrete used in most buildings, roads, and bridges is strong, durable, and well-done. Let’s take a closer look at what batching and mixing involve and how they differ from each other.

                Batching: What Is Batching?

                Batching refers to the process of estimating the amount of concrete required for a given construction project and measuring the ingredients in the required proportions needed for the concrete mixture. Some of the materials used in concrete preparation are cement, water, and aggregates, which typically consist of sand and gravel. Occasionally, admixtures, which are special chemicals that enhance concrete characteristics, are also used. Batching can be done in two ways:

                1. By Volume: the measurement of the ingredients by volume.
                2. By Mass: It can be measured by weighing the ingredients.

                At present, most concretes are batched by mass because of their fair degree of accuracy. In the quest for good concrete, there is a need to measure the various materials in a mix to some considerable degree of .

                Accuracy in Batching

                Here’s how accurately different materials need to be measured:

                • Cement:
                  • If you’re measuring more than 30% of the capacity of a scale, its accuracy should be within 1% of the required weight.
                  • For small batch sizes (say less than 30% of the scale capacity), accuracy should be within ±4% (+ or – 4%) of the weight to be added.
                • Aggregates (like sand and gravel):
                  • If you’re measuring more than 30% of the scale’s capacity, the accuracy should be within 1%.
                  • For small batch sizes (capacity less than 30% of full scale) accuracy will be within 3%.
                • Water:
                  • Water is generally measured volumetrically with ±1% accuracy.
                • Admixtures:
                  • For mineral admixtures, or those materials used as a partial replacement for cement, the precision shall be the same as for cement.
                  • For chemical admixtures (liquids added into the water), the accuracy is the same for water.

                Mixing: What is Mixing?

                Mixing (1)

                Mixing is the operation of combining all batched ingredients into a uniform and homogeneous mass of concrete. The objectives of mixing are the intimate coat of all particles of the aggregate (like sand and gravel) through cement paste and homogeneous distribution of all ingredients. Such homogeneity is an essential requirement for concrete’s strength and durability.

                Mixer Types

                Mixers are of many types, each designed according to different kinds of concrete mixes. Some common types are discussed below:

                1. Tilting Drum Mixer:
                • These mixers have a tilting drum to discharge mixed concrete. The internal vanes of the drum (conical or bowl-shaped) are moving to mix the concrete.
                • Tilt mixing drums are adaptable for mixes of low workability, i.e., mixes that are stiffer and mixes with big pieces of aggregate.
                1. Non-Tilting Drum Mixer:
                • Concrete is mixed in the drum of this mixer, which must remain horizontal during operation. Discharge is by the insertion of a chute into the drum or by rotating the drum backwards.
                • Due to the slower discharge, some segregation or separation of the materials may occur.
                1. Pan Type Mixer:
                • This mixer operates by forcing the materials to mix rather than depending on gravity, as some kinds of drum mixers do.
                • Consists of a circular pan, and it rotates with paddles to mix the concrete. The variation in the mixture is not as much in this type of mixer.
                1. Dual Drum Mixer
                • Primarily used for constructing highways, this mixer has two drums arranged in series. The concrete is partially mixed in the first drum and then transferred to the second drum for final mixing, after which it is discharged.
                1. Continuous Mixers:
                • Mixers: These mixers are automatically fed mixers with continuous weigh batching and are used when continuous mixing of large quantities of concrete is required.

                Charging the Mixer

                Charging the mixer means adding the ingredients to the mixer. These can be added in different sequences, depending on the mixer type and a few concrete mix properties. The typical process is as follows:

                • Typically, a small amount of water is added first.
                • Next, all the solid materials (such as cement, sand, and gravel) are added.
                • Most of the remaining water is added at the same time as the solids, with the rest of the water added after the solids are in the mixer.
                • For very dry mixes, coarse aggregates are at times added right after the initial water just to wet the surfaces of the aggregate adequately.

                Key Differences Between Batching and Mixing

                AspectBatchingMixing
                DefinitionThe process of measuring the amounts of ingredients needed for concrete.The operation of combining all batched ingredients into a uniform mixture.
                PurposeTo ensure the correct proportions of materials such as cement, aggregates, water, and admixtures.To achieve homogeneity and ensure all parts of the mix contribute to the strength and quality of the concrete.
                Measurement MethodIt can be done by volume or by mass.Primarily involves mechanical mixing methods.
                AccuracyIt requires precise measurement for each ingredient to achieve the desired concrete quality.Focuses on thoroughly blending materials to prevent segregation and achieve uniform consistency.
                ImportanceCritical for the performance and durability of concrete structures.Essential for ensuring the final strength and workability of the concrete mix.

                Conclusion

                Batching and mixing are key steps in concrete production. Batching ensures the correct proportions of materials while mixing combines them evenly to create strong and durable concrete. Both processes are vital for achieving high-quality results and preventing issues in construction projects. On the other hand, mixing blends these materials into a uniform and homogeneous mixture, essential for achieving the desired concrete performance. Together, these processes contribute to the reliable and consistent construction of buildings, roads, and other structures, ensuring they can withstand the test of time and environmental challenges.

                Frequently Asked Questions (FAQs)

                1. How is batching an important process in concrete manufacturing?

                Batching is important for achieving the right proportion of the materials, which boils down to the strength and durability of the concrete.

                2. What happens if the mixing isn’t done properly?

                Improper mixing results in weak concrete. The materials are not distributed evenly, hence resulting in cracks or other defects in the structure.

                3. Which mixer is suitable for high-strength concrete?

                A pan-type mixer is generally more desirable for high-strength concrete because this provides a better and more uniform mix.

                4. Can water be added after the mix?

                It is not a good practice to add water after mixing since this may weaken the concrete simply by upsetting the ingredient balance.

                5. Is Manual Mixing Effective for Small Projects?

                Manual mixing can be effective for small projects, but great care is needed to ensure that uniformity and the proper mixing of the materials is attained.