Every door and window in a house is constructed with a lintel, a vital structural component. It ensures the building’s structural stability by supporting the weight above these apertures. To satisfy particular structural requirements, different lintel types and materials are produced. Explore the various varieties of RCC lintels and their uses in construction by reading on.
What is RCC Lintel?
A lintel is a structural beam utilised to bridge gaps over architectural features like doors, windows, and other openings. Cement, aggregates, sand and steel reinforcement are used to make RCC lintels. In addition to providing exceptional durability, fire resistance, and weather and moisture resistance, they are made to satisfy particular structural requirements and are positioned horizontally. They are mainly designed to bear the heavy load of the structures above them by avoiding deformation or cracking and bending as well as enhancing the aesthetic appeal of the front elevation of the building.
Importance of RCC Lintels in Construction
The important functions of lintels in the construction industry are as follows:
- Even Distribution of Loads
Lintels uniformly disperse the weights from the roof, walls, or floors above apertures like windows and doors. Lintels aid in preventing stress accumulation and preserving the building’s overall structural integrity by shifting the weight to the nearby walls or supports.
- Structural Reinforcement
The lintel is an essential component that can support the vertical load from the walls or roofs above openings. This support lessens the possibility of structural issues and helps to stop the surrounding building area from deforming.
- Restricting Bending
Lintels are capable of distributing the load across border areas, which minimises the bending or deflection of the above structure. It guarantees long-term stability by preventing deformation or cracking in the surrounding masonry.
- Appealing design
Lintels contribute to the aesthetic appeal of a building’s facade or front openings when left exposed. It can provide a unique front elevation look for buildings by creating visually pleasing planes.
Components of RCC Lintels
- Cement: It acts as a binding and strengthening agent in which the parts of the lintel can be bonded together.
- Aggregates: They contribute to enhancing the strength and volume of concrete. Sand and gravel are two examples of fine and coarse aggregates that can be utilised.
- Steel reinforcement, such as bars or mesh: They can be embedded in concrete to prevent cracking and enhance its tensile strength.
- Formwork: During the casting process, temporary structures or moulds are used to shape and support concrete until it sets.
- Water: To create the concrete mixture and start the chemical reaction, water is combined with cement and other particles.
- Chemical additives: They can enhance concrete’s workability, curing time, and durability, but are optional to consider.
Types of RCC Lintels
Reinforced Cement Concrete (RCC) lintels are extensively used for openings ranging from small windows to big doorways and may be adapted to a variety of designs. The primary varieties of RCC lintels that can be widely used in construction are as follows:
- Pre-cast Lintels

As precast lintels come in conventional sizes and shapes, they can be produced quickly and installed with ease. They offer accurate measurements, consistent quality, and the ability to be customised with various finishes to meet specific project requirements.
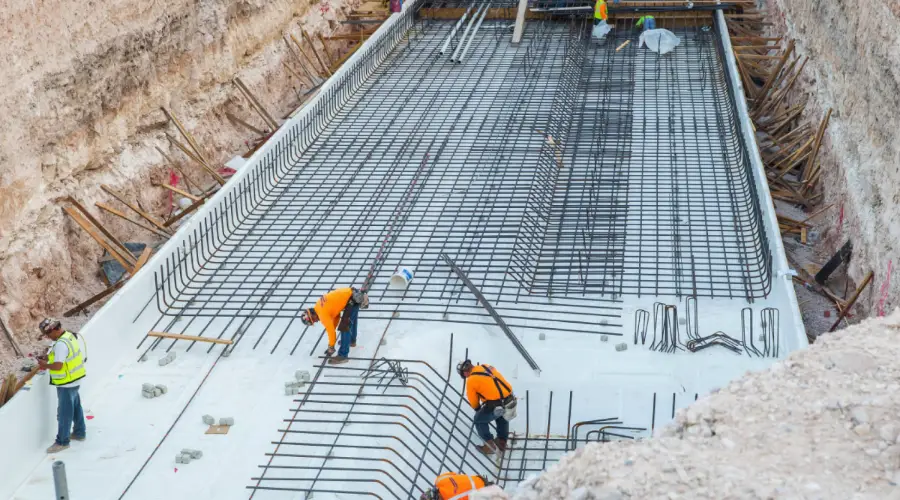
- Cast-in-situ Lintels

On-site construction of cast-in-situ lintels involves pouring concrete into a mould containing reinforcement. They fit in well with the structure and are flexible enough to accommodate different designs and sizes.
Design and Construction of RCC Lintels
Effective Depth and Span:
- Effective depth d = l/10 (IS:456-2000).
- Overall depth D = d (effective depth) + cover.
- Width B = wall thickness.
- Effective Span, l = Least of ([Clearspan + Bearing], [Clean Span + Effective Depth])
- Minimum bearing width = 150 mm on a 50 mm PCC bed.
Load and Moment Calculations:
The triangular load acting on the lintel beam can be determined using the following formula:
Design Load, W = Weight of the equilateral Δªᣴ portion of a masonry wall on the lintel.
= ½ lef x 0.867 lef x t x ρ
Here, lef is the effective span; the thickness of the masonry is given by ‘t’, and ‘rho’ is the density of masonry, i.e. 19.2kN/m2.
- Self-weight of the lintel per metre length (kN/m) w = ( 1 x b x D ) x Density of RCC
- The moment caused by the self-weight of the lintel, M1 = wl2/8
- Moment due to triangular load of masonry wall above the lintel, M2 = Wl/6
- Total bending moment M = M1 + M2
- Factored ultimate moment = Mu = 1.5M
Check Effective Depth:
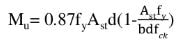
- The moment of resistance for Fe250 bar steel, Mu = 0.149fckbd2
- For Fe415 steel, Mu = 0.138fckbd2
The depth required for the given lintel beam (dreq).
- If d < dreq, the design is not safe. Revise the design for an increased depth.
- If d > dreq, the design is safe.
Design Reinforcement:
- Tension Steel:
The formula for the moment of resistance is given by
From the above equation, determine the value of Ast. Choose the diameter of bars (8mm, 10mm, 12mm, etc.).
Number of bars for tension reinforcement = Ast/ (Area of one bar)
- Shear Reinforcement:
Calculate Vu=1.5 × Shear Force. If τv<τc, provide nominal stirrups; otherwise, add vertical/inclined stirrups. Ensure spacing ≤ min(Sv,0.75d,300mm).
Reinforcement Detailing:
- Main bottom reinforcement: 4 bars (10 mm dia), 2 bent-up.
- Top reinforcement: 2 bars (10 mm dia).
- Shear reinforcement: 2-legged stirrups (6 mm dia) at 125 mm c/c spacing.
Advantages of RCC Lintels
- This kind addresses the poor tensile strength of concrete by using reinforcement.
- They are ideal for larger sizes and longer spans because they are quite strong.
- Modern constructions frequently use RCC lintels due to their easy installation and availability.
- High strength, fire resistance, durability, and ease of building.
- In comparison to other lintel varieties, they are also more affordable and robust.
- They provide a smooth finish and an appealing appearance.
Disadvantages of RCC Lintels
- The heavy weight of RCC lintels makes installation and handling challenging.
- A longer curing period may cause a delayed construction process.
- Cracking susceptibility under extreme loads or temperature fluctuations.
- Increased starting cost because of increased amount of labour and materials required.
- Needs expert labour to be cast and installed correctly.
- Restricted design flexibility after finalisation.
- If not adequately sealed, it may be prone to water damage and vulnerable to moisture and freeze-thaw cycles.
What is the Difference Between a Steel Lintel and an RCC Lintel?
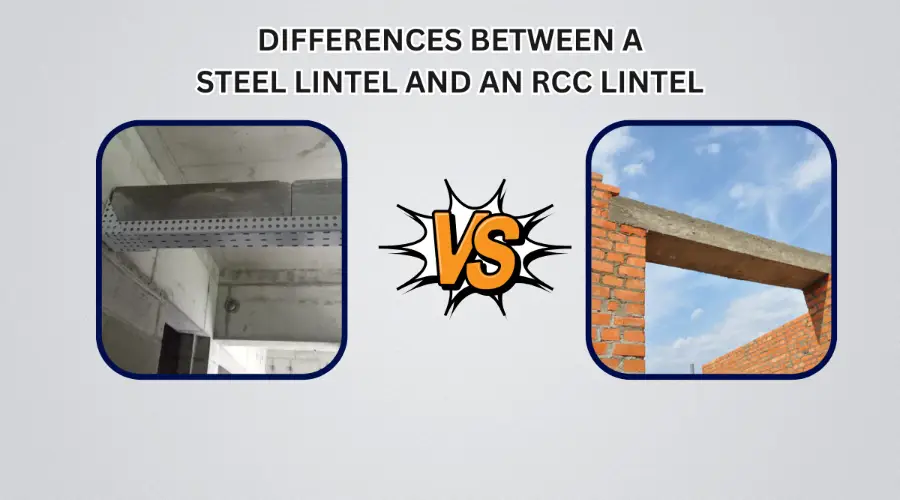
The several differences between a steel lintel and an RCC lintel are mentioned below:
| S.no | Property | Steel Lintel | RCC Lintel |
| 1 | Materials | Made from high-strength steel (e.g., I-beams, channels) | Made from reinforced cement concrete with cement, sand, aggregate, and steel reinforcement bars (rebars) |
| 2 | Strength & Load-bearing Capacity | The high tensile strength of steel lintel provides high load-bearing capacity. | Strong but not as strong as steel; enhanced by reinforcement bars for tensile strength |
| 3 | Installation | Prefabricated in standard sizes and installed with supports or brackets | Can be precast or poured directly on-site using wooden or steel formwork. |
| 4 | Corrosion Resistance | Prone to corrode over time, particularly in conditions that are corrosive or wet | Since there are no exposed rusting metallic components, there are no corrosion problems. |
Conclusion
RCC lintels are vital architectural elements that give structures the support and stability they need. They are crucial to construction projects because they improve a structure’s overall architectural integrity and beauty in addition to meeting functional objectives. RCC lintels are robust, durable, and versatile, making them ideal for supporting large loads or bridging extensive areas. Choosing the right type of RCC lintel is crucial to the success and longevity of a building project since it can significantly affect the structure’s operation and design.