Home Blog Page 15

Urethane Grout – Benefits, Applications, and Installation

0
urethane grout​

Grouting plays a major role in maintaining any construction’s structural integrity, stability, and durability. It is the process of injecting a pasty material into the structure to improve its physical characteristics. Numerous grouting options are available in the industry, among which urethane grout provides excellent resistance and durability. Here is a detailed look at urethane grout and everything you need to know about it.

What is Urethane Grout?

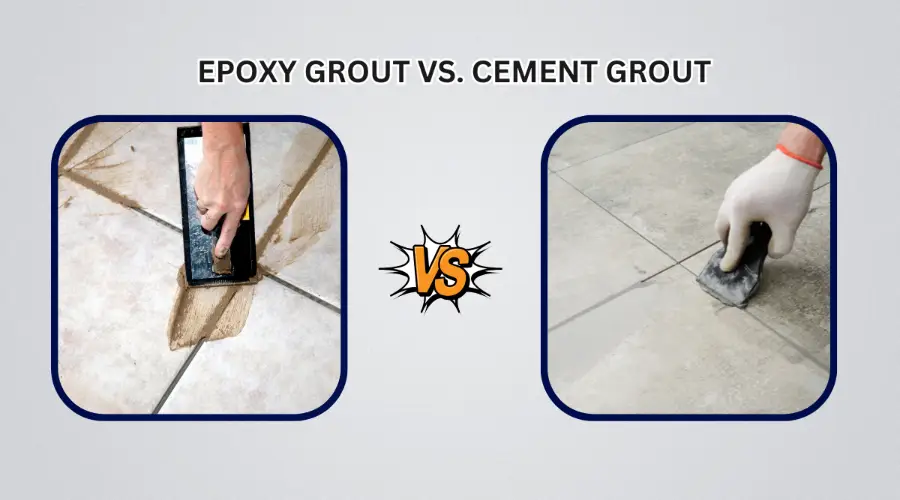
Urethane grout is a type of grout made using polyurethane resin and cementitious materials. It is an alternative to traditional cement grouting, as it is cleaner, faster, and less disruptive than cement grout. This is most commonly used to repair and stabilise concrete structures, improve structural integrity, and prevent further damage.

Benefits of Urethane Grout

Flexibility

This highly flexible grout allows the structure to resist minor movements and vibrations without chipping and cracking. It is ideal for structures prone to stretching, twisting, compression, and fluctuating temperatures.

Adhesion

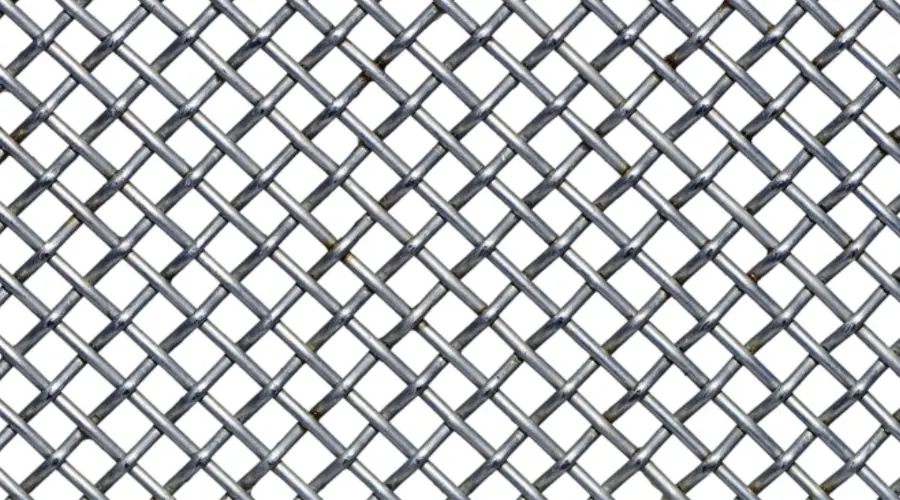
The polyurethane grout provides strong adhesion to most tiles, stones, ceramics, glass, porcelain, and more. This strong bond between the tiles, concrete, and stones prevents the structure from developing cracks or damage.

Waterproof

Urethane grouts are non-porous and highly resilient to water and moisture. This grouting completely seals gaps and cracks and creates a barrier to prevent water from affecting the structure.

Chemical Resistance

PU grout is highly resistant to acids, alkalis, solvents, cleaning agents, and other chemical agents. Thus, it is suitable for exposed structures and marine environments.

Fast Curing

Urethane grouting requires less curing time, which improves the installation and repair speed. The quick setting time makes the structure functional immediately and doesn’t affect foot, machine, or vehicular traffic.

Durability

Urethane grouts are highly durable and superior to other grouts. They can withstand compressive and flexural strength and have good chemical, water, impact, and abrasion resistance. All these properties prevent the structure from distortion and improve the lifespan.

Applications of Urethane Grout

Soil Stabilization

PU grouts are most commonly used to stabilise construction sites. They are injected into the sand to improve the soil’s load-bearing capacity, especially in areas that require quick stabilisation and are water-prone areas.

Waterproofing

Urethane grout is non-porous and highly effective for waterproofing applications. This grout can stabilise soils and structures exposed to water and provide a water-resistant layer. It is used to repair water-prone structures such as basements, tunnels, dams, and marine structures.

Void Filling

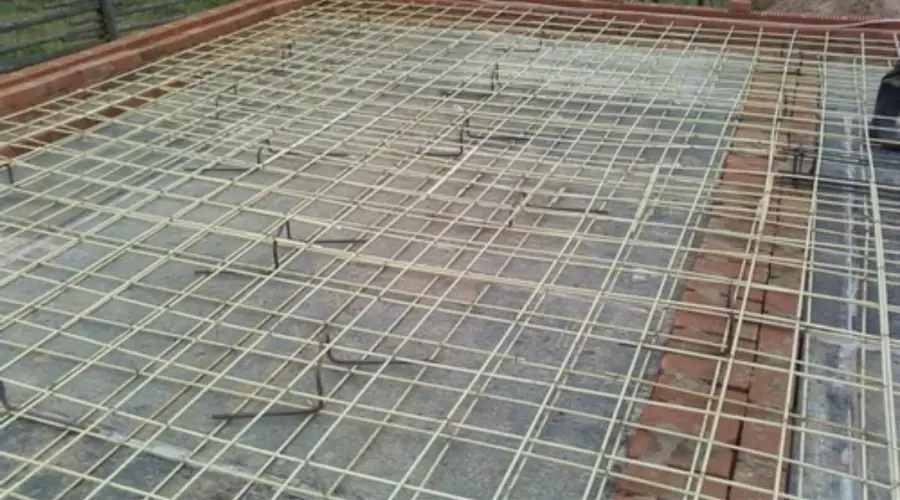
This grout is injected to fill voids in concrete structures such as slabs, walls, and damaged or abandoned structures, improving stability and providing additional support. The filling of gaps prevents the surface from debris and dirt.

Seal Cracks and Joints

PU grout plays an important role in repairing existing structures, such as sealing cracks and joints. It is an excellent adhesive material that binds the cracks or joints and prevents the structure from causing further damage.

Re-level Slabs

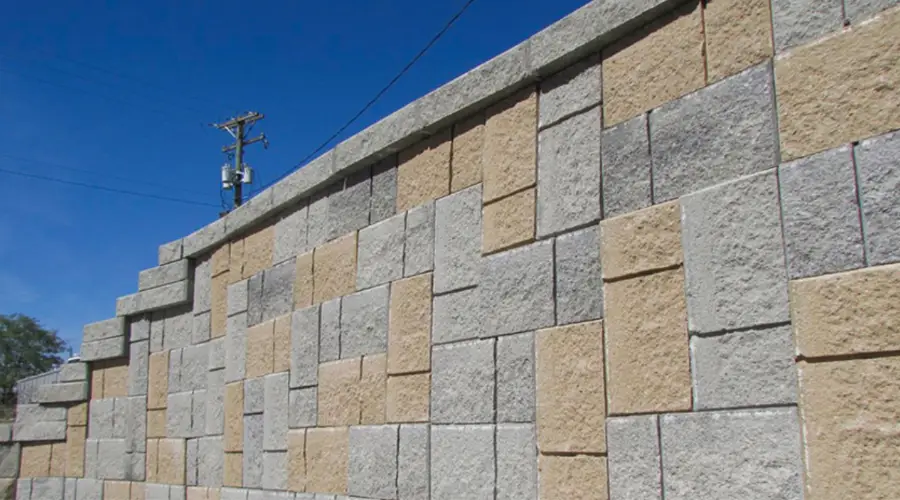
Polyurethane grouting is best suited for lifting large and heavy slabs. It has a high expansion force and can spread large areas of the slabs with minimal injection holes. Thus, lifting roads, bridges, rail crossings, and heavy-load slabs in industries and commercial spaces can be done.

Materials Used for Installing Urethane Grout

The materials used for installing urethane grouts include:

  • Urethane Grout: It can either be pre-mixed or in powdered form.
  • Epoxy/ Rubber Grout Float: It cleans and smoothens the grout and tile surface.
  • Sponges and Microfiber Cloths- They clean the excess grout on the tile surface for a polished finish.
  • Injection Pump: This pump applies or injects epoxy grout to joints or gaps.
  • Drilling Machine: It drills the injection ports to seal the cracks.
  • Water: Used to activate the grout.

How to Install Urethane Grout?

Surface Preparation

Ensure the tile surface is clean, dry, and free from dust, debris, and other contaminants. Dampen the surface with clean water to prevent the grout from binding to the tiles.
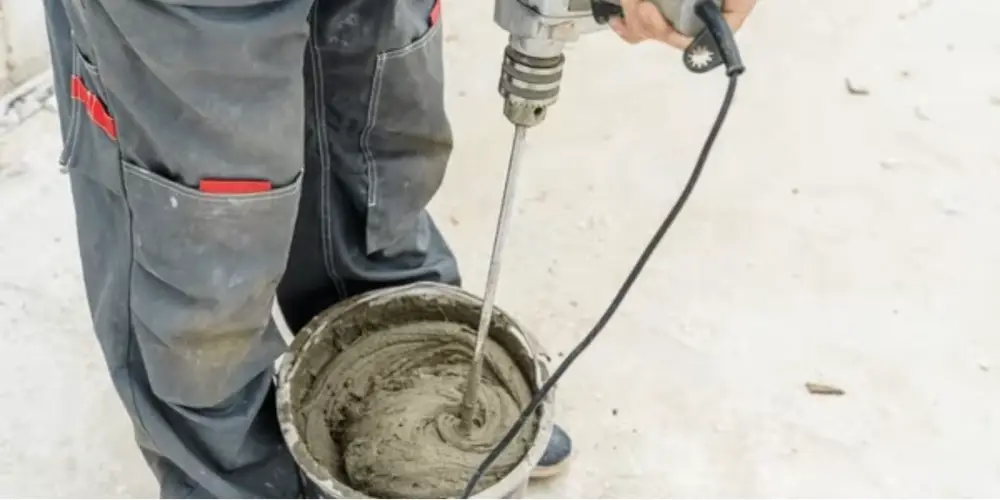
Mixing

Mix the powdered urethane with cementitious material to make it a pasty, homogenous substance. If the grout is pre-mixed, ensure it is well stirred and has the right consistency for grouting.

Applying Grout

Applying Grout

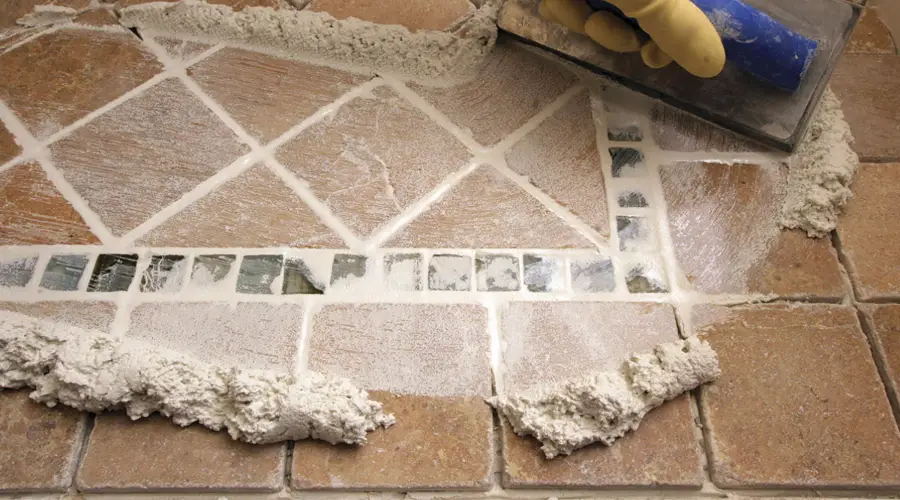
Apply the grout between the tiles using a rubber grout float. The process should be done diagonally across the surface, and the grout should be pressed into the joints without any air voids.

Cleaning

Cleaning

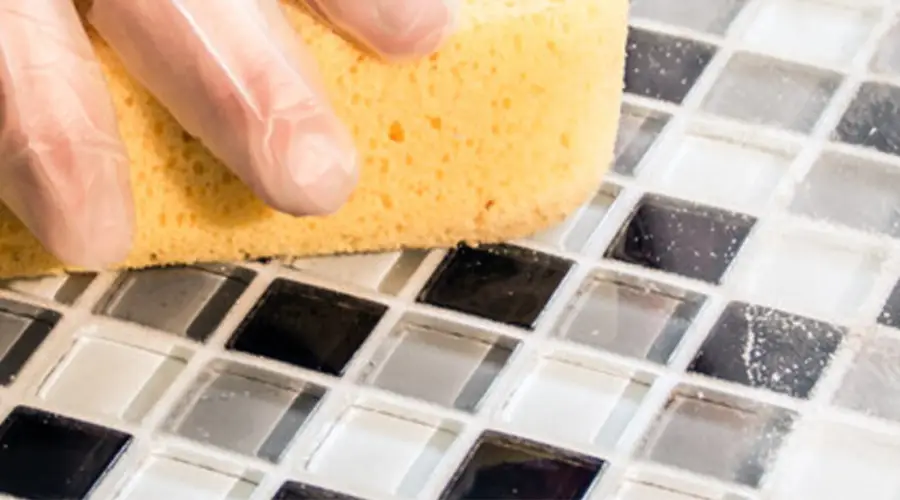
After applying the grout, clean the tile surface using a sponge or microfiber cloth to remove excess grout before it cures. The cleaning process should be done carefully to avoid pulling the grout off the joints.

Curing & Final Cleaning

After initial cleaning, allow the grout to set for 10 to 20 minutes for the initial setting. Use the wet sponge to wipe away the haze formed on the tile surface. Repeat the process until the hazes formed on the tile surface is cleaned. After final cleaning, leave the surface to cure for 24 hours to attain maximum hardness and resistance.

Cleaning and Maintenance of Urethane Grout

  • Avoid harsh cleaning chemicals on the surface, as they may cause damage over time.
  • Frequent cleaning should be done to prevent dust, dirt, spills and debris on the surface.
  • Use natural cleaners, such as oils, enzymes and soft, soapy water to clean the surface.
  • Use a soft scrub, sponge, or microfiber cloth to wipe away stains and dust.

Conclusion

Urethane grout is highly resistant and durable, helping maintain structural integrity. It is widely used for filling voids, cracks, and joints, lifting slabs, stabilising ground surfaces, and fixing tiles. Although it can be expensive and requires skilled workers, PU grouting provides numerous benefits and helps improve the structure’s lifespan.

FAQs

1. Is Urethane Grout Waterproof?

Yes, urethane is extremely water-resistant, which protects the structure from all kinds of water intrusions and moisture. This grout is widely popular for its use in water-prone areas.

2. How Long Does Urethane Grout Last?

Urethane grout is highly durable and has an expected lifespan of ten to twenty-five years. However, the lifespan depends on usage, atmospheric conditions, and material quality. 

3. Can Urethane Grout Be Used Outdoors?

Yes, urethane grout possesses good flexibility and weather resistance, thus making it suitable for outdoor applications.

Roof Slab Reinforcement – Purpose, Design, and Construction

0
roof slab reinforcement

The roof slab is an important component of the building. It provides the necessary support and separates the different levels. It plays a major role in withstanding load and ensuring the building’s safety, security, and durability. As load-bearing is the roof slab’s primary purpose, necessary reinforcement must be placed within the structure. So, here we look at roof slab reinforcement, its purpose, reinforcement materials, and the design and construction process.

What is Roof Slab Reinforcement?

The Roof Slab is a flat load-bearing section of the building supported by beams, columns, and a structural framework. Roof Slab Reinforcement incorporates reinforced steel bars or mesh into the concrete slab to enhance structural strength and durability. It helps the slab withstand tensile stresses acting on the structure and protects it from cracking.

Primary Purposes of Reinforcement in Roof Slab

  • Reinforcement in roof slabs plays a major role in enhancing overall structural integrity and durability.
  • It provides the necessary tensile strength and improves the resistance against tensile forces.
  • It helps control the cracks caused by the slab pulling apart and enhances durability.
  • Improves the load-bearing capacity of the slab.
  • It boosts the ductility of the concrete by allowing it to deform under stress without causing a sudden failure.
  • It helps the slab withstand thermal expansion and contraction.

Reinforcement Materials Used for Roof Slab

Steel Bars (Rebars)

Steel Bars (Rebars)

Steel bars or rebars are the most commonly used reinforcement in the construction of roof slabs. The steel bars vary based on the diameters and grades. The most widely used steel bars are:

  • Mild Steel (MS) Bars: They provide good strength and are easily bendable.
  • Thermo-Mechanically Treated (TMT) Bars: They provide high strength, durability, and corrosion resistance and give flexibility and strength.
  • High Yield Deformed (HYSD) Bars: They are designed with a deformed surface suitable for bonding with concrete and providing tension and shear resistance.

Steel Mesh

Steel Mesh

Steel mesh is a grid or network structure of steel wire that is welded together to provide the necessary reinforcement for smaller slabs and distribute reinforcement uniformly.

Steel Plates and Strips

Steel Plates and Strips

Steel plates and strips can be used as reinforcement within the slab to provide additional strength. These plates and strips are used for higher load-bearing slabs and structures designed for specialised applications.

Fiber Reinforced Polymer (FRP) Rebar

Fiber Reinforced Polymer (FRP) Rebar

This reinforcement offers high strength and good resistance to corrosion. This composite rebar is used in extreme climatic and harsh environments.

Pre-stressed and Post-tensioned Tendons

Pre-stressed and Post-tensioned Tendons

The tendons are made from high-strength steel and are widely used in pre-stressed concrete slabs. They are directly installed, and concrete is poured over them to create the necessary compression to withstand bending.

Design Considerations for Roof Slab Reinforcement

Load Calculations

The loads acting on the slab must be considered while designing the roof slab. The loads that need to be considered include:

  • Dead Load: It measures the self-weight of the reinforcement and concrete used in the slab.
  • Live Load: It measures variable loads on the roof slab, such as traffic, furniture, equipment, and other loads.
  • Other Loads: It also includes the wind, seismic, imposed, and other concentrated loads acting on the structure.

Span and Supports

The length of the span plays a crucial role in determining the thickness of the slab, as well as bending moments and shear forces. The type of support that holds the slab should be specified when designing the reinforcement requirements.

Slab Thickness

The span, loads, and deflection limits play a major role in determining the slab’s thickness, which should be determined based on the span-to-depth ratio. The thicker the slab, the less reinforcement it requires; however, it may be more expensive.

Reinforcement Layout

Two types of reinforcements are used when designing the roof slab: Main Reinforcement and Distribution Reinforcement.

  • Main Reinforcement: It carries the load to the slab and is placed in shorter and longer spans.
  • Distribution Reinforcement: These are the smaller reinforcement bars placed perpendicular to the main reinforcement to distribute the loads evenly across the slab.

Properties of Materials

The compressive strength of the concrete should withstand the imposed loads acting on the structure. The yield and tensile strength of the steel reinforcement should be within the design limits.

Step-by-Step Process of Roof Slab Reinforcement

Preparing the Site

The initial step in constructing the slab reinforcement is to prepare the site. This process includes ensuring the site is level, the foundation is strong enough to support the slab’s weight, and the supporting structures are properly cured.

Building the Formwork

After the site is prepared, the formwork is built to hold the concrete in place. The formwork is typically made of wood, steel, or aluminium. It should have precise dimensions and be strong and secure to keep the concrete in place before it sets. 

Placing the Reinforcement

Place the reinforcement bars within the framework based on the design. The reinforcement should be laid based on the span, thickness, and grid pattern. Connect the grids to form a strong reinforcement framework.

Concrete Pouring

After placing the reinforcement rebars, the mixed concrete should be carefully poured into the formwork. Vibrators remove air voids and form a strong bond between the concrete and the bars. Complete filling the slabs and ensure no leakage or deterioration in the formwork.

Curing

After pouring the concrete, allow the RCC slab to set. After hardening, cure the roof slab periodically with water, keeping it moist and cool. The curing process takes several days until the concrete attains full strength and durability.

Demolding

Once the slab is completely cured and attains the strength to stand without the formwork, the moulds are removed, making it suitable for plastering, other construction, and electrical works.

Critical Considerations in Reinforcement Roof Slab

Dealing with Structural Discontinuities

Any structural discontinuity in the roof slab, such as openings, edges, and changes in slab thickness, has a major impact on the structure. However, it can be addressed carefully to maintain structural integrity.

Providing adequate edge beams, reinforcing the corners, and detailing the cut-off points with reinforcement bars could help distribute loads, prevent cracks, and resist stress.

Handling Thermal and Shrinkage Stresses

Thermal and shrinkage stresses can be mitigated by providing necessary reinforcements to resist tensile stresses, placing control joints, and using high-quality concrete to reduce shrinkage levels.

Also, proper curing methods, controlled temperatures, joint sealing, and regular inspection could mitigate thermal stresses.

Crack Prevention Strategies

  • Proper slab design with adequate reinforcement, control joints, and slab thickness should be properly calculated.
  • High-quality concrete and steel bars can be used.
  • Removing air voids during construction is mandatory.
  • Regular and proper curing under controlled conditions is necessary.
  • Use concrete cover to prevent the reinforcement from corroding.
  • Regular maintenance and providing protective coating could enhance durability.

Conclusion

Roof Slab Reinforcement is an important structural component that enhances the tensile strength of concrete and prevents the structure from cracking and other deterioration. The reinforcement design should be carried out carefully to ensure the roof slab can withstand all loads on the structure. We hope this blog helps you understand roof slab reinforcement and its importance.

Wall Slabs – Benefits, Applications & Installation Explained

0
wall slabs

Modern construction finds numerous ways to improve both aesthetic appeal and structural integrity. When the cost is the biggest concern but you want to improvise the overall building appearance, wall slabs are an ideal way.

They are versatile and find various applications, such as residential, commercial, and industrial projects. Right now, they become an integral part of modern buildings. Beyond their aesthetic value, you can benefit from their various functionalities. If you would like to learn about these slabs, continue your reading. This article covers their applications and advantages in detail.

What are Wall Slabs?

A wall slab is a large, solid, and vertical structural element that covers the walls efficiently with a seamless finish. They can be made of concrete, steel, or other composite materials. Wall slabs are a type of building structure that acts as a load-bearing and partitioning member.

Unlike conventional slabs (roof or floor slabs), they are not positioned horizontally. It is typically used at retaining walls, external walls, and even architectural facades. By adjusting the design, you can use wall slabs for several purposes, such as waterproofing, insulation, and load transfer material. They are capable of withstanding various loads, including lateral, axial, and shear forces.

Application of Wall Slabs in Construction

Wall slabs are vertical structural elements found in a diverse range of applications in the construction sector. Here are some:

External Walls: Wall slabs are a precise choice to be used as load-bearing elements because they can carry the weight of the structure and transfer it to the foundation. They work against harsh weather elements such as rain, wind, and extreme temperature fluctuations.

External Walls slabs

Retaining Walls: Wall slabs are employed to stabilize the structures built on slopes or nearer to water bodies. They offer robust protection against soil erosion, especially in hilly and uneven terrain. It helps create lavish garden beds and terraces in the landscaping areas.

Retaining Walls slabs

Partitioning Walls: Wall slabs are also constructed to divide the space into various partitions within the construction, creating offices and rooms for work. Because they are made of fire-resistant materials, they reduce the chances of fire accidents. They provide excellent privacy and sound insulation.

Partitioning Walls slabs

Architectural Facades: Wall slabs have been possessed with various aesthetic expressions, helping create unique and visually striking facades. The designs can be efficiently elevated with various materials, colours, and textures according to your dreams.

Architectural Facades

Materials Used for Wall Slabs

The choice of material for manufacturing the wall slabs depends on various factors, including sound insulation, structural integrity, fire resistance, and other aesthetic considerations. Let’s see some commonly used materials:

Concrete: Concrete is an ideal material for long-bearing and retaining walls, providing sufficient strength and durability to the structures. They can be prepared off-site and then transferred to the desired location. It speeds up the construction work and reduces the workload of labourers.

Masonry: Masonry blocks are suitable for both interior and exterior applications due to their excellent efficiency and durability. When using natural stones like limestone, granite, or marble, the walls can be aesthetically pleasing, and no separation decoration charges are required.

Steel: Steel frames contain high strength and flexibility and are used for internal partitions and cladding external walls in both commercial and industrial buildings. Whether it is a small or large-scale commercial project, consider steel as a priority material for quality results.

Wood: Wood is a traditional material, offering a warm and natural aesthetic appeal to both residential and commercial construction. Choosing wood-based panels like plywood or OSB(Oriented Strand Board) has been a perfect choice for internal partitions and cladding.

Benefits of Wall Slabs

The installation of wall slabs in your construction offers several advantages, such as:

Structural Support: Wall slabs made from quality material offer exceptional load-bearing capabilities, reducing the essentials of additional support elements like columns and beams. They safely distribute both the vertical and horizontal loads to the foundation.

Stability: The installation of wall slabs ensures the overall strength and stability of the structure by standing against various external factors like wind and seismic forces.

Aesthetic Flexibility: Wall slabs can be customised to the required shapes, sizes, and finishes, allowing the creation of unique patterns, colours, and textures in the building. This allows architects to enhance the overall functional and aesthetic appearance.

Ease of Construction: As stated earlier, wall slabs can be manufactured off-site. It not only speeds up the construction work but also reduces the labour requirements on-site.

Installation of Wall Slabs

The installation of wall slabs can vary based on the material that you choose. However, below are some common processes mentioned:

  • A proper surface or foundation is the primary concern for the effortless installation of wall slabs. Ensure the area is free from dirt, dust, or debris.
  • If it is precast concrete wall slabs, use cranes or lifting equipment to position the slabs at the desired place. Builders should ensure that they are properly aligned on the surface.
  • To secure the joints, fill up the gaps using appropriate sealant to avoid water leakage and water infiltration.
  • Conduct a thorough inspection to confirm that all corners and joints are properly sealed and finished.
  • Take immediate action if any problems are identified during the inspection.

How to Choose the Right Wall Slab

Choosing the appropriate wall slab is essential to ensuring the aesthetic appeal and structural integrity of the building. Here are some key factors listed that help you choose the right one:

  • Evaluate the load-bearing capacity of the wall slab to ensure it can withstand the required weight.
  • Material selection is a fundamental consideration. You have the options of concrete, masonry, wood, metal, or other composite materials. Based on the area of usage, you can choose one with enhanced strength, durability, and other significant properties.
  • Choose a material with an excellent fire rating to enhance the fire-resistance property in the building.
  • Consider the desired colour, texture, and finish to improve the overall aesthetic value of the structure.
  • Compare the cost and durability of materials with one another to save a considerable amount of money.

Final Lines

​Wall slabs are versatile vertical construction elements that provide exceptional structural support and aesthetic value. The higher initial investment and complex installation process may seem difficult; however, they ensure long-term durability, design flexibility, and excellent load-bearing capacity. If you are looking to add a unique advantage to your project, consider installing the vertical elements.

What is a Structural Plan? Importance and Challenges

0
what is structural plan

Structural planning is considered to be an integral part of developmental projects. The land area, layout, and possible future developments in the surrounding area are all included in a structural plan. It is a document that describes the specific detailed planning of a construction project, installation, and reconstruction of any structure. All the information you need to know about structural planning’s significance, uses, execution, and difficulties is provided here. 

What is a Structural Plan?

Structural plans, also referred to as structural drawings or blueprints, are utilised by various professionals in the construction and design industries to convey the project’s design and specifications to both contractors and clients. These drawings are usually created by licensed engineers, who use data from architectural plans to develop them. It serves as a foundation for any construction projects that comprise maps, diagrammatic representations, layouts, dimensions, calculations, specifications, and structural designs.

Importance of a Structural Plan

The significance of structural planning for any project can be highlighted through the following points:

Adherence to Guidelines and Compliance

Structural planning makes sure that all applicable regulations are followed during the design or construction stage. Political, social, technological, economic, and environmental factors are the common factors it considers. Sustainable and legal project execution is ensured by making sure the necessary permits are obtained or listed for quick acquisition.

Streamlining Permit Approvals

Clear, comprehensive plans with precise drawings and calculations must be presented to the appropriate authorities in order to start a building project. A well-written structural design speeds up permit approvals, reduces the need for amendments, and enables a more effective project start.

Risk Identification and Mitigation

The project team can plan and handle challenges during the implementation and construction phases by identifying and analysing any risks early on. Handling these issues during the planning phase ensures smoother execution and reduces the chances of delays.

Encouraging Bidding for Construction

Contractors submit bids to manage construction based on the design team’s plans. A detailed structural plan ensures transparency, helps contractors estimate costs accurately, and provides a fair project value.

Effective Management of Resources

Effective structural planning minimises shortages or surpluses during construction by ensuring that resources such as labour, equipment, and materials are distributed effectively. Structural planning avoids unforeseen expenses, delays, and improves project efficiency by avoiding large gaps in resource availability.

Improved Scheduling

An efficient structural plan saves time and effort by offering a dependable timetable for every aspect of construction. This methodical strategy reduces interruptions and guarantees that the project proceeds without any stops from beginning to end.

To put it simply, structural planning is essential to guaranteeing compliance, lowering risks, optimising procedures, and accomplishing successful and economical project execution.

Applications of Structural Plan

Applications of Structural Plan
  • A structural plan offers comprehensive guidelines for building elements such as slabs, beams, columns, and foundations.
  • It helps obtain the required permits from authorities and guarantees adherence to building codes and regulations.
  • The structural plan’s detailed material and resource specifics make accurate budgeting and cost estimation easier.
  • Early risk identification enables preventative measures, which shortens building delays.
  • It ensures smooth coordination by integrating with various project plans, including architectural and electrical designs.
  • The plan confirms that the structure can support loads and natural forces such as seismic activity and wind.
  • The structural layout helps contractors create precise bids, promoting equitable and open tendering procedures.
  • Allocating resources optimally reduces waste and guarantees timely labour and material supply.
  • It acts as a standard for quality assurance.

Steps to Implement Structure Plan

Regulatory, non-regulatory, or a combination of both approaches can be used to implement a structured plan. Flexibility and adaptability are provided by non-regulatory methods, but they lack the assurance and stability that come with regulated measures, particularly in circumstances such as market fluctuations, rapid expansion, fragmented land ownership, or the possibility of non-compliance with voluntary agreements.

Implementing a structured plan includes tasks such as:

  • Making final drafts of plans, maps, and texts while taking the plan’s implementation into account.
  • Figuring out how much infrastructure or development contributions will cost, if any.
  • Preparing modifications to the plan and carrying out assessments as needed by the Resource Management Act (RMA).
  • The usual plan change procedure must be followed if RMA modifications are required. 

Stakeholder expectations must be managed at every stage of the process because implementation can take years. All parties involved, such as council employees, resource consent processors, policy planners, customer service teams, and infrastructure managers, should get regular brief updates about the progress.

Staged development, such as planned infrastructure programming or phased land release, can assist in lessening the effects of major or long-term projects.

Additional implementation-related factors could be:

  • Under the RMA, new infrastructure is approved.
  • Creating reserves or safeguarding characteristics following applicable laws.
  • Obtaining stormwater consent to facilitate construction.
  • Consultations under the Local Government Act (LGA) if it hasn’t been addressed earlier.
  • updating engineering codes or design specifications.
  • Incorporating pertinent topics into Long-Term Plans (LTPs) or Council Annual Plans.

Challenges in Structural Planning

The following are some typical obstacles in structural planning:

Adherence to Regulations

Complying with strict building rules and legal requirements can be difficult and time-consuming.

Environmental Factors

Complexity is increased when environmental effects, including soil conditions, water drainage, and seismic activity, are taken into account.

Financial Limitations

It can be difficult to maintain the structural plan while balancing the costs of labour, materials, and equipment.

Interdisciplinarity in Coordination

It might be challenging to guarantee alignment between mechanical, plumbing, electrical, and architectural plans.

Controlling Risk

Careful planning is necessary to identify and reduce hazards, such as unexpected site conditions or structural breakdowns.

Availability of Resources

The projected timeline may be thrown off if there are shortages of workers or delays in acquiring materials.

Communication with Stakeholders

All parties involved, including contractors, clients, and regulatory agencies, can benefit from managing expectations and maintaining good communication.

Limitations of Technology

It may require more experience to adopt and integrate new technologies like Building Information Modelling (BIM) or sophisticated simulation tools.

Extended Sustainability

There are difficulties in integrating sustainable and energy-efficient methods into the design while keeping it feasible and affordable.

Unexpected outside influences

Planning and execution may be impacted by variables such as natural disasters, political instability, or changes in the economy.

Conclusion

Considering all the factors discussed, it is evident that structural planning lays the groundwork for any project and must be approached with careful attention and thorough analysis.

Planners must account for every detail to prevent potential issues at any stage—be it obtaining permits, managing construction bids, planning materials and labour, scheduling, or overseeing the construction process as a whole.

While even the most comprehensive structural plan cannot eliminate unforeseen risks, having a well-crafted plan significantly enhances the ability to address and overcome such challenges effectively.

Decorative Beading – Types, Materials & Installation Guide

0
Decorative Beading

Having a more decorative and attractive look to the building has become a basic need in the modern construction field, especially in homes. There are numerous decorative elements, that can be used to improve the buildings’ overall appearance. Among them, beeding plays a major role in improving the overall appearance while also helping to protect the structure.

Beadings are classified into two types: functional beading and decorative beading. In this blog, we will take a look at what decorative beading is and everything you need to know.

What is Decorative Beading?

Decorative beading is a type of trim or moulding applied along the corners, edges, and transitions to provide a decorative and polished look. It is most commonly found around windows, doors, walls, ceilings, furniture, and other architectural elements.

Materials Used for Decorative Beading

Wood

Wood is a widely used traditional beading type known for its versatility and workability. Wooden beadings can be easily shaped, stained, or painted, making them suitable for all aesthetic applications.

Plastic

It is an affordable and versatile beading material that easily mimics wooden and metal beading. It can be used for wall borders, ceilings, and furniture edges.

Metal

Metals like aluminium, brass, and steel can be used as beading materials that offer exceptional strength and durability. They give a more modern and industrial look and are used for door frames, window trims, furniture, baseboards, and edge detailing. 

Glass

Glass beading adds more sparkle and shiny looks to the projects. The glass beading provides a luxurious look for walls and tables with colourful and textured designs.

Choosing the Right Wood Types for Restoration Projects

Numerous beading options are available for restoring buildings to retain their character and provide additional protection. Some of the popular wood options include:

Oak Beading

Oak Beading

Oak beading is known for its rich, warm tones, high resistance to wear, and overall durability. It has been widely popular for wooden beadings for hundreds of years.

Teak Wood Beading

Teak Wood Beading

Teak wood beads are another popular option for restoration projects. They are known for their elegant finish and wide indoor and outdoor use. However, due to environmental restrictions, the use of teak has been reduced. Iroko is often used instead of teak after the restrictions. However, it is no real comparison to teak.

Walnut Beading

It is a chocolate brown wood that adds a luxurious look to the building. Due to its high cost, it is known for more decorative applications than functional uses, and it may not be suitable for certain lengths and sections.

Meranti Beading

Meranti beading is another preferred choice in the restoration of buildings due to its lightweight yet high-strength properties.

Pine Beading

Pine or redwood beading is a popular choice because it’s durable and perfect for outdoor use.

Accoya Beading

It is a modified timber that has high durability and a smooth finish. This type of beading is stable and does not tend to chip or split. However, using Accoya beading with ferrous metals is not recommendable, as it can cause adverse reactions due to the type of treatment the wood undergoes.

Applications of Decorative Beading in Construction

Door and Window Frames

Wooden doors Decorative Beading

Wooden beading is ideal for framing doors and windows to give them a polished look. It enhances the sealing between the frame and the wall, preventing voids and improving energy efficiency. The finished and polished edge improves the overall appearance of the building.

Flooring

Floor beading is used in places where the floor connects to the wall. It connects the gap between them and provides a smooth and clear finish.

Paneling

Paneling in wall

The beading can be used to create decorative panels on walls and ceilings. It is most commonly used to provide the traditional and historical looks to the building.

Furniture

Another main application of beading is using it in furniture such as cabinets, dressers, cupboards, bookcases, and more. It creates good, elevated and decorative borders for the furniture, improving its overall appearance.

Installation Techniques for Decorative Beading

Preparing the Surface

The first step in installing the decorative beeding is to prepare the surface and ensure that it is free from any deterioration and clean without any water seepage or dust.

Measure and Cut the Panels

Measure the area where the beading needs to be installed and take accurate measurements for the length. Mark the measurements for the beading on the surface. Cut the beading according to the measured length and angles, ensuring that they meet the corner.

Apply Adhesive

Apply a thin bead of construction adhesive or glue along the beading and the surface to hold the beading in place. In the case of PVC beading, stronger adhesive is needed.

Fixing the Beading

After applying the adhesive, position the beading along the marked lines and press it firmly against the surface to properly align the beading. Hammer the nails or pins to ensure the beading is fixed firmly. 

Sealing and finishing

Seal the gaps between the beading and the surface with a caulk and wood filler to cover the nail holes, giving it a finishing touch. Smooth the surface and allow the beading and the surface to dry, achieving a complete look.

Benefits of Using Decorative Beading

  • Improves the detailing of plain surfaces and transforms the normal surface into a more sophisticated and visually pleasing feature.
  • It adds architectural and polished looks to the internal and external spaces.
  • It provides cleaner and smoother transitions for the roof, making it feel more cohesive and covering harsh angles.
  • It helps cover gaps, joints, and cracks in the structure and gives a more polished look.
  • It adds depth, texture, and detailing and gives an aesthetically pleasing touch to the surface and furniture.
  • It increases the value of the property by enhancing the overall look.
  • Beadings are easy to install and maintain, limiting the maintenance costs.
  • The polished finish improves lighting and creates a pleasing ambience.
  • These beadings are affordable and can withstand a long period of time.

Conclusion

Decorative beading plays a significant role in improving the overall looks of the structure. The variety of beading materials and designs gives both classic and modernised appeal to spaces. It is easy to install and maintain, adding more value to the structure. Implementing the best installation practice will ensure the longevity of the beading and maintain the overall appearance.

Chamber Bricks vs Normal Bricks – Differences & Applications

0
chamber bricks vs normal bricks

Clay bricks are traditional construction materials that have been used for thousands of years. Although they are traditionally made and used, the evolution in the construction industry has resulted in different types of clay bricks based on the manufacturing methods, quality of raw materials and purposes. One such brick is the chamber brick. In this blog, we are going to compare chamber bricks with normal bricks to give a clear outline of which brick type is suitable for your construction.

Overview of Chamber Bricks

Chamber Bricks

Chamber bricks are clay bricks produced in a fire chamber kiln at high temperatures to achieve the necessary strength and appearance. They are similar to normal bricks; however, the firing process differentiates them. Chamber bricks are kept in rectangular or circular chambers and heated at a controlled temperature for even heat distribution. They are uniform in shape, colour, and dimension and have high strength and durability.

Overview of Normal Bricks

Normal Bricks

Normal bricks, or traditional bricks, are made using clay, sand, and other natural minerals. They are produced by kiln-burning and have high strength, resistance, and durability. They are classified based on grades and are widely used to construct walls, columns, foundations and other structural and non-structural elements of buildings.

Key Differences Between Chamber Bricks and Normal Bricks

Appearance

Chamber Bricks

Chamber bricks are regular and rectangular, with sharp and straight edges. They have a smooth surface, which can be felt on the face of the brick. Depending on the clay and heating process, these bricks are typically red, brown, orange, or yellow in colour.

Normal Bricks

Normal clay bricks have irregular shapes and sizes, with uneven and rough edges. Their surface texture is rougher and uneven. These bricks are generally red, brown, orange, or yellow; however, the colour distribution is inconsistent.

Strength and Durability

Chamber Bricks

The consistency of the chamber kiln burning helps the brick achieve higher compressive strength and reduce cracking and warping. These bricks are highly dense and less porous, protecting the structure from water, fire, and abrasion caused by external forces.

Normal Bricks

Normal bricks are generally strong and durable; however, their strength and durability depend on the grade or quality of the brick. First-class bricks have high load-bearing capacity and high durability, whereas bricks of lower grades are limited in strength and performance. 

Thermal and Sound Insulation

Chamber Bricks

Chamber bricks provide moderate thermal and acoustic insulation. Due to their dense structure, they can absorb, maintain, and release heat to a certain temperature. They offer medium insulation to sound, reducing sound to a certain level, but they are not as effective as other soundproofing bricks.

Normal Bricks

Normal bricks have good fire resistance, as they are burnt at high temperatures in the kiln. Class-A bricks offer good thermal insulation to the building and can be used for fireplaces and fire-prone areas. Due to their dense structure, they provide good sound insulation. The lower-grade bricks have moderate to low heat and sound resistance, making them unsuitable for high-temperature areas.

Weight and Handling

Chamber Bricks

The weight of the chamber bricks ranges from 2.5 to 3.5 kg, depending on their size, raw materials, and density. These bricks are uniformly dense and easy to handle. They have a weight similar to normal bricks. The uniform weight distribution provides well-balanced strength and durability to the structure.

Normal Bricks

These bricks typically range from 2.3 kg to 3 kg, depending on their density and quality. Normal high-grade bricks are tightly packed and weigh more than lower-grade bricks. On the other hand, lower-grade bricks are less dense, but prone to more damage.

Applications

Chamber BricksNormal Bricks
These bricks are best suited for high-strength requirements and multi-floored buildings.These bricks are generally limited to low-mid rise buildings.
This brick is ideal for all types of foundations, including large-scale projects.This brick can be used in foundations for low-rise and less load-bearing buildings.
The blend of aesthetic looks and durability makes it ideal for external walls.These bricks are used for basic internal and external applications where they are generally plastered.
The high durability of the bricks makes it suitable for heavy traffic areas.It can be used for basic paving but is not as durable as chamber bricks.
It can be used in fireplaces and buildings that demand high thermal resistance.It can be used in cases of low thermal requirements due to moderate heat insulation.
Used for more important structures.Used for affordable and low-rise residential construction.
It can be used to restore historical buildings.Used for less demanding restoration projects.

Cost-Effectiveness

Chamber Bricks

These bricks are 15-30% more expensive than normal bricks due to the controlled chamber kiln firing process and the smooth finish. They use high-quality raw materials, and the chamber burning increases the manufacturing cost. Although they have high manufacturing costs, the clear finish and durable properties require less maintenance, thereby reducing the maintenance cost.

Normal Bricks

These bricks are affordable and less expensive than chamber bricks and have low manufacturing costs; however, as they are more prone to damage, plastering and frequent maintenance is required, increasing the maintenance costs in the long run.

How to Choose Between Chamber Bricks and Normal Bricks?

Numerous factors must be considered when choosing the right bricks between the two, such as types of construction, durability, lifespan, strength, performance, aesthetic looks, surface finish, budget, resistance, and environmental considerations. Chamber bricks provide high strength and durability and are expensive, making them suitable for load-bearing, highly durable, and large-scale structures. On the other hand, normal bricks can be used for non-load-bearing, affordable and low-rise buildings.

Conclusion

Chamber bricks are ideal for large-scale projects and highly important construction projects that demand high durability, strength, and perfect fit and finish. On the other hand, if budget is your primary concern and your construction is small, normal bricks could be a wise choice. 

Cement Slurry Ratio – Components, Importance & Design Mix

0
cement slurry ratio

When building a structure, prioritising the durability and performance of cement slurry is essential to ensuring the overall strength and longevity of the construction. The right cement slurry mix is essential for achieving optimal bonding, providing resistance to environmental factors, and enhancing the overall stability of the building. 

Whether you’re constructing a home, commercial space, or other infrastructure, the correct cement slurry ratio ensures that the structure remains solid and resilient, reducing the likelihood of cracks, water damage, or other long-term issues. In this blog, you’ll discover the ideal cement slurry ratio to support the success of your construction project.

What is a Cement Slurry?

A thin mixture of insoluble substances such as cement, water, and additives that are frequently used in construction to create sturdy, secure foundations, particularly on soft or unstable soil, is called cement slurry. It forms a strong, smooth, and water-resistant coating against the soil when it is poured. It is typically administered by pumping or pouring from a cement truck chute, and its thickness varies according to the project requirements. 

For example, cement slurries used in the oil and gas and oil drilling industries usually have a thinner consistency, so they may spread more easily over uneven surfaces. In contrast, residential construction sometimes requires a thicker slurry mixture to provide a strong and water-resistant building foundation.

Importance of Cement Slurry Ratio in Construction

The capacity of cement slurry to produce solid, secure foundations and increase the longevity of structures makes it useful in a variety of significant construction applications. Common applications include:

Soil Stabilisation:

Cement slurry is applied to damp or soft ground to create a firm and secure foundation. The soil is strengthened by this hardened layer, which is also moisture-resistant and appropriate for supporting roads and buildings.

Slurry Walls:

In order to keep structures away from water or unstable soil, cement slurry layers are made. They give structures extra support and stop water seepage.

Paving: 

Cement slurry is frequently used to pave driveways and parking spaces. When placed on a prepared base, it creates a smooth, long-lasting, and water-resistant coating.

Road and hole repairs:

Cement slurry is frequently used to fix concrete surfaces like floors and worktops and to fill potholes, fissures, and other damaged areas in highways.

Components of Cement Slurry

The following components are commonly found in cement slurry:

  • Cement: 

The main binding component, usually Ordinary Portland Cement (OPC), gives the material strength and longevity. 

  • Water: 

Used to make a fluid mixture that makes application easier by hydrating the cement.

  • Additives: 

Special substances used to change specific characteristics, such as

  • Retarders: Reduce the setting time.
  • Accelerators: Quicken the time it takes to set.
  • Plasticisers: Increase fluidity without the need for more water.
  • Weighting agents: Modify density according to particular uses.
  • Fillers: 

In certain applications, materials like sand or fine aggregates are used to control consistency or lower costs.

  • Chemical Admixtures: 

Improve certain qualities, such as resilience to extreme weather or durability. The intended application and environmental factors are taken into consideration when adjusting these components.

How to Calculate Cement Slurry Ratio

Follow these steps to calculate the cement slurry ratio for your construction project:

1. Understand the Cement Slurry Ratio

The slurry ratio is often defined as the ratio of water to cement (W: C) by weight or the volume ratio of components. For the majority of applications, a typical water-to-cement weight ratio falls between 0.4 and 0.6.

2. Determine the Inputs you Require

Cement Weight (C): Typically expressed in pounds or kilograms.

Water Weight (W): Typically expressed in pounds, kilograms, or litres (1 litre of water is equivalent to 1 kg).

3. Calculate the Ratio

Weight Ratio (W: C) = Total Weight of Water ÷ Total Weight of Cement.

Volume Ratio (if aggregates or additives are included): Adjust proportions by volume using component-specific densities.

For instance:

50 kg is the weight of cement.

25 kg is the weight of water.

The ratio of water to cement is equal to 25 ÷ 50 = 0.5.

4. Modify the Ratio for Specific Requirements

Adjust the ratio to account for:

  • Workability: For a thinner slurry, add more water; for a thicker mixture, add less. Increasing water quantity increases workability, but reduces strength and vice-versa. 
  • Strength: For greater strength, reduce the water-to-cement ratio.

Keep in mind that too much water weakens the cement paste. Before mixing on a large scale, always test tiny quantities.

Factors Affecting the Cement Slurry Ratio

Several factors that affect the strength of the cement slurry ratio are as follows:

Material Quality

Using high-quality cement and clean, fresh water guarantees adequate hydration, which influences the strength and bonding of the slurry. The water-to-cement ratio must be carefully regulated to obtain the desired consistency. Too much water weakens the mix, while too little makes it difficult to work with. Additionally, additives such as accelerators or retarders may be used to vary setting time and workability depending on specific project requirements.

Environmental and Site Conditions

The performance of cement slurry is also influenced by environmental factors such as temperature and season. High temperatures can reduce the setting time, whilst cold temperatures slow it down, necessitating changes to the mix. The type of foundation soil conditions also play a role, since some soils may require a thicker slurry to maintain stability. Proper mixing and positioning are critical for maintaining consistency and preventing structural weaknesses.

Testing and Equipment Maintenance

Finally, testing and quality control are critical for getting the intended outcomes. Before applying the slurry on a broad scale, small-scale tests should be performed to confirm that it has the necessary strength and consistency. Proper equipment maintenance and adherence to established mixing standards are also essential for optimal slurry performance, which contributes to the long-term stability of residential construction.

Testing and Equipment Maintenance

Steps to Mix Cement Slurry Correctly

You’ll need certain materials and tools to make a cement slurry.

Ingredients: 

Depending on the purpose, cement, water, and optional chemical compounds.

Tools:

  • container for mixing
  • Tools for mixing (such as a drill mixer, mixing paddle, or comparable instruments)

Procedure for Making Cement Slurry:

  • Measure the cement.
  • Based on the needs of your project, calculate how much cement is needed, then put it in the mixing container.

Gradually Add Water: 

While mixing, gradually add a small amount of water to the cement. To reach the correct consistency, keep adding water little by little. The water-to-cement ratio depends on the type of cement and how it is used. Using your mixing tool or a cement mixer, blend well.

Mix Cement Slurry Correctly

Additives (Optional): 

If necessary, gently include additives into the mixture while mixing. Make certain that the slurry is fluid, consistent and without lumps.

Verify the Consistency:

Check the workability and flow of the slurry. Make any necessary adjustments to the cement or water to achieve the proper consistency for your specific usage.

Conclusion

Cement, water, and additives are mixed in the right proportion to produce an exact outcome of cement slurry. It is used to bind stones, tiles, or bricks in a building. It creates a strong, durable glue between surfaces that supports structures and keeps moisture out. When applied properly, cement slurry can increase a surface’s resistance to water. When applied as a coating or in regions where water seepage is common, it creates a strong connection and serves as a barrier to stop moisture entry. Due to the flexibility it offers, cement slurry can be applied both indoors for applications like tiling and fracture treatment and outdoors for long-lasting constructions like pavements and bridges.

Red Hollow Bricks – Get to Know Its Properties & Advantages

0
red hollow bricks

Bricks are the most fundamental material used in building construction. They provide impeccable stability and support for the structures, from ancient to modern buildings. However, most people are unaware of the available types in the market, which include concrete bricks, red bricks, calcium silicate bricks, red bricks, etc.

You can explore and choose the appropriate brick type to construct your dream home or other buildings. Because brick is a one-time investment, it needs extra attention to ensure the strength of the overall structure. With rapid technological advancements, new construction materials are often produced. One among them is red hollow bricks.

Let’s continue the reading to discuss in detail hollow bricks, their applications, advantages, and the manufacturing process.

What are Red Hollow Bricks

Red hollow bricks are a popular choice in the construction industry. They are lightweight materials composed of natural clay and other additives, including rice husk ash, sawdust, fly ash, and coal ash.

They are also referred to as breeze bricks or perforated bricks, having holes or hollow spaces that contain at least 25% to 60% of their bed area. The hollow core between the brick reduces the overall weight. Red hollow bricks have been used in several applications due to their unbeatable advantages.

Applications of Red Hollow Bricks

Red hollow bricks are versatile and can be used in a wide variety of applications. Here are some of those:

Structural Applications: Naturally, the red hollow bricks are strong and durable, suitable for constructing load-bearing walls in residential, industrial, and commercial buildings. Because they are less heavy, they are used to create internal partitions within the construction. They support slopes and prevent the occurrence of soil erosion.

commercial buildings red hollow bricks

Landscaping: Hollow bricks are incorporated with decorative features, which help achieve the desired landscaping designs for raised beds, garden walls, retaining walls, and other ornamental structures. They can be used for creating driveways, patios, and pathways.

Decorative Elements: Red hollow bricks are an ideal choice for accent walls and decorative elements. They offer unique colour and texture to the surface, improving the overall aesthetic value of the building.

Manufacturing Process of Red Hollow Bricks

The manufacturing process plays a vital role in determining the actual quality and strength of the brick while using it in the construction. Even a small error can cause costly defects in the structure. Let’s get into the process:

Right Selection of Raw Materials: The selection of the right raw materials is a crucial stage of the manufacturing process. Clay is a primary resource, extracted from mines or pits. Depending on the specific project requirements, the other materials like lime, sand, and related additives are added.

Clay Preparation: Clay preparation is the next significant step, which involves crushing and grinding the raw materials into a fine powder. It is then mixed with water in precise proportion to achieve uniform consistency.

Moulding: The homogenous mixture is then transferred into the moulds, which are made of steel or wood. They are available in various shapes and sizes; you can choose the one that fits your construction needs. Moulds determine the size and shape of the bricks that you find in the market.

Curing: The curing process involves the moulded bricks being cooled down at a controlled temperature. They are left for a certain time to develop their complete strength and durability.  The manufacturing process of bricks decides the type of curing required, which is either steam curing or water curing.

Demoulding: After the curing process, it is time to demould the bricks. They are now ready to be used in construction.

Properties of Red Hollow Bricks

These are the significant properties of red hollow bricks:

Strength: Red hollow bricks have a high compressive strength and are resistant to harsh weather conditions. They are capable of handling significant loads and weight from the overall structure.

Weight: Red hollow bricks are lighter than solid bricks, reducing the overall weight of the structure. They are lightweight and easy to transport, handle, and install in the construction.

Size and Shape: There is no defined size and shape for the red hollow bricks. They can vary depending on the mould size and shape used in the manufacturing process. Thus the builders can customise the standard size or shape according to specific needs.

Thermal Insulation: The hollow spaces within the bricks offer excellent thermal insulation, which creates a comfortable indoor temperature in harsh weather conditions. It significantly saves the cost spent on heating and cooling.

Advantages of Using Red Hollow Bricks

Red hollow bricks have several advantages, such as:

Lightweight: The hollow spaces in the brick reduce the overall weight and make it easy to use. It is typically lighter than solid bricks, which simplifies the process of handling, installing, and transporting.

Economical: Red hollow bricks are a budget-friendly choice, as the cost of resources and labour costs are typically lower than other types of bricks. This contributes to long-run cost savings for the property owners or homeowners.

Insulation Properties: The empty spaces that exist in the red hollow bricks act as a natural insulator, serving a comfortable indoor environment within the buildings. It proficiently reduces the heat transfer through walls and improves the overall energy efficiency of the construction. This type of building reduces the costs associated with heating and cooling.

Fire Resistance: Red hollow bricks have enhanced fire resistance properties, ensuring the safety of the people and building. In case of an unfortunate fire accident, these bricks help prevent the fire from spreading throughout the building.

Final Lines

Red hollow bricks are widely used in various construction applications. Due to their balanced strength, aesthetic appeal, and durability, they have become a popular choice for residential, commercial, and industrial buildings. Additionally, these bricks are environmentally friendly, reducing the carbon footprints and contributing to a sustainable environment.

Slab Beam Reinforcement – Guidelines & Best Practices

0
slab beam reinforcement

For concrete projects to be structurally strong, long-lasting, and economical, the detailing of reinforcements in beams and slabs is essential. Key elements, including cover depth, bar lengths, curtailment, and the quantity and diameter of reinforcements, must all be specified for proper reinforcement detailing. 

For simply supported beams and slabs, shear forces occur nearer to the supports, requiring shear reinforcements in those areas, while the maximum bending moment occurs at the centre of the span, requiring tension reinforcement there. Bending reinforcements can be restricted or bent upwards to act as shear reinforcements, balancing cost-effectiveness and strength to maximise material use. 

Fundamentals of Reinforcement Detailing

The maximum bending moment in a normal concrete slab or beam supported simply occurs close to the centre of the span, and the shear force is concentrated at a distance of d/2 from the support face, where d is the effective depth of slab or beam. 

This indicates that the centre of the span, where bending moments are greatest, requires more bending reinforcement than the supports. On the other hand, strengthening is necessary for the supports to successfully withstand shear stresses.

Therefore, tension reinforcement does not need to be applied over the entire structure. By bending the bars upward at predetermined spots, up to 50% of the reinforcement can be restricted at suitable sites and diverted for use as shear reinforcement.

Materials Used for Reinforcement

The primary features and uses of each reinforcement material are listed in the table below. You can select the one that works best for your building project.

S.NoFeatureTMT Steel BarsConcreteEpoxy-Coated Carbon SteelWire MeshGeotextiles
1MaterialSteelBase materialEpoxy-coated carbon steelSteel wiresSynthetic fibers (Polyester, Polypropylene)
2StrengthVery HighModerate to high (compressive)ModerateModerateLow
3StiffnessModerateHighModerateModerateLow
4Corrosion ResistanceHighModerate (susceptible in harsh environments)GoodLowNA
5CostModerateLowModerateLowLow
6WeightHeavyHeavyModerateLightLight
7FlexibilityHighNAModerateLowNA
8ApplicationsGeneral construction (buildings, bridges, pavements)Used as the significant  building material in various construction applicationsModerate corrosive environments, improved bondslabs, walls, and pavementsSoil reinforcement, filtration, drainage

Detailing of Reinforcements in Beams

  1. General Standards and Guidelines
    Reinforcement detailing must comply with relevant codes such as BS 8110 Part 1 and IS 456:2000. These standards ensure the beam is safe, durable, and efficient.
  2. Key Rules for Reinforcement Detailing

Tension and Compression Reinforcement:

  • Rectangular sections with yield strength fy=460N/mm² require a minimum tension reinforcement of 100As/Ac=0.13. 
  • Minimum compression reinforcement is required when necessary for ultimate limit states, set at 100As/Ac=0.4.
  • The maximum amount of reinforcement, either compression or tension, cannot be more than 4% of the cross-sectional area of the beam.

Shear Reinforcement (Links or Stirrups):

  • Links must be at least 6 mm in diameter or at least 25% the size of the largest compression bar, whichever is larger.
  • The maximum link spacing is twelve times the diameter of the smallest compression bar.
  • In compression zones, no bar may be farther than 150 mm from a confined bar.

Beam Side Reinforcement:

  • For beams deeper than 750 mm, provide reinforcement covering 2/3 of the height from the tension face. There should be no more than 250 mm between them.
  1. Curtailment of Reinforcement

Top Reinforcement:

  • From the support, supply 100% of the necessary hogging steel up to 0.15 times the effective span and 60% more than this up to 0.25 times the span. 
  • Use 20% of the required tension steel as hanger bars beyond this point.

Bottom Reinforcement:

  • Curtail or bend upward as required to serve as shear reinforcement in areas of low bending moments.
  1. Anchorage Details
  • Tension anchorage length is critical at supports and must be calculated based on restraining bar locations.
  • Use U-bars or lower construction joints at beam-column intersections to maintain required anchorage lengths.
  1. Beam-to-Beam Connections
  • Reinforce areas where one beam supports another to handle vertical forces. Determine the area of reinforcement needed to successfully withstand axial loads.
  1. Practical Tips for Implementation
  • Use bending moment diagrams to adjust reinforcement placement as per load variations.
  • Follow detailing rules strictly for effective load transfer and cost efficiency.
  • Make sure that bars in tension zones are spaced clearly apart; no bar should be more than 150 mm from a vertical link leg.

By adhering to these comprehensive guidelines, reinforcement detailing for beams can achieve structural stability and cost optimisation while maintaining compliance with design standards​. 

Detailing of Reinforcements in Slabs

  1. Adhere to Relevant Codes and Standards
    Follow established guidelines such as BS 8110 or Eurocode 2 for slab reinforcement detailing to ensure safety, durability, and compliance.
  2. Types of Slabs
    Reinforcement detailing differs based on the slab type:
Types of Slabs
  • One-Way Slabs: Reinforcement provided along the shorter span.
  • Two-Way Slabs: Reinforcement in both directions for balanced load distribution.
  • Cantilever Slabs: Reinforced to handle upward bending moments near supports.
  1. Key Rules for Detailing
  • Minimum Reinforcement:
  • The cross-sectional area of the concrete should be at least 0.13%.
  • Anchorage at Supports:
  • If the design shear stress is modest, extend the bars past the centerline of the support by 30 mm or one-third of the support width, whichever is larger.
  • Bar Spacing:
  • Maintain clear spacing no greater than the lesser of 3d or 750 mm, where d is the effective depth.
  • Lapping Bars:
  • Ensure a gap of at least 50 mm or 4ϕ (whichever is lesser) between lapping bars.
  1. Crack Control
    To prevent cracking:
  • Keep slab depth within 250 mm for steel grade 250 or 200 mm for steel grade 460.
  • Ensure the reinforcement percentage is less than 0.3% of the section area.
  • Follow additional spacing rules for reinforcement exceeding 1%.
  1. Shrinkage Reinforcement
    Provide 0.25% of the concrete cross-sectional area for Grade 460 steel to handle shrinkage stresses, following the same guidelines as for walls (as per BS 8110).
  2. Simplified Detailing Rules
    For ease:
  • For continuous slabs, extend the top reinforcement to 0.3×span from the support face; for simplicity, extend it to 0.25×span.
  • Maintain 100% steel area for the first 0.15×span.
  1. Reinforcement at Restrained Edges
  • Provide tension anchorage lengths and additional reinforcement at restrained edges to manage stress concentration.

By following these simplified rules and adapting to specific design requirements, slab reinforcement detailing can be done efficiently and effectively.

Tools and Techniques for Reinforcement Detailing

A crucial step in the building process, reinforcement detailing guarantees the structural soundness of beams and slabs. The main devices and techniques used in this procedure are listed below:

1. Reinforcement Tools Providing Specifics 

a. Software Tools

AutoCAD: A popular tool for creating intricate designs of reinforcement for beams and slabs.

Revit: It provides 3D reinforcement layouts using Building Information Modelling (BIM) capabilities.

Tekla Structures: It is an expert in 3D detailing intricate reinforcement structures.

ETABS/STAAD Pro: A popular tool for structural analysis, offers placement instructions for reinforcement.

b. Manual Tools

  • Standardised templates for detailing provide consistency when draughting by hand.
  • Graphing tools and scale rulers: They are necessary for producing accurate reinforcement sketches.
  • Bar Bending Schedules (BBS): A tabular form used to specify the lengths, forms, and quantities of reinforcement.

2. Reinforcement Detailing Methods 

a. Conventional Codes and Practices

Follow international regulations like IS 456:2000, Eurocode 2, or BS 8110 for comprehensive instructions on anchoring, spacing, and reinforcement installation.

b. Detailing Process

Load analysis: To ascertain the need for reinforcement, and comprehend the bending moments and shear forces.

Bar Location: Arrange the compression and tension reinforcement bars following the necessary span.

Spacing and Cover: Maintain proper concrete cover and spacing to guard against corrosion and guarantee longevity.

Curtailment and Anchorage: Cut off reinforcement bars where bending moments are minor and make sure anchorage lengths are appropriate.

c. 3D Simulation and Modelling

3D Simulation and Modelling  Slabs

Use software to see how reinforcement is included in slabs and beams. This guarantees maximum design efficiency and helps spot possible conflicts.

d. Scheduling Reinforcement

To ensure precise on-site placement, use Bar Bending Schedules (BBS) to specify bar sizes, forms, and placement locations.

3. Best Practices

  • To prevent stress concentration, make sure that the distance between reinforcements is constant.
  • Utilise common hooks, bends, and lap splices to satisfy anchorage specifications.
  • Before implementing, use structural load testing to validate the detailing and find any design problems.

Reinforcement detailing can be completed precisely, guaranteeing safety, strength, and cost-effectiveness in building projects, by integrating cutting-edge software, code compliance, and useful procedures.

Conclusion

In conclusion, understanding and applying the detailing requirements of beams and slabs are essential for ensuring the structural integrity and durability of reinforced concrete elements. By carefully considering the detailing requirements of beams and slabs, as well as the materials and techniques involved, you can design structures that meet safety standards and function effectively. Proper attention to these elements ensures that the design not only adheres to building codes but also performs reliably over time.

Epoxy Grout – Everything You Need to Know About It

0
Epoxy Grout

In the construction sector, tiling or other floor covering is inevitable in most building projects. It has become rare to witness a construction site without tiles on floors or other areas for various purposes. This includes both commercial and residential projects. Tiles transform the outlook of any space, providing ultra-chic finishes. The next important step in fitting tiles on the floor is grouting. While we have different types of grouting, epoxy grout has become one of the most preferred choices. This is because of its incredible durability, and ability to resist mould. This article clearly explains epoxy grout and the benefits a constructor can reap by applying it in buildings.  

What is Epoxy Grout?

Before we move on to epoxy grouting, a basic understanding of grouting is important. To make the tile structures strong,durable and aesthetic, the gaps between the tiles are filled with grout. Epoxy grout is made of resin, hardener, and sand aggregates for textures. The main aim is to prevent gaps between tiles, resulting in a long-lasting surface with a seamless finish. Epoxy grout can resist abrasion, has chemical resistance, and waterproof qualities. This feature of epoxy grout makes it suitable for high-traffic areas, damp settings, and applications that require hygienic practices.

Properties of Epoxy Grout

  • The hardening capacity of the epoxy grout makes it significantly resist cracking, chipping, and wear and tear. The resistance in the epoxy grout increases the longevity and reduces the maintenance requirement.
  • The impermeable nature of epoxy grouts prevents water from permeating through them. This makes them suitable for places that are often exposed to moisture. They prevent the floor from any damage and staining.
  • The non-porous surface makes epoxy grout less susceptible to stains. Non-absorption of liquids or contaminants makes it ideal for high-traffic areas.
  • It can withstand exposure to chemicals, cleaning products, and acid substances. The formulation of epoxy grout makes it capable enough to encounter spills or usage of stronger cleaning solutions on the floor.

Applications of Epoxy Grout

The locations where epoxy resins are primarily used are areas that demand superior strength, waterproofing, and stain resistance. They are:

  • Areas that are often exposed to water prefer using epoxy grouts for their waterproofing capacity. Some of the areas in residential places are bathrooms, showers, kitchens, laundry rooms, pools, etc.
  • They are even being used in entryways and hallways, kitchen floors, and commercial settings as their durability and stain resistance play a crucial role in maintaining floor finishes.
  •  It can even be used in natural stones like marble, granite, and limestone. The gentle nature and stain resistance of epoxy grout makes it appropriate for these applications.
  • Some other prominent locations where epoxy grout is prioritised are chemical industries, production and storage workshops, laboratories, dyeing plants, paper mills, tanneries and food industries.
  • The versatile nature of epoxy grouts makes them suitable for various tiles such as ceramic, porcelain and vitrified.

How to Apply Epoxy Tile Grout

While the process of applying epoxy grout is simple, certain steps need to be considered sequentially. They are:

Step 1: Before we use or apply epoxy grout, we must make sure we have a proper surface. Preparing the surface is important as it determines the positioning of slides. After the adhesive or mortar that has been applied underneath a tile sets well, spaces and grout joints should be cleaned well. Remove dirt, dust, water or excess adhesive or mortar.

Step 2: Combine the epoxy grout and hardener according to the manufacturer’s instructions. Air entrapment in the resin can be prevented by not overmixing. Mix until you get a smooth and consistent-coloured paste.

Step 3: Avoid the tool getting hardened with epoxy resins as this will make them non-reusable. Apply water to clean the tools immediately. One may prefer using mechanical mixers, however, the addition of water as one component with the mixture should be avoided.  Personal Protective Equipment (PPE) is a must-have before applying epoxy grout.

Step 4: Use a rubber float tool or weber tool squeezer to fill the joints. Make sure you fill the gaps with grout till it is level with the edge of a tile. A sponge or tool can be used to remove excess grout immediately to avoid uneven surfaces. A damp sponge will prevent water from compromising chemical resistance by making a circular motion.

Step 5: After applying the epoxy grout, the applied area should be isolated. This will prevent any potential damage to the setting. Without damaging the grout, remove the film from vertical surfaces using a non-abrasive cloth or pad. For 30 minutes, do the final cleaning and touch-ups and repeat the same for vertical surfaces for 20 minutes. Following these steps, one achieves a professional and long-lasting finish.

Epoxy Grout vs. Cement Grout

Epoxy Grout vs. Cement Grout
Epoxy GroutCement Grout
It is composed of epoxy resins combined with a filler powder.Cement Grout is made from a mixture of cement, water, and sand.
It has a waterproofing feature.Low waterproofing unless it is sealed.
It resists stains.No resistance to stain unless sealed.
It is chemical-resistantIt is less resistant to chemicals.
It is more flexible and resists any movement within.It may crack under movement.
Epoxy resins have a shorter curing time compared to other materials.It takes a longer time to cure.
It is very expensive.It is affordable.
It doesn’t require sealing, negating the need for periodic maintenance.It requires periodic maintenance.
The usage of synthetic resins makes them less eco-friendly.The usage of cement makes it less eco-friendly.

Conclusion

The introduction of epoxy grout has transformed the tiling industry with its high strength, moisture resistance, stain resistance and resistance to chemicals. Its application ranges from domestic places such as kitchens and bathrooms to commercial and industrial locations where strength and cleanliness remain a preference. Even though it costs more than ordinary cement grout, one will appreciate the performance, maintenance and design flexibility it brings to a project. As the world moves on, epoxy grout is still paving the way for a new generation of construction materials. By knowing the specific details of the product and the correct methods for installation, constructors can achieve a level of impregnability that enhances the installation and the appearance of the tiled area. Therefore, for anyone in the market for tile grout, epoxy grout is the best all-rounder.