Home Blog Page 12

How to Fix Chipped Marble Counter – Easy Guide

0
how to fix chipped marble counter

If you’re here, you might be looking for simple steps to fix chipped marble. Is that right? Great. Chipped marble countertops are common issues in houses, particularly when used frequently. 

Whether heavy pots or sharp utensils cause damage, the chipped part spoils the countertops’ overall beauty. So, it is important to address the issue immediately. 

However, you don’t always need a professional to repair the chipped marble. You can easily fix the damage with the right tools and techniques. Read the following sections to restore the aesthetic appeal of the marble countertops once again. 

Material Needed for Fixing Chipped Marble

So, you’re worried about how to fix the chipped marble, aren’t you? No problem. Just collect these materials, and let’s fix the chipped marble countertops together. 

Essential Tools for Fixing Chipped Marble 

  1. A milling tool to smooth the chipped area. It flattens the chipped surface, which promotes better adhesion of the filler material. 
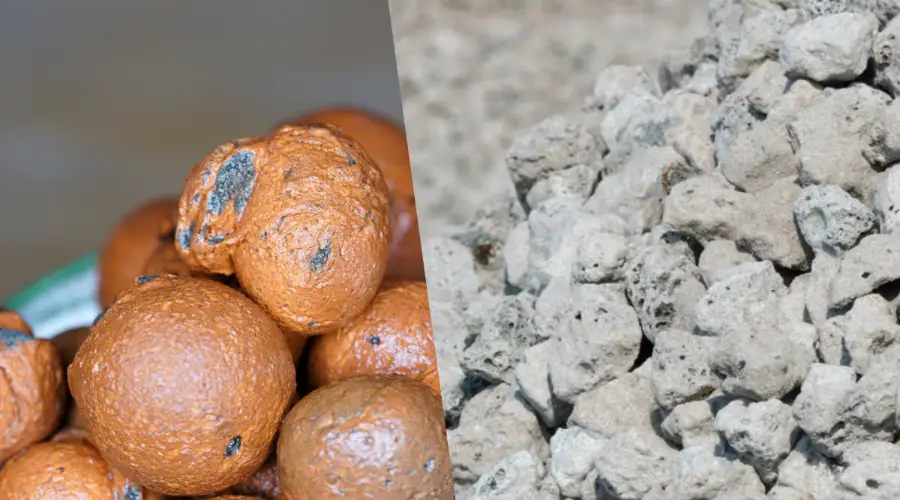
  1. Purchase a filler material; you can choose high-quality and specifically designed epoxy or resin. 
  1. You need to buy colouring pigments so the marble will not look like it was previously repaired. Select the same colour as your countertops. 
  1. A dispenser or applicator to fill the chip with epoxy or resin. 
  1. Buy a flat surface mould to maintain the same level as the surrounding marble. 

On the other side, there are many marble repair kits available on the market; you can purchase them online or in stores. In these readymade kits, you’ll get almost everything you need. 

Steps to Fix the Chipped Marble Countertop

Now, you have everything to repair the chipped marble countertops. Let’s fix it. 

Steps to Fix the Marble Countertops with a Chipped Piece 

  • Keep the chipped piece safe and accessible before initiating repair.
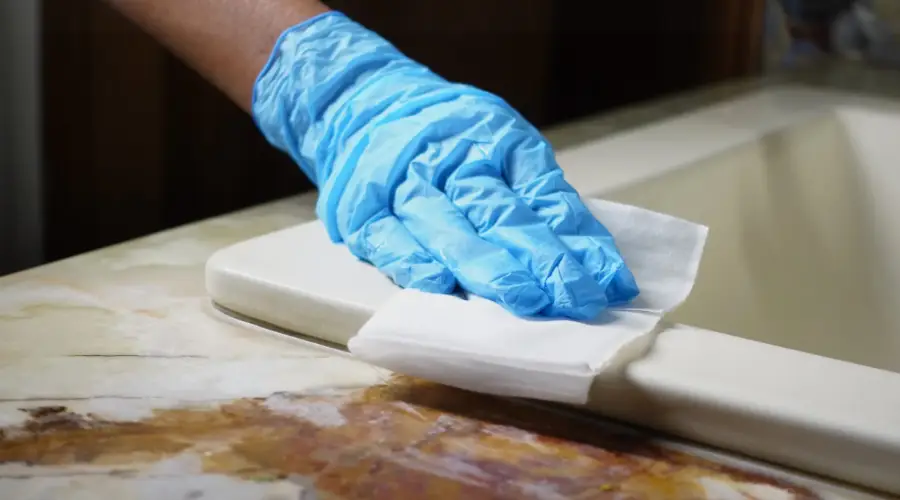
  • Clean the area with a gentle cleaner, wipe it with a microfiber cloth, and let it dry. This helps to remove debris or dirt.  
  • Apply adhesive; you can use epoxy glue or repair cement on the edges of the chipped piece and countertop areas. 
  • Press and hold the chipped part with the damaged area; it’s better to wear a glove while performing this activity. 
  • Fill the gaps with a colour pigment that matches the marble colour.
  • Smooth the repaired area and level it the same as the surroundings. 
  • Let it sit for some time. Once it dries, you can gently rub the rough edges and polish the repaired spot. 

So far, you have learned about how to fix the marble with a chipped part. But what if you don’t have that chipped part? Here are the steps; take a glance. 

Steps to Fix the Marble Countertops without a Chipped Piece 

  • Clean the area with a soft cloth and a gentle cleaner to remove the debris and dust.
  • You can use coloured paste or epoxy to fill the gaps in chipped parts. If you use epoxy, make sure you mix it until it has a paste-like texture. 
  • Now, place the paste into the syringe and position the mould over the chipped area of the marble slabs. 
  • Fill the paste into the damaged area and let it dry for one night. 
  • Finally, use a milling tool or sandpaper to smoothen the surface and complete the repair. 

How to Prevent Damage to Marble Countertops?

Countertops are vital components of both residential and commercial buildings. They significantly impact the aesthetics and functionality of any building. 

In that case, even a small scratch on the marble countertops can spoil the beauty of the rooms. Utilise these tips to maintain the marble.   

Handle with Care 

Maintaining marble is an art, so be a Picasso of it. Address every stain immediately; use a mild, pH-neutral cleaner and a soft, damp cloth. 

Try to clean the countertops before you start any work and repeat the same once your work is completed. Following it properly helps to avoid colour dullness and stain formation. 

Use Cutting Boards, Trivets, and Coasters 

Use Cutting Boards marble counter

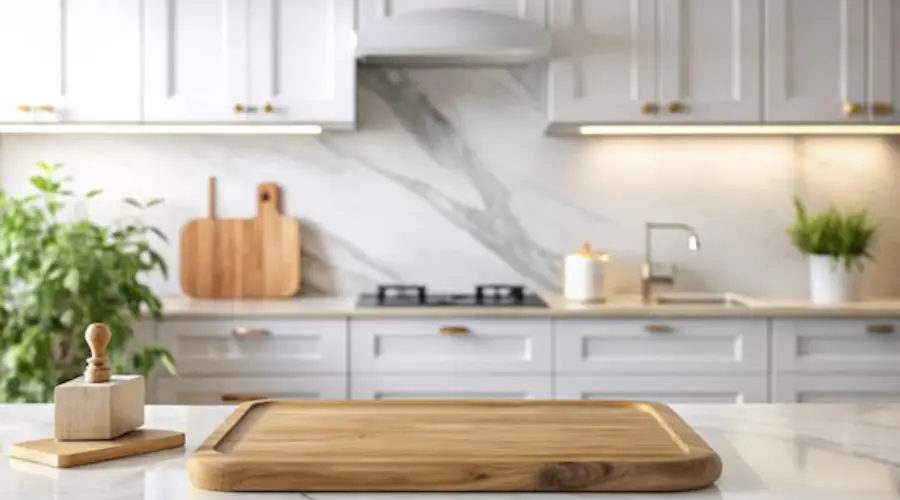
If you frequently use marble countertops to serve hot dishes or a hot cup of coffee, then it’s better to use trivets and coasters.  

On the other hand, you can use boards to cut veggies or meat to cook any dish instead of cutting directly on the countertop. 

Following this helps you to maintain the same texture and shine of the marble even after years. 

Sealant is Must 

Applying a sealant protects your investment. Yes, sealing marble surfaces acts as a protective barrier, repelling oil, water, and other staining agents from penetrating the surface. 

To get started, purchase the best quality sealer from the store and clean the overall countertop. Particularly, mask off the stove if it is attached to the countertops. Apply the first layer of sealant and use a soft foam brush to spread it over the corners and edges. 

Let the first layer sit for some time, and then apply the second coat of sealer. Wait one night for the surface to dry, then use a soft cloth to wipe the countertop. Now, the countertop’s protective layer is all set to use. 

Find the Right Way to Clean the Stains

Find the Right Way to Clean the Stains

Here are some simple yet notable tips provided to clean the marble countertops effectively. Follow these steps to ensure your countertops stay spotless and well-protected:

Organic Stains 

You can use baking soda to remove organic stains, such as those from spilling food, tea, or other beverages. Mix baking soda with water to make a paste and apply it over the spills. Then, scrub the area gently using a soft cloth and rinse thoroughly. 

Etching and Water Stains 

You can use marble polishing power to remove stains caused by water settlement and acidic substances. Follow the instructions on the package, use proper equipment, and wipe the surface gently with a soft cloth once the process is completed. 

Things to Avoid 

Similar to focusing on the right things, you must be aware of the things not to do. Learn about the don’ts here and stop doing them if you’re following any so far. 

  • Avoid contact with acidic food items like vinegar, citrus fruits, coffee, tomato sauce, and wine. 
  • Don’t procrastinate; addressing issues immediately reduces the chances of stains settling down. 
  • Avoid cleaners containing harsh chemicals like bleach, ammonia, or abrasives. Instead, choose pH-neutral cleaners exclusively designed for cleaning marble. 
  • Stop placing objects in excessive weight and temperature because these can cause scratches and cracks over time. 
  • Never neglect regular maintenance. Fix a schedule or add it to a to-do list for the timely cleaning of marble countertops. 

Conclusion

Hope this article helps you fix the damage yourself. Follow these steps effectively to restore the beauty of your home. If you’re not confident enough, consider hiring a professional to get better outcomes. Plus, make sure you follow the proper care tips to keep marble countertops looking as new as ever.  

FAQs

1. How much does it cost to fix a chipped countertop?

There are no exact price details for repairing the chipped marble countertops, and the cost might vary from person to person.

2. How long does it take for the epoxy to fix the chipped part?

Drying time may vary depending on the type of adhesive you use. However, the usual duration is 24 hours, so it’s better to leave it for at least one day.

3. Can I fix a chipped marble countertop myself?

Yes, you can do it using ready-made marble repair kits or following the steps mentioned above.

Dense Graded Aggregate – Properties & Uses

0
Dense Graded Aggregate

Due to the rapid advancement in technology, the construction industry is experiencing various new techniques. Builders can witness tremendous changes in project execution when compared to previous decades. However, it is always good to adapt to the advancements to make the project reliable and efficient.

One of the products is DGA, which stands for Dense Graded Aggregate. It is a type of aggregate used in a wide range of applications.

In this article, you will uncover significant information about DGA, including its characteristics, benefits, and applications. Let’s delve into the topic:

What is Dense Graded Aggregate (DGA)?

Dense Graded Aggregate (DGA) is a type of aggregates material often used in various types of constructions, such as road and infrastructure projects. It consists of larger particles measuring around 1 inch and has been used as a base for proper compaction in roads, parking lots, and driveways. It is a blend of crushed stone and stone dust, creating a stable, durable, and dense surface.

Key Characteristics of Dense Graded Aggregate

  • Dense graded aggregate is available in various particle sizes. ​The size range for DGA typically falls between 1 inch (25.4 mm) to 0 inches (0 mm), encompassing a variety of sizes from larger stones to finer materials such as stone dust. When used in construction, it ensures efficient packing and minimal voids between the particles.
  • The dense packing of particles contributes to the excellent strength and load-bearing capacity.
  • DGA offers superior compatibility under mechanical pressure, leading to a stable and reliable surface.
  • Due to its low permeability, DGA reduces the risk of frost damage and erosion.
  • A well-interlocking of particles provides constant strength and resistance against deformation, weathering, abrasion, and other environmental impacts.

Benefits of Using Dense Graded Aggregate in Construction

Dense graded aggregate provides several advantages to construction projects, such as:

Improved Load-Bearing Capacity: DGA builds a strong and dense packing of particles, allowing the structure to possess an excellent load-bearing capacity and be an ideal option for heavy-duty applications. Its enhanced strength and stability reduce the need for frequent repair and maintenance.

Durability and Longevity: DGA is a type of aggregate that enables a durable bond between the particles and contributes to the durability and longevity of the pavement. It also provides excellent resistance against deformation and damage caused by environmental factors and traffic loads.

Economical: While using DGA as a base material can be cost-effective, it is suitable for projects with budget constraints. It provides a strong foundation and often reduces repair and maintenance over the life of the pavement.

Applications of Dense Graded Aggregate

DGA is a versatile material used in various applications in the construction industry. These include:

Road Construction: It is a crucial component that acts as both a base and subbase material in the construction of roads and highways. It is key to improving the structural integrity of the constructions and resistance to traffic loads.

Road Construction- Dense Graded Aggregate

Infrastructure Projects: DGA is used in large-scale infrastructures such as abutments, bridge decks, piers, and airport runways. In addition to the structural support and durability, it ensures safe and smooth operation.

Subgrade Stabilization: DGA is a precise choice for areas that are subjected to weak or unstable soil. It helps stabilise the subgrade before the construction of pavement begins. It also prevents settling and helps build a reliable pavement structure.

Base Layer for Pavements: DGA serves as a fundamental layer for pavements such as parking lots, driveways, and roads. It ensures a strong foundation by supporting the overlying asphalt and distributing the load evenly throughout the structure.

How to Properly Use Dense Graded Aggregate?

When using DGA in the best possible ways, you can enjoy optimal performance and durability of the structure. Here are some guidelines:

Quality Check: Conduct thorough research and choose a reliable supplier or company where DGA meets the determined quality standards. With laboratory tests, it is easy to verify that the aggregate has the desired strength, gradation, and durability.

Efficient Storage and Handling: It is highly recommended to store DGA in a well-drained area to prevent degradation and contamination. By using appropriate techniques and equipment, it is possible to maintain the desired gradation.

Base Preparation: Base preparation is a crucial step that requires a clean and dust-free surface. An optimal moisture content is essential for proper compaction; excess moisture can reduce strength and hinder compaction.

Placement: When DGA is used as a base layer, it must be in an appropriate thickness that is typically around 4 to 6 inches. To achieve the desired density, use suitable compaction equipment like rollers. Conducting a field density test allows you to monitor the compaction efforts periodically.

Specifications and Standards for Dense Graded Aggregate

The specifications and standards of DGA can significantly vary based on the intended applications and the country in which it is used. However, some of the common points are explained below:

  • The aggregate should be durable, cubical in shape, hard, and clean.
  • DGA should have low porosity.
  • The recommended level of magnesium sulfate is less than or equal to  18%.
  • Its water absorption capacity should be 2%.
  • This aggregate should have sufficient strength to withstand heavy loads.
  • It must be resistant to abrasion, deformation, weathering, and other environmental impacts.
  • It should be free from silt, clay, and other deleterious materials, which can influence its performance.

Final Wordings

DGA is a crucial material in the construction sector, especially in projects like pavements and stabilisation of subgrades. Its excellent strength, stability, and load-bearing capacity make it an ideal choice for achieving a solid foundation. Understanding its complete usage can help you make an informed decision.

FAQs

1. What is the ideal thickness for a DGA layer?

The thickness ranges from 4 to 6 inches for base layers and 2 to 4 inches for sublayers. It can vary based on the requirements of specific applications and local standards.

2. How does dense graded aggregate prevent erosion?

Due to its dense packing and interlocked structure, DGA can actively resist erosive forces caused by water and wind. It also prevents the underlying soil from eroding. Additionally, the well-graded particle size can actively reduce the risk of subsequent erosion and water accumulation.

3. Can DGA be reused in future projects?

Yes, DGA can be reused. However, it is advisable to ensure the material is suitable for that specific requirement. It may be cleaning, blending, or screening; a quality DGA can provide desired gradation and quality.

Conbextra GP2 – Grouting Strength, Applications & Benefits

0
conbextra gp2

Grouting is an important construction process that helps increase structural integrity, stability, and durability. It is the process of injecting a pasty material into a structure to improve its physical characteristics. The industry has numerous grouts; however, Conbextra GP2 grouting is unique and provides multiple advantages and versatile applications. This blog provides an overview of Conbextra GP2 grout and everything you need to know about it.

What is Conbextra GP2?

Conbextra GP2 is a ready-to-use dry grouting material primarily used to fill gaps, voids, and places where both static and dynamic loads are involved. This dry powder is made using Portland cement, graded fillers, and chemical additives. When mixed with an adequate amount of water, it forms a free-flowing grout suitable for thicknesses up to 100 mm.

Properties of Conbextra GP2 in Construction

  • Conbextra GP2 has an extraordinary compressive strength of 55 MPa, making it more durable and able to withstand heavy loads and stresses acting on it.
  • It has the minimum shrinkage rate that the Conbextra GP2 does not contract after hardening.
  • It has good flowability and can fill narrow gaps and voids precisely.
  • It takes approximately 30-40 minutes to set after mixing with water, making it workable enough to apply the grout.
  • It undergoes controlled expansion during the curing process, ensuring that the bond to the surrounding surfaces is tight and secure.
  • Conbextra GP2 can withstand loads and resist impact, vibration, and chemicals, making it more durable.
  • This grouting option is suitable for places where the temperature is between 5℃ and 40℃, above which a special curing process should be followed as a precaution.

Applications of Conbextra GP2 in Construction

  • Due to its load-bearing and durable properties, Conbextra GP2 is used to fill the gap between machine baseplates and concrete foundations.
  • It is used to fill voids around the anchor bolts, dowels, and other reinforcement elements to ensure that they are firmly attached to the foundations.
  • It acts as an interface in the RCC structure, providing a strong bond between the steel structure and the concrete. It is widely used to grout the spaces between columns, footings, slabs, and beams.
  • Due to its flowability, Conbextra GP2 is used to repair concrete structures by filling the cracks, voids, and damaged parts, ensuring structural integrity.
  • It provides smooth and durable surface flooring options for industrial structures such as factories, warehouses, and manufacturing units.
  • Due to its excellent adhesive properties, it can be used in marine, underwater, and offshore structures.
  • It is used to join the precast concrete panels together for efficient sealing and effective load transfer.

Advantages of Using Conbextra GP2

  • It has high compressive and tensile strength, making it suitable for carrying heavy machinery loads and equipment efficiently.
  • This grouting material is highly durable and can resist stresses such as wear, tear, vibration, and impact loads.
  • The minimal shrinkage ensures structural stability and helps protect structural integrity.
  • It has excellent flowability, so it can easily flow through voids and gaps to provide a strong and uniform bonding.
  • The initial strength gain of Conbextra GP2 is high, which allows a faster equipment installation process.
  • It has good resistance against moisture and chemical attacks, protecting the structure from corrosion.
  • It provides good stability and strength between machinery and the foundation, helping to achieve optimal performance.

GP2 Cement Mixing Ratio

The Conbextra GP2 is made of Portland cement, graded fillers, and chemical additives that can be directly mixed with water to achieve a workable consistency. In general, around 3.8 to 4.2 litres of water are required to mix a 25 kg GP2 cement bag. The mix ratio may vary based on the consistency and flowability of the grout.

A forced-action mixer or a paddle mixer is used to ensure that the grout is free from lumps and has a smooth, creamy consistency. However, it is always recommended to follow the manufacturer’s information and engineer’s advice before mixing the cement.

How Long Does Conbextra GP2 Take to Cure?

The curing process of Conbextra GP2 takes place in stages, with the setting and strength development occurring over time. The curing duration depends on factors such as temperature, humidity, and other external conditions.

  • The initial setting time of the GP2 cement grout is 2 to 4 hours when kept under a controlled temperature of 30℃, where the grout attains a solid shape.
  • The grout’s final setting time is 4 to 6 hours when kept under a controlled temperature of 30℃ when it finally sets to bear certain loads.
  • Although it achieves the final setting time within a few hours, it develops 30% of its strength after 1 day, 70-80% of its strength after 7 days, and a full compressive strength of 55 MPa after 28 days.

The curing process should keep the grout moist for at least 7 days. In hot and dry conditions, the grout needs to be covered with damp cloths, or a curing compound should be used as a precautionary measure.

Conclusion

Conbextra GP2 is a high-performance, non-shrink grout that offers a wide range of benefits. This grouting option is exceptionally known for its high strength, flowability, and minimal shrinkage, making it ideal for versatile applications, especially in machinery bases and grouting steel structures. Since it comes in powdered form, consisting of all the ingredients, it can be readily used for the construction and repair process. All these make it one of the unique grouting materials in the industry.

Concrete Bases – Essential for Building Foundations

0
Concrete Bases

Having a solid foundation is essential for any construction, as it keeps the structure lasting. Concrete bases are widely used for the construction of bases for all kinds of buildings and are highly efficient. This blog will explore the importance, applications, and laying procedures of concrete bases and how they contribute to the longevity of concrete structures.

What is a Concrete Base?

A concrete base is a solid, level layer of concrete that acts as a support or foundation for numerous construction, machinery, and other structural elements. This base slab is highly strong, stable, and resistant and is most commonly applicable in residential and industrial construction.

Application of Concrete Base

foundation in residential and commercial buildings
  • It is most commonly used as a foundation in residential and commercial buildings.
  • Patios, walkways, driveways, and sidewalks are laid using the concrete base.
  • Outdoor structures such as sheds, garages, and storage units use concrete slab foundations.
  • It is ideal for greenhouse construction to prevent the building from shifting due to heavy winds.
  • Industrial structures and places using heavy machinery and equipment have concrete bases.
  • The base material is used to anchor retaining walls to prevent soil erosion.
  • Basketball and tennis courts are constructed using concrete bases. 
  • It is used as the base for holding outdoor generators.

Preparing the Area for a Concrete Base

Marking and Measuring

Measure the place where the concrete base needs to be laid and mark the length, breadth, and depth. Ensure that the ground surface is dense, level, and free of rocks, grass, or debris.

Dig Marked Area

Excavate the soil up to the measured depth using a shovel or a mechanical excavator. Generally, the concrete slab is recommended to be 150 to 225 mm deep. Ensure that the surface is on the same level throughout the excavated area. Compact the excavated area with a compactor to make the surface dense and stable.

How to Lay a Concrete Base

Lay the Sub-base

Place a layer of crushed stones or gravel 50 mm thick throughout the excavated area and compact it using the compactor to create the sub-base layer.

Build Framework

Build a temporary framework across the excavated area using metal or wooden forms of the required length and width. Ensure that the framework is stable enough to hold the concrete poured into the structure.

Install Reinforcement (if necessary)

Steel rebars or steel meshes can be installed within the structure to provide additional strength to the concrete base. The rebars should be placed at an elevation to avoid direct contact with the base, and a minimum gap of two inches should be left from the formwork.

Pour Concrete

Mix the concrete using a mechanical mixer based on the appropriate mix ratio (standard ratio: 1:2:3). Pour the concrete mix into the framework onto the sub-base material from each corner and spread it evenly across the surface using the shovel. Use a vibrator to remove gaps in the concrete.

Finishing

To achieve a polished look, use a trowel or a float to provide a smooth surface to the concrete base. In some cases, textures are added by using a broom, a patterned float, or grooves on the wet concrete.

Curing

Keep the concrete base idle for one or two days to set, and it will get hard enough. Maintain the moisture on the surface for at least seven days by spraying water periodically or covering the surface with plastic. It will take approximately 28 days for the base concrete to achieve maximum strength.

Remove Formwork

After curing, remove the formwork carefully without affecting the slab’s structural integrity. After that, smooth the hard surface and edges with a trowel.

Essential Tools and Materials for Building a Concrete Base

Tools

  • Shovel
  • Concrete mixer
  • Trowel or Float
  • Level
  • Measuring tape
  • Rake
  • Hammer
  • Saw
  • Rubber mallet
  • Concrete vibrator

Materials

  • Mixed Concrete
  • Gravel or Crushed Stone
  • Formwork
  • Sealant
  • Reinforcement steel rebar

Advantages of Concrete Bases

  • The concrete base has a high load-bearing capacity and can support heavy loads from buildings, machinery, and other structures.
  • It provides a stable foundation, thus preventing the risk of settlement.
  • This slab is resistant to weather and temperature fluctuations and can be used in all types of weather conditions.
  • It is highly durable and can last for a very long time.
  • This slab has versatile applications and is suitable for residential, commercial, and industrial applications.
  • Concrete bases are customisable and can be created for different shapes, sizes, and textures.
  • It requires low maintenance in the long run, thus saving maintenance costs.
  • It is highly resistant to fire and pests, thus increasing the lifespan of the structure.

Conclusion

Concrete bases are essential components of construction that provide durability and longevity to the structure. They provide additional support, uniform distribution of loads, improved drainage systems, and acting as a foundation. Due to its physical properties, it is used in a wide range of applications in almost all types of construction projects.

FAQs

1. How long does it take for a concrete base to cure?

The curing process of the concrete base typically takes around 28 days to fully cure and attain maximum strength and durability.

2. How can cracking in a concrete base be prevented?

Cracks in the concrete base can be prevented by
1. Using the right concrete mix
2. Proper curing
3. Compaction before pouring
4. Adding reinforcement
5. Adding control joints
6. Sealing the voids and cracks
7. Maintaining a cool surface temperature

3. Can a concrete base be used for all types of construction?

Yes, concrete bases can be used for all types of construction, as they provide good stability, durability, and a level base. These bases are widely used in the construction of residential, commercial, and industrial buildings.

2.5 lakh subsidy for land owners to build house​ – overview

0
2.5 lakh subsidy for land owners to build house​

The weaker and middle-income sections of society are deprived of owning a house due to the high inflation rate. The increasing inflation rate in real estate obstructs the marginalised sections of society from affording a house in India. Addressing this challenge, in 2015, Pradhan Mantri Awas Yojana was launched by the central government. The main aim or objective of the scheme is to enable an eligible household to own a house by 2022. Under this central government scheme, people are given up to Rupees 2.5 lakh as an interest subsidy to purchase houses through home loans. This article will provide a detailed overview of the 2.5 lakh subsidy for landowners and answer several queries one may have about the scheme.   

What is the 2.5 Lakh Subsidy for Land Owners?

The 2.5 lakh subsidy for landowners is an interest subsidy brought by the central government to aid marginalised people in purchasing houses. This interest subsidy is part of the Pradhan Mantri Awas Yojana. The government gives up to Rupees 2.5 lakh as an interest subsidy when an individual attempts to purchase a house through housing loan. The introduction of this scheme gave a fillip to the real estate sector which was reeling under high inflation rate. In addition, if the beneficiary is not interested in taking a loan, the government facilitates the provision of  Rupees 1.50 lakh for a house to be built on private land.

Key Benefits of the Subsidy for Land Owners

The main objective of the scheme is to make housing affordable to all sections of society. While the scheme has several advantages, some of the remarkable benefits of implementing this scheme in society are a significant reduction in the overall cost of home ownership and making home ownership accessible to a larger population. Some other key benefits are,

  • Reduction in monthly EMIs makes it easier for individuals to repay the loan without any problems because the interest subsidy lowers the interest rate on the home loan directly.
  • The interest subsidy makes it possible to pay the loan quickly and expedite the process behind the repayment to own the house sooner.
  • This enables people from all walks of life to own a house, providing them with a sense of security and stability. It improves the social and economic status of the people.
  • In general, the scheme has created a positive impact on the economy, boosting construction activity, generating employment, and stimulating industries.
  • The scheme has brought up the economically weaker sections of society, reducing inequality and promoting social inclusion.

Eligibility Criteria for the 2.5 Lakh Subsidy

Eligibility Criteria for the 2.5 Lakh Subsidy

There are set criteria that need to be met to become eligible for the scheme. The criteria are based on income levels, property value, and other factors. In terms of income criteria, to become eligible, people from the economically weaker section’s annual income should range up to Rs. 3 lakh, the low-income group’s annual income ranges between Rs. 3 lakhs to Rs. 6 lakhs, and the middle-income group’s ranges between Rs. 6 lakhs to Rs. 18 lakhs. When it comes to property value limits, the limits vary according to the income category, location, and type of property. This interest subsidy can only be availed by first-time homebuyers and the property purchased should be intended for personal purposes, not for commercial purposes. 

How the Subsidy Works for Landowners?

While the main purpose of the 2.5 lakh subsidy is to benefit homebuyers purchasing a new house or constructing one. However, in certain cases, this scheme benefits land owners as well only if they intend to build a house on their land. This eligibility criteria may vary with the state government’s guidelines and bank policies. Some states may even provide additional benefits to land owners alongside this 2.5 lakh interest subsidy. Some common procedures followed in the states to extend benefits to the land owner are, securing a home loan from an eligible bank, and submitting the necessary documents under PMAY. If approved, the amount will be credited directly to the loan account.

Conclusion

The Pradhan Mantri Awas Yojana’s (PMAY) interest subsidy for landowners has become a key stepping stone towards achieving the dream of homeownership for millions of Indians. By providing substantial financial assistance, this scheme boosts access and affordability to housing, particularly for the economically weaker sections of society. This subsidy directly benefits individuals and families and contributes to the economy. It boosts the construction industry and creates job opportunities, besides having a positive impact on related sectors. It also ushers in social inclusion, with homeownership empowering individuals and families. The scheme has been quite pragmatic considering its set objectives. But still, the need for regular evaluation and further improvement is there. If bureaucratic barriers, documentation difficulties, and territorial differences are tackled, the effectiveness can be elevated. The government can greatly impact housing and, thus, the nation itself by alleviating the hindrances in the process and broadening the benefits of the subsidy.

FAQs

1. How can I apply for the 2.5 lakh subsidy?

Following are the steps to apply for a 2.5 Lakh interest subsidy under Pradhan Mantri Awas Yojana (PMAY).
1. Identify a bank or financial company that is part of PMAY.
2. Submit the application form provided by the lender.
3. Cross-checking of information will take place.
4. If every step of the process goes uninterrupted, interest subsidy will be directly credited to your loan account.

2. What documents do I need to submit to avail of the subsidy?

Specific documents that are required to avail of the interest subsidy are identity proof, income proof, address proof, land ownership documents, and bank account information.

3. How long does it take to receive the subsidy after applying?

The time taken may vary depending on the processing time of the lender, the verification process, and the government’s distribution procedures. The approximate period ranges between 4 and 6 months

Flush Pointing in Stone Masonry – Process & Advantages

0
flush pointing in stone masonry

The construction process of residential or commercial buildings does not just end with the accurate arrangements of materials and sturdy foundations. It must incorporate a visually striking masterpiece to set your structure apart from the ordinary construction work. 

When it comes to aesthetic appeal, you need to consider pointing in priority. It improves the structural integrity and overall appearance of the building. They are a suitable choice for achieving the desired finish in brick and stone masonry construction. Among the several pointing types, we are about to discuss flush pointing. Let us continue the reading to explore its meaning, purpose, and advantages it serves. 

What is Flush Pointing in Stone Masonry?

Flush pointing is extremely durable and is a widely used type in construction. This process involves filling the raked mortar joints with fresh mortar, resulting in a smooth and seamless finish. The mortar that is flushed between the two stones or bricks eliminates the collection of water and dust in between the spaces. It helps enhance the cleanliness and longevity of the structure.

Purpose of Flush Pointing in Stone Masonry

The flush pointing in stone masonry serves two important purposes. They are:

Protection: Flush pointing efficiently seals the gaps or cracks that exist between the stones, protecting the structure from adverse effects of snow, humidity, and other harsh environmental conditions. While filling the joints with fresh mortar, the structural integrity of the masonry is enhanced, which typically prevents corrosion and other damages.

Aesthetic Value: As stated earlier, flush pointing creates a smooth and seamless finish on the surface, making it look cleaner and polished. It naturally highlights the patterns and textures applied to the stone.

Materials Used in Flush Pointing

Materials Used in Flush Pointing

These are the significant materials used in flush pointing, including:

Lime Mortar: It is typically used to reduce shrinkage and cracking. It is one of the softer materials often used in brick or stone masonry work. Lime mortar efficiently maintains the structural integrity of the construction by allowing moisture to move through the joints.

Cement Mortar: Another essential material composed of cement, sand, and water, it enables the building to be strong and durable, used for different types of masonry work. The recommended ratio of cement to sand is 1:3.

Paint: Paint is an added material to create a rustic look for the traditional mortar pointing. It transforms the entire look of the room, commonly used on ceilings and woodwork.

Process of Flush Pointing

Flush pointing is the most commonly used construction technique. This technique involves filling the mortar joints with fresh mortar to create a smooth and perfect finish.

Here are the simple steps involved in flush pointing:

Remove Existing Mortar: The old, deteriorated mortar that exists between the stones of bricks should be removed to ensure a strong bond with new mortar. IT is essential to ensure the gaps are thoroughly cleaned without any excess mortar, dust, or debris.

Mortar Preparation: Prepare a new mortar in appropriate proportions of cement, sand, water, and lime. The consistency should be properly workable and can be easily applied over the joints or gaps of the stones.

Fill the Gaps: Apply a newly prepared mortar into the raked joints and ensure the voids are completely filled. Once you level the surface, gently remove the excess mortar to create a clean, seamless surface.

Finishing: To enhance the appearance of the whole space, create a smooth and uniform finish over the surface. The mortar at the right consistency can allow you to create specific textures or patterns, enhancing the overall atmosphere of your home.

Advantages of Flush Pointing

Due to its exceptional advantages, flush pointing is used in several applications. Here’s a breakdown of some of its significance:

Excellent Durability: While sealing the gaps between stones or bricks, you can reduce water penetration and prevent the risk of mould growth, structural degradation, and frost damage. A well-pointed wall resembles the strong bond that exists between individual stones.

Low Maintenance: You might be afraid that the flush pointing needs regular maintenance to extend its durability. Luckily, this is wrong. Maintenance is quite easy; removing dust and grime buildup is enough to improve the lifespan of the structure.

Unique Appearance: More than being durable, flush pointing involves improving the overall look of the structure. The creation of a smooth and perfect surface with no gaps or voids filled. It is a quite natural way that contributes to achieving the desired pattern and texture of the stonework.

Energy Efficiency: Flush pointing is a low-energy consumption method and also improves the thermal performance of the overall building. It is suitable for small- and large-scale construction, providing aesthetic appeal and long-term preservation.

Disadvantages of Flush Pointing

Flush pointing has some potential drawbacks, which are listed in the following:

Less Water Resistance: Flush pointing may fill the gaps and prevent water penetration inside the wall, but it may not be water-resistant in harsh weather conditions. When it is exposed to heavy rain, it can be susceptible to moisture and water penetration.

Complex Repairing: The maintenance of flush pointing might be easier, but the repair or replacement may compromise the original colour and texture of the mortar, particularly if the structure is old or ancient.

Cracking and Shrinkage: Mortar proportions are crucial for strong and durable bonding. Ensure it is properly mixed and applied between the stones; otherwise, it can lead to cracks and shrinkage in the pointing.

Maintenance of Flush Pointing

Regular maintenance is advisable to improve the effectiveness and longevity of flush pointing. Here are some maintenance tips provided for your reference:

  • Conduct periodical inspections to pinpoint the signs of damage like chips, loose mortar, or cracks. Timely repairs can cost less and prevent further deterioration.
  • Repointing is not recommended as it can significantly impact the originality of pointing. If it is necessary, consider hiring a professional mason to retain the integrity.
  • It is suggested to use a pressure washer or soft brush to clean the dust and dirt from the masonry surface. Avoid applying harsh chemicals that cause damage to the stone or mortar.
  • Consider applying a water-repellent coating to withstand harsh weather conditions and prevent moisture damage.

Final Thoughts

Flush pointing is crucial for construction as it promotes structural integrity, longevity, and aesthetic appeal with reduced maintenance. Choosing high-quality materials and professional masonry workers ensures better results. Follow the steps mentioned in this article to avoid any difficulties while filling with fresh mortar.

Circular Columns – Advantages & Construction Process

0
Circular Columns

A construction project involves several challenging processes. Being aware of every stage of the work ensures desired strength and longevity of the structures. Among all, the column is the most noticeable feature, often used to support and transmit the gravity loads from the roofs or floors of buildings to the foundation.

The design of the column is quite typical. It considers various significant parameters such as location, shape, and size. The commonly used column shapes are circular, rectangular, and square. In this article, you will get to understand about circular columns and why they play a vital role in construction. Let’s delve into the topic now.

What are Circular Columns?

Circular columns are cylindrical structural members generally made of concrete and are typically reinforced with steel bars to make them even stronger. It is primarily used to carry vertical loads caused in the buildings and other structures. Being a strong and durable column choice, they can withstand a lot of weight, and the sizes can be accommodated according to the project needs.

A circular column is an ideal choice for seismically active areas, providing resistance against earthquakes, harsh winds, and other types of environmental impacts.

Importance of Circular Columns in Construction

Circular columns serve several advantages to the construction. They are often designed to withstand ultimate axial load, moment and shear forces. Additionally, here are some more benefits:

Uniform Load Distribution: Circular columns are primarily recognised for the uniform load distribution across their cross-sectional area, providing optimal load-bearing capacity to structures. This leads to reduced stress concentration and risk of deformation and cracks.

Strong and Ductile: As mentioned earlier, a circular column is generally made of concrete, which helps improve the strength and durability of the structure. It is specifically suitable for seismic areas where they are subjected to encountering torsional moments and lateral forces.

Aesthetic Appeal: More than its technical aspects, circular columns are often used for their sleek and modern appearance. They offer a neat and contemporary look to a wide range of architectural styles. It makes the structures unique and visually appealing.

Buckling Resistance: Circular columns are a better alternative for slender columns, which have failed under compressive loads. They are mostly used in tall structures that are subjected to significant axial loads.

Design and Calculation of Circular Columns

Design of Circular Columns in Construction
  • To design and calculate the size and number of circular columns for your construction, here are the steps to follow:
  • Before stepping into the calculation, you need to determine the axial load, moment, and shear force that the column must support.
  • Select the compressive strength of the concrete and yield strength of the reinforcement steel according to your construction needs.
  • Calculate the diameter using the axial load and moment of the column.
  • Estimate the required area of steel by selecting the appropriate bar diameters and spacing to resist the tensile forces.

Calculations:

Formwork:

A = π x d x h

Where d is the diameter and h is the height

Concrete quantity:

To determine the concrete quantity to design the circular column, use this formula:

V = π/4 x d2 x h.

Construction Process of Circular Column

A circular column is valued for its exceptional structural integrity and aesthetic feel. Herewith, you could know the construction process involved in it:

Formwork Preparation: The structures are incorporated with specialized circular formwork, which is often made of plywood or steel. Firstly, the formwork is assembled on-site according to the required shape and height. It is then tied to avoid movement during concrete pouring.

Reinforcement Placement: Placing the reinforcement bars in the specified spacing and diameter based on design calculations is crucial. Fortunately, the bars can be bent to achieve the desired shape within the formwork. Then the reinforcement is tied with wires to ensure safety.

Concrete Pouring: Mix the concrete in an appropriate consistency and pour it into the formwork either using pumps or buckets. The concrete is vibrated to eliminate the air voids and leveled to achieve the desired height.

Curing: The concrete needs to be cured in a controlled environment to meet the estimated strength. Rapid drying may cause cracking and other severe damages; ensure that the concrete is kept moist for at least 28 days.

Formwork Removal: Once the concrete is cured well, it can achieve its desired strength and durability. After inspection, the formwork in the field is safely removed.

Applications of Circular Columns in Modern Construction

Circular columns have become a popular choice in various modern structures. Here are some of its key applications to know:

High-Rise Buildings & Bridges: Circular columns are an ideal choice for high-rise structures and bridges due to their exceptional load-bearing capacity and resistance to buckling and deformation. They can bear the load from roofs or floors and safely transmit it to the foundation.

Industrial Settings: They can also be an integral part of industrial settings because they can withstand heavy loads and harsh environmental conditions. Additionally, they are widely used in tall structures and seismic areas that are frequently subjected to harsh weather.

Why Rectangular Column Shape is Preferred Over Circular Column?

Why Rectangular Column Shape is Preferred Over Circular Column?
ParametersRectangular ColumnCircular Column
FormworkA rectangular column is easier to construct and dismantle with no complexities and challenges.Circular columns require better formwork materials and workmanship, which takes more time to build.
ReinforcementPlacing reinforcement is easier than for a circular column, and it is ideal to use in displaying signage, images, and notice boards.Requires a complex reinforcement arrangement, particularly when handling large diameters.
CostDue to its simpler and trouble-free construction method, a rectangular column is cost-effective and requires lower material usage.It is expensive because it requires specialised labour and equipment for proper setting.
Material EfficiencyRectangular columns can be optimized for specific load conditions even for varying dimensions.It offers less flexibility in adjusting material usage in a cross-sectional area.

Concluding Lines

In the intricate world of construction, choosing the right column type is essential to ensure the structural integrity and visual appearance. The circular column is the most commonly used, suitable for a range of architectural styles, and can fit any type of construction. By understanding its significance and applications, you can get to know the benefits of usage.

Floating Caissons – Construction, Benefits & Applications

0
Floating caisson

The need for land and space is growing steadily each day. The rise of global trade among all countries increases the demand for the transportation of goods from one place to another through maritime channels. Similar to land, maritime traffic is also increasing. To resolve this issue, construction professionals use floating caissons. Floating caissons can be used in the construction of seaports, docks, and harbours, which are essential places for loading and unloading goods from the sea. Let us explain in detail the ways floating caissons work, their applications, advantages and disadvantages, the materials used for making caissons, and the construction process.

What is a Floating Caisson?

The floating caissons are prefabricated concrete constructions with cylindrical voids or chambers that resemble boxes. They are made with specialised equipment called “Floating Docks.” These caissons’ proportions are customised to fit the unique requirements of every project while staying within predetermined bounds. Floating caissons facilitate international trade by expanding the ports and also supporting the construction of ship vessels and protecting against wave action and the transfer of goods. 

These caissons can be used to do different kinds of marine work. They are mentioned below:

  • Ports 
  • Breakwaters
  • Wharves
  • Berthing Facilities and Docks
  • Dry Docks and Slipways
  • Fishing Ports and Marinas

How do Floating Caissons Work?

During building and installation, floating caissons use their buoyancy to function. With steel and reinforced concrete reinforcements, these massive, hollow concrete buildings are constructed off-site or in dry docks and are intended to float because of their hollow nature. Once built, tugboats or other propelling devices are used to float the caisson to the intended destination. 

The caisson is ballasted with water or heavy materials like sand or gravel after it arrives at the installation site to sink it to the necessary depth. It settles on the seafloor as it sinks, giving future construction projects like piers and bridges a solid foundation. To guarantee stability against waves, tides, and currents, the caisson is secured to the seabed using piles, cables, or other techniques after it has been positioned. After the caisson is anchored, further building tasks, such as adding utilities or superstructures, can be carried out on top of it. 

The caisson can then be joined to other caissons or structures to provide a wider platform for the construction project, and additional ballast adjustments can be made to guarantee the caisson stays level and stable. All things considered, floating caissons use buoyancy to facilitate transportation and accurate positioning, offering a sturdy base for maritime construction projects.

Applications of Floating Caissons

A variety of maritime works and harbour structures are built using floating caissons, which include harbours, wharves, dry docks and slipways, berthing facilities and docks, fishing ports and marinas, breakwaters. These structures rely on caissons that create sturdy, secure foundations to endure the harsh marine environment, such as waves, tides, and currents. Because they provide dependable support for large loads and maritime operations, caissons are crucial to the security and operation of important maritime infrastructures.

Advantages of Floating Caissons

Advantages of Floating Caissons
  • Because of their tremendous load-bearing capability, floating caissons are perfect for sustaining large, weighty structures like piers and bridges.
  • They provide flexibility in areas where conventional foundation techniques would not be practical due to their adaptability to deep-water construction.
  • For large-scale marine construction projects, floating caissons may be more cost-effective than traditional deep foundation techniques, despite the initial installation being more expensive.
  • Project durations are accelerated by the prefabrication and floating capabilities, which shorten on-site building times.
  • Sensitive ecosystems benefit from them since they disturb the marine environment less than pile-driving methods do.
  • Because floating caissons are simple to move or reposition, they can be adjusted to accommodate shifting project needs or site circumstances.
  • They are dependable in difficult situations because they are less impacted by changing soil conditions.

Disadvantages of Floating Caissons

  • Floating caissons can be expensive to construct and install, particularly in deep water or challenging environments.
  • The installation process is complex and requires specialised equipment, increasing both time and cost.
  • They are less suitable for shallow water or low-depth areas where other foundation methods may be more effective.
  • Floating caissons are vulnerable to environmental forces such as strong currents, waves, and storms, which can impact their stability during installation or use.
  • Significant noise and vibration can be created during the installation process of floating caissons, which causes disturbance to marine life and nearby communities.
  • Due to their location in water, regular ongoing checks are required to confirm their structural integrity.
  • During installation and relocation, they may cause environmental impacts, such as disruptions to marine ecosystems.
  • Floating caissons require precise positioning and anchoring, making them sensitive to changing field conditions and weather.

Materials Used in Floating Caissons

The equipment and resources used for construction activities around floating caissons are as follows:

  • Concrete
  • Sand
  • Reinforcements
  • The floating dock that holds concrete delivery pipes and a crane
  • Auxiliary floating platforms
  • Batch plant
  • Concrete pumps
  • Gantry crane
  • Loaders
  • Air compressors
  • Pneumatic pumps
  • Workmen on a shift basis

Construction Process of Floating Caissons

Step 1: Concrete Preparation

Preparing the concrete is the first step in the caisson prefabrication process. Two distinct equipment configurations work together to manage various steps in the process. The following are the steps: A batch of concrete is created in a mixer and then moved into a hopper that is attached to a concrete pump. A delivery pipe that is situated above the work platform then carries the concrete.

Step 2: Slab Construction

Starting with the base slab, each caisson is built in an ascending order. After being prepped on a secondary floating platform, the slab’s reinforcing structure is moved to the floating dock. The slab is formed as one unified piece using a movable mould.

Step 3: Building the Upper Sections

With the use of a movable mould, work on the higher portions of the caisson begins once the slab is finished, moving upward in one-meter intervals. In each step, the concrete is poured and compacted, the mould is adjusted, and reinforcing is installed. Until the caisson reaches its maximum height, this procedure is repeated.

Step 4: Releasing the Caisson

When the caisson is finished, it is released from the floating dock by disassembling a specific support and locking bar system. With the help of tugboats and ropes anchored on the coast, the caisson becomes buoyant and is guided to its destination.

Step 5: Final Placement and Filling

Granular materials fill the cylindrical spaces inside the caisson when it reaches its final place. Support vessels that are outfitted with the material and a specialised crane for its transfer are used to complete this task. 

Step 6: Preparation for the Next Caisson

On top of the caisson, equipment like trucks, loaders, tractors, and bulldozers finish the filling operation. Meanwhile, at the floating dock, work on building the next caisson begins.

Conclusion

To sum up, floating caissons give stability and support in deep-water settings, making them a dependable option for marine building projects. They are perfect for construction like ports, breakwaters, and offshore platforms because of their ability to float, enabling convenient transportation and accurate placement. Floating caissons are regarded for their great load-bearing capacity, versatility, and longevity, making them crucial for current harbour and infrastructure development in maritime settings, despite installation obstacles and the requirement for specialised equipment.

FAQs

1. What is the lifespan of a floating caisson?

Depending on the materials used, the surrounding environment, maintenance procedures, and the kind of marine activities, a floating caisson’s lifespan normally varies from 30 to 50 years. 

2. How is a floating caisson different from a conventional caisson?

Whereas a traditional caisson is pre-sunk or cast on-site, a floating caisson is buoyant, transported, and sunk into place, perfect for deep sea.

3. What are the safety measures during installation?

Structural integrity inspections, controlled ballasting, environmental monitoring, tugboat support for accurate placement, worker protection gear, and secure anchoring to stop movement are all examples of safety precautions during installation. Safe operations are guaranteed by constant communication, emergency response plans, and adherence to safety procedures.

2BHK House Construction Cost in Village – A Complete Guide

0
2 bhk house construction cost in village

Many people consider building their own home to be their life’s ambition. Although there are many different kinds of buildings, 2BHK homes are the most popular and useful choices for relocating. 

Are you planning to build a two-bedroom house in a village but worried about the cost? This blog gives a clear overview of the 2BHK construction cost in the village and the important aspects that need to be considered.

Understanding Construction Costs for a 2BHK House

Understanding the construction cost is crucial for preparing the budget and planning the finances. It ensures that the project is financially sound throughout the construction process. There are numerous components and factors related to constructing a 2BHK house.

Key Components of Construction Cost

There are two different components of the construction cost: hard costs and soft costs.

Hard Costs

The hard costs of a building are the physical costs that occur during construction. They include labour, materials, equipment, site preparation, hiring subcontractors, and more.

Soft Costs

Soft costs, or indirect costs, are those that are not directly associated with the construction process but influence it. They include the cost of architects, engineers, and designers to prepare plans, designs, and blueprints and the cost of obtaining permits, licences, and clearances.

Factors Affecting Construction Cost

Design and Planning

Design and Planning

Design and planning are important aspects of construction that help the building last a long time. This reduces the money and time spent on repair and maintenance. Architects and engineers take care of this designing process, for which they charge a fee.

Size of the Property

Size of the Property

It is one of the most common factors that affect the construction cost. The property size of construction influences the impacts of labour and materials required. Larger buildings require more material and labour, thereby increasing the overall cost.

Material Quality

The choice of construction materials plays a major role both during construction and in the long term, affecting durability. High-quality materials demand a considerable price, which increases the initial cost but saves the cost spent on maintenance. On the other hand, low-quality materials reduce the initial cost but could increase the maintenance cost.

Location

The location where the construction takes place plays a crucial role in determining the overall cost. The cost of the land is a significant factor in deciding the cost of construction. Urban and metropolitan areas typically have higher land costs than rural and suburban areas. Based on the location, the availability of materials, cost of labour, construction regulations, and transportation costs increase or decrease.

Labour

Labourers associated with the construction process play a significant role in determining the overall cost. The number of labourers, location, construction duration, and the cost spent on labourers influence the overall cost of construction.

Economic Factors

Economic factors such as inflation, higher interest rates on financing and loans, and supply chain disruption could affect the cost and duration of construction.

Government Regulations

Construction codes are based on localities and change from one place to another. They affect the overall structural integrity, choice of materials, fire safety, and every aspect of the construction. This influences an increase in the overall cost of the building. The cost spent on permits, licences, and clearances is done by the local government only when the structure comes under the criteria, and this increases the overall cost.

Cost Breakdown for Building a 2BHK House

Land Cost

A 2BHK house could occupy a land area of 800 and 1200 square feet. The rural land pricing in India does fluctuate due to various factors such as locality, demand, and infrastructure; a more grounded estimate would suggest a typical cost range between ₹3,00,000 and ₹35,00,000. The cost of the land could be much less in rural locations than in urban and metropolitan areas.

Fees for Planning and Design

Typically, 3% to 10% of the construction cost goes on design. The architect’s experience and the unique construction design will determine the price of plot design, blueprint creation, and structural approval. 

Materials Cost

The quality and quantity of the construction materials and equipment required for the construction cover major portions of the budget. The purchase of materials could cost ₹8,00,000 to ₹ 20,00,000 for a 2BHK house, depending on the construction needs and quality of materials. 

Labour Cost 

Labourers associated with the construction process play a significant role in determining the overall cost. The labour cost could range from ₹2 – ₹5 lakhs depending on the skillset, experience, quantity, and location. Labour costs in rural areas are comparatively lower than in urban areas. 

Permits and Legal Fees 

To obtain construction permits, property registration, and other licences required to legally authorize the building, a fee ranging from ₹10,000 to ₹50,000 can be charged depending on the local building codes and the scope of the project.

Contingency Fund

A contingency fund should be allocated to cover unexpected construction expenses. This includes an increase in material cost, design changes, or other additional requirements. The building’s contingency fund ranges from 5% to 10% of the total cost.

Average Cost of Constructing a 2BHK House in a Village

Considering that the building is a 1000-square-foot house, here is the cost of constructing a 2BHK house in that land area in a village.

FactorsApproximate Cost
Architectural Design₹15,000
Brick Wall without RCC₹800 per sq ft
Brick Wall with RCC₹900 per sq ft
Civil Works (Construction)₹1,500 per sq ft
Electric and Plumbing Installation₹2,500 per sq ft
Raw Materials Cost₹7 Lakh

By interpretation, it would cost around ₹12 – ₹15 lakhs on average to construct a 1000 sq ft house in a village in India.

Steps to Reduce Construction Costs

  • It is important to have a clear idea of the project, including the design, materials, labour, and other equipment requirements, to minimise changes during construction.
  • Look for cost-effective design and construction alternatives to manage the construction flow effectively.
  • Through the bidding process, obtain competitive bids from the contractors and suppliers who best suit your budget and understand your construction needs.
  • Select the building materials that have a good balance of cost-effectiveness, good quality, and ease of availability.
  • Prefer sustainable construction practices to achieve long-term cost savings and gain environmental benefits.
  • Practice lean construction processes to minimise waste generation and improve productivity.
  • Manage the workers by scheduling their work and ensuring that the workers are well-trained.
  • Constant supervision should be done to diagnose and treat construction errors without delay to avoid costly and unforeseen expenses.
  • Use efficient content management tools and techniques to provide transparent and timely updates on progress and costs.
  • Negotiate with suppliers and contractors to secure favourable terms and pricing for the construction materials.
  • Plan a proper recycling method to reduce construction waste.

Conclusion

A 2BHK house that consists of two bedrooms, a hall, and a kitchen is a dream house for many, and we hope this blog will help you plan your budget for construction funding. The cost of the construction and labour charges might change depending on the location and the design requirements. Plan your financing accordingly with the pre-estimation to keep you within the budget.

FAQs

1. What is the minimum cost to build a 2BHK house in a village?

In India, the minimum cost of a 2BHK house in a village will be at least ₹ 10,00,000 for an 800 sq ft land area.

2. How can I estimate the total construction cost accurately?

Define the project scope and calculate all costs, including direct and indirect costs and the equipment required for construction. Before starting your project, it is better to consult a builder for a cost estimation.

3. Are there additional costs for permits and legal processes?

Yes, permits and legal procedures require additional costs. This includes charges imposed by local authorities for building permits, zoning permits, and environmental assessments.

Lightweight Aggregates – Benefits & Types

0
Lightweight Aggregate

In modern-day construction, lightweight aggregate offers a solution to reduce the weight of structures without diminishing their strength and durability. The materials of lightweight aggregates are less dense than traditional aggregates. This helps produce lightweight concrete and is preferred by many builders for various structural and non-structural applications. This article dives deep into the subject matter of lightweight aggregate and what role it plays in the construction sector.

What is Lightweight Aggregate?

It is a rough aggregate used in the production of lightweight concrete products. Some concrete products are concrete blocks, structural concrete, and pavements. The shape of the lightweight aggregate varies and some of the commonly available ones are cubical, rounded and angular. The constructor cannot neglect the shape and texture as insignificant as they both influence the workability of the structure. Lightweight aggregates can generally easily achieve the compressive strength needed for normal construction. Lightweight aggregates do not have a standard density value as the density value is often swayed by factors such as mixture proportion, air content, water demand, density and moisture content.

Types of Lightweight Aggregates

Types of Lightweight Aggregates

In the construction sector, lightweight aggregates have been divided into three types based on their origin, production process and application. These are:

  • Industrial waste lightweight aggregate: This aggregate includes materials processed by industrial wastes such as fly, ceramsite, expanded slag bag, cinder, and light sand.
  • Natural aggregate: This type of aggregate uses naturally occurring materials such as pumice (volcanic rock), scoria (volcanic material, much denser and darker in colour), diatomite (sedimentary rock), volcanic tuff (lightweight rock from volcanic ash).
  • Artificial lightweight aggregate: This aggregate includes local materials like clay ceramsite, expanded perlite, and others. This also includes sintered aggregate, foamed aggregate, and processed by-product aggregate.

Applications of Lightweight Aggregate in Construction

  • Lightweight aggregates are used in screeds and thickening, making the job of smoothing or thickening easily achievable.
  •  It can also be utilised in screeds and walls where wood is fastened together.
  • The lightweight aggregate can even provide resistance against fire and corrosion when castigated with structural steel. 
  • The heat-resistant property of light aggregates makes them suitable for roofing as they act as a heat insulation material.
  • It can even be used as an insulator for water pipes.
  •  It can be used to make partition walls and panel walls in framed structures.

Properties of Lightweight Aggregates

  • The compressive design strength of concrete that uses lightweight aggregate is 17-18N/mm^2 which is lesser in comparison to that of normal concrete’s compressive strength.
  •  Again, the density of lightweight aggregate is lesser than normal concrete and the values range between 500 kg/m^3 to 1800 kg/m^3
  • Lightweight aggregate can be in any shape including cubical, rounded and angular. The texture and form influence the workability of lightweight aggregate to a great extent.
  •  Lightweight aggregates maintain low density and absorb little water.
  • It has a high saturation level and can reduce the structural load, making it economically viable.
  • The low thermal conductivity in them makes them the perfect option for roofing.
  • Lightweight aggregates generally possess good acoustic properties.

Benefits of Using Lightweight Aggregate in Construction

Lightweight aggregates provide a number of advantages, making them an essential material in modern construction. The key noticeable advantages of lightweight aggregate are structural performance enhancement, reduced costs, and enhanced sustainability. Other key benefits in the construction sector are

  • Lightweight aggregates reduce the load on foundations and structural elements by reducing the weight of the concrete. This makes them ideal for skyscrapers and long-span structures. The feature facilitates innovative designs.
  • The reduced weight of concrete makes transportation easier and reduces labour and equipment requirements. In addition, they also make it easier for placement and shaping in precast and modular construction.
  • The porous structure in lightweight aggregate produces thermal insulation, reducing heating and cooling costs in buildings. This makes the material suitable for places where temperature stability is crucial.
  • Natural materials such as expanded clay or pumice provide excellent fire-resistance properties, enhancing safety and reducing the risk of structural collapse under fire conditions.
  • Industrial-based aggregates produce a better option for the reuse of by-products with sustainable construction practices.
  • The porous nature and flexibility prevent freeze-thaw cycles and at the same time prevent moisture entry and chemical attacks.

Manufacturing of Lightweight Aggregates

While the majority of aggregate materials such as clay, shale or slate can be substituted, in preparation the raw material is extended to twice its original volume. This helps to create a lightweight aggregate. The detailed procedure behind the manufacturing of lightweight aggregates is as follows:

Extraction: This step is also known as quarrying in which several crushers are used to crush the material. The finished product is then screened for quality.

Sizing: The finished materials are returned to the crushers. Thereafter, the material is recycled and moved to hoppers.

Reaction: The material from the hopper is moved into a rotary kiln at 1200 degrees Celsius. The carbonaceous compounds liquefy and form gas bubbles. These gas bubbles at high temperature expand the material.

Cooling: The clinker is cooled and shaped into a porous material. The lightweight aggregate material may be crushed again if necessary and is then stockpiled after it has cooled down. 

Conclusion

With their ability to fulfil the long-standing needs of structural efficiency alongside sustainability, lightweight aggregates seem to have been a transforming material in the construction domain. Reducing the structural load without weakening the strength, lightweight aggregates facilitate innovative ideas and cost-effective solutions within the realms of design capabilities. Applications from screed to roofing, fire resistance, and thermal and acoustical insulation, further bring out their wide scope and significance in construction. The use of natural and industrial waste aggregates further underlines the adaptability and eco-friendliness of the material, furthering sustainable building practices by using by-products and conserving resources. Lightweight aggregate manufacture requires advanced processes that are optimised to provide the right properties for modern construction requirements. Whether it is to be used for structural or non-structural purposes, lightweight aggregates become an imperative in achieving the goals of efficient, durable, and sustainable construction for the 21st century.