Home Blog Page 2

Temporary Structures in Construction: Importance, Types, Benefits & Applications

0
Temporary Structure in Construction

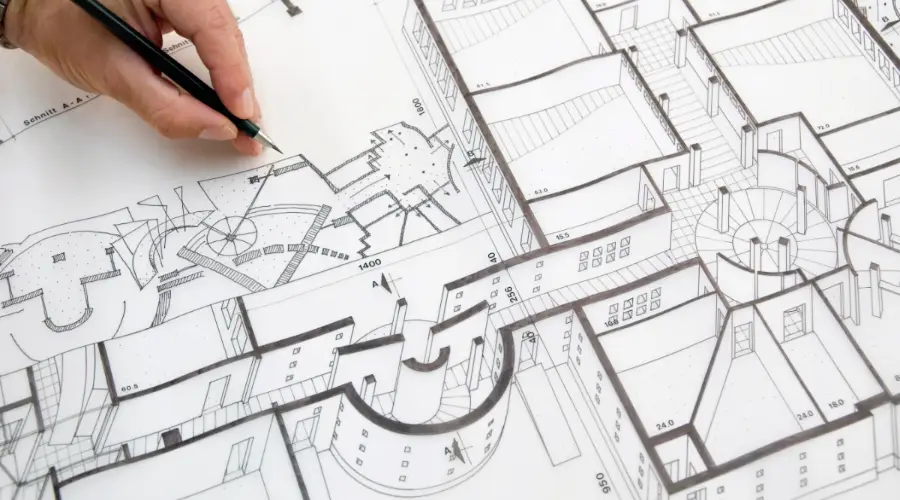
In the dynamic world of construction, temporary structures play a key role in ensuring efficiency, safety, and cost-effectiveness during the project lifecycle. These structures, designed to support specific tasks or provide temporary solutions, are essential in achieving construction milestones. This article explores the importance of temporary structures in construction, their benefits, types, applications, and the relevant standards that guide their use.

Importance of Temporary Structures in Construction

Temporary structures serve as essential components in construction projects. They provide the necessary support and infrastructure to facilitate various construction activities, ranging from excavation and concrete casting to equipment storage and worker accommodation. Without these structures, completing tasks efficiently and safely would be challenging.

Key Roles of Temporary Structures

1. Assisting Construction Activities: They provide support during operations like concrete formwork, scaffolding for workers, or bracing during excavation.

2. Ensuring Safety: Temporary structures minimise hazards by providing stable platforms, barriers, or enclosures in high-risk areas.

3. Time and Cost Efficiency: These structures streamline processes by offering specific solutions for particular tasks, reducing project duration and associated costs.

Types of Temporary Structures in Construction

Temporary structures come in various forms, each designed to address specific construction needs. Below are some commonly used types:

1. Scaffolding: It provides access and support for workers during the construction, repair, or maintenance of buildings. They are available in various materials, like steel, plywood and aluminium.

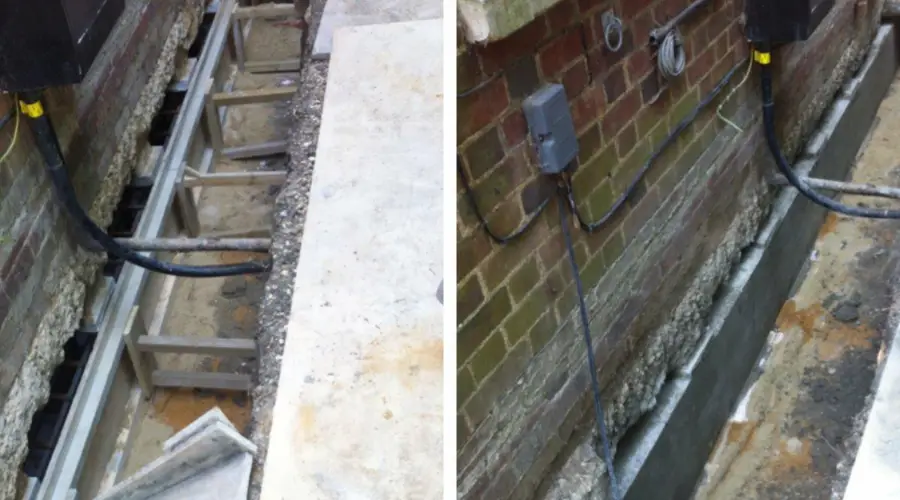
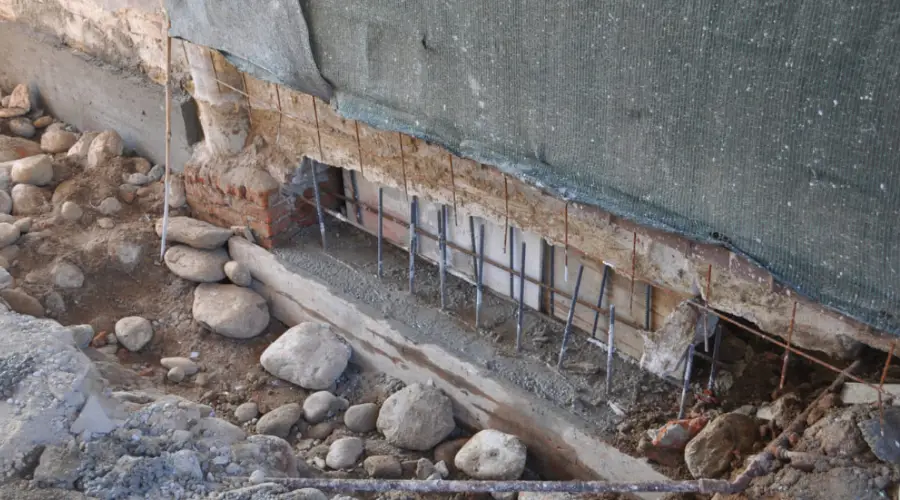
2. Shoring Systems: They are the temporary supports for structures or excavations to prevent collapse. There are different types of shoring systems, like raking shores, flying shores, and dead shores.

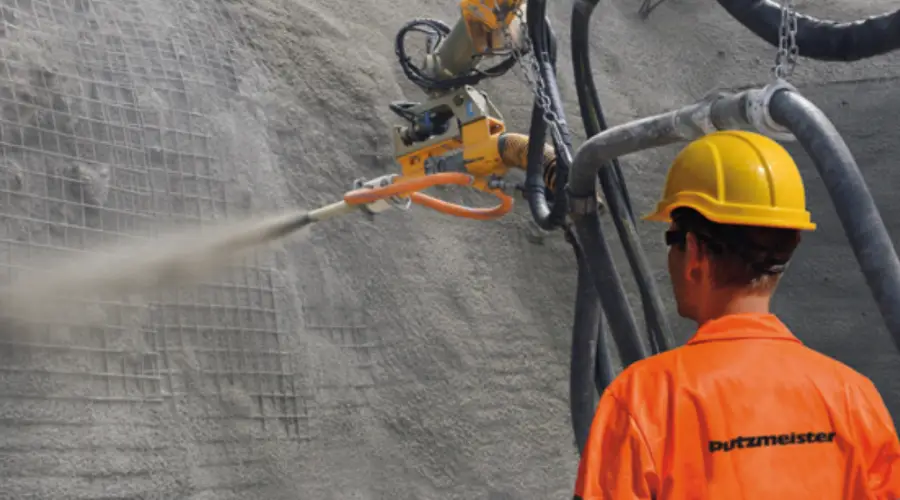
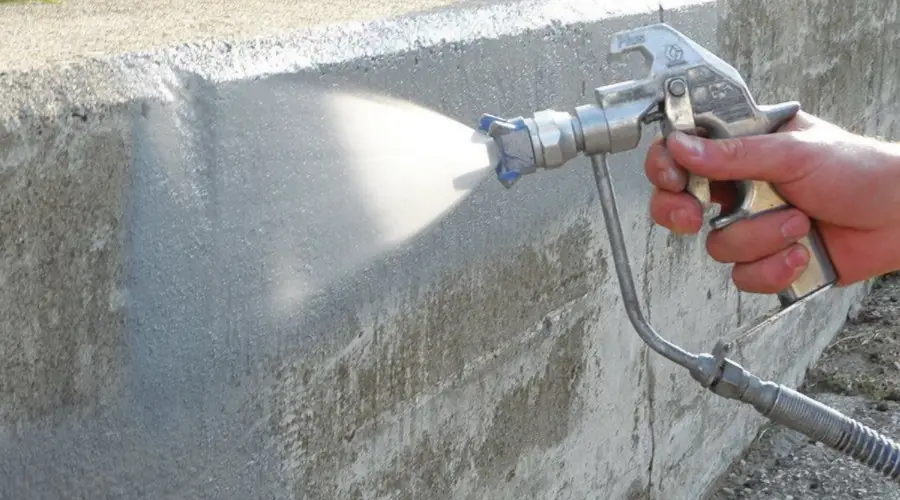
3. Formwork: Formworks are temporary molds used to shape concrete during casting. The common materials used are timber, steel, and plastic. 

4. Bracing Systems: They provide lateral support to stabilise structures like walls and frames during construction. 

5. Cofferdams: Cofferdams are temporary enclosures used to create dry workspaces in water-logged or submerged areas.

6. Construction Hoardings: They are temporary fencing or barriers to secure construction sites and protect the public. 

7. Temporary Buildings: Portable structures like site offices, worker accommodations, or storage units.

8. Falsework: Supports that hold up structures until they become self-supporting.

Applications of Temporary Structures

Temporary structures are vital across a wide range of construction activities, including but not limited to:

1. High-Rise Construction: Scaffolding and formwork systems ensure accessibility and structural support during the construction of skyscrapers. 

2. Bridge and Highway Projects: Falsework and shoring systems allow the safe construction of bridges and elevated highways.

3. Excavation and Foundation Work: Bracing and shoring systems stabilise soil and prevent collapse during deep excavations.

4. Renovation and Restoration Projects: Scaffolding provides access for repair work on existing structures.

5. Marine and Hydroelectric Construction: Cofferdams and other water-retaining structures are essential for underwater construction or repairs.

6. Site Preparation and Security: Temporary hoardings and fencing secure construction sites, keeping them safe from unauthorised access.

Benefits of Temporary Structures

Temporary structures offer numerous benefits to construction projects, such as:

1. Enhanced worker safety: Temporary scaffolding and protective barriers prevent falls, debris-related injuries, and other accidents, creating a safer work environment.

2. Flexibility and Adaptability: These structures are customisable, making them suitable for a wide range of construction scenarios, from urban high-rises to remote infrastructure projects.

3. Cost-Effective Solutions: Temporary solutions are reusable, reducing material waste and the need for multiple procurement cycles.

4. Ease of Installation and Removal: Designed for quick assembly and disassembly, temporary structures minimise disruptions to ongoing construction or usage activities.

5. Environmental Sustainability: Many temporary structures are made from recyclable materials, aligning with modern sustainable construction practices.

Challenges and Innovations in Temporary Structures

While temporary structures are essential, they are not without challenges. Issues such as improper installation, material weakness and inadequate maintenance can lead to safety hazards or project delays. However, many new innovations are being developed to overcome these challenges

Emerging Innovations

1. Modular Designs: Prefabricated components enhance assembly efficiency and adaptability.

2. Smart Monitoring Systems: Sensors integrated into temporary structures monitor stress levels and environmental conditions in real time. 

3. Sustainable Materials: The use of eco-friendly materials like bamboo or recycled composites aligns with green construction initiatives.

Standards Governing Temporary Structures

Ensuring the safe and effective use of temporary structures needs adherence to established standards and regulations. These standards provide guidelines for design, material selection, installation and inspection.

Relevant Standards and Guidelines

1. Occupational Safety and Health Administration (OSHA): Provides safety guidelines for scaffolding, excavation support, and other temporary structures in the U.S.

2. BS 5975:2019 – Code of Practice for Temporary Works Procedures and the Permissible Stress Design of Falsework: A British standard outlining best practices for temporary works, including falsework design and management.

3. EN 12811-1:2003 – Temporary Works Equipment: European standard defining performance requirements for access and working scaffolds. 

4. Australian Standard AS 3610 – Formwork for Concrete: Details design and construction requirements for temporary concrete formwork in Australia.

5. IS 14687:1999 – Guidelines for Falsework for Concrete Structures: Indian standard offering recommendations for the design and use of falsework.

6. Temporary Works Forum (TWf) Guidance: Provides insights and technical guidance on managing temporary works effectively.

Monitoring with these standards ensures structural integrity, worker safety, and alignment with legal requirements.

Conclusion

The role of temporary structures in construction cannot be overstated. They form the backbone of efficient, safe, and cost-effective project execution. From scaffolding and shoring to formwork and cofferdams, temporary structures are versatile tools that adapt to the dynamic needs of the construction industry. Following set guidelines promises their practical use while innovations continue to push the boundaries of what these structures can achieve.

As construction projects grow more complex, the importance of temporary structures will only increase. Investing in high-quality temporary solutions and staying updated with the industry’s best practices are key to driving successful outcomes in modern construction projects.

Civil Engineering Software: Importance, Types, Benefits, and Key Features

0
civil engineering software

The field of civil engineering has changed dramatically because of technological advances, as accuracy, speed, and efficiency are essential in today’s world. Civil engineering softwares play a vital role in transforming ideas into reality, enabling professionals to design, analyse and execute projects with accuracy and foresight. Whether you are a seasoned engineer or a student exploring civil software courses, understanding the top civil engineering tools is essential for career success.

In this blog, we will explore the importance of civil engineering software, its key benefits, types, and examples, along with standout features.

Why Civil Engineering Softwares are Essential

Civil engineering software bridges the gap between planning and execution. It supports engineers in every phase of the project lifecycle, from drafting to construction, providing benefits such as:

1. Streamlined Project Workflow: Tools like AutoCAD Civil Engineering simplify drafting and modelling, saving time and effort.

2. Enhanced Design Accuracy: Civil engineering design software reduces human error, ensuring the structural integrity of designs.

3. Efficient Collaboration: Cloud-enabled tools foster seamless communication and data sharing among team members.

4. Cost Management: Accurate analysis minimises material wastage and prevents costly errors during construction.

5. Regulatory Adherence: Software used in civil engineering incorporates local and international standards, ensuring compliance and structural safety and integrity. 

Types of Civil Engineering Software

Civil engineering tools are used at different stages of a project. Below is a categorised civil engineering software list to help you choose the right one:

1. Drafting and Design Software

  • AutoCAD Civil Engineering: A versatile tool for 2D and 3D modelling.
  • Civil 3D Software: Adds design and analysis capabilities for land development and transportation projects.

2. Structural Analysis and Design Tools

  • STAAD.Pro: Ideal for analysing and designing structures under various loads.
  • ETABS: Focuses on high-rise buildings and structural dynamics.

3. Geotechnical Engineering Tools

  • PLAXIS: Excels in soil and foundation behavior analysis.
  • GeoStudio: Offers advanced geotechnical modelling features.

4. Surveying and Mapping Software

  • ArcGIS: Provides strong GIS mapping capabilities.
  • Revit: Includes topography modelling for detailed surveys.

5. Project Management Software

  • Primavera P6: Streamlines scheduling for large-scale infrastructure projects.
  • Microsoft Project: Simplifies task management and tracking.

Key Features of Civil Engineering Tools

Modern civil engineering softwares come packed with features that serve diverse project needs. Here’s what makes them essential:

1. 3D Modelling and Visualisation: Many tools, like Civil 3D software, enable engineers to create realistic models for better design assessment. 

2. Integrated Standards and Codes: Preloaded design standards ensure acceptance of regional regulations, saving time on manual checks.

3. Cloud-Based Collaboration: Software like BIM 360 facilitates real-time teamwork across geographical locations.

4. Simulation and Testing: Advanced tools simulate real-world scenarios, helping to predict the behaviour of structures under environmental conditions.

5. Data Analytics and Reporting: These tools generate detailed insights and visual reports to help decision-making.

Benefits of Using Civil Software

1. Precise Drafting and Modelling: Tools like Civil 3D software allow for complex designs and 3D visualisation.

2. Efficient Analysis: Structural analysis software, like STAAD.Pro allows engineers to predict performance under various conditions.

3. Comprehensive Data Management: Civil engineering tools provide centralised data management, helping in project documentation and analysis.

4. Realistic Simulation: Promoting real-world conditions (like seismic events) ensures project viability and safety.

5. Project Optimisation: Civil software has resource management features, ensuring timely and budget-friendly project delivery.

Popular Civil Engineering Software List

Here’s a quick civil software list covering some of the most widely used tools:

  • AutoCAD Civil Engineering: The go-to drafting software for beginners and professionals alike.
  • Civil 3D Software: Ideal for transportation, site development, and water management projects.
  • STAAD.Pro: Perfect for structural analysis and ensuring load capacities.
  • Revit: Combines architecture, engineering, and MEP (mechanical, electrical, and plumbing) features in one tool.
  • Primavera P6: Ensures effective project scheduling and resource allocation.

Learning Civil Engineering Software

The ability to use these tools effectively is as important as the tools themselves. Civil engineering software courses provide engineers with the skills to maximise the potential of these programs. Here are some recommended courses:

1. AutoCAD Civil Engineering Basics: Platforms like Udemy and Coursera offer affordable courses to help users master drafting and design fundamentals.

2. Civil 3D Software Training: Autodesk provides thorough resources for learning this powerful design tool. 

3. Structural Analysis with STAAD.Pro: Bentley offers detailed tutorials and certifications for their software.

4. GIS Mapping with ArcGIS: Esri’s online training resources help users understand the full potential of GIS software.

How to Choose the Right Software

Selecting the appropriate software from the civil engineering list depends on project requirements and organisational goals. Consider the following factors:

1. Project Scope: Identify whether the project requires basic drafting or advanced structural analysis.

2. Budget: Evaluate software costs, including licensing and training expenses.

3. Usability: Choose user-friendly software with adequate support and tutorials.

4. Compatibility: Ensure the software integrates with existing tools and workflows.

5. Scalability: Opt for tools that can grow with your business and project complexities.

Conclusion

The landscape of civil engineering is changing rapidly, driven by innovations in software technology. From AutoCAD Civil Engineering to Civil 3D Software, the right tools can enhance precision, save time and improve project outcomes. Investing in civil engineering software and relevant training courses is not just a choice but a necessity for professionals aiming to excel in the field.

With a wide civil engineering software list to choose from, it’s important to evaluate your project’s specific needs and budget before making a selection. By using these advanced tools, civil engineers can transform ambitious concepts into long-lasting infrastructure.

Rammed Earth Construction: Meaning, Process, Applications and Benefits

0
Rammed Earth Construction

Rammed earth construction is an ancient technique that has experienced a comeback in modern architecture due to its sustainability, durability, and aesthetic appeal. Used for centuries in various cultures, this method creates structures by compacting layers of soil into solid, load-bearing walls. The adaptability of rammed earth construction makes it an attractive choice for environmentally conscious builders and architects seeking timeless, sustainable solutions. 

In this article, we will explore the fundamental aspects of rammed earth construction, its advantages, and its relevance in modern architectural design.

What is Rammed Earth Construction? 

Rammed earth construction includes compressing a mixture of soil, sand, clay, and sometimes stabilisers, like lime or cement, between formwork to create solid walls. The process results in strong, durable structures with a natural aesthetic, blending effortlessly into the environment.

The key component in this construction method is the earth itself, which is carefully chosen and prepared to ensure stability and longevity. Rammed earth walls are identified by their dense, stratified appearance and exceptional thermal properties.

The Process of Creating Rammed Earth Walls

The process of creating a rammed wall includes the following steps.

1. Material Selection

The first step in rammed earth construction is selecting suitable soil. The soil must have the right proportion of sand, clay, and silt to achieve structural integrity. Usually, the mix should have approximately:

  • 70% of sand
  • 20% of clay
  • 10% of silt or fine particles

Additionally, stabilisers such as lime or cement can be added to improve water resistance and strength.

2. Formwork Setup

Formwork acts as a mold for the rammed earth walls. It is usually made of wood, metal or engineered materials to hold the soil mixture securely during compaction. Formwork is designed to take into account the desired dimensions of the earth wall, ensuring precise and consistent construction.

3. Layering and Compaction

Soil is poured into the formwork in layers, typically 4 to 6 inches thick. Each layer is compacted using pneumatic or manual rammers, reducing air pockets and increasing density. This compaction process gives the rammed earth its characteristic stratified appearance, often seen as natural layers or bands on the surface of the wall.

4. Removal of Formwork

Once the wall reaches the desired height and the soil mixture is thoroughly compacted to gain adequate strength, the formwork is removed. The result is a solid, seamless wall that requires minimal finishing.

Advantages of Rammed Earth Construction

  • Sustainability: Rammed earth construction is an environmentally friendly method, as it uses natural, locally available materials. By reducing the dependency on manufactured materials like concrete and steel, this building method minimises carbon emissions.
  • Durability: Rammed earth walls are known for their exceptional durability. Ancient structures built using this technique still stand today, demonstrating its longevity. The compressed earth resists weathering, pests, and fire, making it a reliable choice for various climates.
  • Thermal Performance: One of the most notable benefits of rammed earth construction is its thermal performance. Rammed earth walls regulate indoor temperatures by absorbing and releasing heat slowly. This thermal mass property reduces the need for artificial heating or cooling, contributing to energy efficiency.
  • Aesthetic Appeal: Rammed earth architecture has a natural, timeless beauty. The stratified texture of the walls creates a unique visual effect that blends well with modern and traditional designs. Additionally, pigments can be added to the soil mix to achieve specific colours or tones, improving the architectural aesthetic.
  • Acoustic Insulation: The dense composition of rammed earth walls provides excellent sound insulation. This feature makes rammed earth buildings ideal for residential, commercial and educational settings where noise reduction is desired. 

Applications of Rammed Earth Architecture

Rammed earth construction is versatile and suitable for various building types, including: 

  • Residences: Rammed earth walls create a cozy, energy-efficient environment for homeowners. Their natural insulation properties help maintain a stable indoor temperature year-round. 
  • Commercial Buildings: Sustainable, visually appealing, rammed earth architecture is increasingly being adopted for offices, retail spaces, and public buildings. These structures highlight a commitment to environmental management while offering a modern aesthetic. 
  • Educational and Community Centres: Schools, libraries and community centres benefit from the thermal and acoustic properties of rammed earth walls, providing a comfortable and quiet environment for users.
  • Cultural and Heritage Projects: Rammed earth construction is often used in heritage conservation and cultural projects, reflecting traditional building practices and connecting modern design with historical roots.

Modern Innovations in Rammed Earth Buildings 

While the basic principles of rammed earth construction remain unchanged, modern techniques and materials have enhanced its practicality and performance. Innovations are:

  • Stabilised Rammed Earth: The addition of cement, lime, or other stabilisers has improved the structural integrity and water resistance of rammed earth walls. Stabilised rammed earth is particularly suitable for regions with high humidity or frequent rainfall. 
  • Prefabricated Panels: Precast rammed earth panels are gaining popularity as they streamline the construction process. These panels are manufactured off-site and transported for assembly, reducing on-site labour and time.
  • Advanced Formwork Systems: The development of reusable, lightweight formwork has made rammed earth construction more efficient and accessible. Modern formwork systems ensure precision and enable architects to experiment with complex designs.
  • Integration with Renewable Energy: Rammed earth buildings are often paired with renewable energy systems, like solar panels or geothermal heating, to create self-sufficient, sustainable structures.

Challenges in Rammed Earth Construction

Even with its benefits, rammed earth buildings have drawbacks.

  • Labour-Intensive Process: Compaction of soil layers requires skilled labour and can be time-consuming.
  • High Initial Costs: The cost of formwork, labour, and stabilisers can make rammed earth buildings more expensive upfront compared to conventional methods. 
  • Limited Expertise: Finding contractors and architects with experience in rammed earth architecture can be difficult, particularly in regions where the technique is less common.
  • Limited Heights: The number of floors in a rammed earth building is limited to a maximum of two to three. Beyond this height, the structure might not have ideal structural stability.
  • MEP: Since conduits cannot be run through rammed earth walls, exposed pipelines are often required for running electrical and plumbing lines. 

Rammed Earth: A Building Method for the Future

The growing demands for sustainable construction methods have placed rammed earth construction at the forefront of eco-friendly architecture. By combining ancient methods with modern innovations, rammed earth buildings offer an even balance between environmental responsibility and architectural excellence. As we continue to prioritise sustainable development, rammed earth architecture stands as evidence of the potential of natural materials in shaping a green future. With its unique blend of functionality, beauty, and sustainability, rammed earth construction remains an inspiring choice for architects, builders, and environmental advocates.

Compressed Stabilised Earth Blocks (CSEB): Properties, Types, and Advantages

0
CSEB (Compressed Stabilised Earth Blocks)

Compressed stabilised earth blocks (CSEB) are eco-friendly and cost-effective building materials that are gaining attraction in sustainable construction practices. These blocks, also known as CSEB bricks or stabilised mud blocks, are manufactured by compacting a mixture of soil, stabiliser, and water under high pressure. 

CSEB full form is compressed stabilised earth blocks. These blocks display outstanding strength, durability, and thermal insulation while being environmentally friendly. Their properties depend on the soil composition, the type and percentage of stabiliser, and the manufacturing process. This article explores the properties, types, advantages, disadvantages, and manufacturing processes of CSEB.

What is CSEB?

Compressed stabilised earth blocks are a material composed of dry inorganic subsoil, non-expansive clay, aggregate, and Portland cement. These blocks are produced by compressing damp soil mixtures under high pressure. The use of chemical binders like cement stabilises the soil, improving its strength and durability. Often referred to as compressed earth bricks or stabilised mud blocks, CSBEs are seen as an ideal solution for low-rise construction, offering enhanced thermal mass, eco-friendliness, and cost efficiency.

Key Properties of CSEB 

1. Strength and Stability: CSEBs offer good compressive strength, which is suitable for low-rise structures and comparable to traditional bricks- ranging from 2.5 to 5 MPa. The addition of Portland cement improves their stability, making them more durable.

2. Durability: Resistant to weathering when properly stabilised and cured.

3. Thermal Insulation: These blocks provide excellent thermal insulation properties. Excellent thermal efficiency helps maintain the right indoor temperatures, therefore lowering the demand for artificial heating and cooling systems. 

4. Aesthetic Adaptability: The natural colour and texture of CSEBs, derived from soil, allow for creative architectural designs without requiring extensive artificial finishes.

5. Sustainability: CSEBs are biodegradable and do not emit toxic gases. Additionally, any waste material can return to the soil, improving its natural fertility. They also have lower embodied energy compared to fired bricks due to reduced carbon emissions.

6. Environmental Impacts: CSEBs are eco-friendly due to the minimal energy required for their production. Unlike fired clay bricks, they do not require high-temperature kilns that significantly reduce greenhouse gas emissions. 

Types of CSEB

The two main types of CSEB are given below.

1. Compressed Earth Blocks (CEB)

  • Traditional blocks made by compressing soil.
  • Often requires only moisture and pressure to form stable bricks.

2. Compressed Stabilised Earth Blocks (CSEB)

  • A more advanced version of CEBs that uses stabilisers like Portland cement to improve durability.
  • Suitable for a wider range of construction projects due to their enhanced structural integrity.

Furthermore, CSEB blocks are categorised based on shape, size, and the stabilisation method:

1. Standard CSEB Blocks: Rectangular blocks commonly used for walls.

2. Interlocking CSEB Blocks: Designed with grooves and tongues for easy stacking without mortar. 

3. Stabilisation-Based Types: 

  • Cement-Stabilised: Incorporates cement for strength and water resistance.
  • Lime-Stabilised: Utilises lime for enhanced durability and eco-friendliness.

Manufacturing Process of CSEBs

The manufacturing of Compressed Stabilised Earth Blocks (CSEBs) includes combining soil, non-expansive clay, sand, and aggregates with a stabilising agent like Portland cement. Here is a detailed description of the process:

1. Soil Preparation: Soil is sourced and identified to meet the composition requirements (dry inorganic subsoil and non-expansive clay). The soil is screened and mixed with appropriate stabilising materials (cement).

2. Mixing: The damp soil-cement mixture is prepared and thoroughly mixed. The moisture content is maintained within optimal limits to facilitate proper compression.

3. Compression: The mixture is loaded into a mold or press machine (either manually operated or automated). The press compresses the mixture under high pressure (ranging from 4-10 MPa) to form solid blocks.

4. Curing: The compressed blocks are placed in a cool and dry area where they are left to cure for up to 3 weeks. Curing ensures that the cement fully stabilises, improving the strength and durability of the blocks.

5. Quality Testing: Comprehensive tests, including compressive strength evaluations, ensure that the CSEBs meet construction standards.

Advantages of CSEBs

1. Cost-effective: CSEBs are cheaper than traditional clay bricks because they can be made from locally available soil. On-site manufacturing reduces transportation costs and overall expenses.

2. Eco-Friendly Production: Manufacturing CSEBs need less energy than traditional clay bricks, which often rely on fossil fuels. The absence of kilns reduces deforestation and Carbon dioxide emissions.

3. Energy Efficiency: Their excellent thermal mass properties help maintain stable indoor temperatures, thereby saving 10-15% on cooling and heating costs.

4. Durable and Resilient: CSEBs can resist fire and seismic forces, making them a reliable material for low-rise structures.

5. Sound Insulation: The density of the material provides good sound insulation, reducing noise transmission.

6. Employment Opportunities: The process of manufacturing CSEBs offers local employment and skill development since it requires manual labour, thus contributing to community empowerment. 

Disadvantages of CSEBs

1. Limited Use in High-Rise Structure: CSEBs have limited structural strength and are unsuitable for wide-span or high-rise buildings. 

2. Soil Identification Challenges: The production of CSEBs requires proper identification of dry inorganic subsoil and non-expansive clay. Incorrect identification can compromise the integrity of the bricks.

3. Dependence on Skilled Labour: Producing high-quality CSEBs requires specialised knowledge and skill, which may not be readily available.

4. Quality Control Issues: Inadequate machinery or unskilled teams can result in substandard bricks. Each manufacturing step needs strict quality checks to ensure performance.

5. Weathering Concerns: CSEBs can erode when exposed to rain unless appropriate protective measures are taken.

Applications of CSEBs

CSEB blocks are suitable for various construction applications, such as:

  • Residential and commercial buildings
  • Boundary walls
  • Paving and landscaping
  • Load-bearing and non-load-bearing walls

Conclusion

CSEBs are a sustainable, cost-effective, and eco-friendly material, offering sustainable advantages in the context of low-rise construction projects. While they present challenges in terms of production complexity and material availability, their environmental benefits and cost efficiency make them an attractive choice in green construction. With proper soil identification, skilled manufacturing processes, and adherence to quality checks, CSEBs can significantly contribute to eco-friendly and cost-effective building solutions. As awareness about sustainability grows, embracing CSEBs could pave the way for more environmentally conscious construction practices.

What is a Pony Wall – A Comprehensive Guide for Construction

0
what is a pony wall

A proper wall type influences the overall aesthetic appearance and comfort of your home or workplace. You might have heard about various wall types and their features, but ensure that choosing the appropriate one fits your changing requirements.

If you are particularly looking for an option to divide spaces into useful partitions, pony walls are highly recommended. They play a paramount role in modern houses and office workspaces.

Continue your reading to explore pony walls in detail, including their types, common uses, and advantages.

What is a Pony Wall?

Pony walls are low-height partition walls often called short or half walls. The wall typically stands between the height range of 3 to 4 feet. Similar to full-height walls, pony walls consist of top and bottom plates where the vertical studs are attached with spaces of 16 or 24 inches apart.

These walls are primarily used for both decorative and functional purposes in your home, from partitioning spaces to supporting staircases or countertops. They can be constructed from various materials like steel, wood, or gypsum board; you can choose the one that fits your architectural design and functionality.

Types of Pony Walls

Let’s have a look at the types of pony walls:

Load-bearing Pony Wall: This wall type efficiently carries the weight of the structure and safely transfers it to the foundation. It is often referred to as cripple walls and is situated on a foundation’s sill plate to support the roof joist above them.

Non-load-bearing Pony Wall: Unlike load-bearing walls, these don’t support structural loads or weight of other elements. Since it should be anchored properly to improve the overall stability of a building. They are often used as decorative elements or room dividers.

Staircase Pony Wall: The pony wall gives a sturdy base that efficiently displays the artwork or photographs on the wall at eye-level. Architects choose pony walls as an outstanding option to build on one side of the entryway rather than constructing full walls.

Partitioned Entryway: Mudrooms can be created easily using pony walls by separating the space from the main living space and an entry. This wall partition allows organizing shoes and other outdoor items efficiently.

Room Separator: Pony walls can divide larger spaces into smaller divisions for different purposes, like a dining room from a living room. They can be used wherever you want, like at home or in office spaces.

Bathroom Separator: Sometimes, pony walls can also be used as a bathroom separator to create private space for the shower or toilet. To improve the overall ambience, you can cover it with glass for an added visual appeal.

Children’s Space: Pony wall heights, which are between 3 to 4 feet tall, are ideal for partitioning the larger room into smaller spaces. When you are planning to build separate or private play areas for children, this can be an ideal choice.

Common Uses of Pony Walls

Pony walls are a versatile solution for various home design challenges. Here are some of its popular applications:

Space Division: Pony walls can excellently divide the spaces into smaller divisions appropriate to your desired needs without closing off the entire space. They can be used to define areas like living rooms, kitchens, dining rooms, or even home offices.

Privacy: Create private spaces in areas like toilets, showers, dressing areas, or bedrooms without obstructing the natural light. Beyond the sense of intimacy, they create a claustrophobic feel inside the space.

Safety: Pony walls can prevent accidental falls in staircases and balconies while maintaining an open and airy feel. They can also be used to create a separate play area for children within the living area.

Advantages of the Pony Wall

Pony walls offer several advantages in both residential and commercial settings. Here are those:

  • A pony wall allows for a sense of openness without closing off the space. It can efficiently define the areas like dining rooms, living rooms, home offices, or kitchens.
  • It creates visual interest in a room and makes it more functional.
  • To improve the overall design scheme, you can decorate them using wallpaper, artwork, or paint.
  • Pony walls prevent accidental falls when installed in balconies and staircases.
  • They are cost-effective compared to constructing full-height walls.

Disadvantages of the Pony Walls

  • Compared to full-height falls, they offer limited space and less privacy.
  • If pony walls are not carefully designed, they can make the room feel more cramped.
  • The shorter height of pony walls limits the design options for the installation of doors, windows, or electrical outlets.

Pony Wall Construction Procedure

Pony wall construction needs careful planning and execution for a better outcome. Here are steps to follow:

  • Ensure the length and location of the pony wall by considering the desired purpose and space layout.
  • Material selection is a significant task; choosing the right material that provides uniformity in length for vertical boards is crucial.
  • To enable a secured installation, attach vertical boards to the top and bottom plates using screws.
  • For enhanced stability, pony walls should be anchored to the existing walls.

Tools and Materials Needed

Pony wall installation needs careful attention to avoid unexpected results at the end. Using the right tools and materials is important to ensure the correct method of process:

  • Level
  • Drill
  • Anchoring hardware
  • Drywall or other wall covering
  • Saw
  • Lumber for top and bottom plates and studs
  • Screws and nails
  • Pressure-treated lumber for bottom plates on concrete
  • Tape measure
  • Stud finder

Closing Thoughts

If you have decided to install pony walls, weigh their pros and cons before committing to a design. Consider the available space and consult your professional for the possibilities of installing pony walls with the best outlook. It not only creates privacy but also improves the aesthetic appearance of your overall project. Ensure you choose the right labour and materials for enhancing the stability that is worth the investment.

FAQs

1. What’s the difference between a pony wall and a knee wall?

Knee walls are primarily a structural element that is typically 3 to 4 feet tall. While the pony walls are design elements, which are typically less than 3 feet tall.

2. Are pony walls outdated?

No, pony walls are still in use. In fact, they have become a popular choice for interior design because of their versatility, functionality, and customization.

3. Can a pony wall be converted into a full wall?

Yes, the pony walls can be converted into a full wall according to your changing requirements. You can hire a professional who can significantly help you change the layout and the functionality of the whole space.

what is underpinning in building construction -A Full Guide

0
what is underpinning in building construction

An important construction method that can be used to intensify and stabilise the foundation of the existing building is termed underpinning. When an existing building faces issues like settling, subsidence, and structural inadequacy, this procedure is essential to safeguard the building or structure. Various methods can be employed to stabilise the foundation based on the conditions and requirements of a specific project. The ultimate goal of employing various methods is to bring structural  integrity and correct existing structural problems to provide long-lasting structures.

This article examines several underpinning techniques, their application, and their timing in strengthening different kinds of foundations.

What is Underpinning in Building Construction?

When unforeseen issues occur after construction is finished, the underpinning process is utilised to strengthen and repair the building’s foundation. Underpinning is required to promptly restore stability in the event that a footing or foundation breaks unexpectedly. To increase the overall safety of the structure, the process includes strengthening and deepening the current foundation with additional support.

What are the Common Methods of Underpinning?

When laying foundations, there are a few distinct methods that can be applied. However, the four methods listed below are the most popular ones:

Mass Concrete Underpinning

Mass Concrete Underpinning

When extensive excavation is not necessary, this underpinning technique is employed. To strengthen the base, a concrete foundation is poured. This is a fairly simple foundation technique that doesn’t require large equipment. It is also a cost-effective approach.

Beam and Base Underpinning

Beam and Base Underpinning

This technique uses a conventional mass concrete base that is held up by beams to provide a sturdy foundation. In this type of underpinning, the beam that is built either above or below the concrete base will support the weight of the foundation.

Mini-Piled Underpinning

Mini-Piled Underpinning

Mini-piled underpinning is a versatile technique that works well on a variety of soil types, including loose or soft ones, where conventional techniques are ineffective. It is perfect for crowded or built-up areas since it requires less excavation and causes less disturbance to the surrounding area. 

Jet Grouting

In order to build columns and other structures in the ground, the jet grouting technique entails cutting the soil with a high-velocity jet of fluid or fluids and combining the eroded soil with a self-hardening grout.

When is Underpinning Necessary?

When an issue arises in the foundation of the existing structure, there exists an underpinning procedure. The following are the common situations where underpinning is essential to perform.

Foundation Failure

When the foundation of the building or structure is not stable, reinforcements should be added to safeguard the existing structure without it falling or collapsing. It can also be possible when there is a poor foundation. The base soil should be strengthened to avoid uneven settlements.

Change in Building Usage

If there is any potential change in the use of the existing structures, you may choose this underpinning method. If you improve the strength of the foundation, then the load-bearing capacity of the building may increase tremendously and be apt for the intended use.

Soil Condition Changes

Different soils have different properties over time, such as deformable soils, decomposing soils, and so forth. The foundations may move as a direct result of this. In these situations, efforts are made to improve the soil conditions.

Adjacent Construction

The existing structure is significantly impacted by the excavation of adjacent structures. Therefore, if proper shoring is not implemented, it is essential to prevent or avoid the negative effects to ensure stability and prevent structural damage.

What are the Benefits of Underpinning?

The purpose of underpinning is to prevent the existing structure from falling or collapsing. Several benefits of underpinning are as follows:

Enhanced Structural Stability

Commonly, your existing building or structure is affected by a poor foundation due to various reasons like worsened weather conditions or just being worn out. To resolve this issue, underpinning is employed to strengthen your foundation and ensure that it is shielded from various disasters in the upcoming years. This results in providing safer shelter for the occupants.

Increased Property Value

The fact that underpinning raises the value of your property is among its biggest benefits. A well-built structure with completed underpinnings will be worth more when you decide to sell your property in the future, and you can expect a healthy return on your investment.

Accommodation of Additional Loads

If you want to change the potential load-bearing capacity of your property, you can use the underpinning method. It can increase the structural integrity of the building as well as its potential to bear greater traffic.

What Should You Consider Before Underpinning?

Only skilled professionals should manage the intricate process of underpinning. Hiring a qualified contractor with an emphasis on underpinning is advisable. Here are some important things to think about:

Cost: 

As underpinning can be costly, it’s frequently used as a last resort to repair damaged or weakened foundations. Costs can be significant because of the dangers. To make sure it works within your budget, always get an estimate before beginning.

Insurance: 

Before beginning any underpinning work, notify your insurance provider. Your policy will be modified to include coverage for the renovations. If you neglect this step, your insurance may be nullified, leaving you vulnerable in the event of an emergency.

Permit:

Make sure your contractor has the required permits for construction. Ignoring them at first could result in financial and legal problems, reduce the value of your home, and make insurance more difficult. Verify the competence of the contractor before starting the process. It is even better to check when you are searching for an underpinning expert.

Conclusion

A clever, economical, and less intrusive method of resolving issues of your existing building or structure and adding more space to your current structure is underpinning. Underpinning can help you save money and offers long-term advantages by strengthening your foundation. You can have peace of mind and a stronger, more resilient home or property by fortifying your building now to prevent future expensive repairs.

FAQs

1. Is underpinning a permanent solution?

A professional underpinning expert can be able to give you a permanent solution for your poor foundation.

2. How much does underpinning cost?

The cost of the underpinning procedure starts from Rs. 500 per square metre. Depending on the method, size, location, and materials involved, it may vary as per project requirements.

3. Can I occupy my building during underpinning?

In some cases, if the internal walls are affected, then you must move out; otherwise, you don’t need to relocate while the underpinning is going on.

4. How long does the underpinning process take?

Based on the complexity of the project, it may take around four to six weeks to complete the underpinning process.

5. Are there risks associated with underpinning?

Some risks are always associated with underpinning. It requires more skill and attention to take care of the process. It’s better to consult an expert before undertaking underpinning your building or existing structure.

Types of Wood for Construction – Hardwoods & Softwoods

0
types of wood for construction

For more than a century, wood has been used as a basic building material. Wood is still utilised extensively worldwide, despite new developments in construction brought about by materials like steel and concrete. As the wood industry has improved due to new technologies, this opinion is shifting, and wood is now appropriate for larger, more intricate buildings. More robust and taller buildings than ever before are being constructed with wood. 

It’s crucial for builders to understand the many kinds of wood, their uses, and their capabilities. Knowing how the major wood types are graded will help you choose the ideal one for your project once you have a solid understanding of them.

Types of Wood for Construction

Hardwood, softwood, and engineered wood are the three varieties of wood that are frequently discussed by builders. Only hardwood and softwood are solid, natural woods that are derived straight from trees. Conversely, engineered wood is a product of human creation. It creates a more robust and adaptable material by mixing wood products with other substances like resin or glue. Let’s examine these three categories of wood:

Hardwood

Angiosperm trees, which produce seeds with a protective covering, give rise to hardwoods. Pollen is transported from one tree to another by birds and insects that pollinate these trees. The plants provide seeds, nuts, or fruits after fertilisation.

Most hardwood trees shed their leaves every year because they are deciduous. The wood of these trees is denser and stronger than that of softwoods because they typically develop more slowly. Hardwoods are therefore ideal for building projects that must withstand weather or the elements. Hardwood is frequently utilised in strong decks, exquisite flooring, robust beams, sophisticated panelling, and long-lasting, fine furniture. These trees’ slow growth lends their wood a special durability and strength, making it a sturdy choice that lasts for many years.

Types of Hardwood 

5 common hardwood species used in construction are listed below:

Teakwood

With a light brown colour, teak is a popular hardwood that is excellent for indoor furniture and buildings, along with its robust, weather-resistant, and non-flammable properties.

Rosewood

Rosewood smells of flowers and has a lovely reddish-brown colour. It can be costly and is frequently utilised for high-end furniture and musical equipment.

Oakwood  

It resists moisture and fungi effectively and is utilised to make sturdy furniture like bookcases and cabinets.

Maplewood

Maplewood is ideal for high-traffic areas like floors because it is shock-resistant and light beige in colour. 

Ashwood

Ashwood has a lovely light brown colour and is durable and lightweight. It is more reasonably priced than oak and is frequently used for flooring, cabinets, and furniture. The timber industry frequently uses it.

Softwood

The gymnosperm family of trees, which produce cones rather than flowers or fruits, are the source of softwoods. These trees typically have straight, basic grain patterns, light-coloured wood, and rapid growth. Softwoods are incredibly adaptable and can be used for a wide range of products, including paper, furniture, building materials, and even energy.

Types of Softwood

Here are five popular types of softwood used in construction:

Pinewood 

Pinewood is light yellow and easy to stain. It is perfect for doors, windows, and floors but not suitable for outdoor use as it decays quickly.

Cedarwood 

With a stylish light brown, striped look, cedar wood is great for decorative furniture like chests and closets and naturally resists decay.

Firwood

A reddish-brown wood that’s harder to stain, ideal for furniture and interior structures.

Spruce Wood 

A strong and light beige spruce wood is used for high-end projects like ship masts and aircraft but needs upkeep to prevent decay.

Hemlock Wood 

A very affordable, lightweight, and versatile hemlock wood that is used for planks, doors, and joinery, though prone to decay.

Engineered Wood

Discarded wood pieces create more problems in constructing a structure. To balance this, engineered woods are created by using discarded pieces of wood. By adding some adhesives, these engineered woods are well known for their long-lasting property. For building a structure, engineered wood is a fantastic option due to its strength and budget. In large-scale construction, it can be used to create floors, walls, and beams. This lowers the wood waste and makes it more environmentally friendly.

Types of Engineered Wood

AC Plywood 

One side of AC plywood may be rough (C grade) and the other smooth and finished (A grade). When only one side is exposed, it works well for floors, fences, roofing, and furniture.

CDX Plywood

CDX plywood has an exterior glue that bonds the sheetboard together. One side of the plywood is C grade, and the other side of the board is D grade. It can withstand moisture and is apt for spaces like sheathing and subfloors.

High-Density Fiberboard (HDF) 

HDF plywood is made by compressing recycled wood fibers along with resins to become tough and versatile. It is ideal for making furniture, cabinets, and floors. To enhance its style and appearance, it can be painted or laminated.

Laminated Veneer Lumber (LVL) 

A strong option for beams and heavy loads in structural work.

Oriented Strand Board (OSB) 

A budget-friendly plywood alternative for walls, floors, and roofs.

Medium-Density Fiberboard (MDF) 

Dense and eco-friendly, ideal for furniture and curved surfaces. 

Benefits of Wood in Construction

Wood can be used for many purposes for its easy process and it is one of the most sustainable gifts of nature for mankind. It’s cheaper and uses less energy to build than steel and concrete. These are its main advantages:

  • Thermal Insulation: Wood keeps spaces warm, making it perfect for cold climates. It also lowers energy use and electricity costs.
  • Sound Insulation: It absorbs sound, creating quieter homes, offices, and studios.
  • Adaptability: Wood can be reused for new purposes, like turning an old door into furniture.
  • Health Benefits: Wood moderates humidity and improves emotional well-being, reducing stress.
  • Cost-Effective: It is easy to source and maintain, thus resulting in saving your money for the long term.
  • Fire Resistance: Wood burns predictably, with a charcoal layer that slows fire spread.

Maintenance and Care of Wood in Construction

If you take proper care of them, wood floors are simple to maintain. Here’s how to maintain their excellent appearance:

Clean Regularly: Dust, sweep, or vacuum weekly using a vacuum without hard heads or beater bars. Avoid abrasive mops or steam cleaners.

Handle Spills Quickly: Wipe spills immediately with a clean, damp cloth to prevent stains. Don’t let liquids sit, as they can damage the wood.

Prevent Scratches: Trim pet nails and use furniture pads or sliders when moving furniture. Avoid hauling heavy goods.

Use Proper Equipment: Invest in wood floor cleaning supplies and a microfiber mop. Steer clear of strong cleaners, water, and oils.

Protect Floors: Place mats at entrances to trap dirt. Use rugs in sunlit areas to prevent fading and maintain indoor humidity at 35-45% to avoid warping or splitting. 

Remove Sticky Substances: Loosen with ice and gently scrape with a plastic tool. Follow these tips for long-lasting, beautiful floors!

Conclusion

In the construction field, wood has been used as a building material for more than a century. It is differentiated according to its strength and durability. In building, different wood varieties have different uses; some are better suited for flooring, beams, or structural components, while others are best for doors and windows. Builders can make well-informed decisions to get the greatest results for their projects by being aware of the distinctive qualities of each type.

Spray on Concrete – Efficient Construction Techniques

0
spray on concrete

Constructing a house or a commercial building with a unique design within a strict deadline is a challenge, and homeowners often have to sacrifice either time or design. However, spray-on concrete or shotcrete has been a revolutionary method, providing a balance between the two. 

They offer numerous benefits in the construction industry and have been used for a wide range of applications in residential and commercial buildings. This blog will explore spray-on concrete in detail and will help you gain a deeper understanding of how it is done.

What is Spray-on Concrete?

Spray-on concrete or shotcrete is a method of applying concrete to surfaces by spraying it through the nozzle under high pressure. This application can be used for a wide range of applications, including vertical, horizontal, and overhead structures directly without the need for formwork. The shotcrete used is of two types— dry-mix shotcrete and wet-mix shotcrete, and the application process and equipment differ based on the type.

Planning and Design

Accessing Project Requirements

It is necessary to identify the specific needs of the project, whether to construct structural reinforcement, decorative elements, or pool construction for other parts of the structure. After understanding the need, the type of concrete mix must be determined along with the necessary additives. 

Ensure that the design possesses the required load-bearing capacity, resistance to external conditions, and durability to withstand the elements for a long time. Set up an appropriate estimate and timeline based on the complexity and scope of the work.

Design Specifications

After understanding the requirements, create a design for the structure’s shape, determine the reinforcements, and specify the types of finishes to get a clear view of the structure that needs to be built with sprayed concrete.

Site Preparation

Surface Cleaning

Prepare the surface over which the structure needs to be installed. Ensure that the surface is free from dust, oil, grease, or contaminants on the existing concrete. Any cracks or voids formed on the surface need to be addressed, as they could affect the bonding.

Moistening the Surface

After cleaning, use light moisture on the surface to improve adhesion and prevent rapid evaporation caused by shotcrete, to ensure proper curing and water seepage.

Equipment Setup

Selection of Equipment

  • The use of shotcrete machines varies based on the type of shotcrete materials used. Choose either a dry-mix or wet-mix shotcrete machine.
  • Air compressors are essential for dry-mix shotcrete to propel the concrete into the nozzle.
  • Pumps are used for wet-mix shotcrete to push the mixed concrete into the hose.
  • Nozzles and hoses allow the control and flow of shotcrete in the spray pattern.

Safety Checks

Ensure that all the machines and equipment are in working condition to maintain an efficient flow, without causing any blockages or leakages.

Application Process

Nozzle Technique

Nozzle Technique

Keep the nozzle at an appropriate angle between 30° and 90°, and spray at a distance of 45 cm to 90 cm for even distribution of shotcrete. The spraying process needs to be carried out back and forth, ensuring a uniform and consistent layer thickness.

Layering

Layering

If the surface is rough or porous, spray the first layer of shotcrete in a thin layer to create a tight bond with the substrate. After the initial layering, fill the subsequent layer with  a thickness of 1 to 2 inches, with frequent intervals, allowing time to set until it achieves the desired thickness.

Finishing

Surface Finishing

After the shotcrete is completely applied, finishing tools such as trowels, floats, or brushes can be used to achieve the required texture.

Curing

After application, keep the shotcrete structure moist for at least a week to allow the structure to attain the necessary strength and hydration. Periodic sprinkling of water can be done to keep the surface wet. 

In the case of rapid direct drying, avoid the exposure of structure to direct sunlight or hot external temperatures, as they could cause cracks in the surface.

Quality Control

Testing

The wet-mix shotcrete can be tested in the laboratory using a slump test to measure the workability. Compressive tests can be done to ensure the load-bearing capacity of the shotcrete after 7 and 28 days of curing. In the construction of tunnels and pools, the bond strength of the shotcrete to its substrate is tested.

Inspection

Visual inspection of the shotcrete surface can be done to ensure consistency in application, evenness in layering, and to check for cracks, defects, and honeycombing caused by poor compaction.

Safety Considerations

  • It is mandatory to ensure that all the workers wear safety gear and are equipped with safety glasses, gloves, face shields, and hearing protection among other safety measures.
  • In dry-mix shotcrete, there is a risk of dust pollution through the air; thus water sprays and proper ventilation methods can be used to suppress it.
  • Site safety must be ensured by establishing emergency protocols in case of accidents and keeping the non-workers at a safe distance to prevent injuries.

Conclusion

In summary, spray-on concrete or shotcrete is an advanced and efficient method that is used in various construction applications. It offers a wide range of benefits in design flexibility and speed of construction. However, there are certain challenges when it comes to labour costs, equipment costs, and environmental concerns. But when carefully carried out, it can deliver superior results.

FAQs

1. How do I choose between dry-mix and wet-mix processes?

Dry mix shotcrete is typically used for highly flexible and precise projects, such as for repairs and artistic features, where minute details are crucial. On the other hand, wet-mix is suitable for large and robust projects, where strength and durability are crucial.

2. Can spray-on concrete be applied to vertical or overhead surfaces?

Yes, shotcrete or spray-on concrete can be applied to all types of vertical, horizontal, and overhead surfaces and can be highly effective.

3. What are the most common issues when using spray-on concrete, and how can they be avoided?

Some of the common issues associated with spray-on concrete are, 
1. Inconsistent bonding- This can be avoided by proper surface preparation
2. Uneven or rough finish- This can be avoided by applying from an appropriate distance and through experienced labour.
3. Cracking- It can be prevented by applying concrete in thin layers, using reinforcements, and following a controlled curing process.
4. Sagging- This can be avoided by proper mixing of shotcrete and using the right equipment.

How to Read Construction Drawings – Key Components

0
how to read construction drawings

Anyone working in the construction sector needs to be able to read construction drawings. Reading building plans is one of the first skills that everyone in the construction sector learns. One must learn and hone the skills to understand these drawings if one wants to work in the construction sector for a very long time.

For design concepts to become real buildings, construction drawings are essential. They offer a precise blueprint for constructing the building as intended. The main components, varieties, and significant tools and techniques used to read construction drawings in the building sector will all be covered in this article.

What are Construction Drawings?

A set of drawings that display the building’s complete design is known as construction drawings. They are the graphic representation of the official plan and typically contain information about every aspect of the building, including the foundation, floors, walls, ceilings, interiors, structural components, and HVAC, electrical, and plumbing systems.

Important details about construction drawings:

  • They display the building’s entire design.
  • The design team created them.
  • They are developed before the project goes up for bid.
  • They act as formal contracts.
  • They can be modified as the project progresses.

Key Components of Construction Drawings

Every aspect of a construction project is captured in well-prepared construction drawings. They facilitate clear communication between experts and guarantee that the specified architectural design is constructed. The main components of these drawings are broken down simply as follows:

Title Block and Sheet Information

Important information such as the project name, drawing number, scale, date, and revision history are displayed in the title block of every page. This makes it easier to spot and monitor drawing changes.

Site Plan and Location Details

The project’s layout, including the location of the building, access points, landscaping, and surrounding elements, is shown in the site plan. Additionally, it contains the coordinates for an exact location.

Space Layouts and Floor Plans

The layout of the rooms, hallways, and entrances on each floor is depicted in floor plans, which aid in understanding the functionality and flow of the structure.

Elevations and Facade Details

A vertical view of the building’s exterior facing is provided by elevations, which also display the building’s size, window location, and architectural features.

Cross-sections and Sections

The building’s interior, including the walls, floors, ceilings, and roofs, is revealed through sections that cut through it. Cross-sections provide in-depth perspectives of particular regions.

Details and Annotations

While annotations offer measurements and remarks for clarification, details highlight specific architectural components, like joints or connections.

Schedules and Material Specifications

Schedules provide information regarding components and materials, such as windows or doors, and material requirements guarantee uniformity and quality.

Types of Construction Drawing

Let’s examine the many kinds of construction drawings that are essential to project development:

Type 1: Architectural drawings 

Architectural drawings 

These offer a comprehensive perspective of the structure, displaying its size, arrangement, and style. Designed by architects, they support owners and contractors in understanding the appearance and functionality of the structure. These drawings are now easier and less expensive to generate due to modern technology.

Type 2: Structural drawings

These highlight the walls, beams, columns, and other load-bearing components that make up the building’s framework. The building’s safety and stability can be ensured by these drawings, which are created by adept structural engineers.

Type 3: Electrical drawings

These depict the internal layout of the building’s electrical systems. To help electricians know where to install devices, they incorporate symbols for outlets, light fixtures, and other electrical components.

Type 4: Plumbing and Sanitary Drawings 

Plumbing and Sanitary Drawings 

These drawings show the water supply and sewage pipelines as well as the plumbing layout. They direct the plumbing installation by displaying the locations of fixtures such as pumps, drains, and sinks.

Type 5: Finishing drawings

These ensure that the building looks as intended by analysing the remaining details of its appearance, such as paint colours, flooring, plaster patterns, and ceiling shapes.

Significance of Reading Construction Drawings

Construction drawings are essential to every building project and are more than just visual plans:

  • Ensuring Compliance: They make sure the project complies with all safety and regulatory requirements.
  • Leading Builders: By providing precise directions, these drawings assist builders in staying consistent and avoiding errors.
  • Enhancing Communication: They maintain alignment by serving as a liaison between contractors, engineers, and architects.

Making architectural concepts a reality is the primary objective of building drawings. They act as a detailed manual to ensure that every stage of the building proceeds according to schedule.

How to Read Construction Plans?

To easily understand the construction plans, you can follow the steps as discussed here:

Title Block

The first item you have to read to understand the construction drawings is the title block. It identifies who made the plans, when they were finished, what scale was used, and who gave their approval.

Orientation and Scale

Once the title block has been examined, locate the north-pointing compass or arrow to determine the location of the building. Next, examine the scale to determine the dimensions and size of the drawing.

Lines of Draft

You can determine the sizes of various features included in the plans with the use of draft lines.

Use the Legend for Symbols

The drawing symbols, which are used to represent windows, doors, and materials, are explained in the legend. You will eventually learn to recognise these symbols, but if something new comes up, the legend will explain it to you.

Study the Notes

Important information that isn’t depicted in the drawings is frequently included in the notes that are updated as the plans change. For more details, always refer to the notes.

Practice Frequently

Understanding the nuances of engineering drawings becomes easier the more you work with them. You can understand them more quickly and accurately with regular practice.

Gain Knowledge from Real-World Examples

Examining drawings from completed projects demonstrates how designs are realised. Read about finished projects to see how these designs influenced the building process.

Seek Assistance from Experts

One excellent method of learning is to collaborate with seasoned engineers or drafters. When something is unclear, don’t be afraid to clarify it or ask questions.

Make Use of Digital Tools

Engineering drawings can be easier to interpret with the use of software tools. You may have a better understanding of how everything fits together with features like 3D visualisations.

Conclusion

Anyone working in the construction sector needs to be able to read construction drawings. You can confidently contribute to the completion of successful construction projects by comprehending the key components of these drawings, going over them step-by-step, and applying effective techniques.

What is Footing in Construction – A Comprehensive Guide

0
what is footing in construction

When you start your construction process, you may undergo several procedures and steps to ensure the structural stability of a building. Because the foundation is crucial when it comes to building construction, the foundation is referred to as the base, whereas the footing is its main component. Footing has its unique significance and characteristics when it comes to building a structure, ensuring its durability and longevity. 

In this Brick and Bolt blog, let us explore more details about the types of footings, applications, building processes, advantages, and disadvantages of footings.

What is a Footing?

Footing is an essential component of building construction, as it gives a building’s base structural stability and transfers the load from the structure to the ground. Each structure deserves a unique footing based on the location, soil conditions, and other environmental factors. Therefore, the stability of a structure can be greatly impacted by the types of footings utilised in building construction. To satisfy the requirements of various building projects, footings are often composed of concrete or masonry and come in a wide range of sizes and shapes.

Types of Footings

For effective transfer of loads from the structure to the ground, different footings are built for different construction projects. They are usually constructed depending on the building’s size, soil conditions, and load capacity. Here is a brief overview of the most typical footing types:

Strip Footing

This footing is long and narrow, and it extends the entire length of a wall. Usually shallow, it is effective for smaller load-bearing walls.

Spread Footing

Spread footing offers a reliable foundation for individual posts or columns. As they are stronger and wider than strip footings, they are perfect for supporting larger walls or columns to prevent settlement. They are built in various shapes such as round, square, and rectangular. 

Combined Footing

A combined footing is used when two or more columns are too near to one another for separate footings. A common broader foundation can be built to support multiple columns.

Isolated Footing

This foundation, which is often round or rectangular, supports a single column. Isolated footings are usually larger and deeper, made to support the weight of a single column.

Mat or Raft Footing

A mat footing is a sizable slab of concrete that covers the entire foundation area of the building. It is frequently utilised for large structures and disperses the load equally across the ground.

Pile Footing

Pile footings are used when the earth isn’t sturdy enough to hold up a structure. These are lengthy, deeply buried steel or concrete columns that offer additional support.

To ensure the foundation is secure and dependable, each type of footing is selected according to the building’s design, the state of the soil, and the structural requirements.

Application of Footing

Residential Buildings: 

Through supporting slabs, walls, and columns, footings give dwellings stability.

Commercial Structures: 

Used to distribute large loads and provide durability in offices, warehouses, and shopping centres.

Industrial plants: 

Footings are made to endure vibrations and support large machinery.

Bridges and flyovers: 

Footings are crucial for maintaining the stability of bridge piers and abutments during extreme weather conditions and loads.

High-Rise Structures: 

To withstand seismic and wind activity, deep foundations secure skyscrapers to stable soil layers.

Retaining walls: 

Footings keep walls stable so that soil pressure doesn’t cause them to collapse.

Water Tanks and Silos: 

Footings can distribute weight uniformly to ensure a safe installation.

Boundary Walls

They offer a sturdy foundation for durable walls and fences.

Sloped Terrains: 

In hilly regions, stepped footings provide level platforms.

Infrastructure Projects: 

Footing ensures the safe operation of roads, tunnels, and dams.

The Building Process of Footing

One of the first things that is done immediately after excavation is the construction of footings. The first step in the process is digging a hole for the footing. The size of the building and the type of soil determine how deep this hole should be. It must be deep enough to remain beneath the freeze line (where the ground freezes) and above any soft or loose soil.

When the hole is prepared, the footing is built by either pouring concrete into it or by utilising brick blocks, stone, or pre-made concrete. In order to adequately sustain the weight of the building, the footing needs to be level and extend past the hole’s sides. The foundation walls are built on top of the completed footing.  

Advantages of Footing

  • Footings ensure stability by distributing a building’s weight uniformly across the ground, avoiding excessive stress on any one area.
  • They can spread the weight on softer soils or reach deeper levels for strength, depending on the type of soil.
  • Footings keep constructions from tilting, sinking, or breaking by preventing uneven settlement.
  • Additionally, they stabilise buildings in the face of extreme weather by anchoring them against natural forces like wind, earthquakes, and floods.
  • By raising the foundation above ground dampness, footings protect the building from mould and water damage.
  • To guarantee correct alignment, they offer a sturdy, level foundation for walls, columns, and other components.
  • Footings are modified to provide sturdy platforms on sloping terrains, enabling safe building even on uneven terrain.

Disadvantages of Footing

  • Building a footing can be costly due to the substantial labour and material requirements.
  • The entire construction schedule may be extended by the footing design and construction process.
  • Unsatisfactory soil conditions may necessitate reinforced or deeper footings, which would raise the cost and complexity.
  • Unfavourable weather conditions, including persistent rain or extremely cold temperatures, might make installing footings take longer than expected.
  • Footings may need constant upkeep, particularly in locations with shaky soil or subpar design. 

What is the Difference Between a Footing & a Foundation?

What is the Difference Between a Footing & a Foundation?
S.NoAspectFootingFoundation
1DefinitionThe part of a building’s foundation that directly supports and distributes the weight.The complete structural system that supports the building, including footings and foundation walls.
2PurposeProvides stability by distributing the load of the building.Supports the entire structure, ensuring its stability.
3LocationLocated beneath the foundation, in direct contact with the soil.Extends from the footings to the surface, including walls, slabs, etc.
4Role in SettlementHelps prevent differential settlement by spreading the load evenly across the soil.Ensures the building is securely anchored to the ground.
5Construction RequirementTypically required by building codes to ensure stability.Essential for supporting the entire structure, may or may not include footings.
6MaterialUsually made of concrete, stone, or brick.Can be made of concrete, stone, brick, wood, or other materials depending on the type.
7Risk of FailureImproper footings can lead to foundation instability and cracks.Weak foundations may lead to structural collapse or significant damage.
8MaintenanceRegular inspection is needed to check for cracks or water accumulation.Requires periodic checks for settlement, water damage, and structural integrity.

Factors to Consider in Footing Construction

The factors that need to be considered are as follows:

Soil Type: The size and depth of the footings depend on the kind of soil. While weaker soils could require larger or deeper footings to maintain stability, stronger soils can support greater weight.

Climate: To avoid settling or damage, footings may need to be deeper in places with a lot of rain or extremely cold weather.

Building Weight and Size: While smaller buildings could require less sturdy footings, larger and heavier structures require more.

Type of Building: Lighter constructions, such as residences, can employ shallow footings, but taller buildings need deeper, stronger ones.

Lateral Forces: To maintain the stability of the building, footings must be made to withstand forces such as wind and earthquakes.

Building Codes: To ensure safety and compliance, local building codes establish minimum requirements for footing design, including size, depth, and materials.

Conclusion

Footings are often overlooked, but they are vital for a building’s stability. They help transfer the weight of the building to the soil that can support it, ensuring the structure lasts.

Whether to employ piles, individual, combined, raft, or strip footings will depend on the style of structure and the condition of the land. The water table in the area, soil strength, frost line depth, and local building codes must all be taken into account while designing footings.